Integration Guide:
Cisco Tetration & Splunk via Kafka
Table of Contents
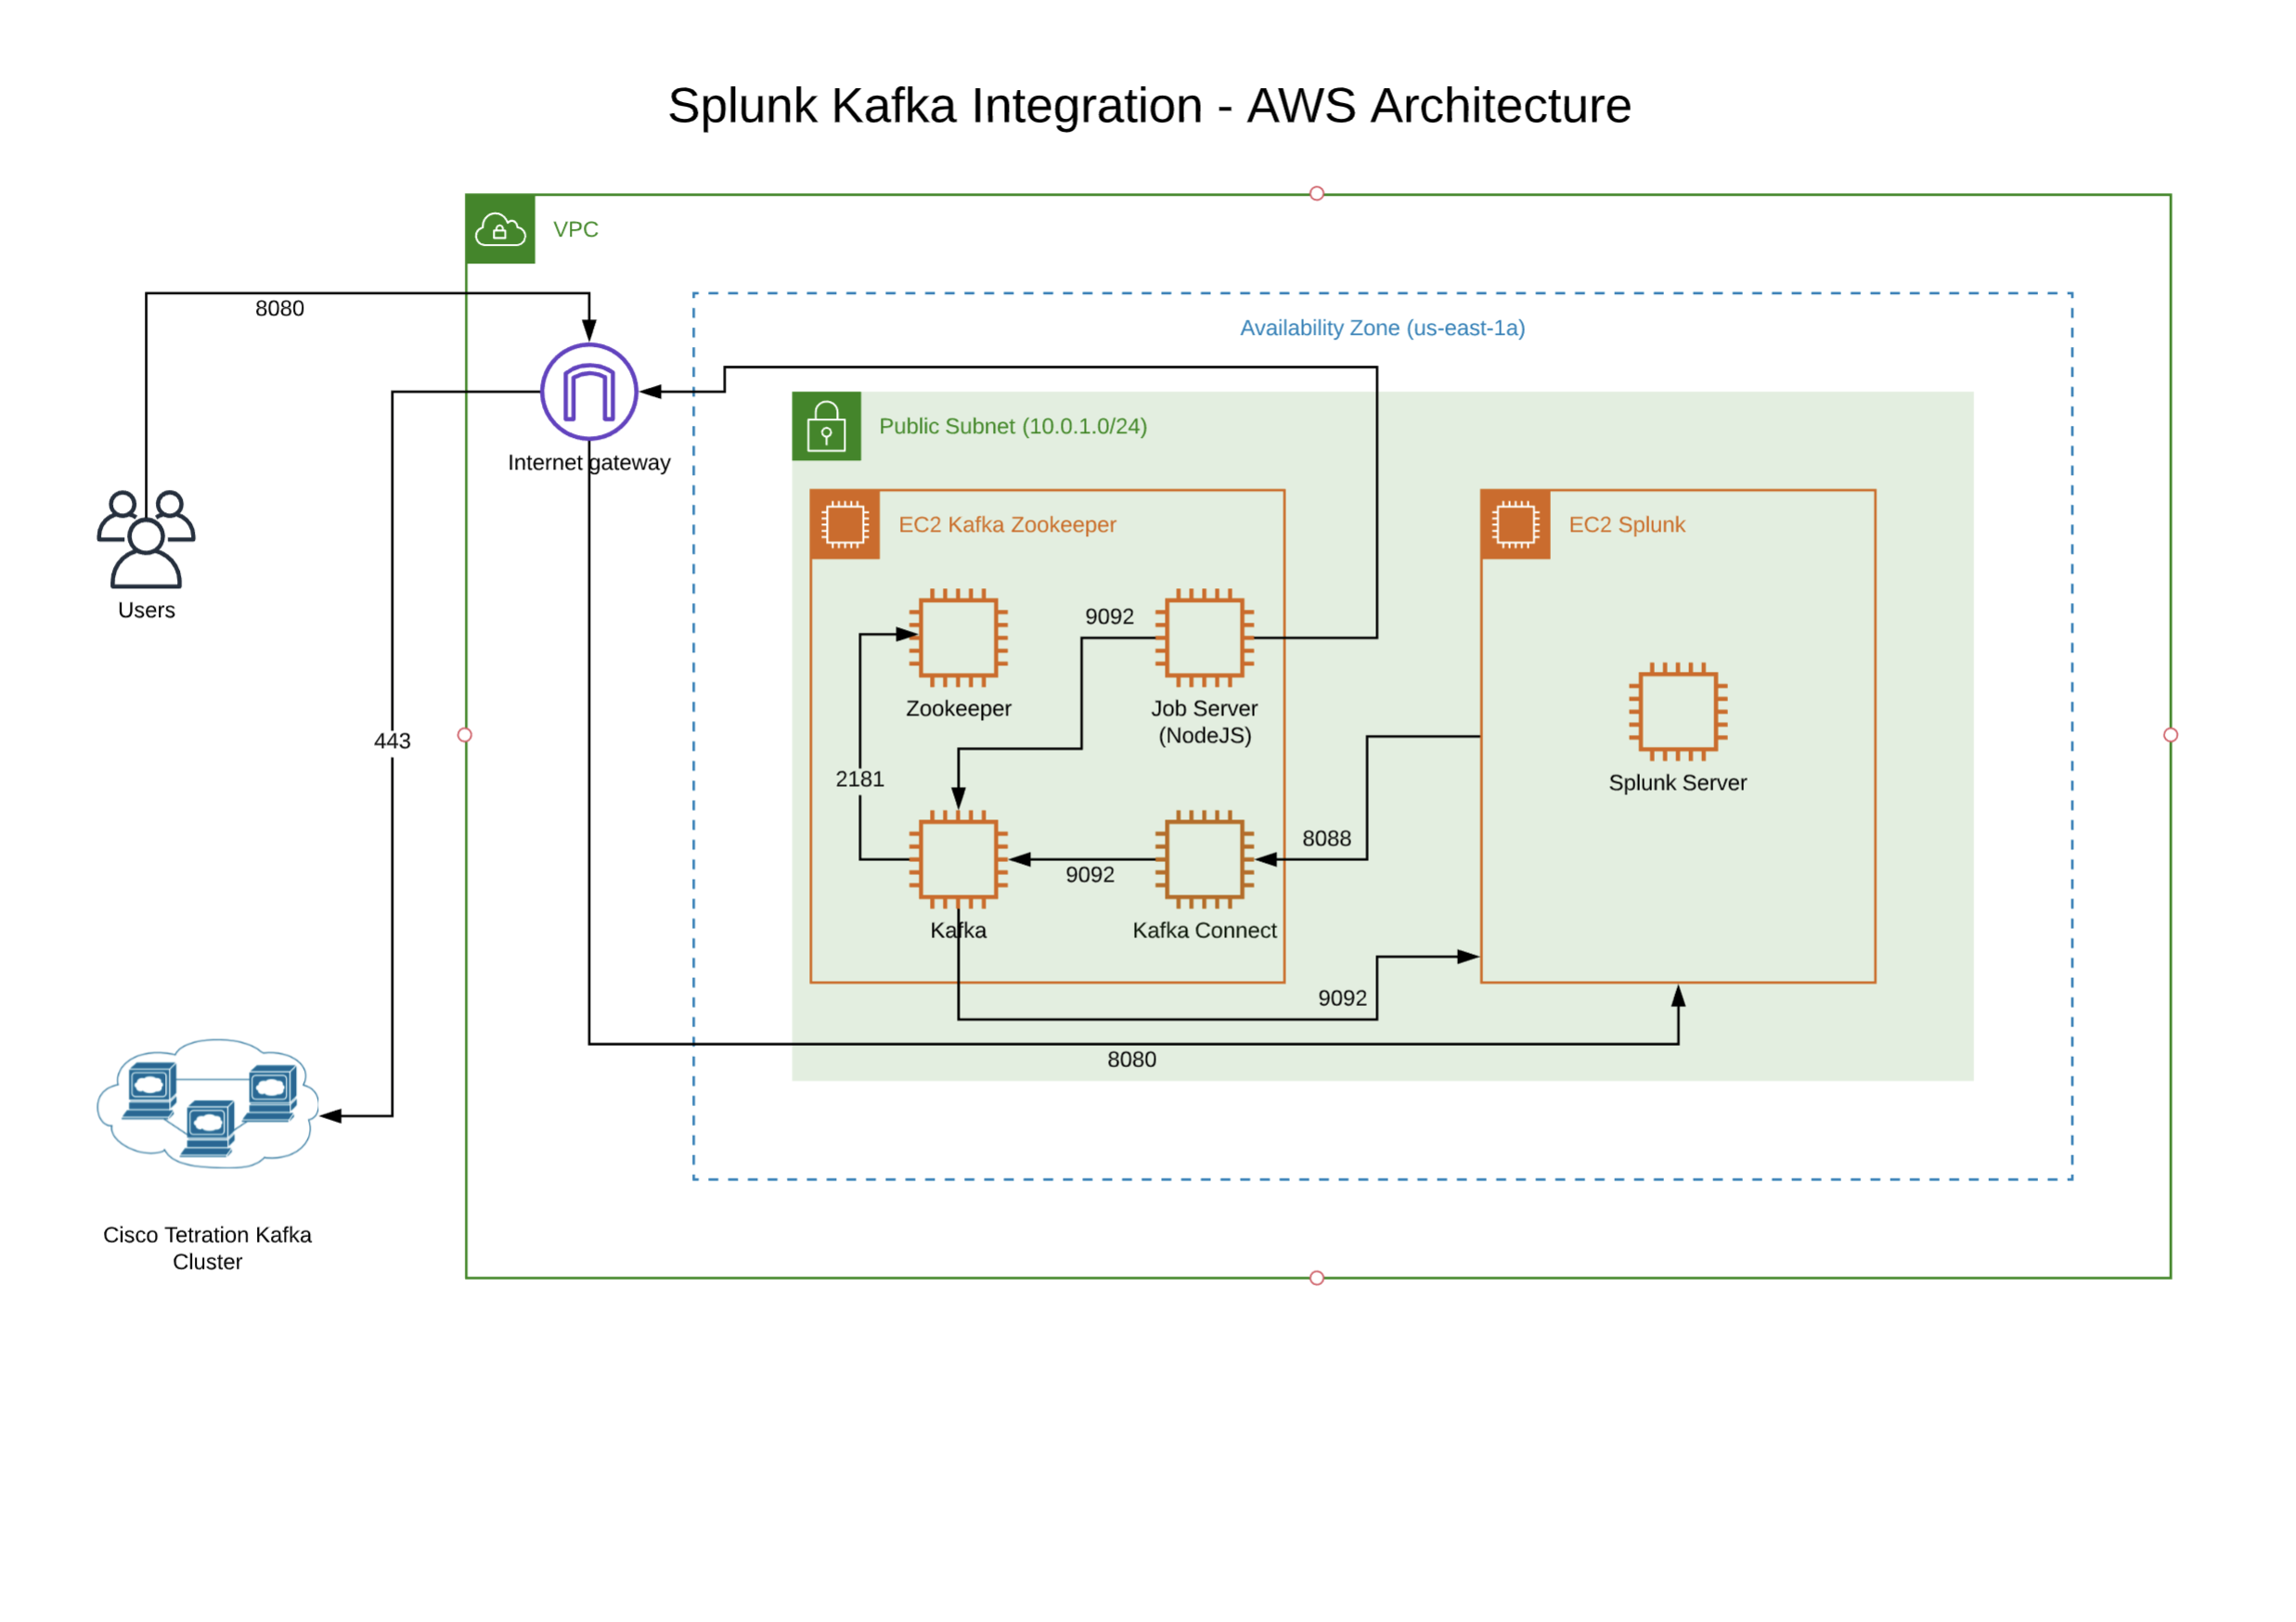
Diagrams
Section 1 - Splunk Installation on CentOS 7
Step 001 - Login to VM
Step 002 - Donwload Splunk
Step 003 - Install Splunk
Step 004 - Create Admin Credentials
Step 005 - Start Splunk
Step 006 - Connect in Browser
Section 2 - Splunk Connect for Kafka Installation
Step 001 - Open Splunk WebUI
Step 002 - Navigate to Data Inputs
Step 003 - Navigate to HTTP Collector
Step 004 - Navigate to Global Settings
Step 005 - Enable All Tokens
Step 006 - Create a New Token
Step 007 - Enable Indexer
Step 008 - Create a New Index
Step 009 - Name and Save Index
Step 010 - Review New Index
Step 011 - Submit Token
Step 012 - Copy Token
Section 3 - Connector Installation and Configuration
Step 001 - Download Splunk Kafka Connect
Step 002 - Create Directory
Step 003 - Modify Properties
Step 004 - Deploy
Step 005 - Verify
Step 006 - Initiate Connector
Information on ReST API
Live Interactive Diagram
You may prefer to utilize this interactive LucidChart diagram. It is possible that the interactive diagram may have slightly newer enhancements or modifications, depending on when you view, and should be considered to be the most reliable and up-to-date version, though every attempt will be made to take static screenshots and update those here, as often as possible.
Section 1 - Splunk Installation on CentOS 7
Login with credentials of your machine and then become root user with the following commands:
sudo su -
Create your account on Splunk.com and download your Splunk package. In this case, we used the following commands:
wget -O splunk-8.0.1-6db836e2fb9e-linux-2.6-x86_64.rpm 'https://www.splunk.com/bin/splunk/DownloadActivityServlet?architecture=x86_64&platform=linux&version=8.0.1&product=splunk&filename=splunk-8.0.1-6db836e2fb9e-linux-2.6-x86_64.rpm&wget=true'
Install Splunk:
rpm -i (Splunk-version-rpm-package)
In our case,
rpm -i splunk-8.0.1-6db836e2fb9e-linux-2.6-x86_64.rpm
After installation is complete, you must create the admin credentials manually without starting Splunk. To do this, open the user.conf file with your favourite editor. Here we show vi being used.
vi/opt/splunk/etc/system/local/user-seed.conf
Add the following lines in the file, save, and exit.
[user_info]
USERNAME = admin
PASSWORD = your password
Start your instance of Splunk with following command:
/opt/splunk/bin/splunk start
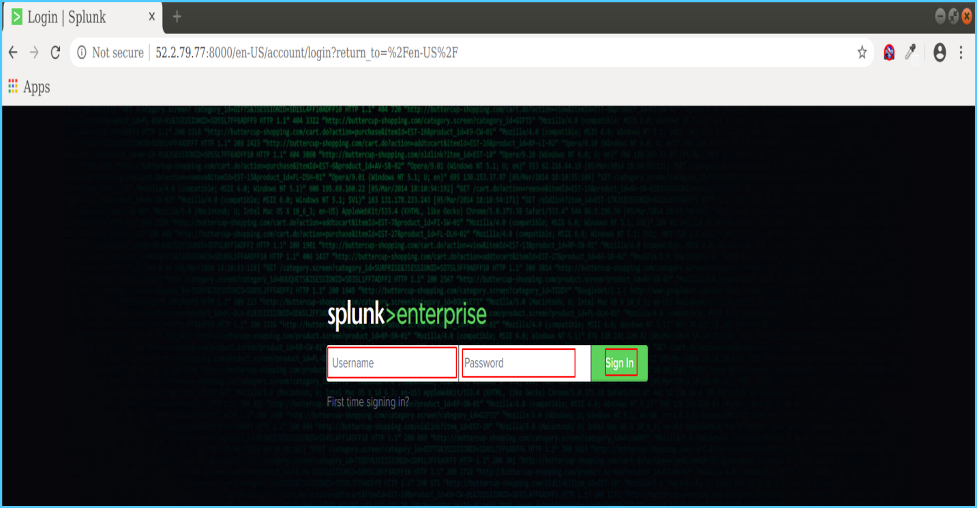
From your web browser, open Splunk Enterprise Web Console
http://your_public_ip:8000
Enter your credentials and explore Splunk.
Your Splunk machine is now ready to go.
Section 2 - Splunk Connect for Kafka Installation
System Requirements
A Kafka Connect Environment running Kafka version 1.0.0 or later. Java 8 or later. Splunk platform environment of version 6.5 or later. Configured and Valid HTTP Event Collector (HEC) token.
Start creating HEC token by following the instructions provided below with images.
From any browser visit http://your_public_ip:8000 and provide your credentials to login.
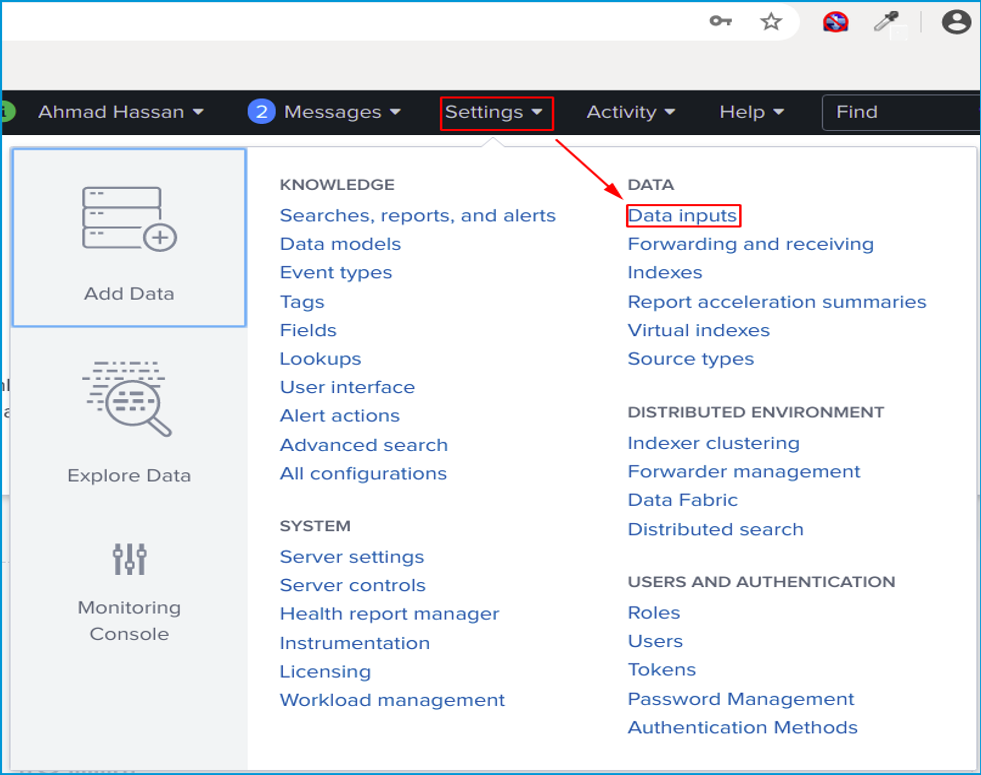
After login, click Settings, then click Data inputs as shown in the image below.
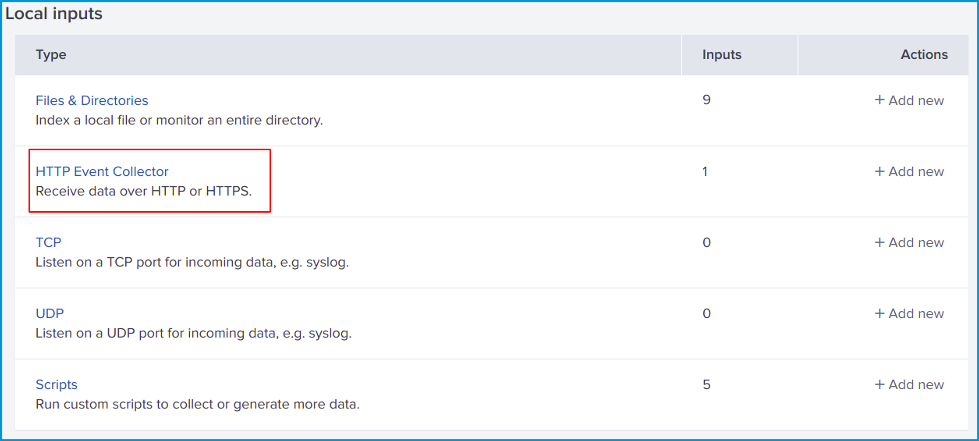
Next, click on HTTP Event Collector.
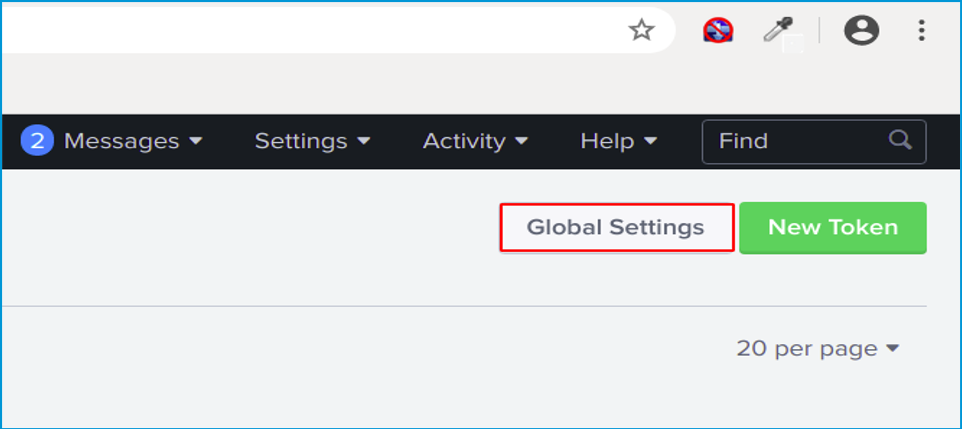
Before start creating a New Token click Global Setting.
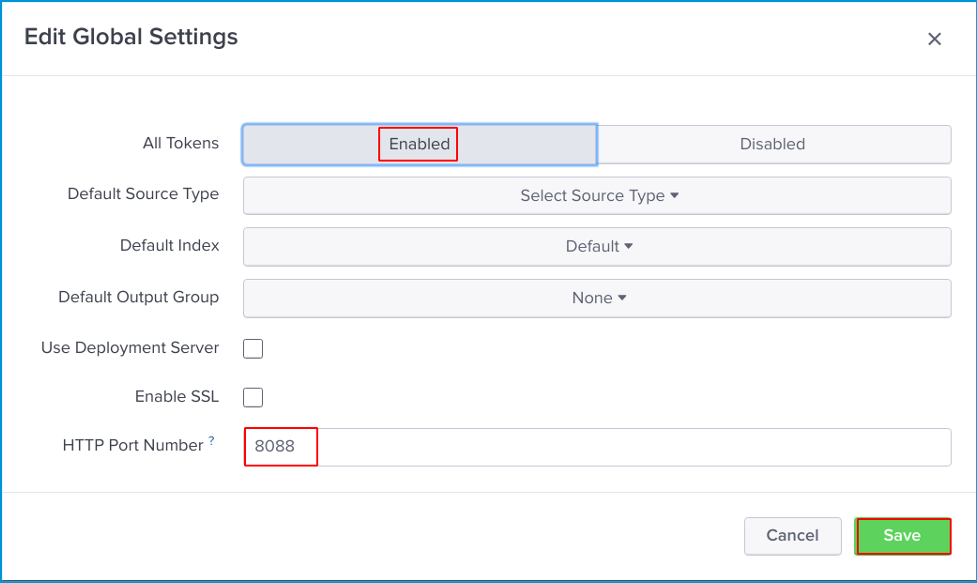
Here you will select Enabled for All Tokens and verify the port is set to 8088. Click Save.
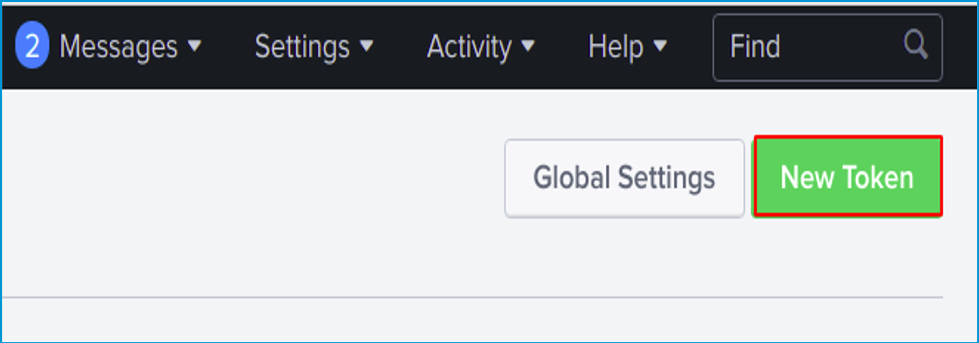
Now we will create our New Token by clicking it.
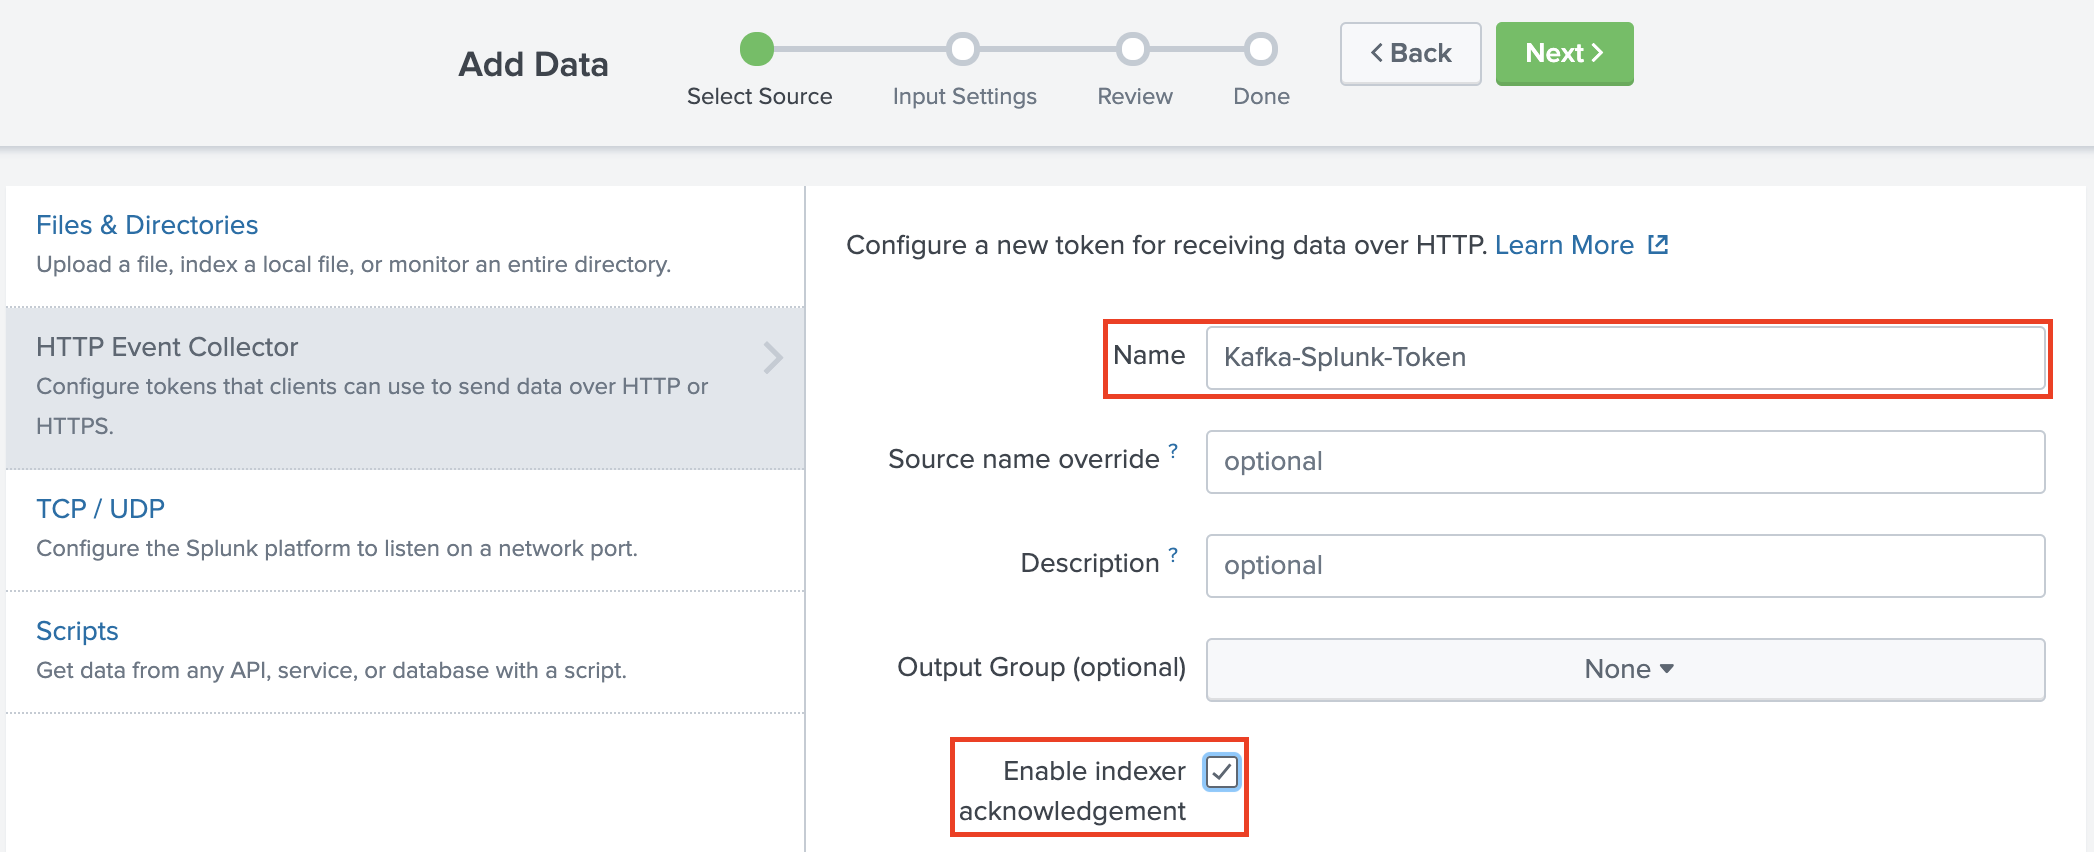
Give your token any Name and according to your need you can enable or disable Indexer acknowledgement and then click Next.
Next, click Create a new index.
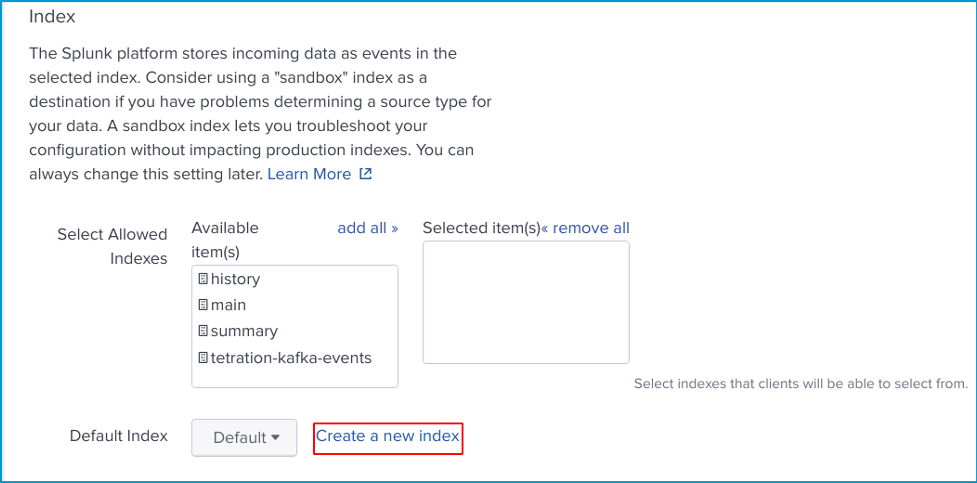
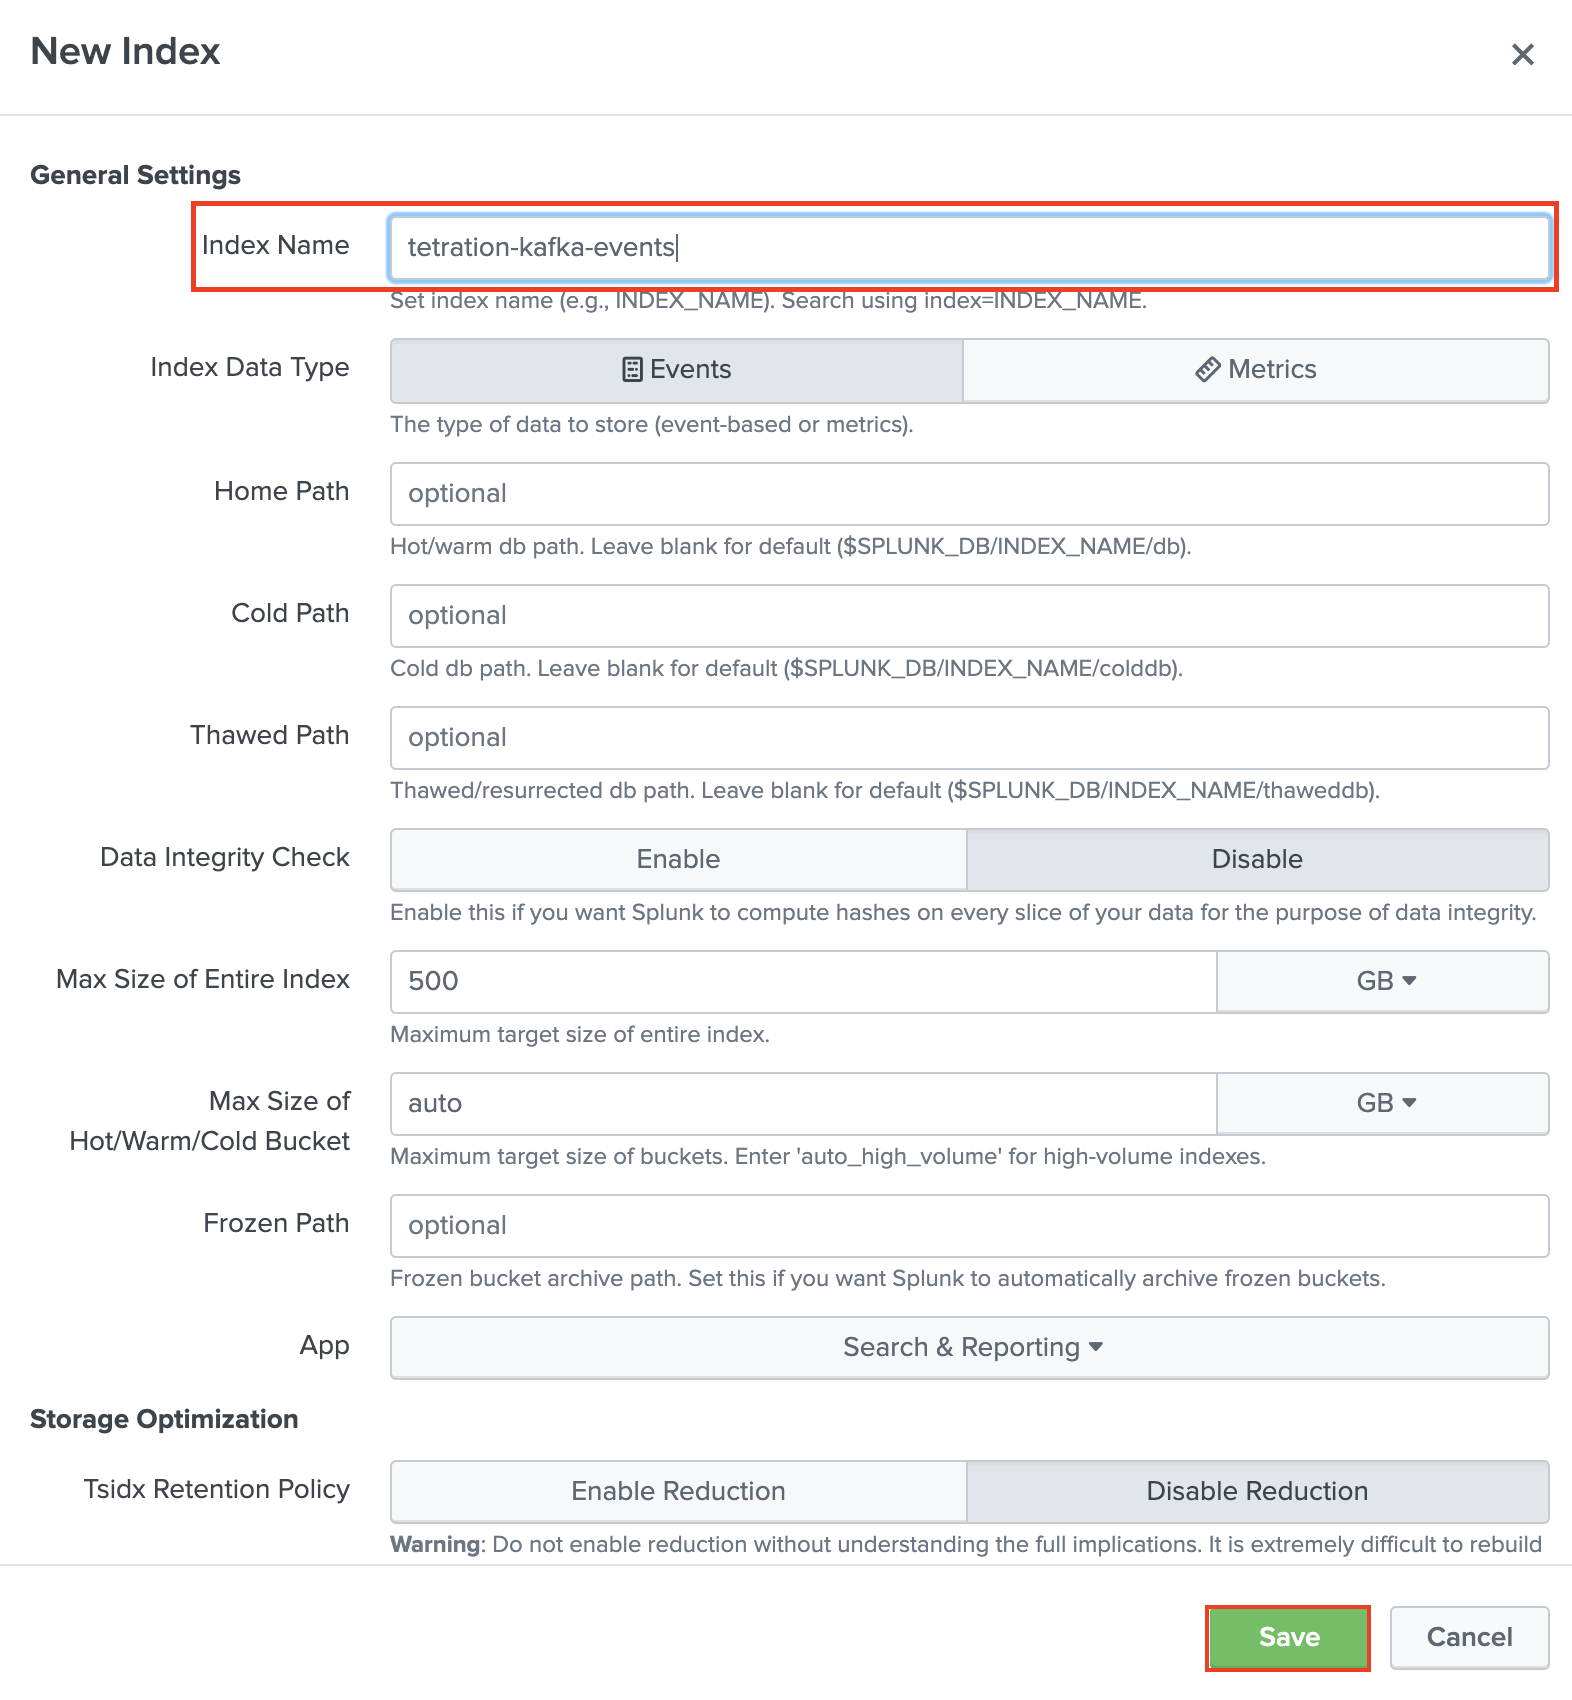
Simple add a Name for your index and click Save. You can leave other options as default.
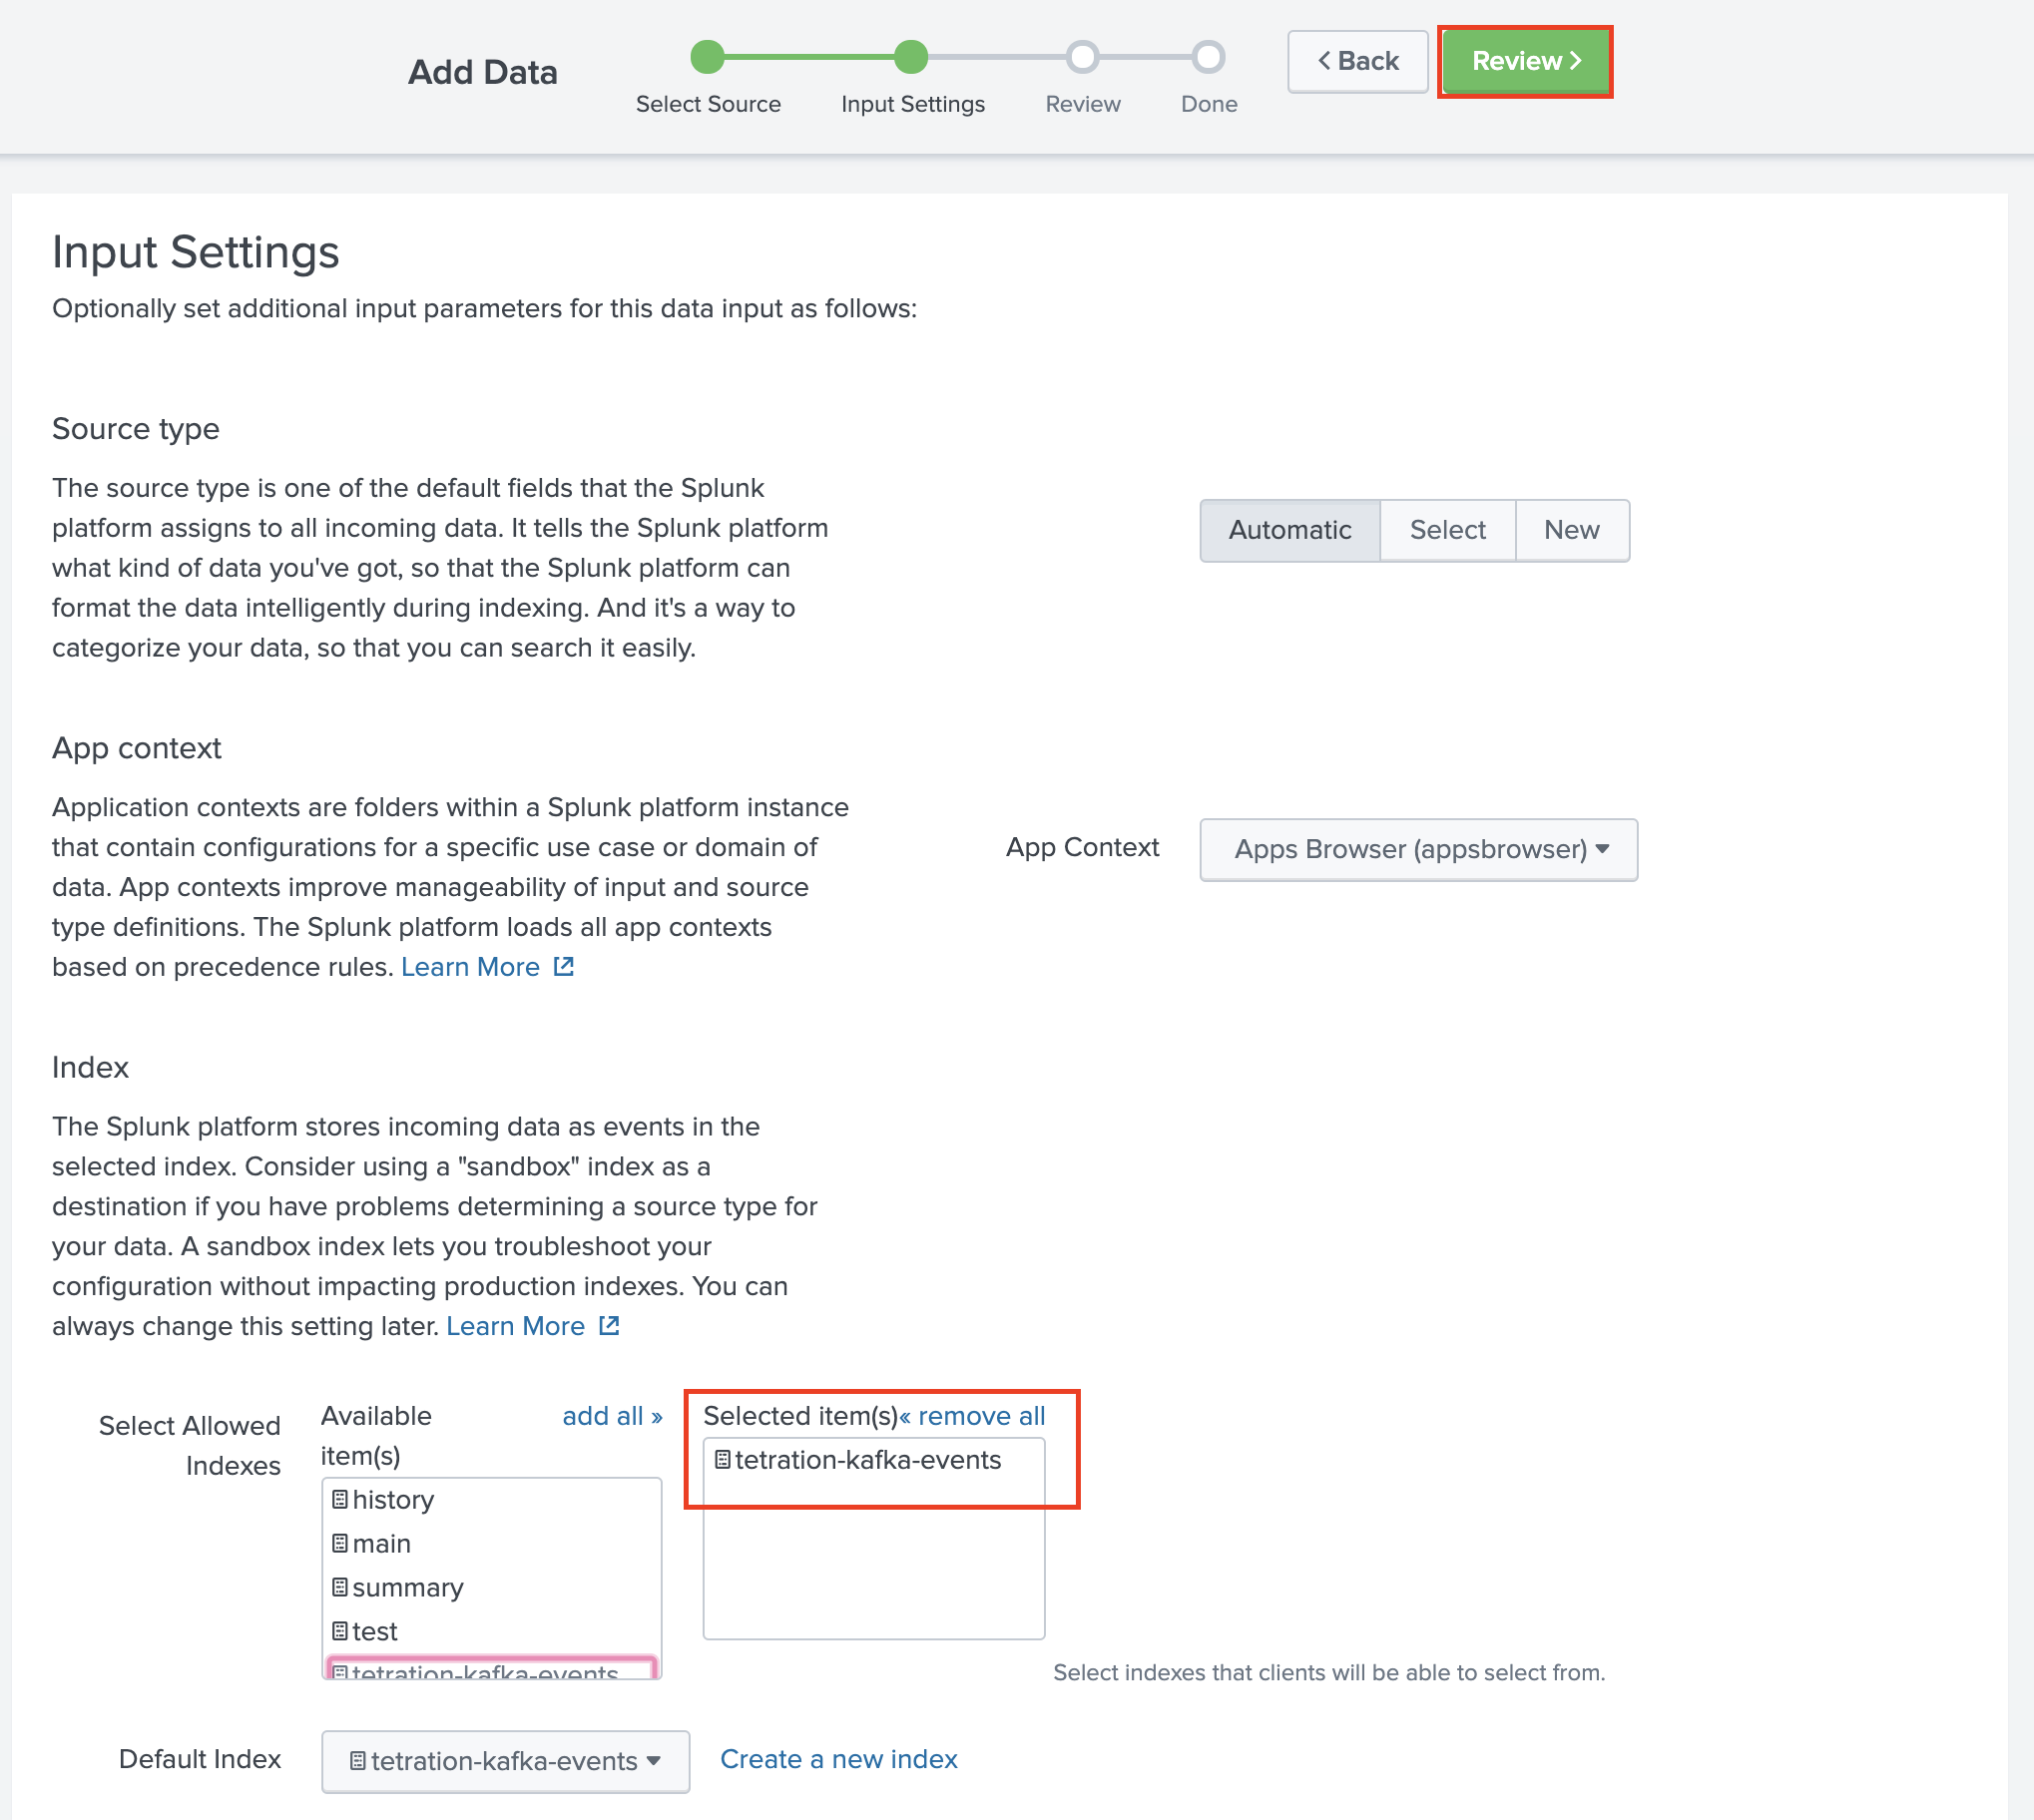
Select your created index and make sure it appears in Selected item(s) box and click Review.
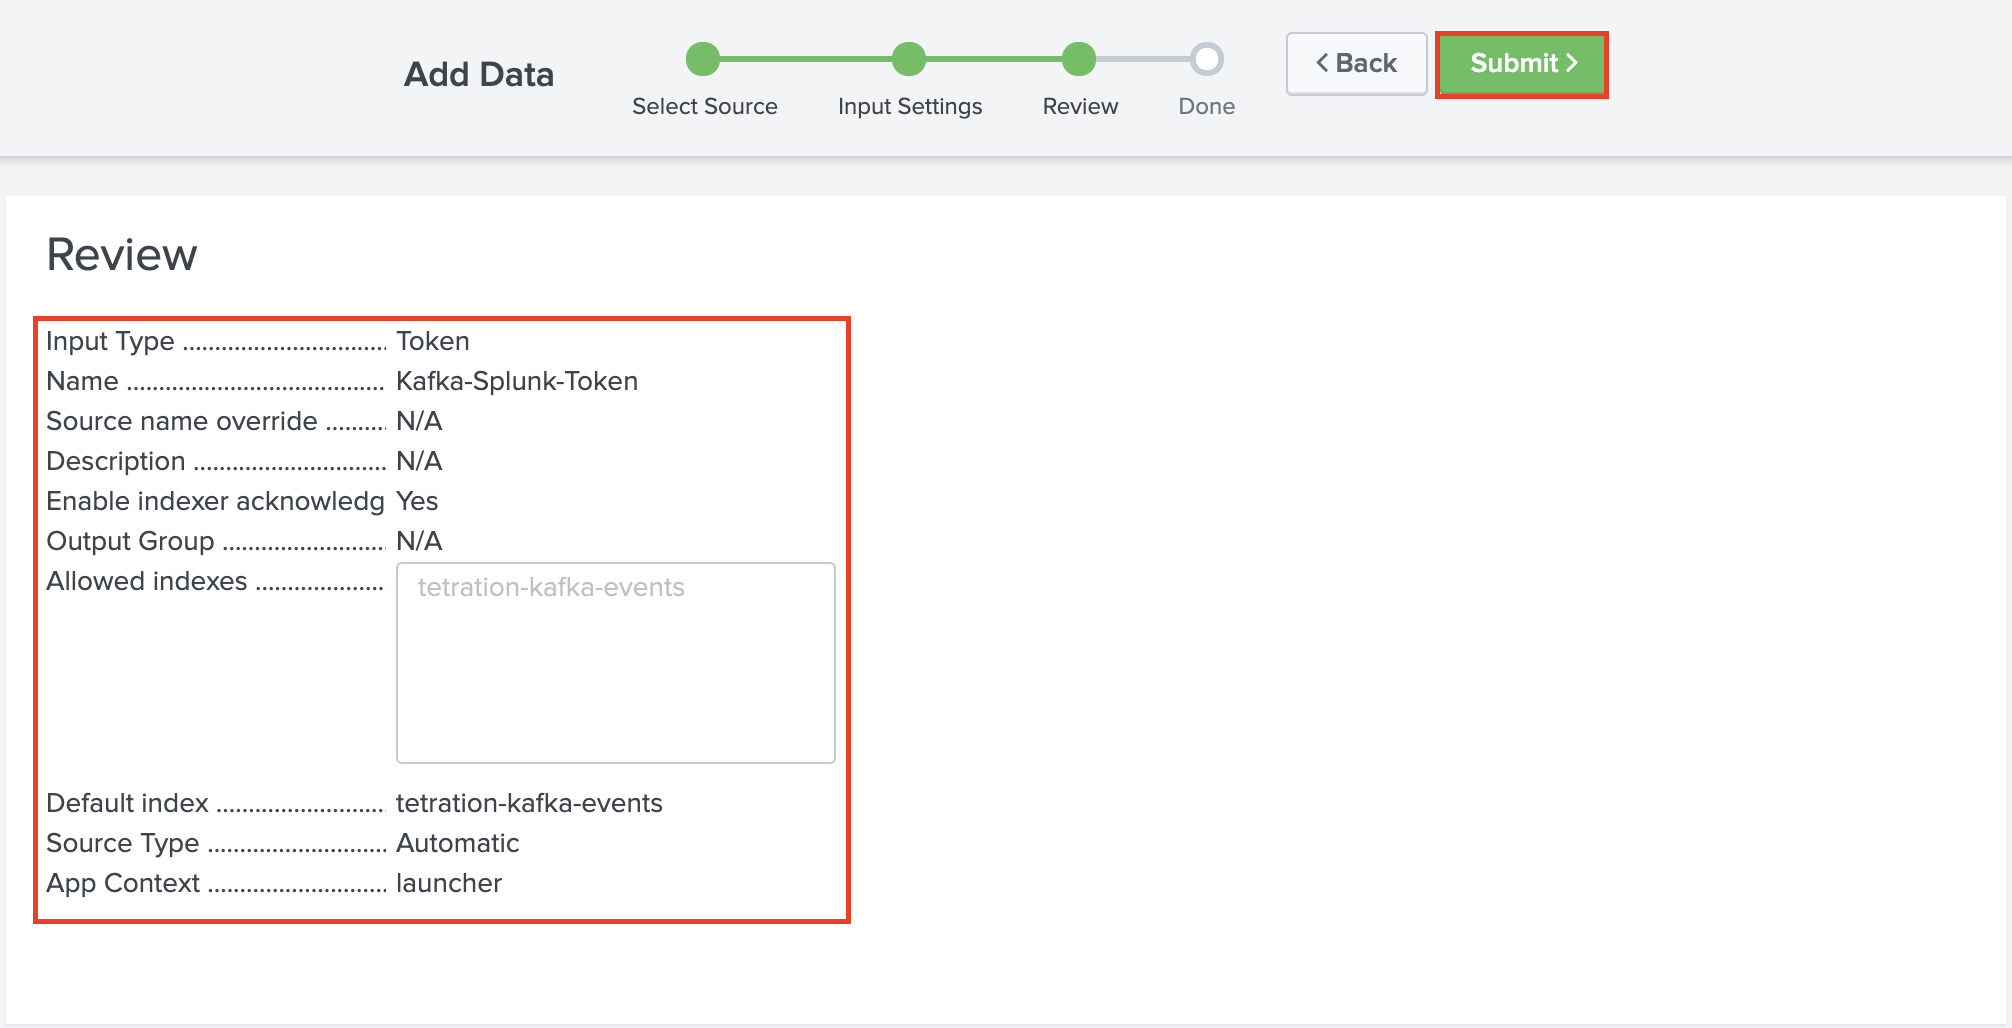
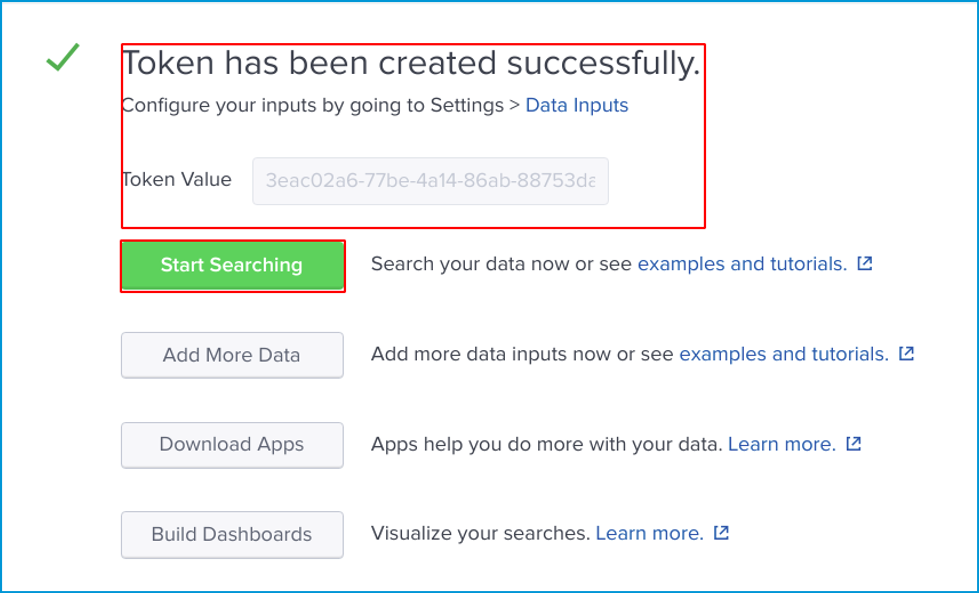
Review your setting and click Submit to create your token.
Here your token is created you can copy your Token Value and can use in your Rest Api. You should now be able to begin searching .
Section 3 - Connector Installation and Configuration
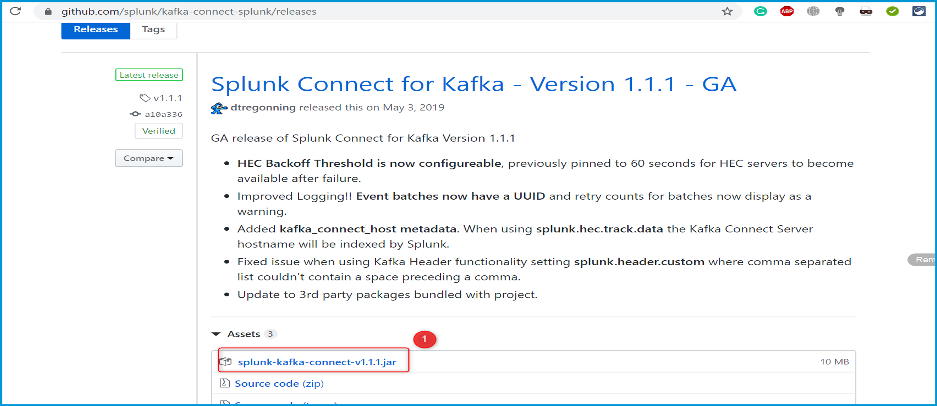
Visit https://github.com/splunk/kafka-connect-splunk/releases and download the latest splunk-kafka-connect-[version].jar release.
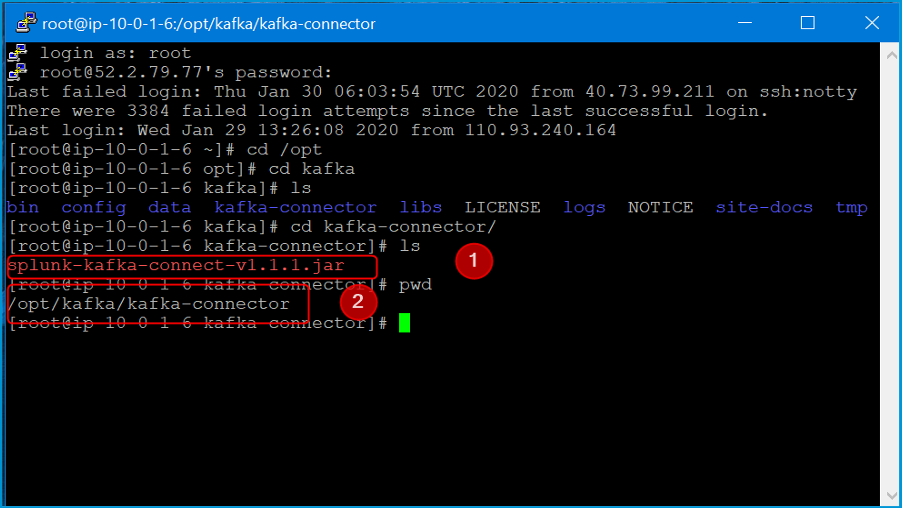
Create a directory to store your Kafka Connect Connector. This will be used for your plugin.path setting.
Navigate to your /$KAFKA_HOME/config/ directory.
Modify the connect-distributed.properties file to include the below information.
#These settings may already be configured if you have deployed a connector in your Kafka Connect Environment
bootstrap.servers=<BOOTSTRAP_SERVERS>(ip-10-0-1-6.ec2.internal:9092)
plugin.path=<PLUGIN_PATH>(/opt/kafka/kafka-connector)
#Required
key.converter=org.apache.kafka.connect.storage.StringConverter
value.converter=org.apache.kafka.connect.storage.StringConverter
key.converter.schemas.enable=false
value.converter.schemas.enable=false
internal.key.converter=org.apache.kafka.connect.json.JsonConverter
internal.value.converter=org.apache.kafka.connect.json.JsonConverter
internal.key.converter.schemas.enable=false
internal.value.converter.schemas.enable=false
offset.flush.interval.ms=10000
#Recommended
group.id=kafka-connect-splunk-hec-sink

bootstrap.servers ## This is a comma-separated list of where your Kafka brokers are located.
plugin.path       ## To make the JAR visible to Kafka Connect, we need to ensure that when Kafka 	Connect is started that the plugin path variable is folder path location of where your connector 	was installed to in the earlier section.
After we have our properties file configured and ready to go, we’re now ready to deploy Kafka Connect. If we kept the same name for our properties file, this command will deploy Kafka Connect.
./bin/connect-distributed.sh config/connect-distributed.properties
Now is a good time to check that the Splunk Connect for Kafka has been installed correctly and is ready to be deployed. Run the following command and note the results.
curl http://KAFKA_CONNECT_HOST:8083/connector-plugins
Initiate Connector for Splunk Indexing with Acknowledgement Using HEC/Event Endpoints:
Rest API:

curl -s 10.0.1.6:8083/connectors -X POST -H “Content-Type:application/json”  -d’{
“name”: “Sending-Data”,
“config”: {
“connector.class”: “com.splunk.kafka.connect.SplunkSinkConnector”,
“task.max”: “1”,
“topics”: “Kafka-Splunk-Token”,
“splunk.indexes”: “tetration-kafka-events”,
“splunk.sourcetypes”: “access_combined”,
“splunk.hec.uri”: “http://54.224.99.155:8088”,
“splunk.hec.token”: “c8926f55-2c9b-4e16-88a7-eba0a039998b”,
“splunk.hec.ack.enabled”: “false”,
“splunk.hec.raw”: “true”,
“splunk.hec.raw.line.breaker”: “####”,
“splunk.hec.ssl.validate.certs”: “false”
	}
}’
Following is helping information about the REST API.
name Connector name. A consumer group with this name will be created with tasks to be distributed evenly across the connector cluster nodes.
connector.class The Java class used to perform connector jobs. Keep the default unless you modify the connector.
tasks.max The number of tasks generated to handle data collection jobs in parallel. The tasks will be spread evenly across all Splunk Kafka Connector nodes.
topics Comma separated list of Kafka topics for Splunk to consume.
splunk.hec.uri Splunk HEC URIs. Either a comma separated list of the FQDNs or IPs of all Splunk indexers, or a load balancer. If using the former, the connector will load balance to indexers using round robin
vi. splunk.hec.token: Splunk HTTP Event Collector token.
splunk.hec.ack.enabled Valid settings are true or false. When set to true the Splunk Kafka Connector will poll event ACKs for POST events before check-pointing the Kafka offsets. This is used to prevent data loss, as this setting implements guaranteed delivery.
splunk.hec.raw Set to true in order for Splunk software to ingest data using the the /raw HEC endpoint. false will use the /event endpoint.
splunk.hec.json.event.enrichment Only applicable to /event HEC endpoint. This setting is used to enrich raw data with extra metadata fields. It contains a comma separated list of key value pairs. The configured enrichment metadata will be indexed along with raw event data by Splunk software. Note: Data enrichment for /event HEC endpoint is only available in Splunk Enterprise 6.5 and above.
splunk.hec.track.data Valid settings are true or false. When set to true, data loss and data injection latency metadata will be indexed along with raw data
| Go to Top of the Page |