Cisco Tetration - Hands-On Lab
Module23: Policy Enforcement - nopCommerce
In this module we will enable enforcement on the nopCommerce application workspace. First we will review the current policies in place on the IIS web server, and will come back to review the policies after enabling enforcement. Once in enforcement, we’ll resolve a common error that can occur when using the Preserve Rules feature. Then we will test the application, as well as test the user-based policy that was created based on ISE Security Group tags in Module 16
Steps for this Module
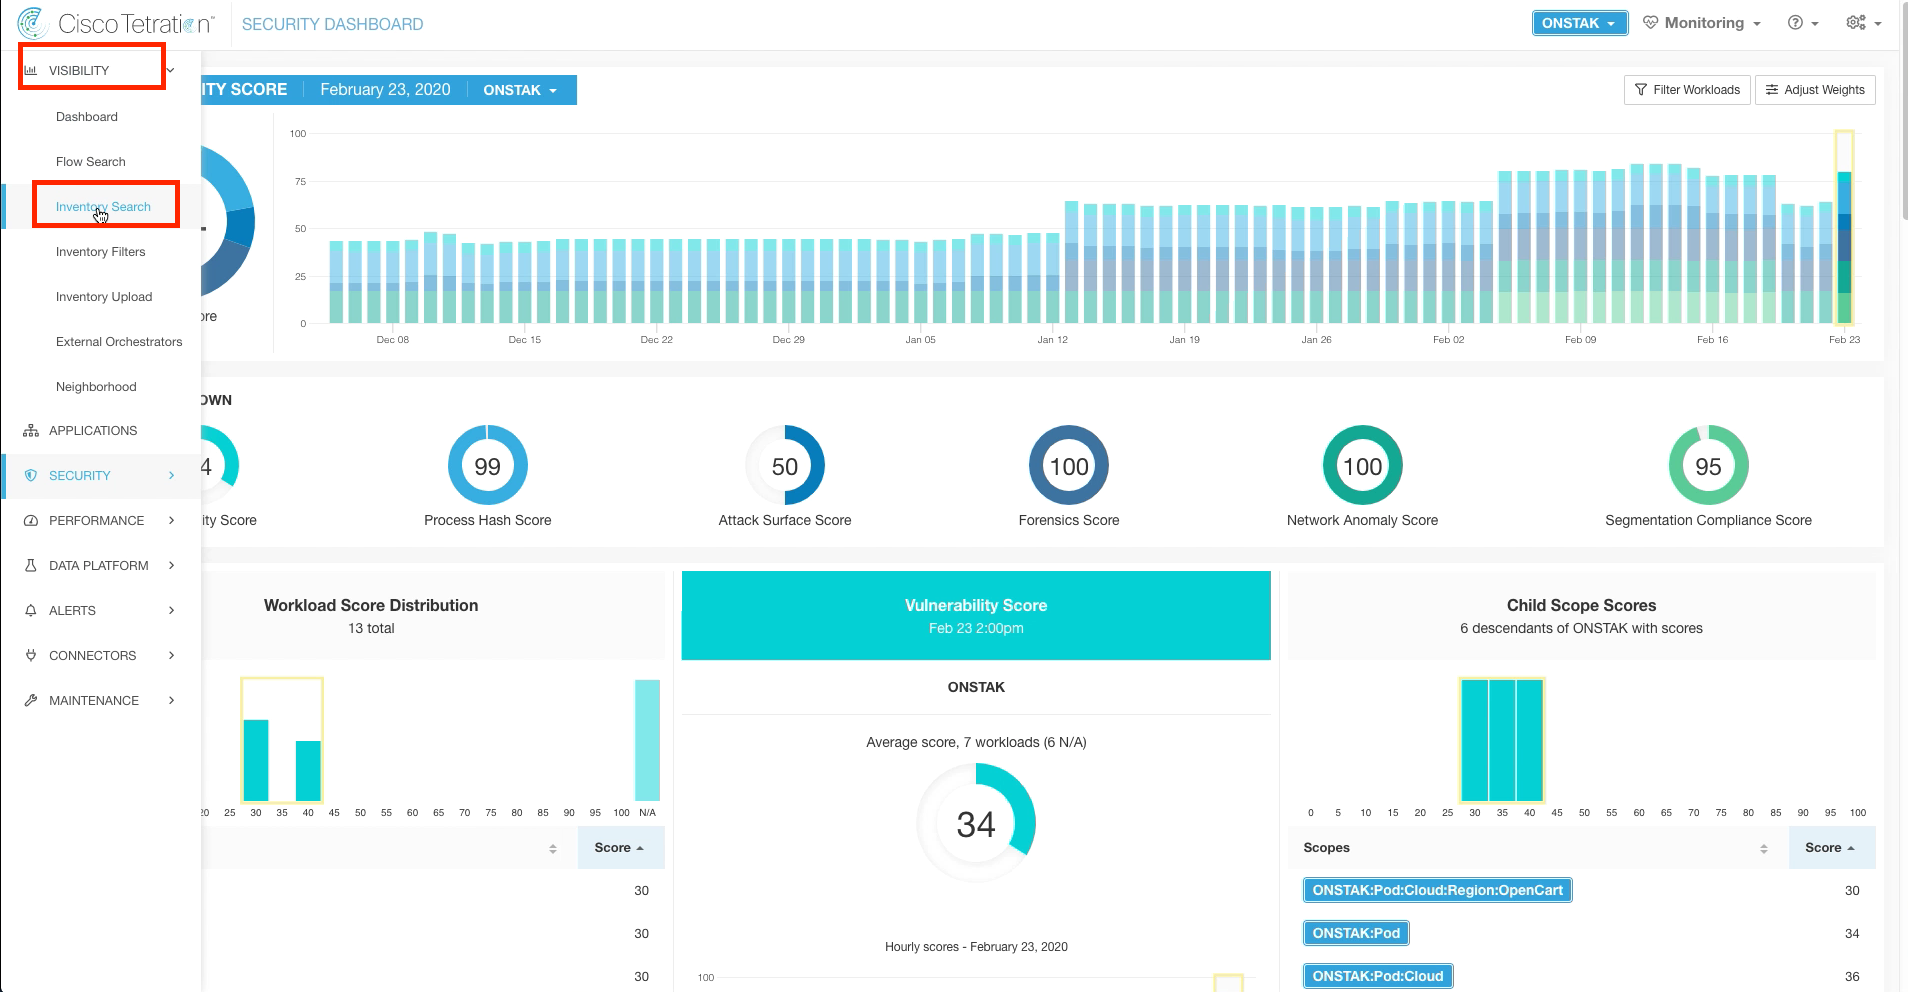
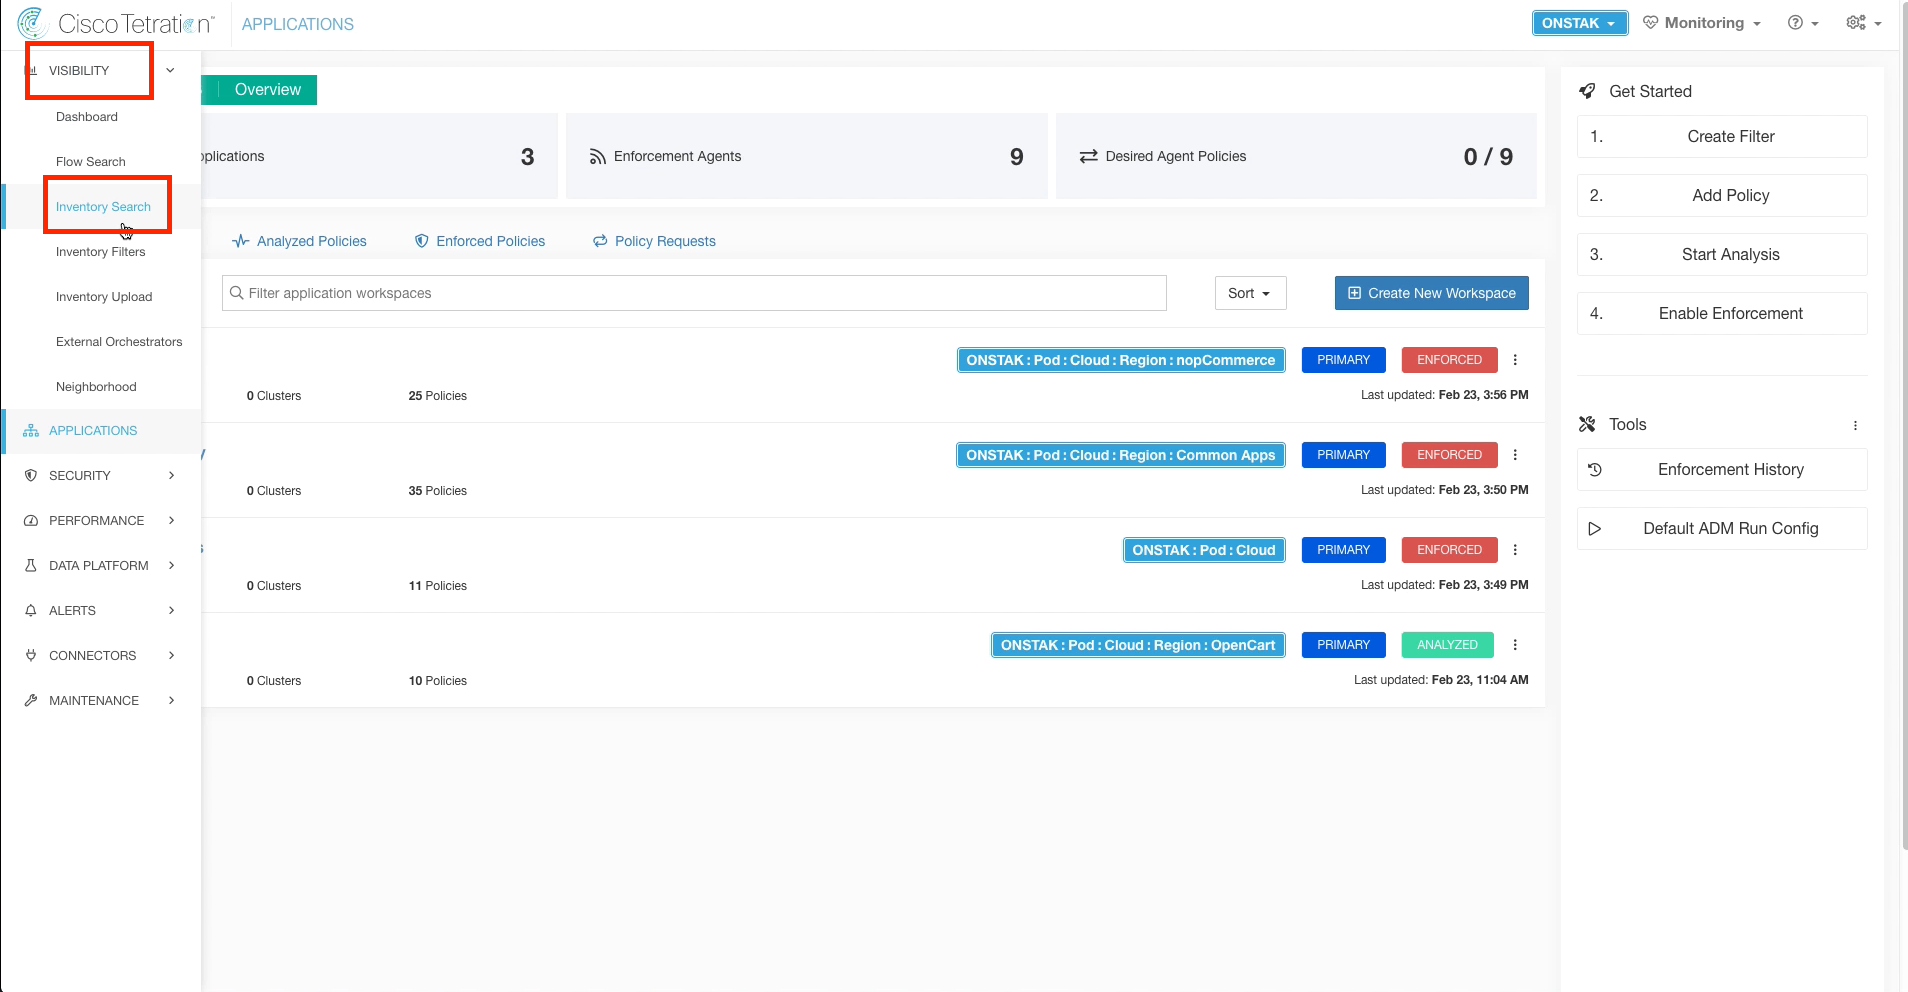
Step 001 - Navigate to Inventory Search
Step 002 - Search for the IIS web server
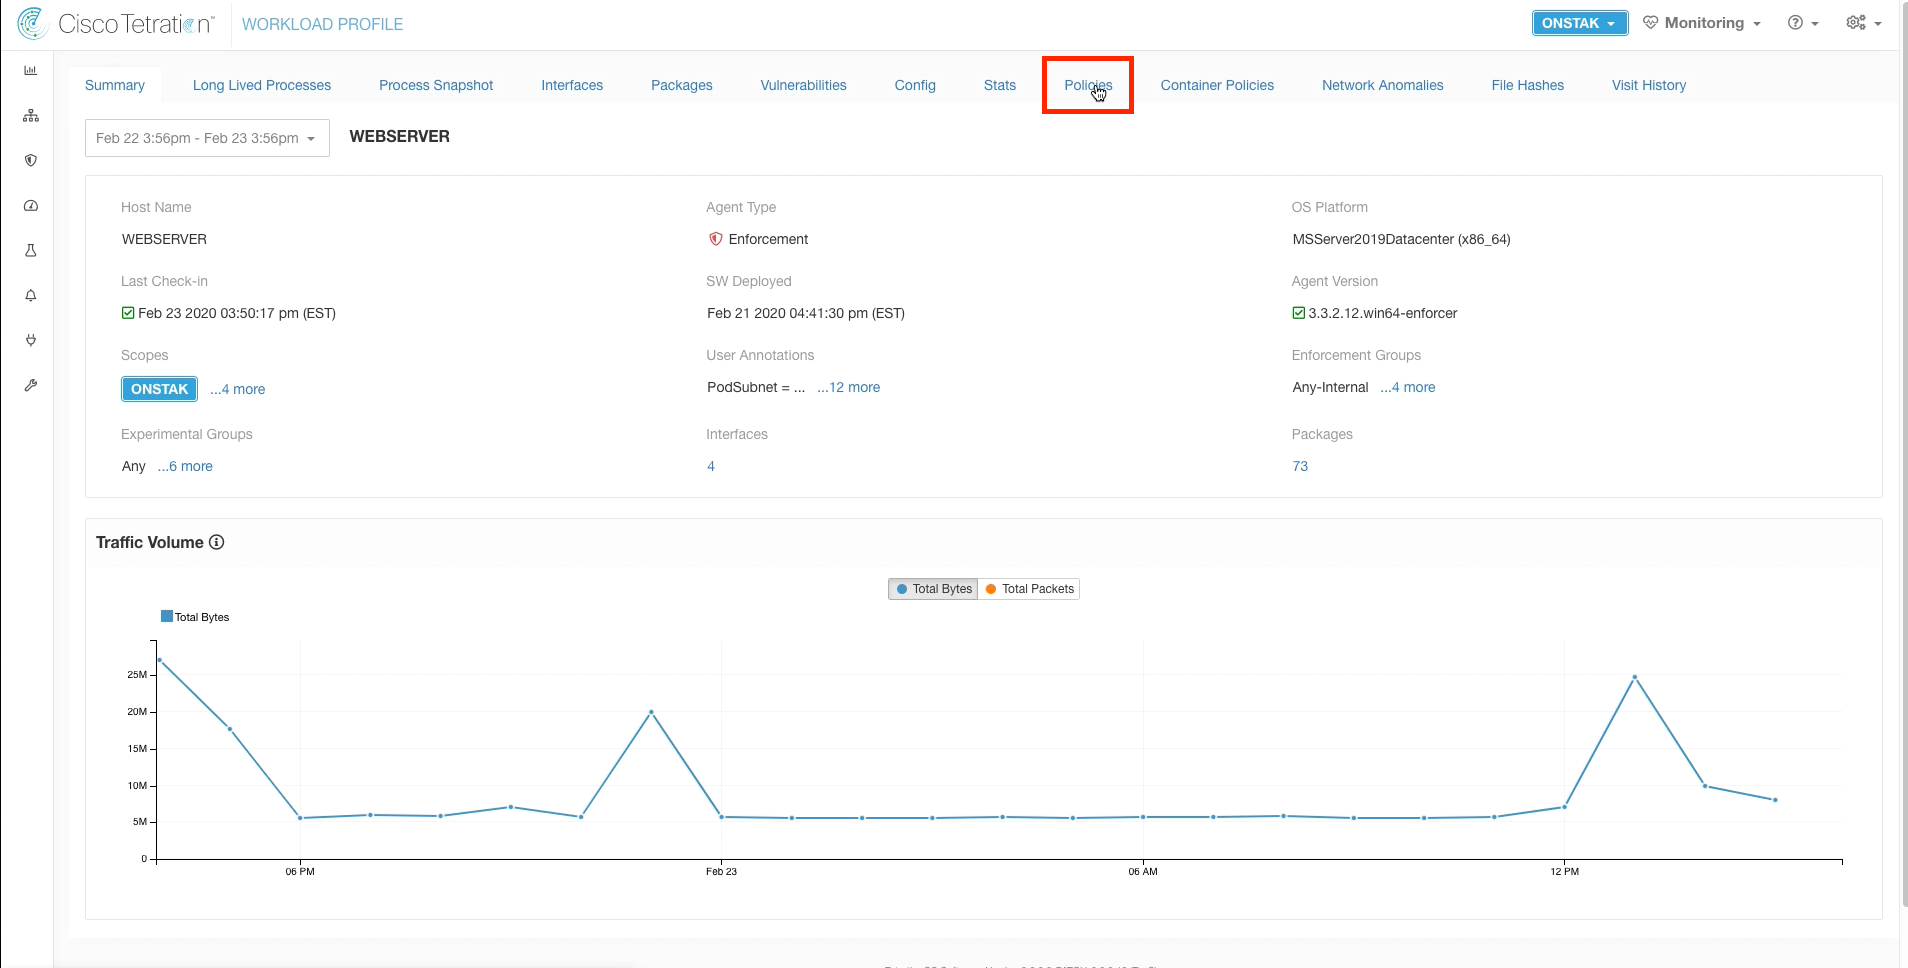
Step 003 - Click on Policies
Step 004 - Note the current number of Policies
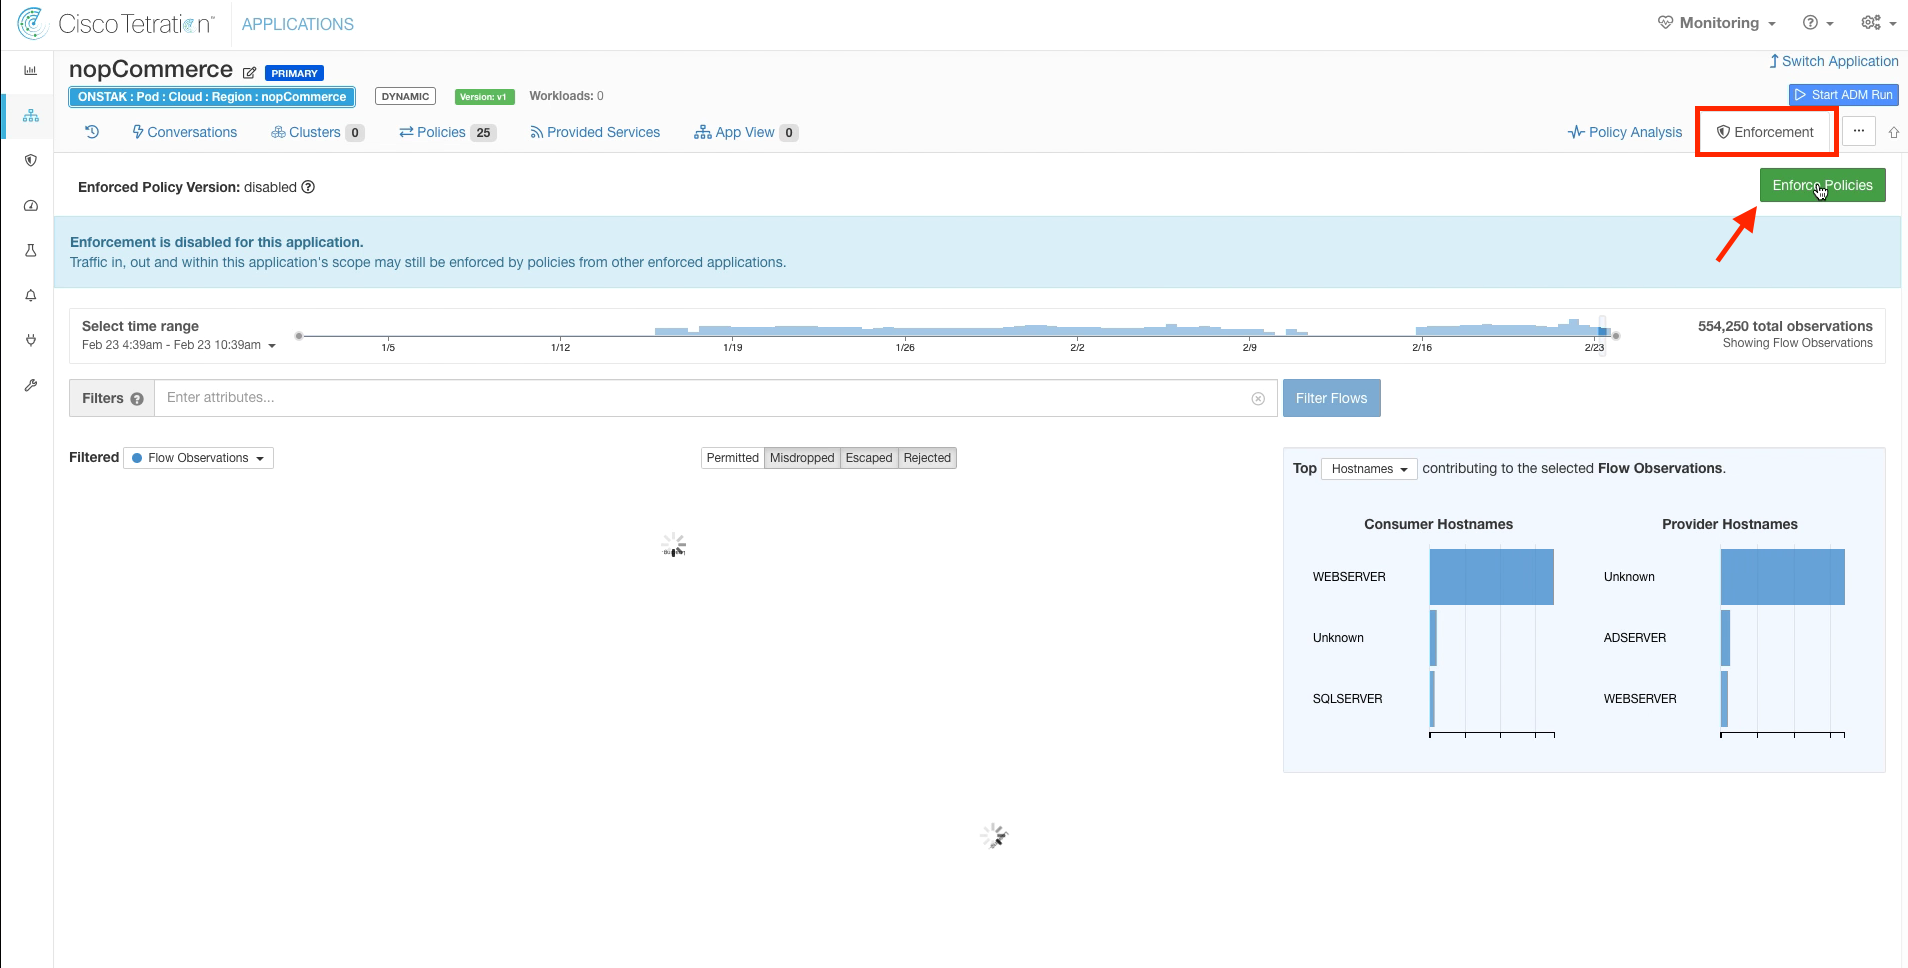
Step 005 - Navigate to the nopCommerce app workspace
Step 006 - Enter enforcement for the nopCommerce app
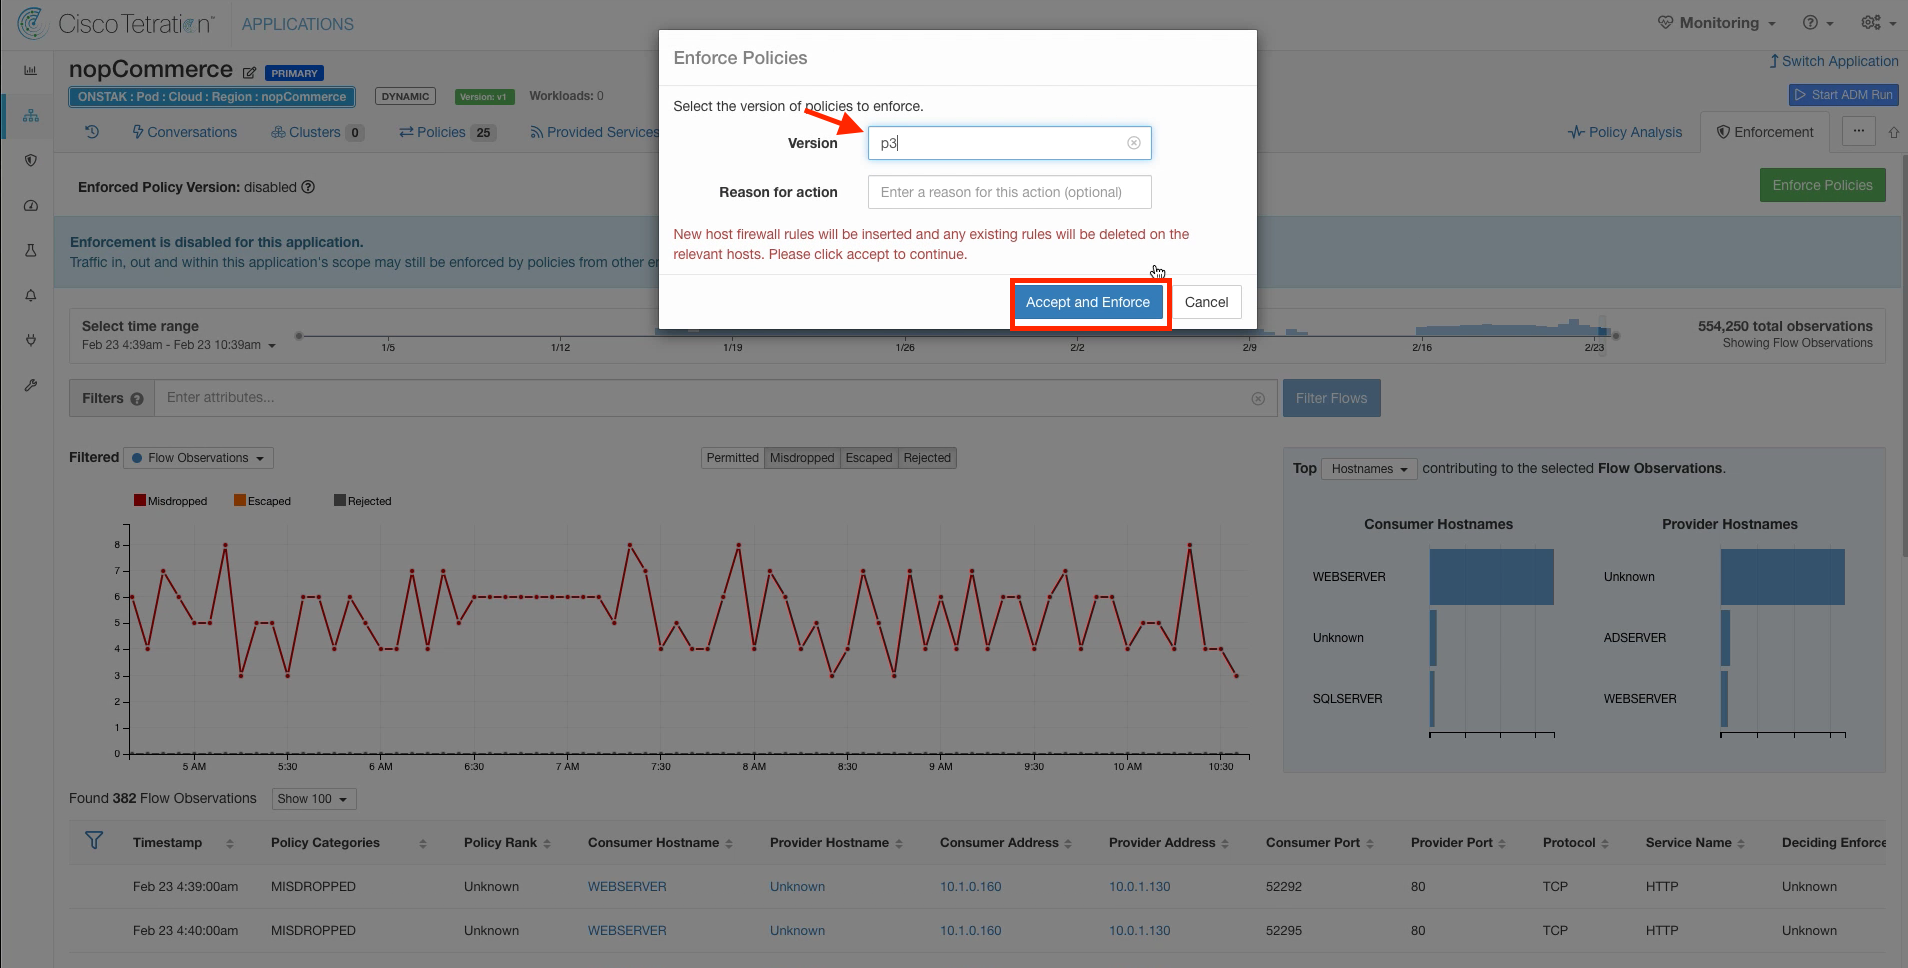
Step 007 - Choose the version of policy to enforce
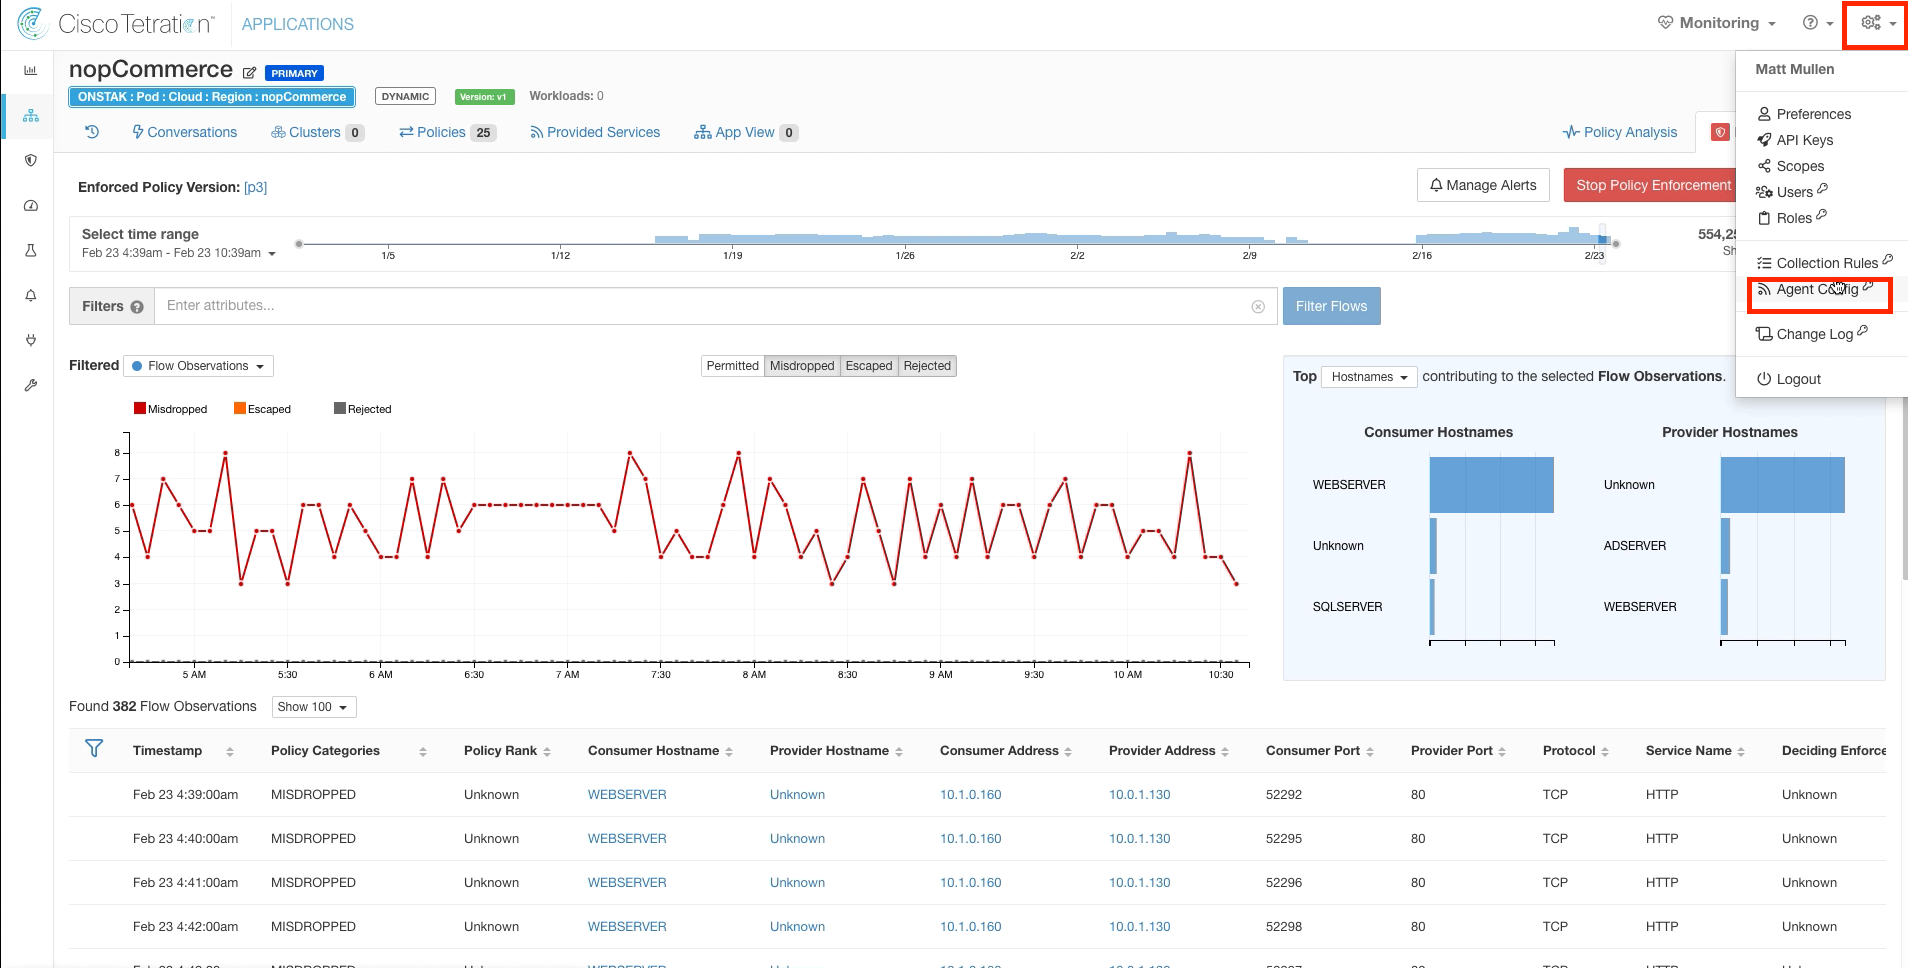
Step 008 - Navigate to Agent Config
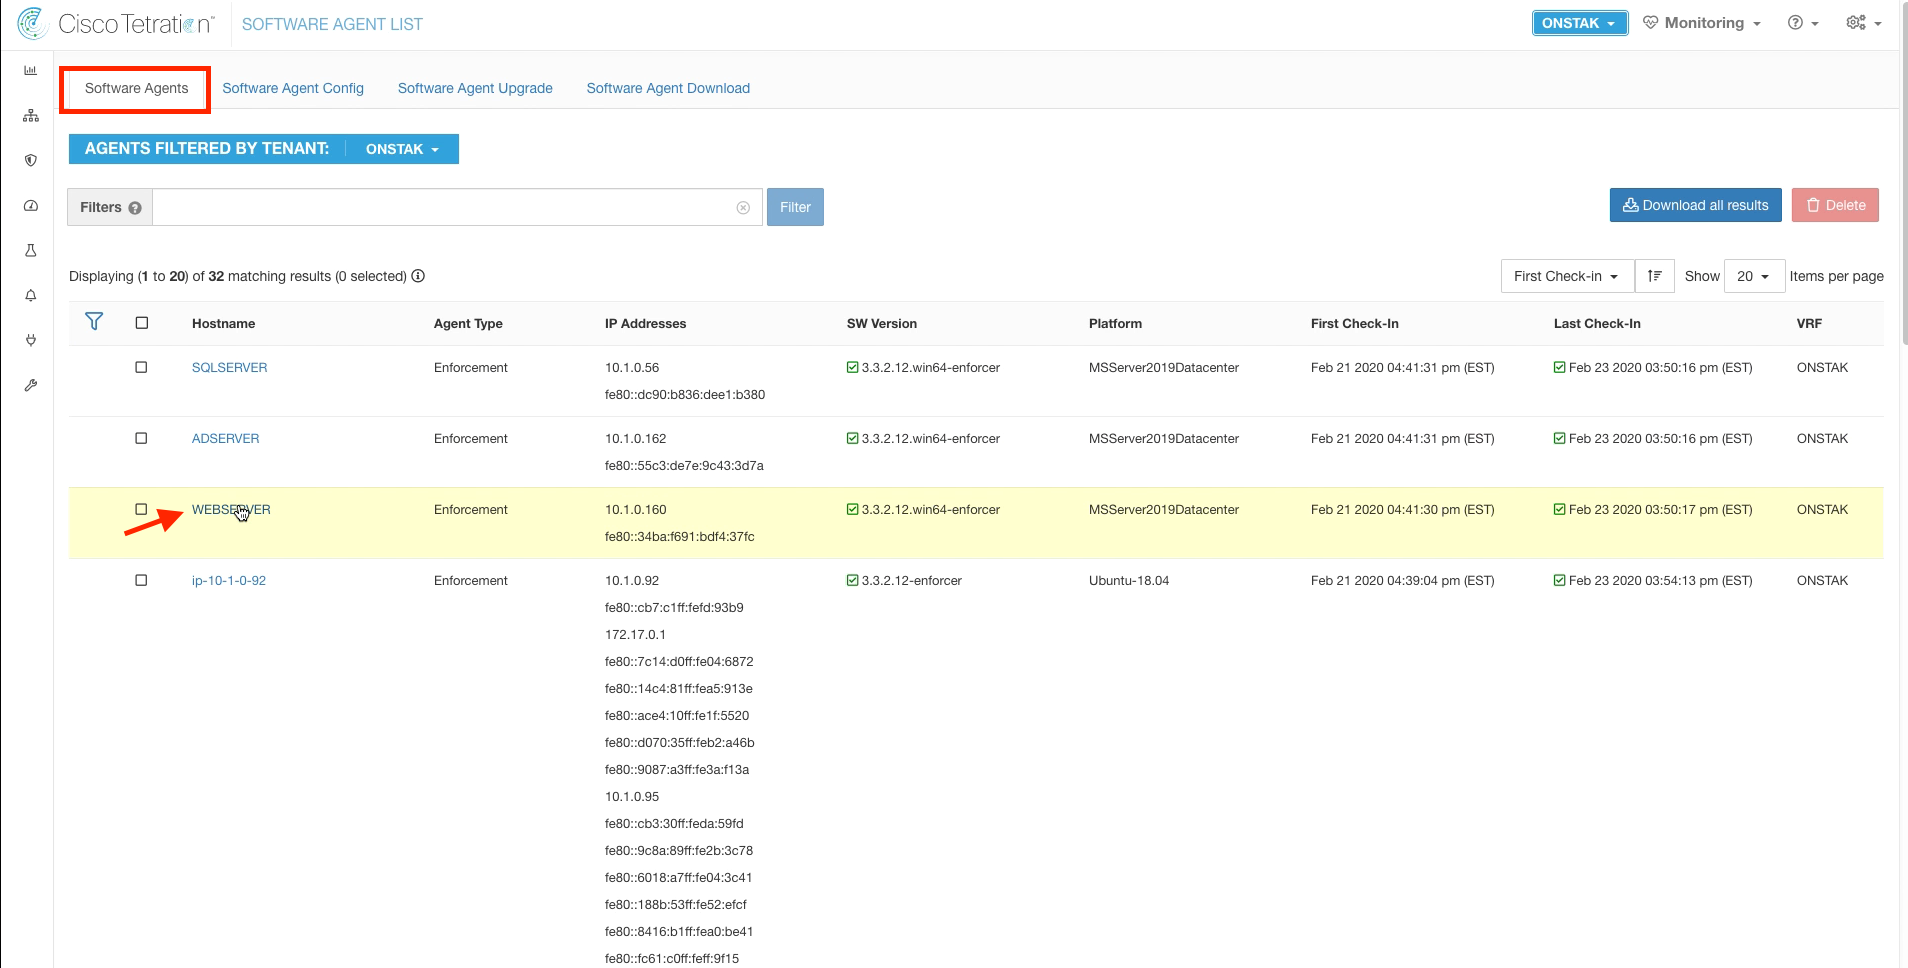
Step 009 - Select the IIS server from Software Agents
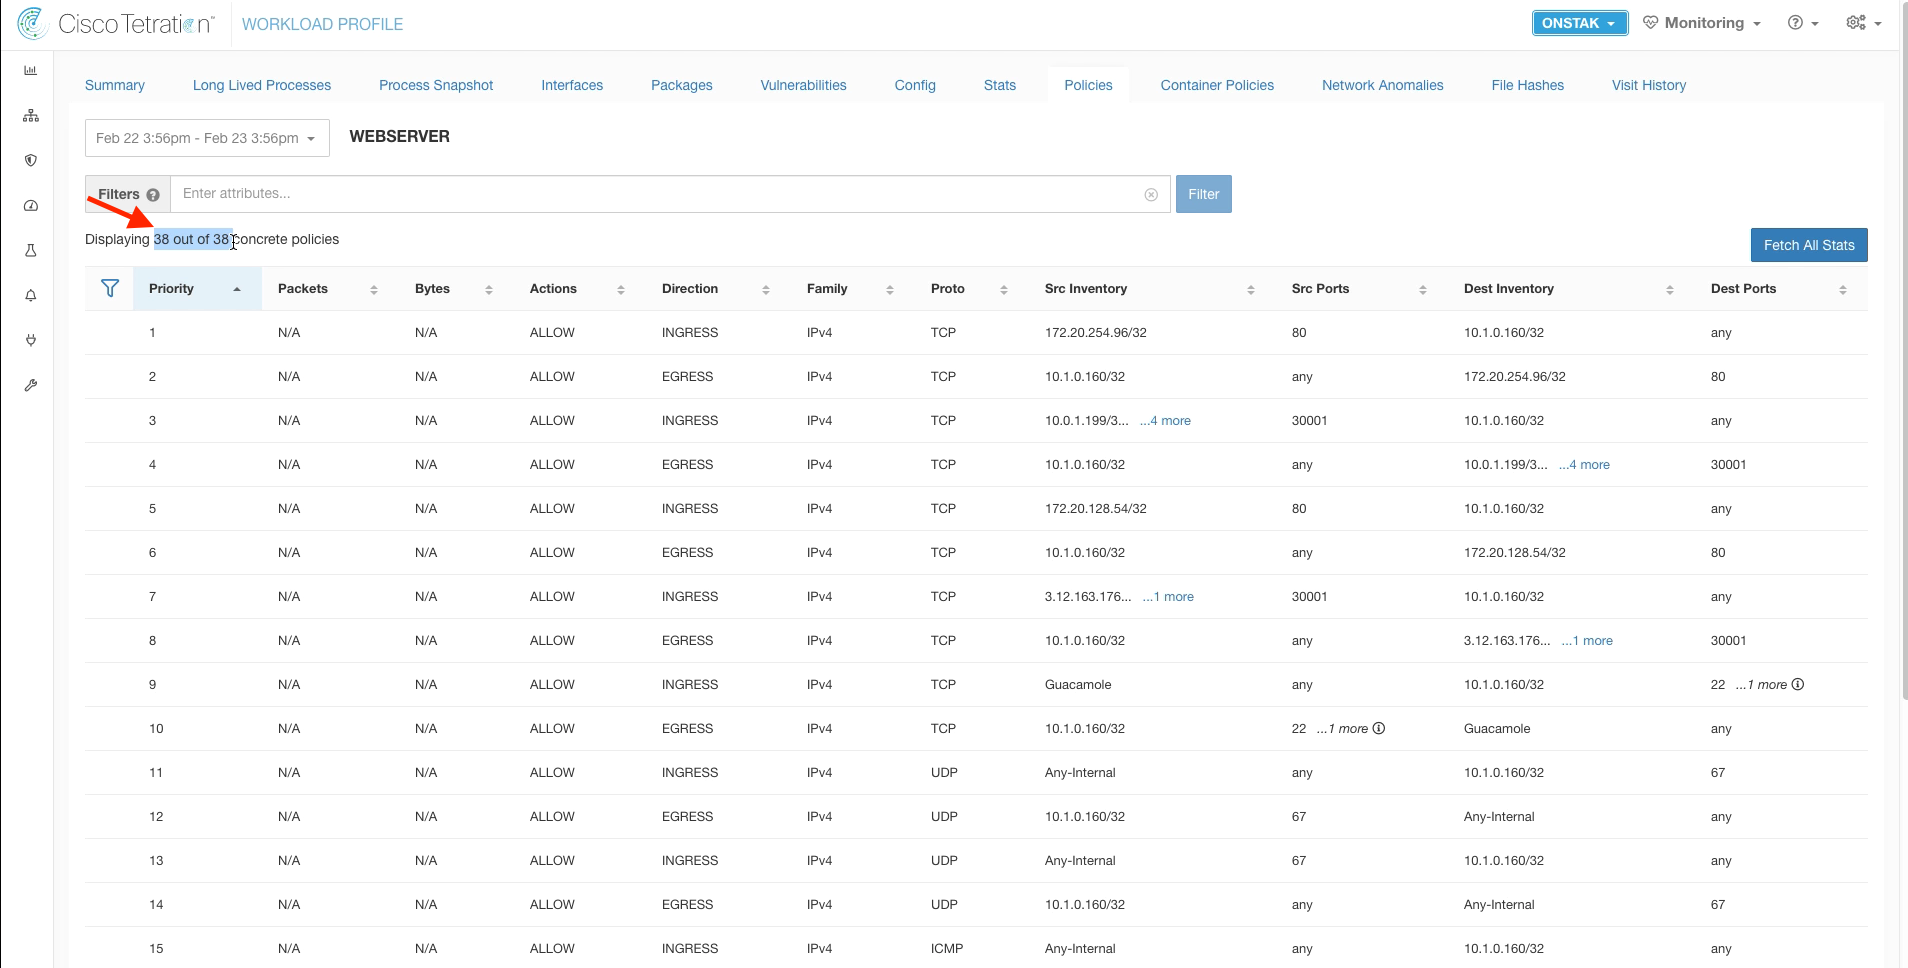
Step 010 - View the Policies
Step 011 - Examine the increased number of policies
Step 012 - Test public access to the IIS server
Step 013 - Open sessions to the Employee desktop
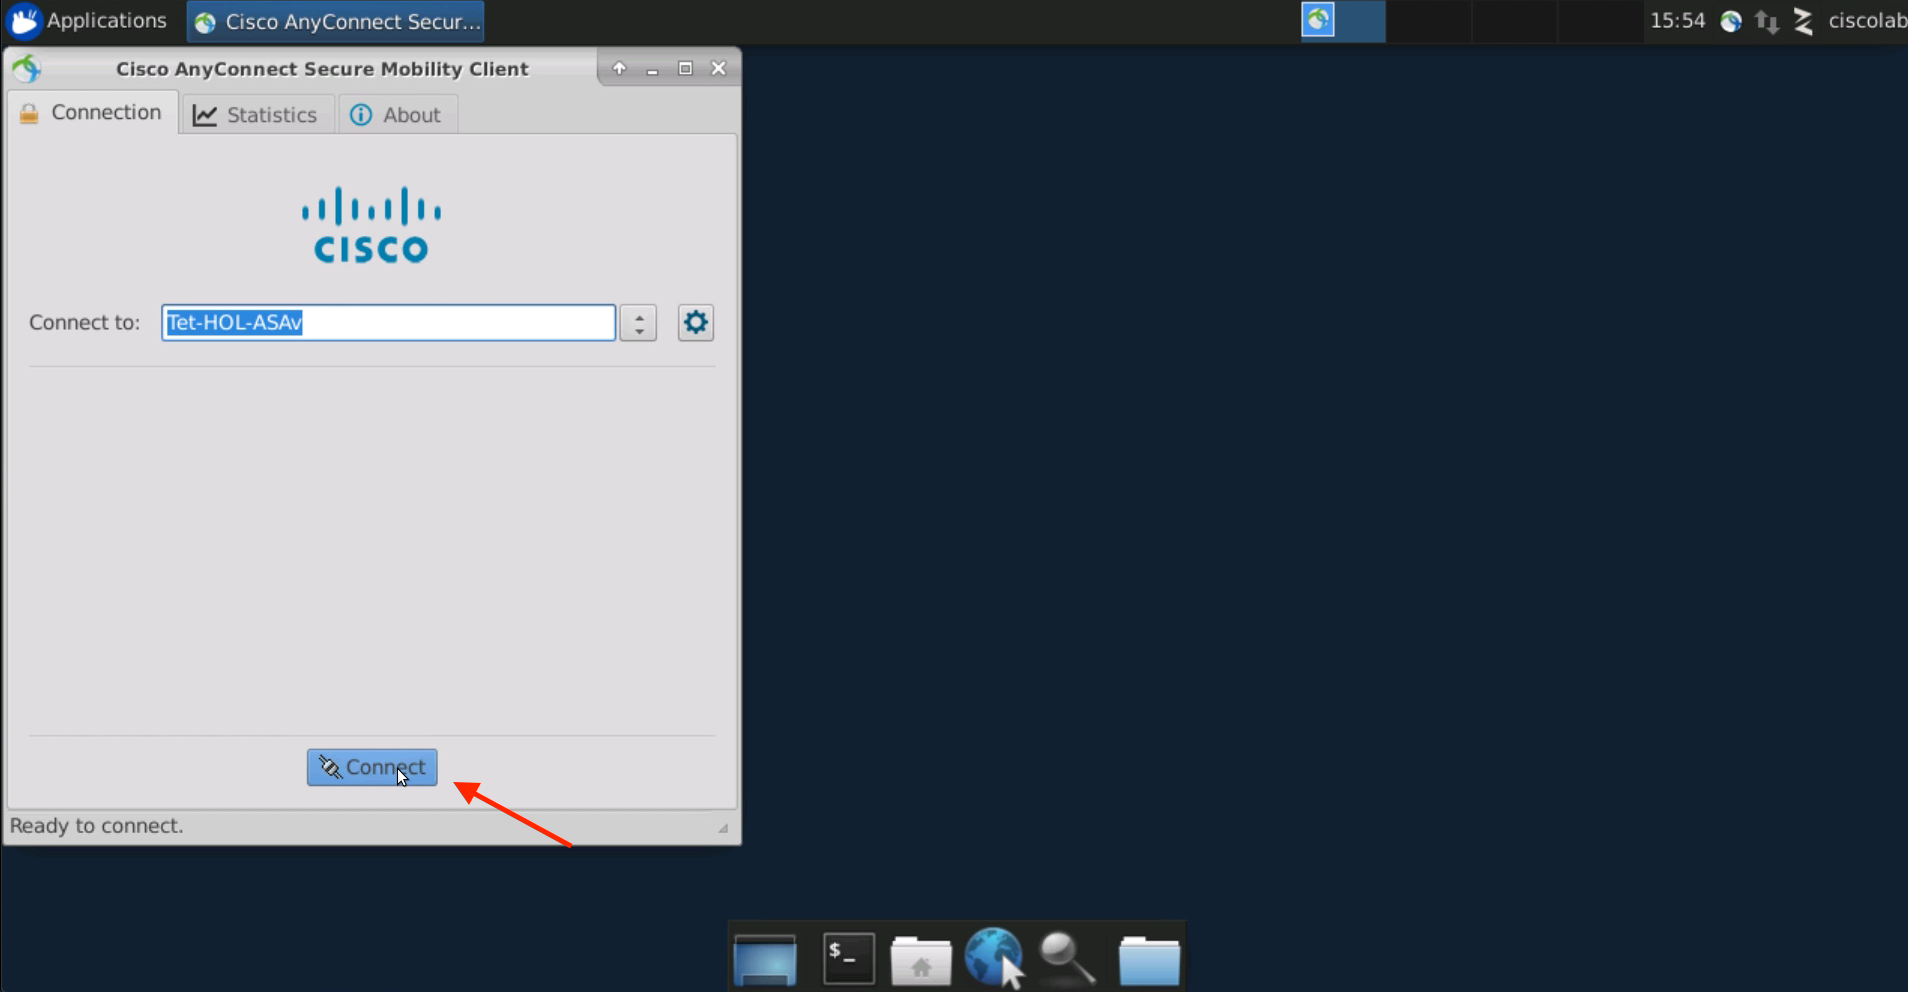
Step 014 - Open the Cisco Anyconnect VPN Client
Step 015 - Connect to VPN
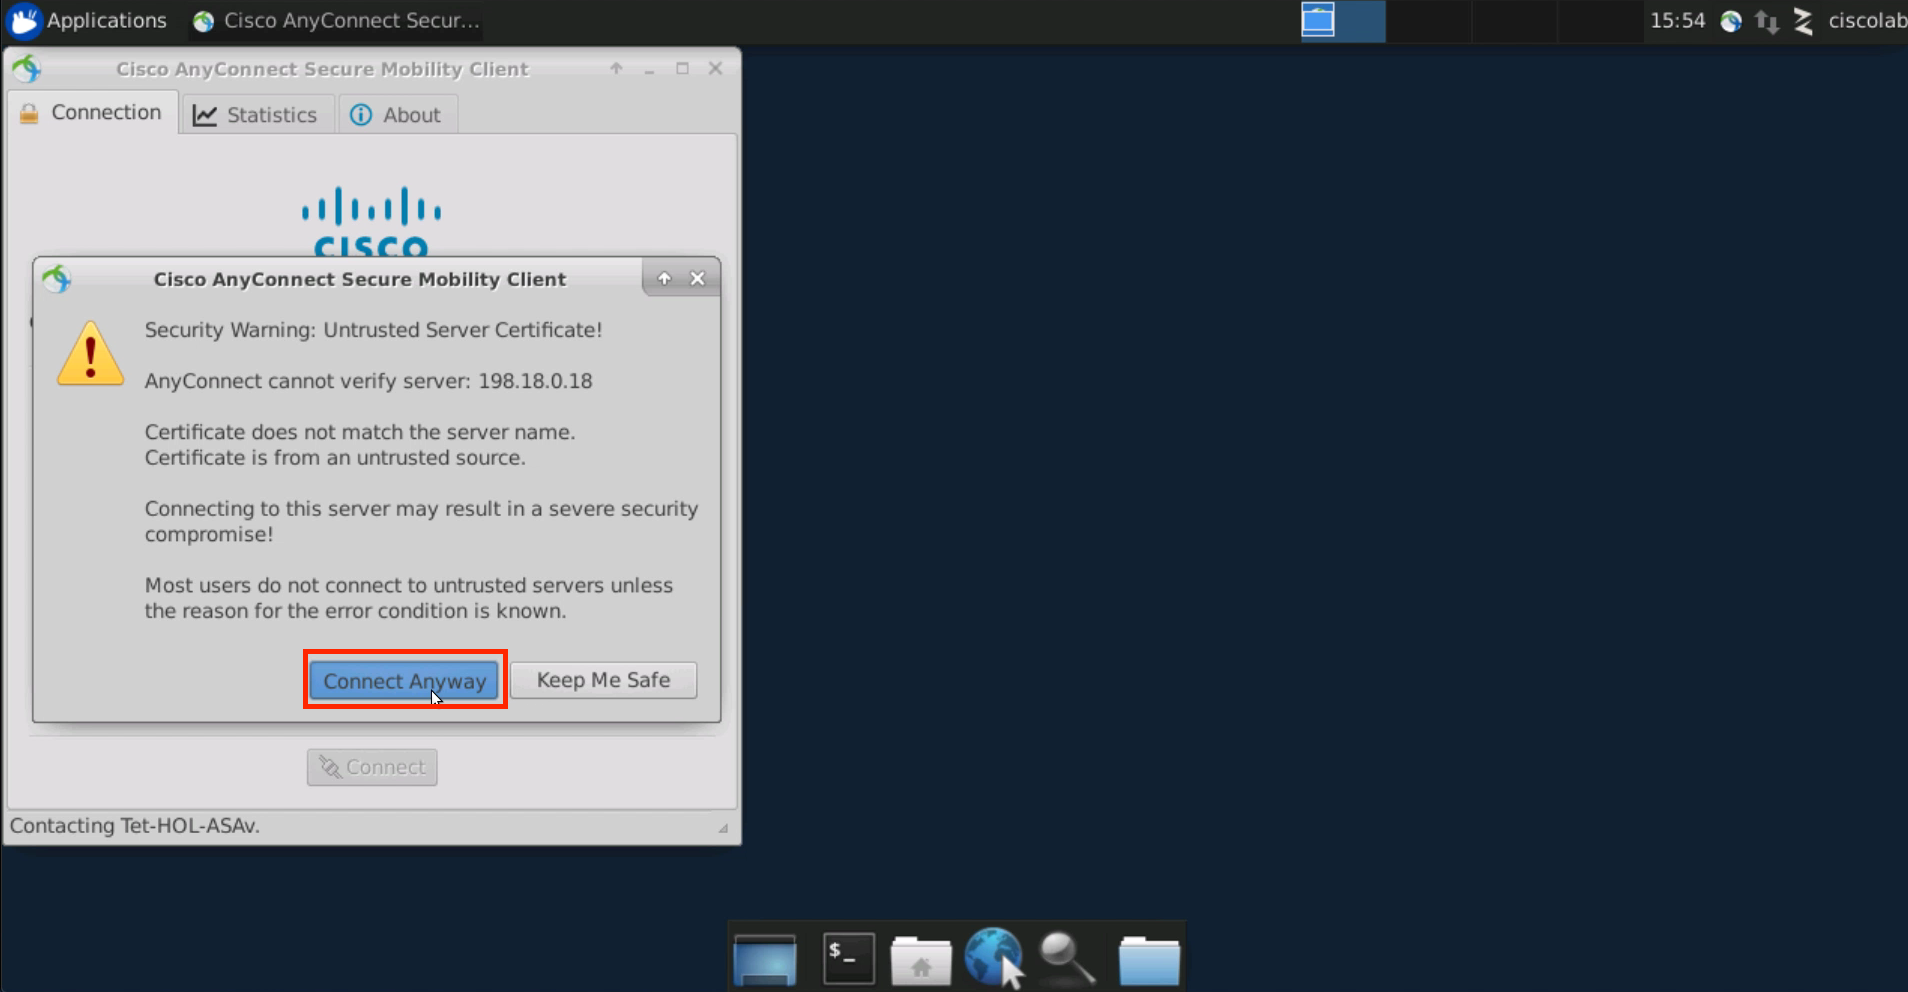
Step 016 - Ignore the security warning
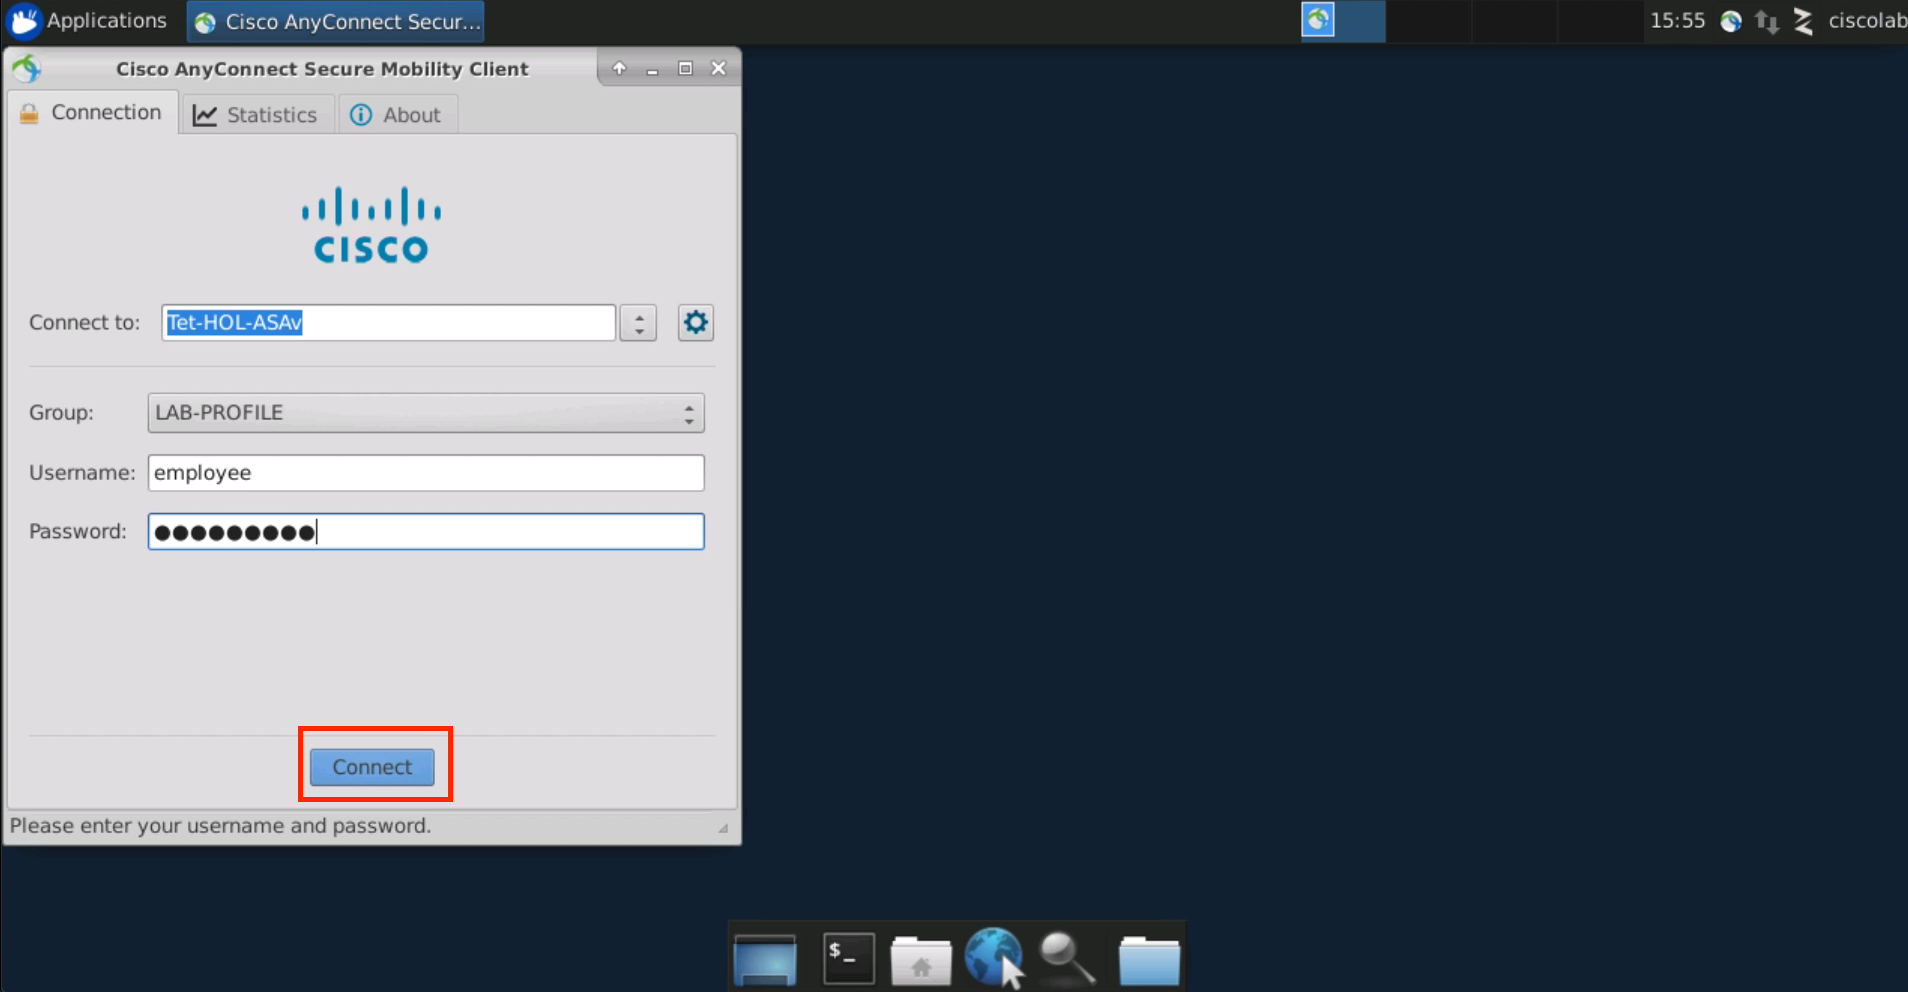
Step 017 - Enter employee credentials
Step 018 - Navigate to Inventory Search
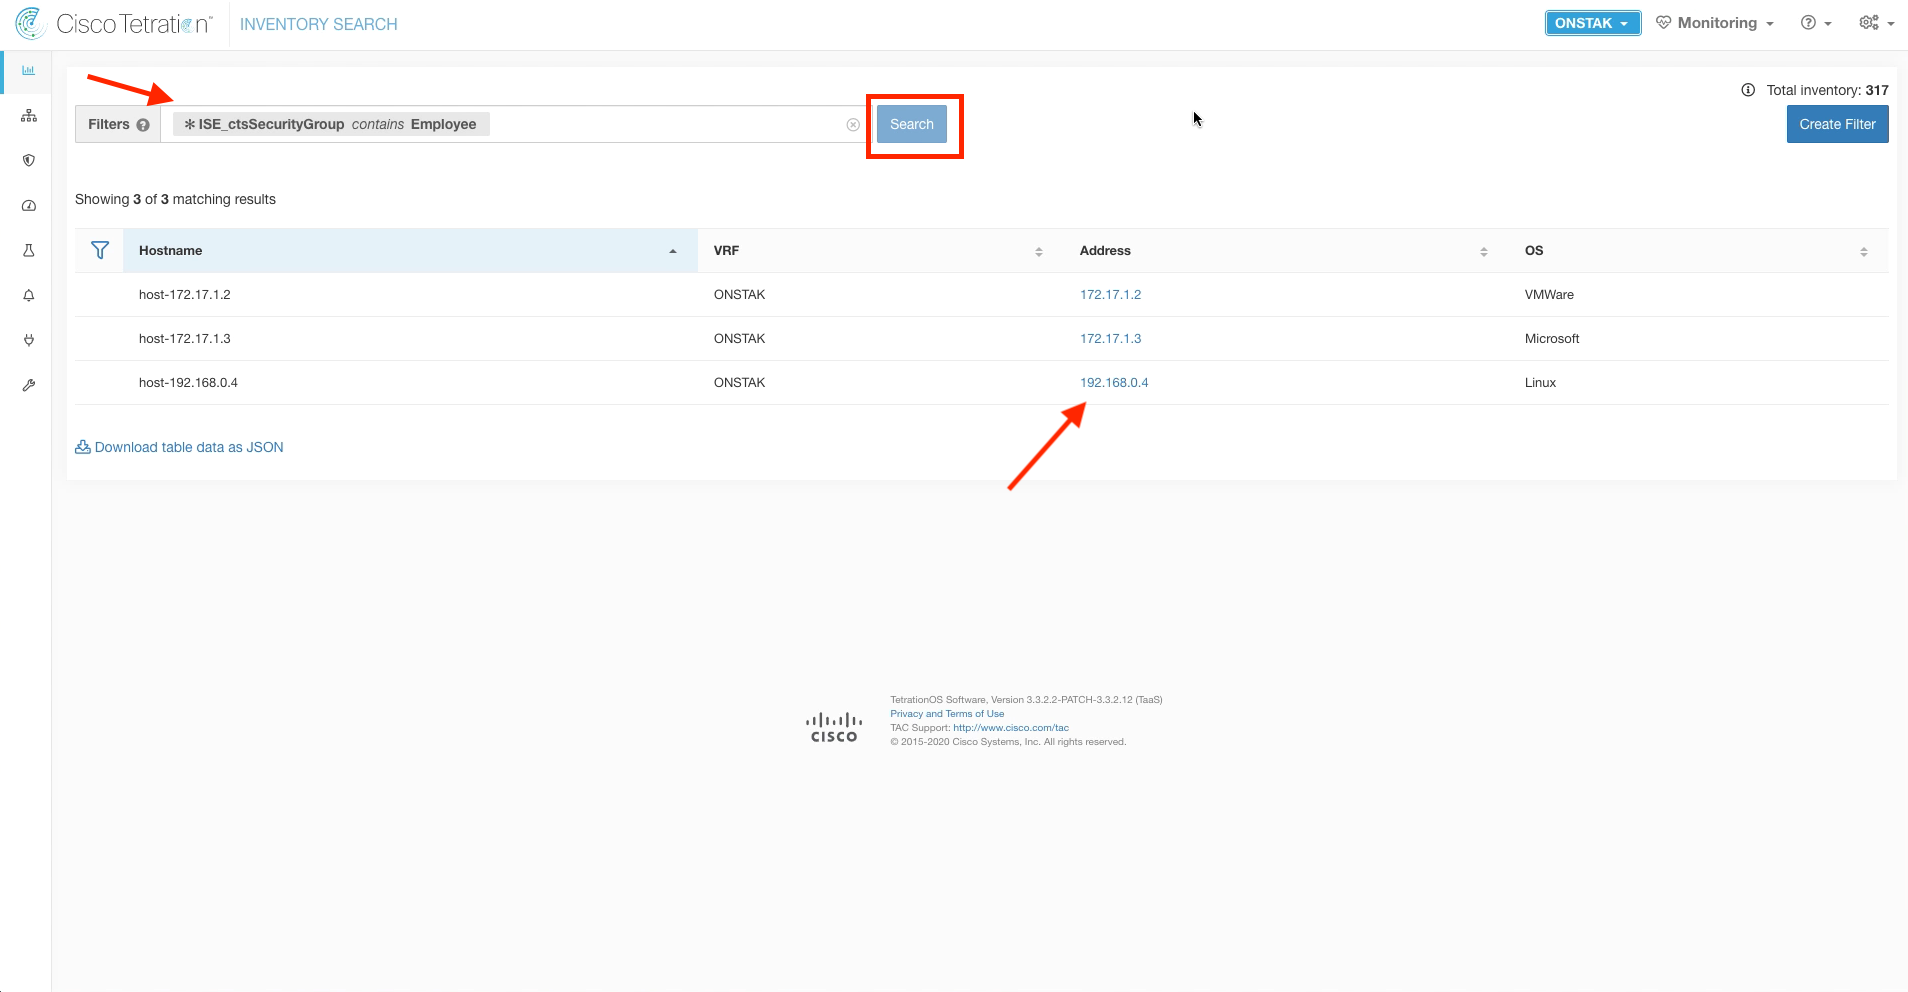
Step 019 - Search for the Employee SGT
Step 020 - View annotations
Step 021 - Locate SGT tag in annotations
Step 022 - Test HTTP connectivity to the IIS web server
Step 023 - Test HTTPS connectivity to the IIS web server
Step 024 - View HTTPS response
Step 025 - Open the Remote Desktop application
Step 026 - Attempt an RDP session to the IIS web server
Step 027 - Navigate to the nopCommerce application workspace
Step 028 - Examine Policy Analysis for the employee IP address
Step 029 - Discover the escaped flows for the employee traffic
Step 030 - Perform Quick Policy Analysis
Step 031 - Determine policy decision
Step 032 - Open a session to the IIS web server
Step 033 - Open the Windows Firewall control panel
Step 034 - Examine Inbound Rules
Step 035 - Locate the policy rule for Remote Desktop
Step 036 - Examine the Remote Desktop rule
Step 037 - Test RDP connection from the Employee desktop
Step 038 - Open a session to the SysAdmin Desktop
Step 039 - Connect to Remote Desktop on the IIS web server
Step 040 - Navigate to Inventory Search
Step 041 - Filter for the SysAdmin SGT
Step 042 - Examine annotations
Step 043 - Locate the SysAdmins security group
Step 044 - Validation of SGTs for User Segmentation
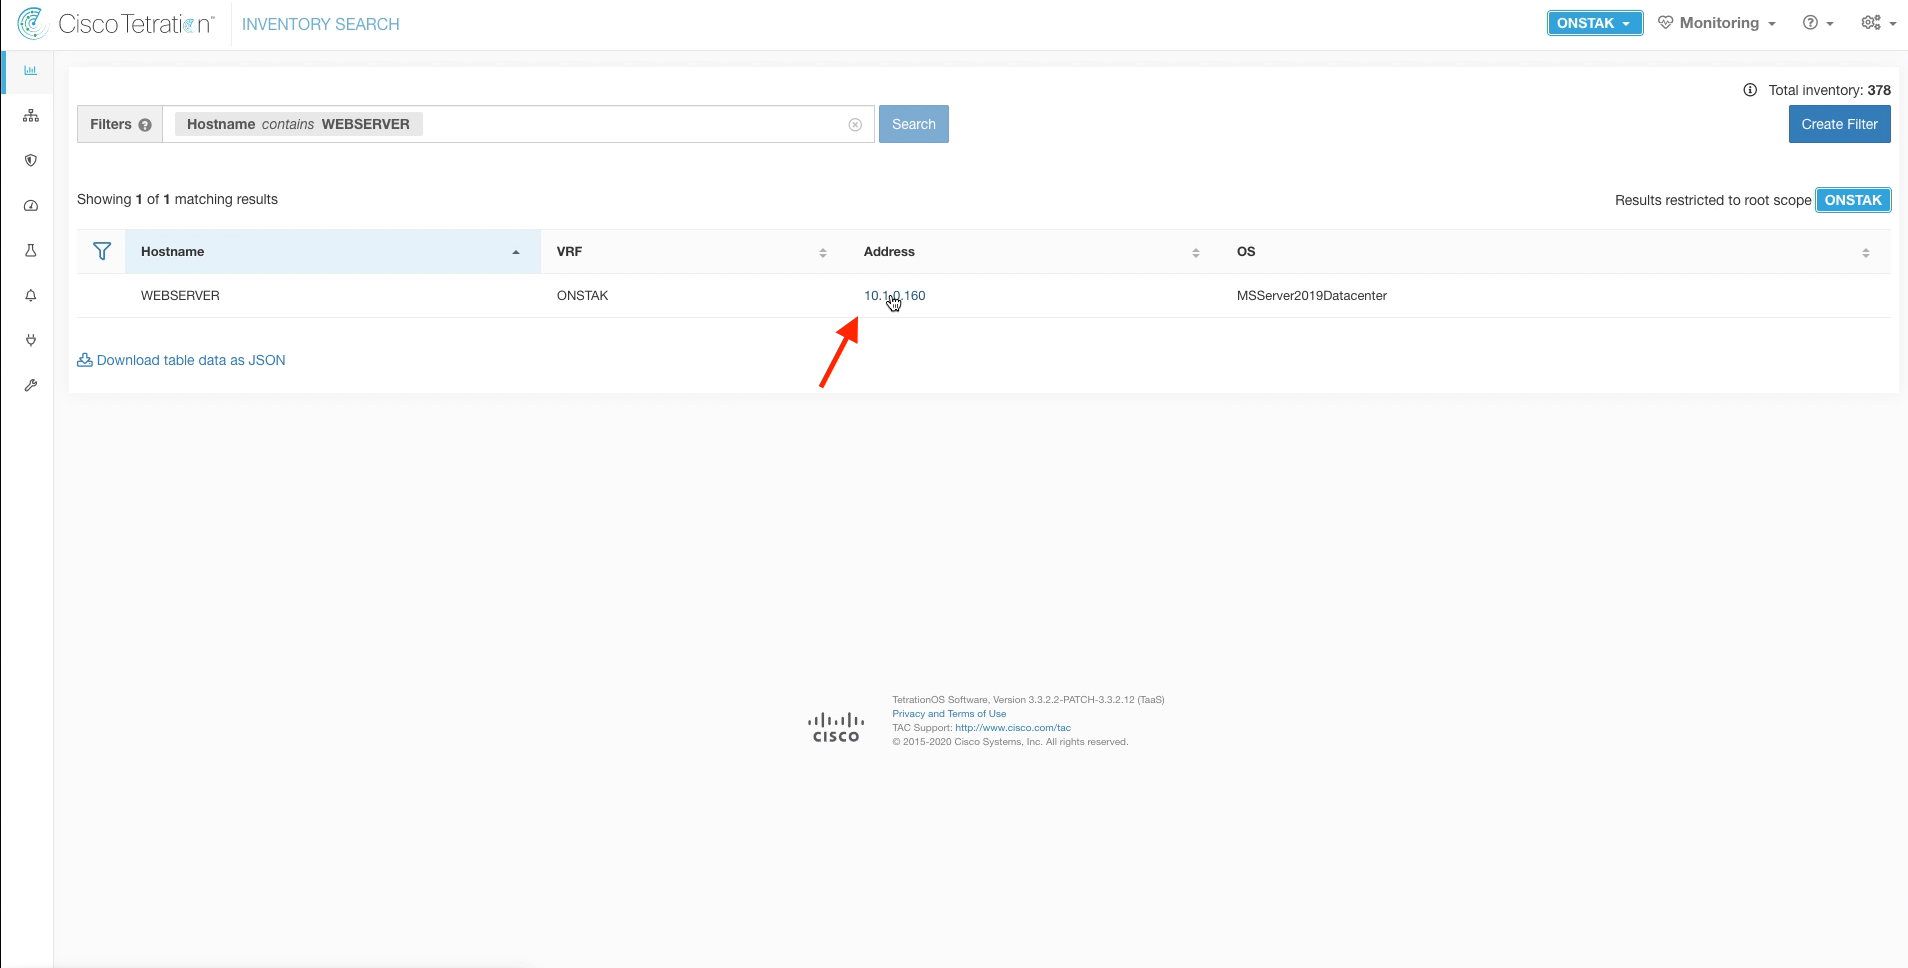
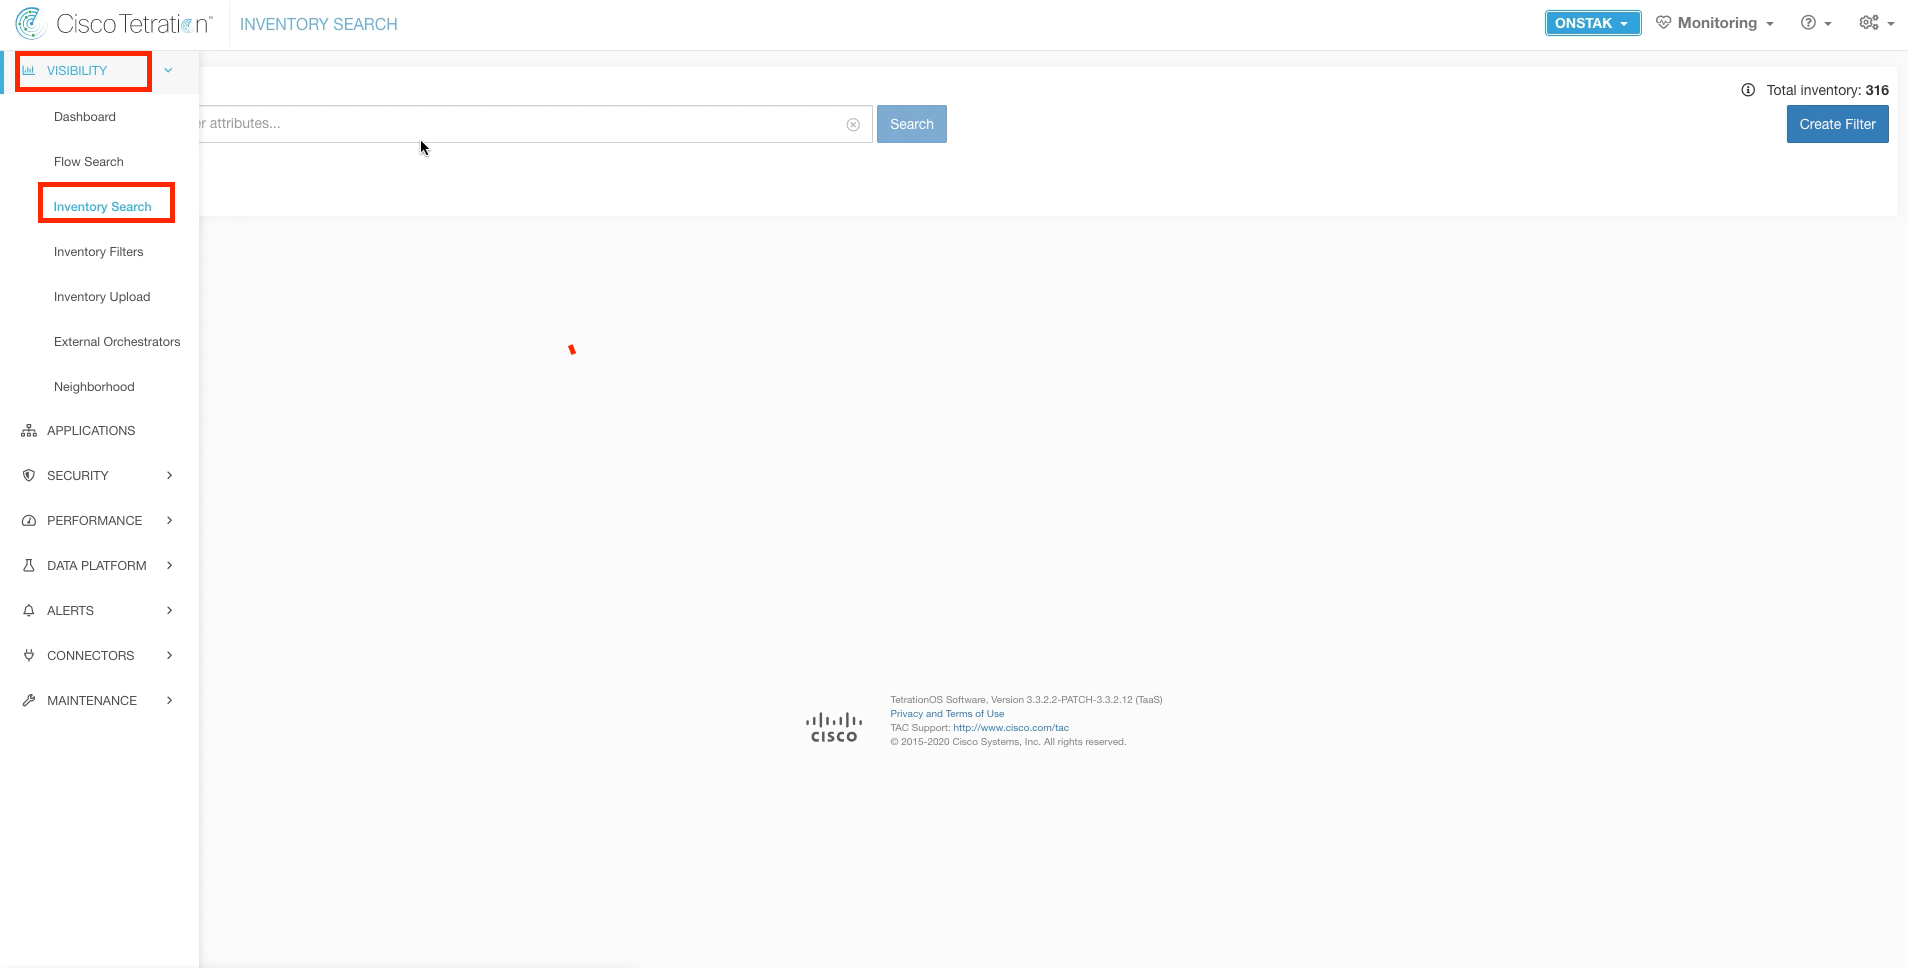
Navigate to Inventory Search.
Filter for the IIS web server using filter Hostname contains WEBSERVER. Then click on the IP address of the web server.
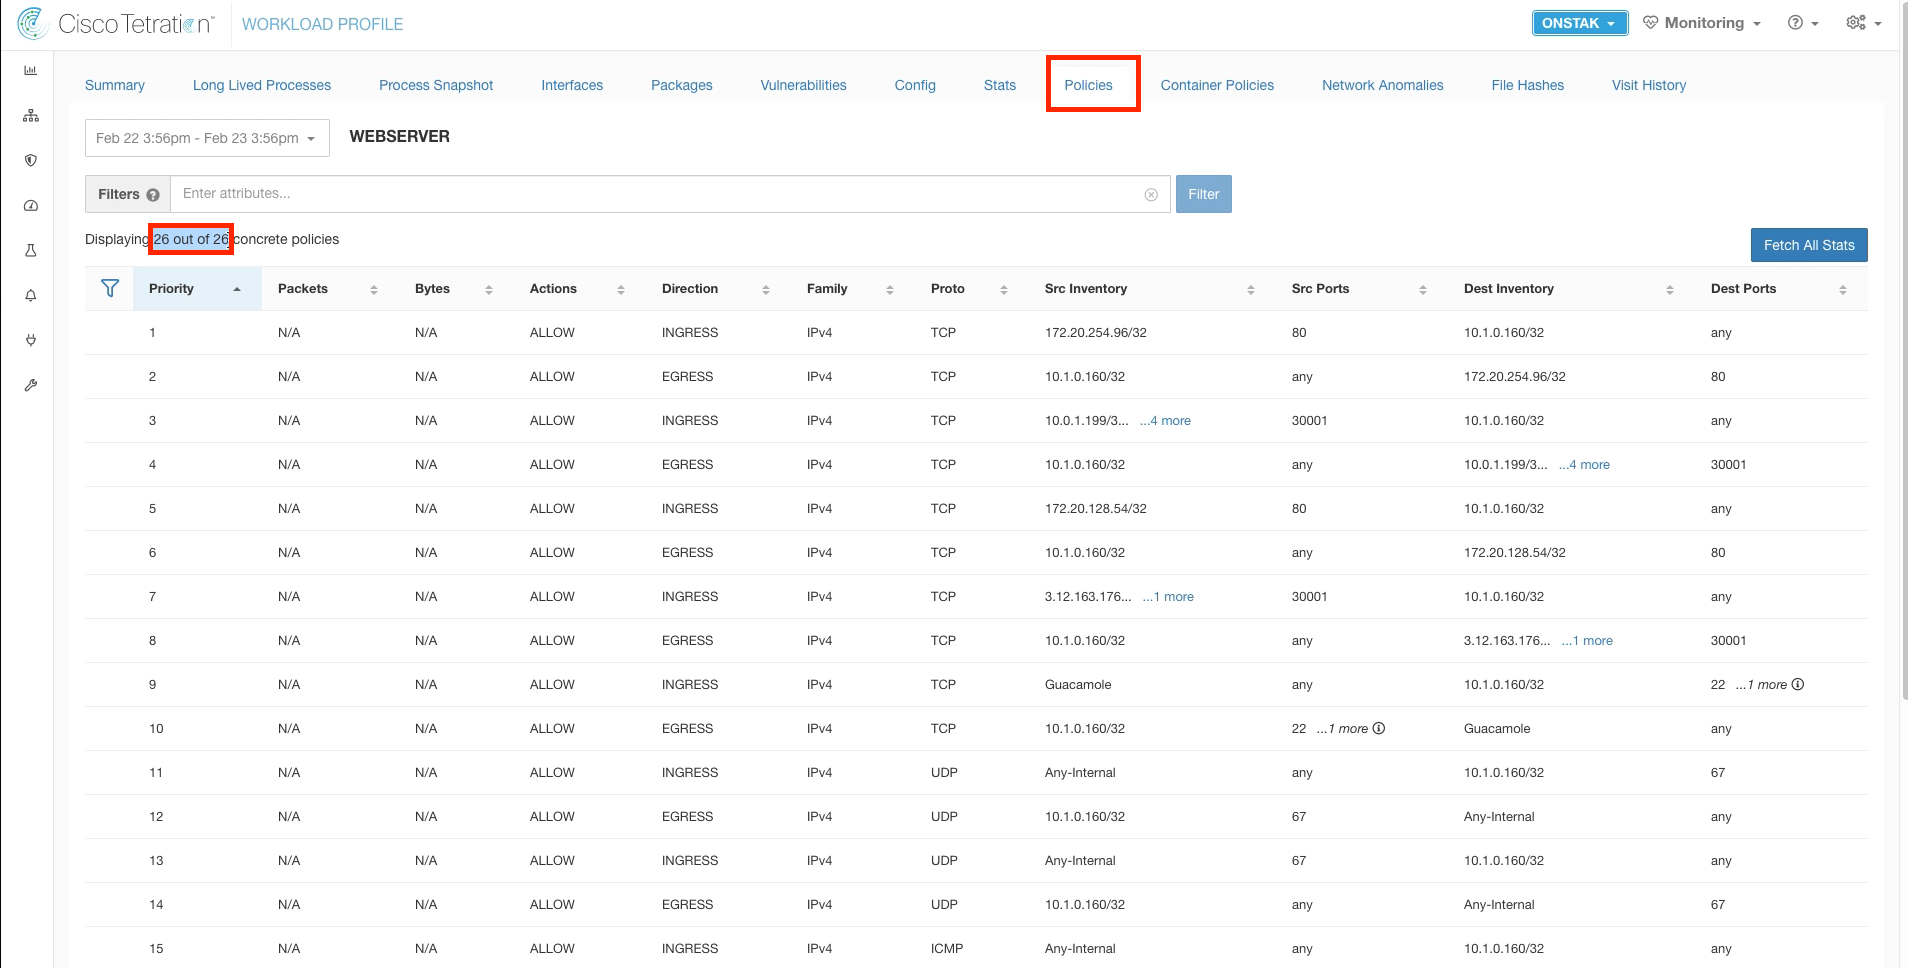
Click on Policies.

Note the number of policies currently displayed. These are the policies that were implemented as part of the Common Policy and Global Services application workspaces that were moved to enforcement earlier. We will see the number of policies increase further after we enable enforcement for the application.
Navigate to the nopCommerce application workspace.
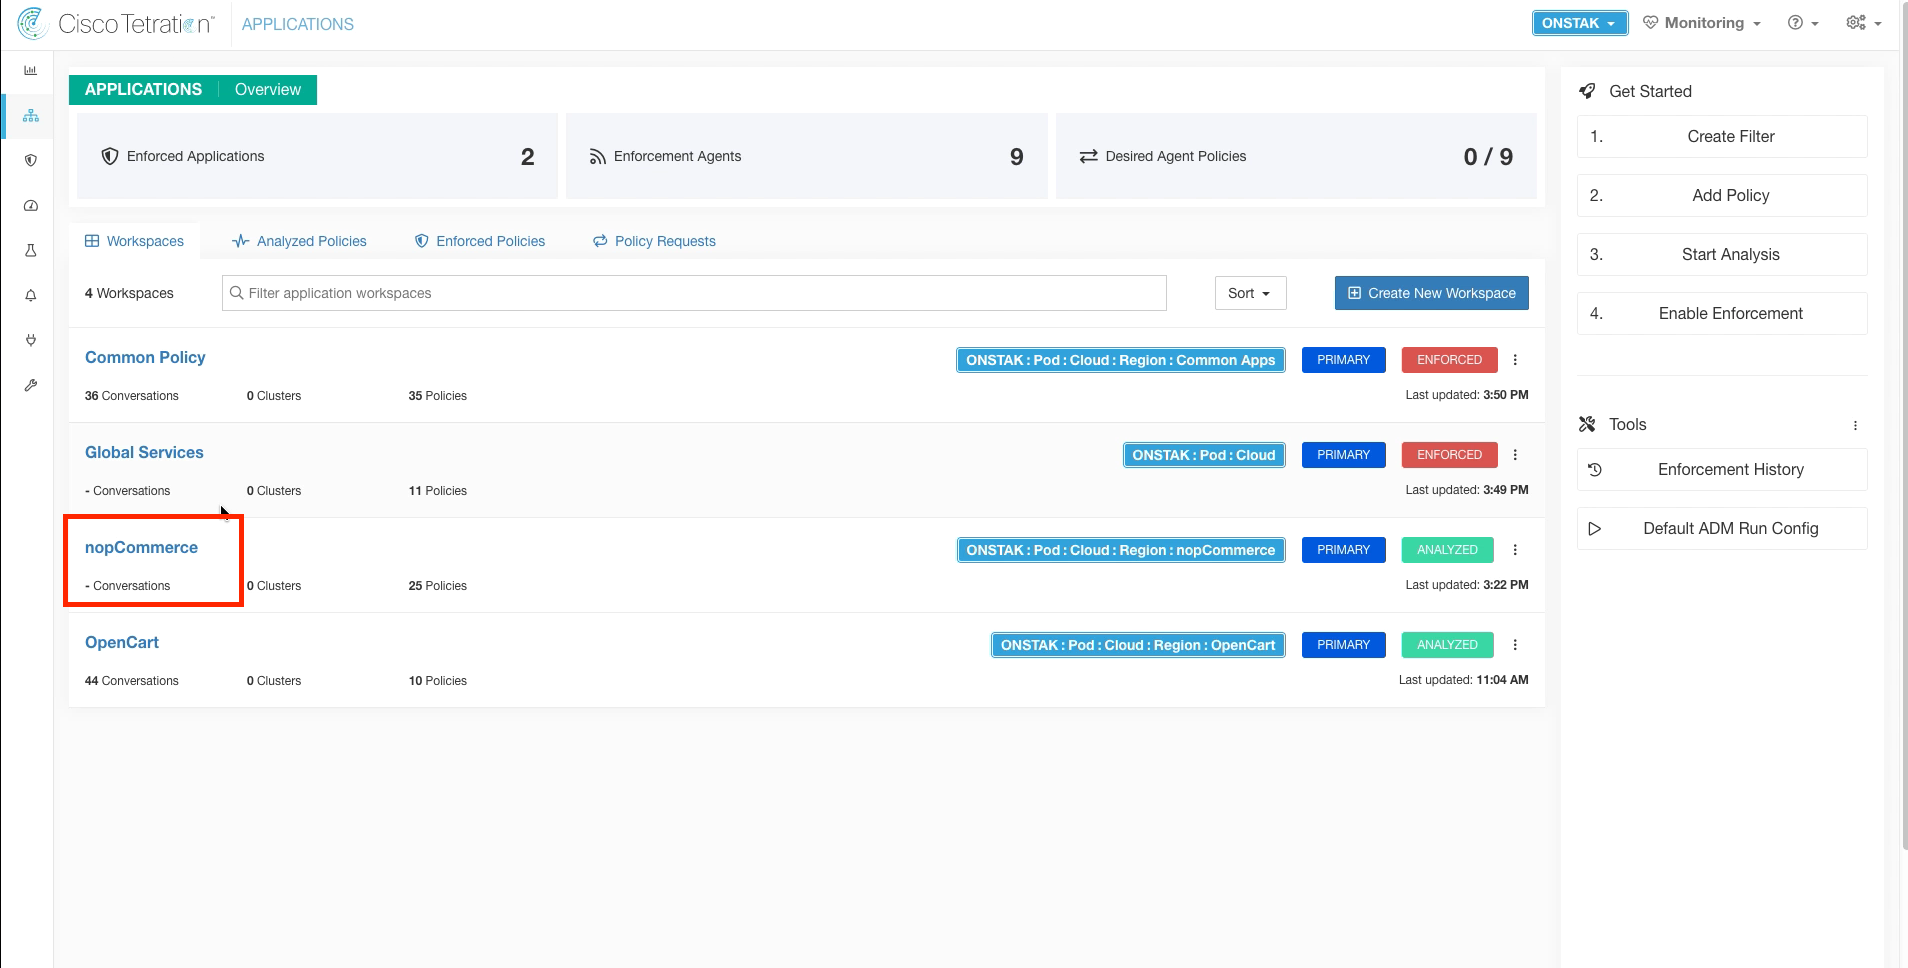
Click on the Enforcement tab and then select Enforce Policies.
Select the latest version of policy to enforce and then Accept and Enforce.
Navigate to Agent Config.
Select the Software Agents tab, and then locate and click on the IIS web server. This is an alternative way to get to the Workload Profile screen.
Click on the Policies tab.
Notice the increased number of policies that are now displayed. Tetration has pushed the additional rules into Windows firewall to implement our configured policy for the application.
It may take a few minutes for the additional rules to be displayed.
Open a browser and point to the public IP address of the IIS web server. We should see that the web application is still accessible after moving into enforcement.
Open a session to the Employee desktop.
Click on the Cisco Anyconnect VPN Client icon on the desktop.

Connect to VPN, if not already connected.
Select Connect Anyway when presented with the security warning.
Enter the employee credentials. The password is tet123$$!.
Navigate to Inventory Search.
Enter the following filter: * ISE_ctsSecurityGroup contains Employee. You should see the IP address that is assigned to the Anyconnect VPN Client appear in the list. You can check this IP address by going to the statistics view in the Anyconnect VPN Client on the employee desktop.
It takes a few minutes after connecting to VPN for the IP address of the VPN client to become annotated with the ISE Security Group Tag.
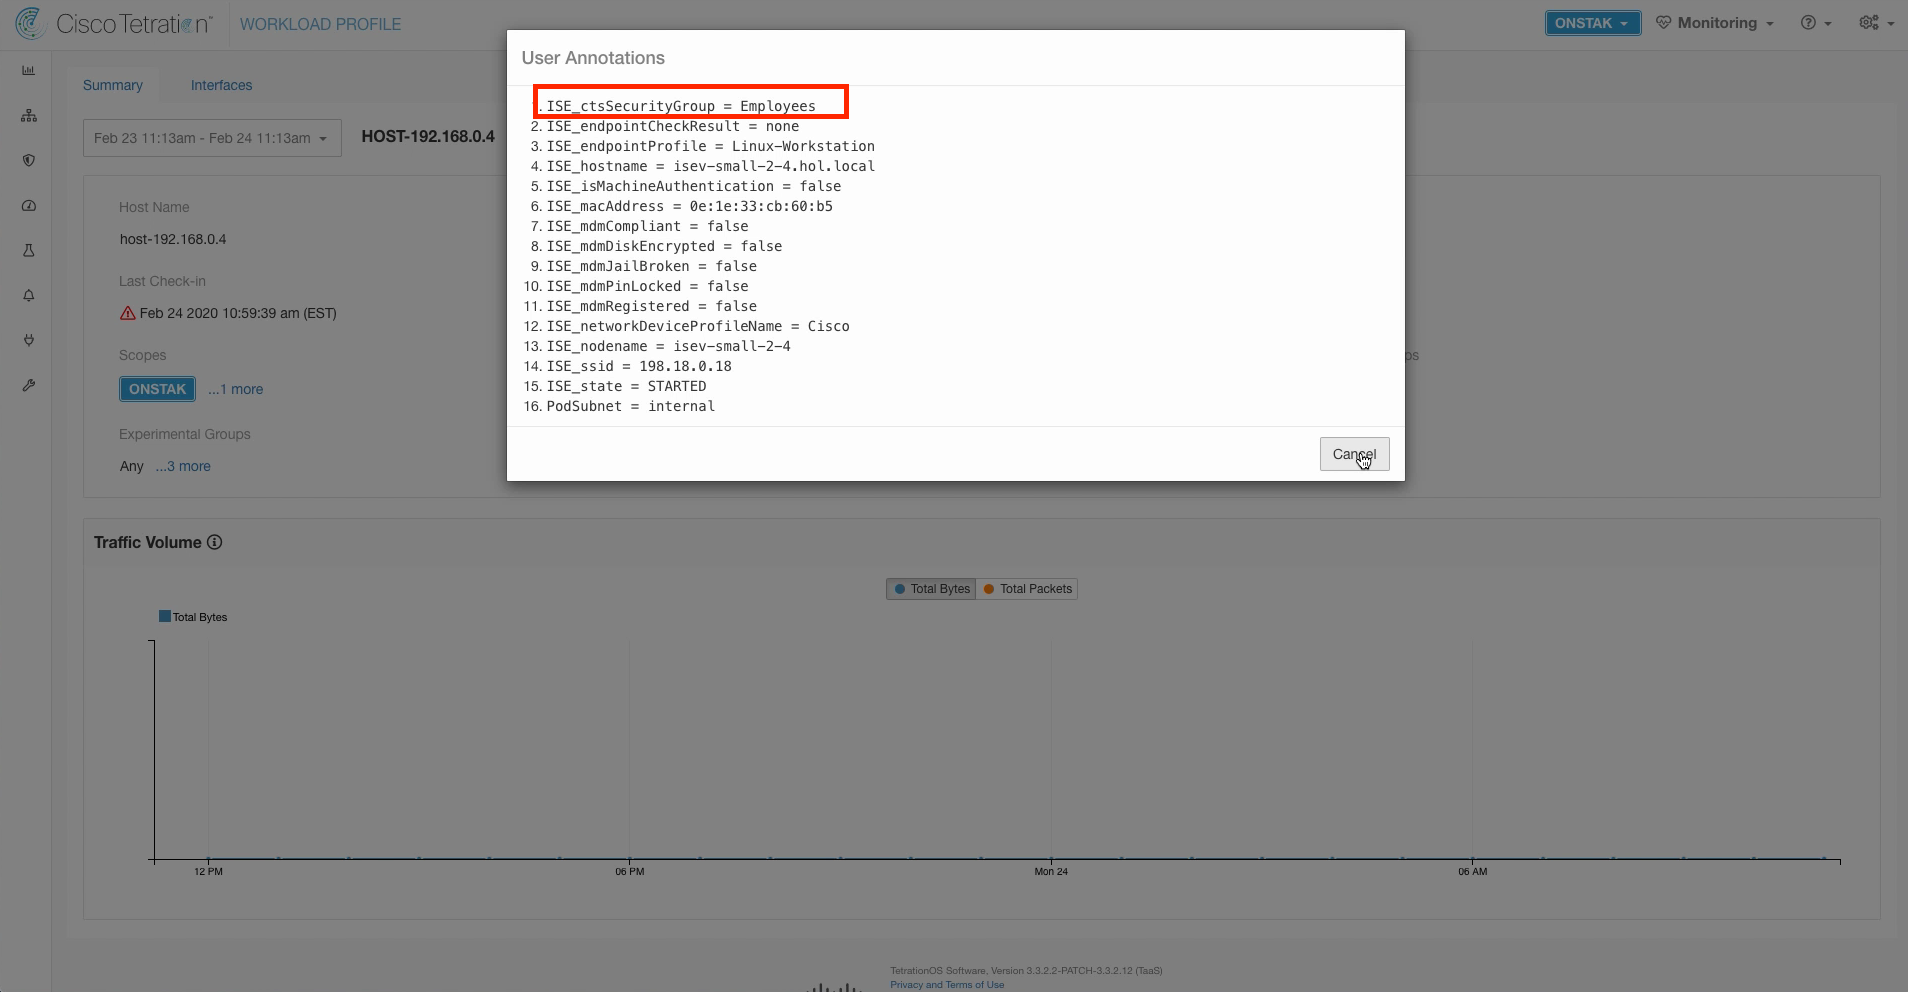
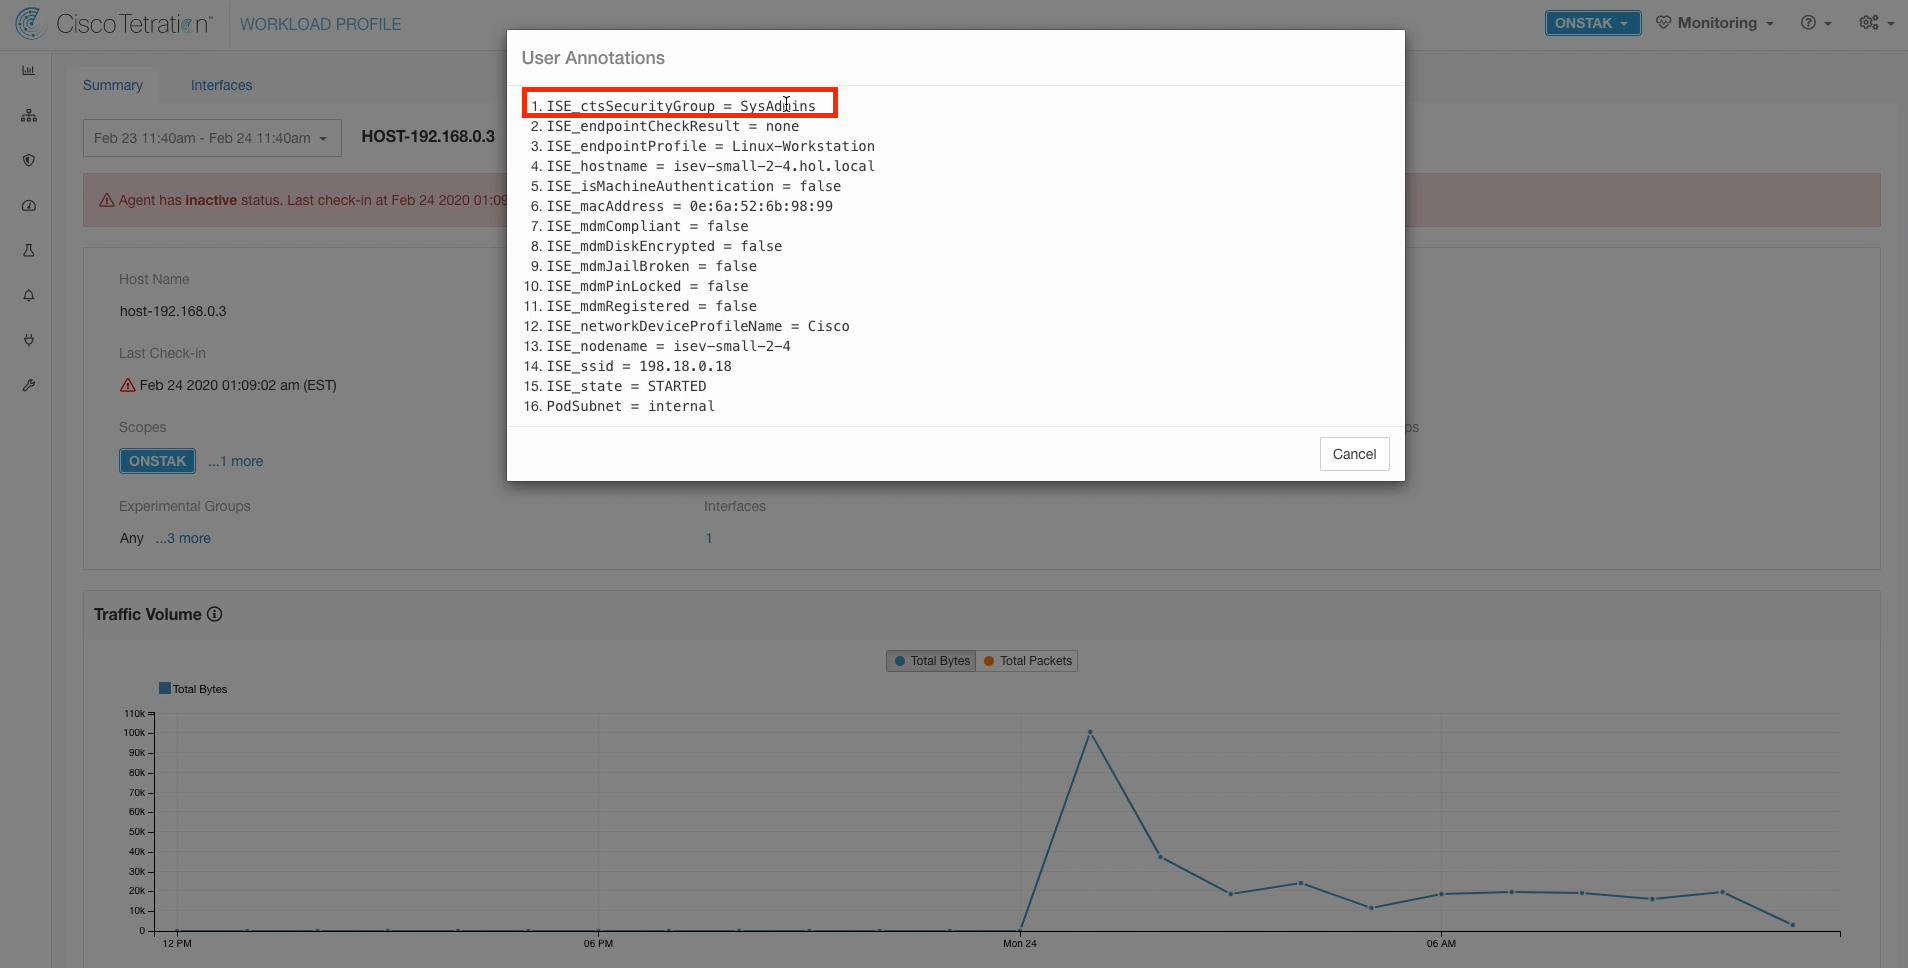
Click on the IP address of the employee desktop to access the Workload Profile screen. Then click on the link next to User Annotations.

This shows all of the annotations that are placed on the IP address, including the ctsSecurityGroup which is the Security Group assigned to the IP address.
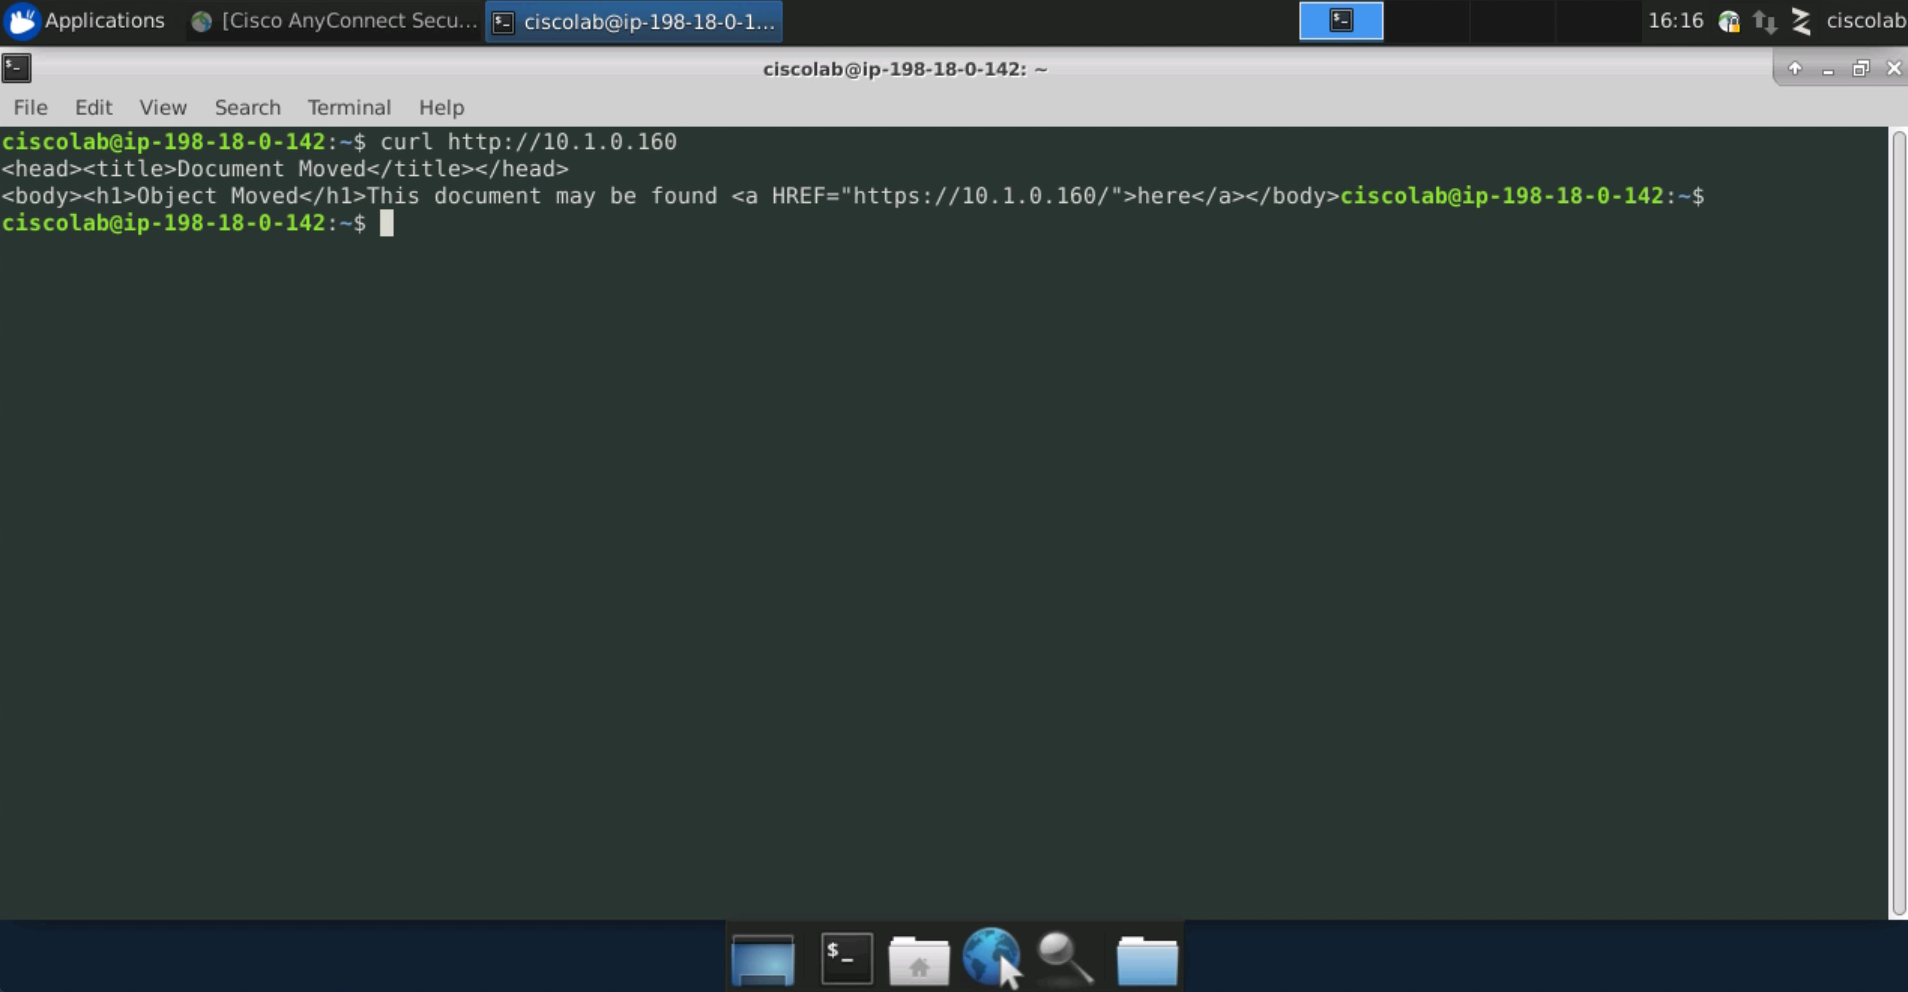
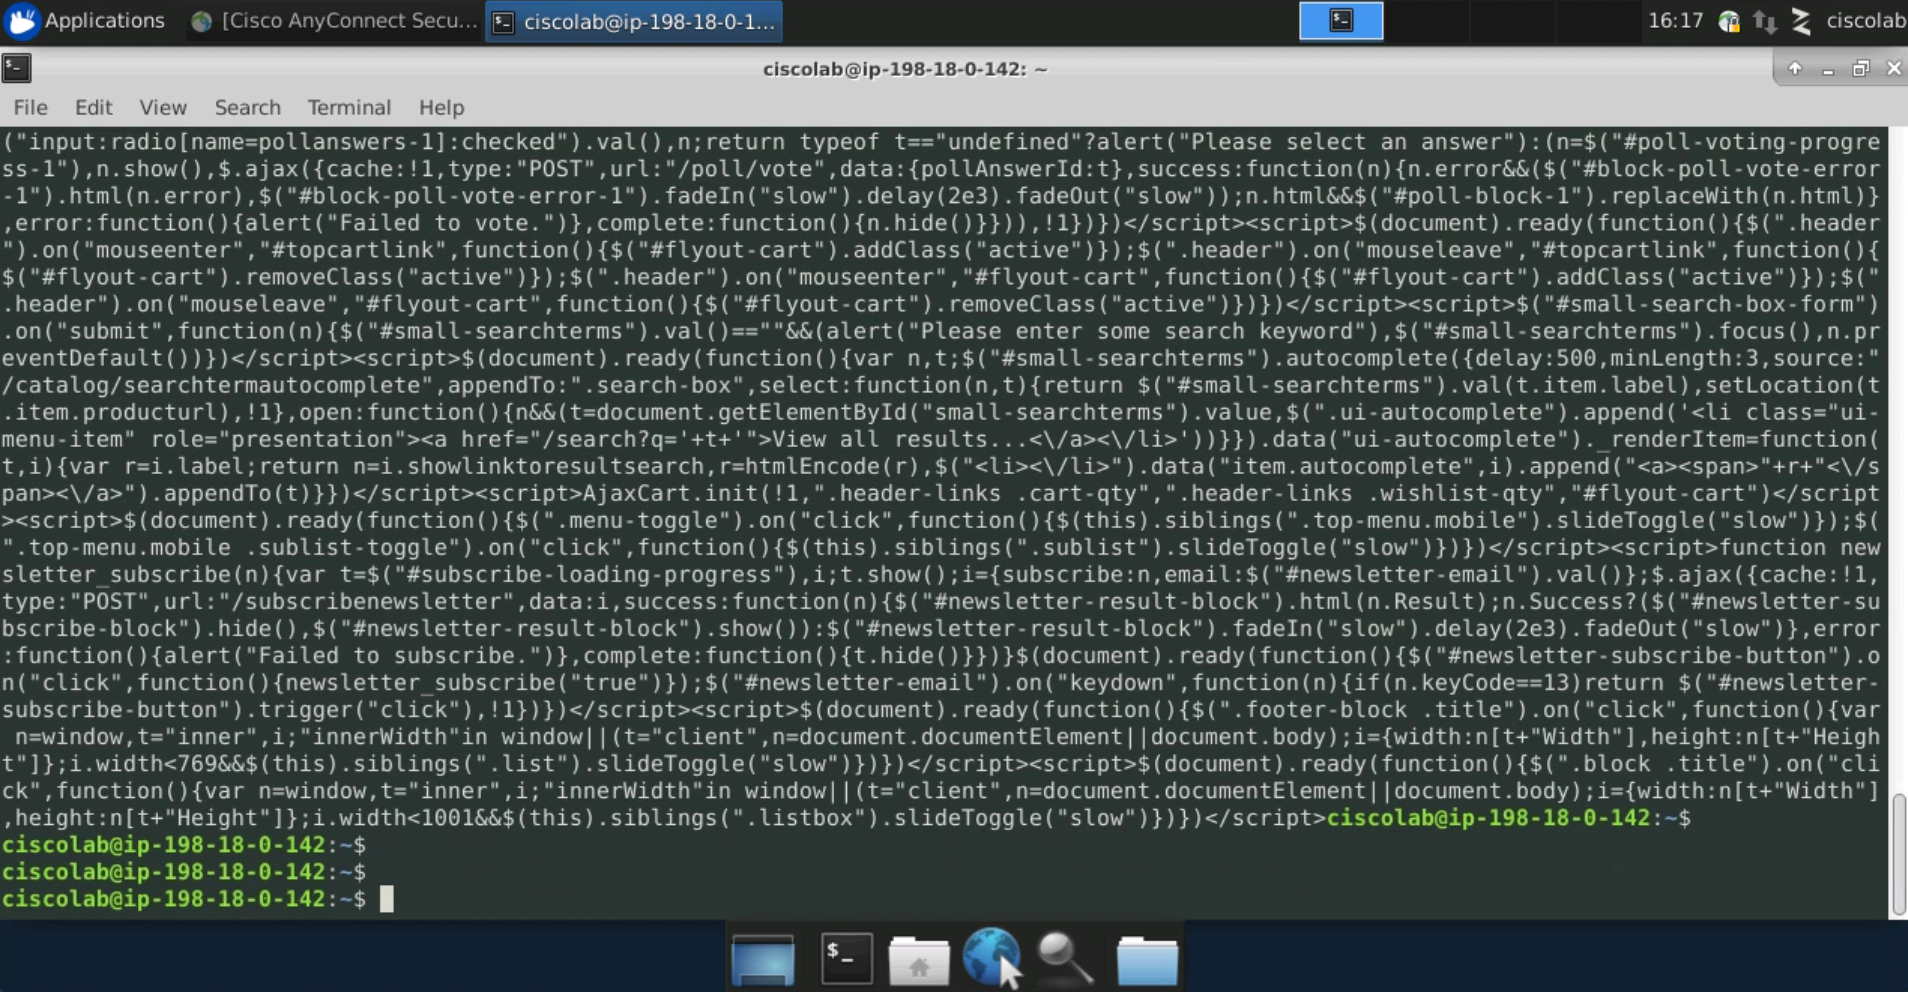
Open a terminal session from the employee desktop and test HTTP connectivity to the IIS web server using the curl command as shown in the image below. The response should be an HTTP redirect to the HTTPS URL of the web server. This shows that we are still able to access the web application using HTTP after moving to enforcement.
Test HTTPS connectivity to the web server using the curl command as shown in the image below. The response should be a text representation of the web site.
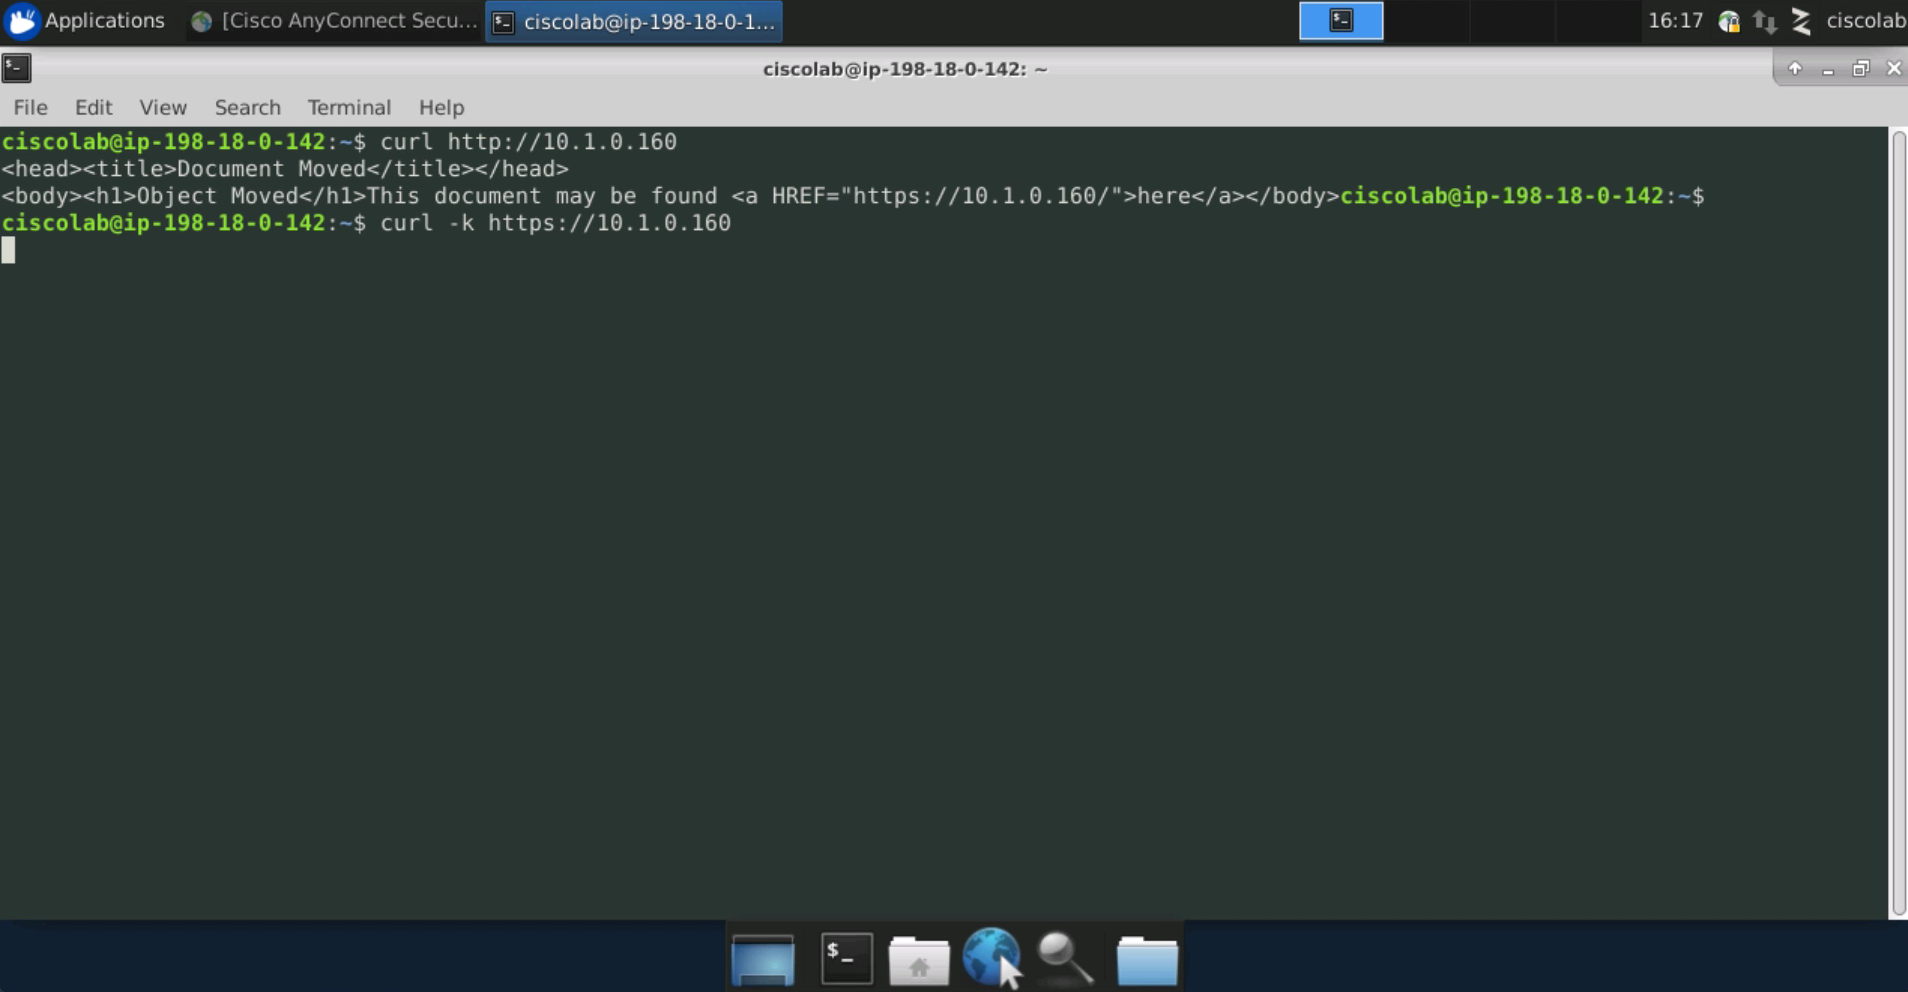
The below output shows the output of the previous curl command using HTTPS.
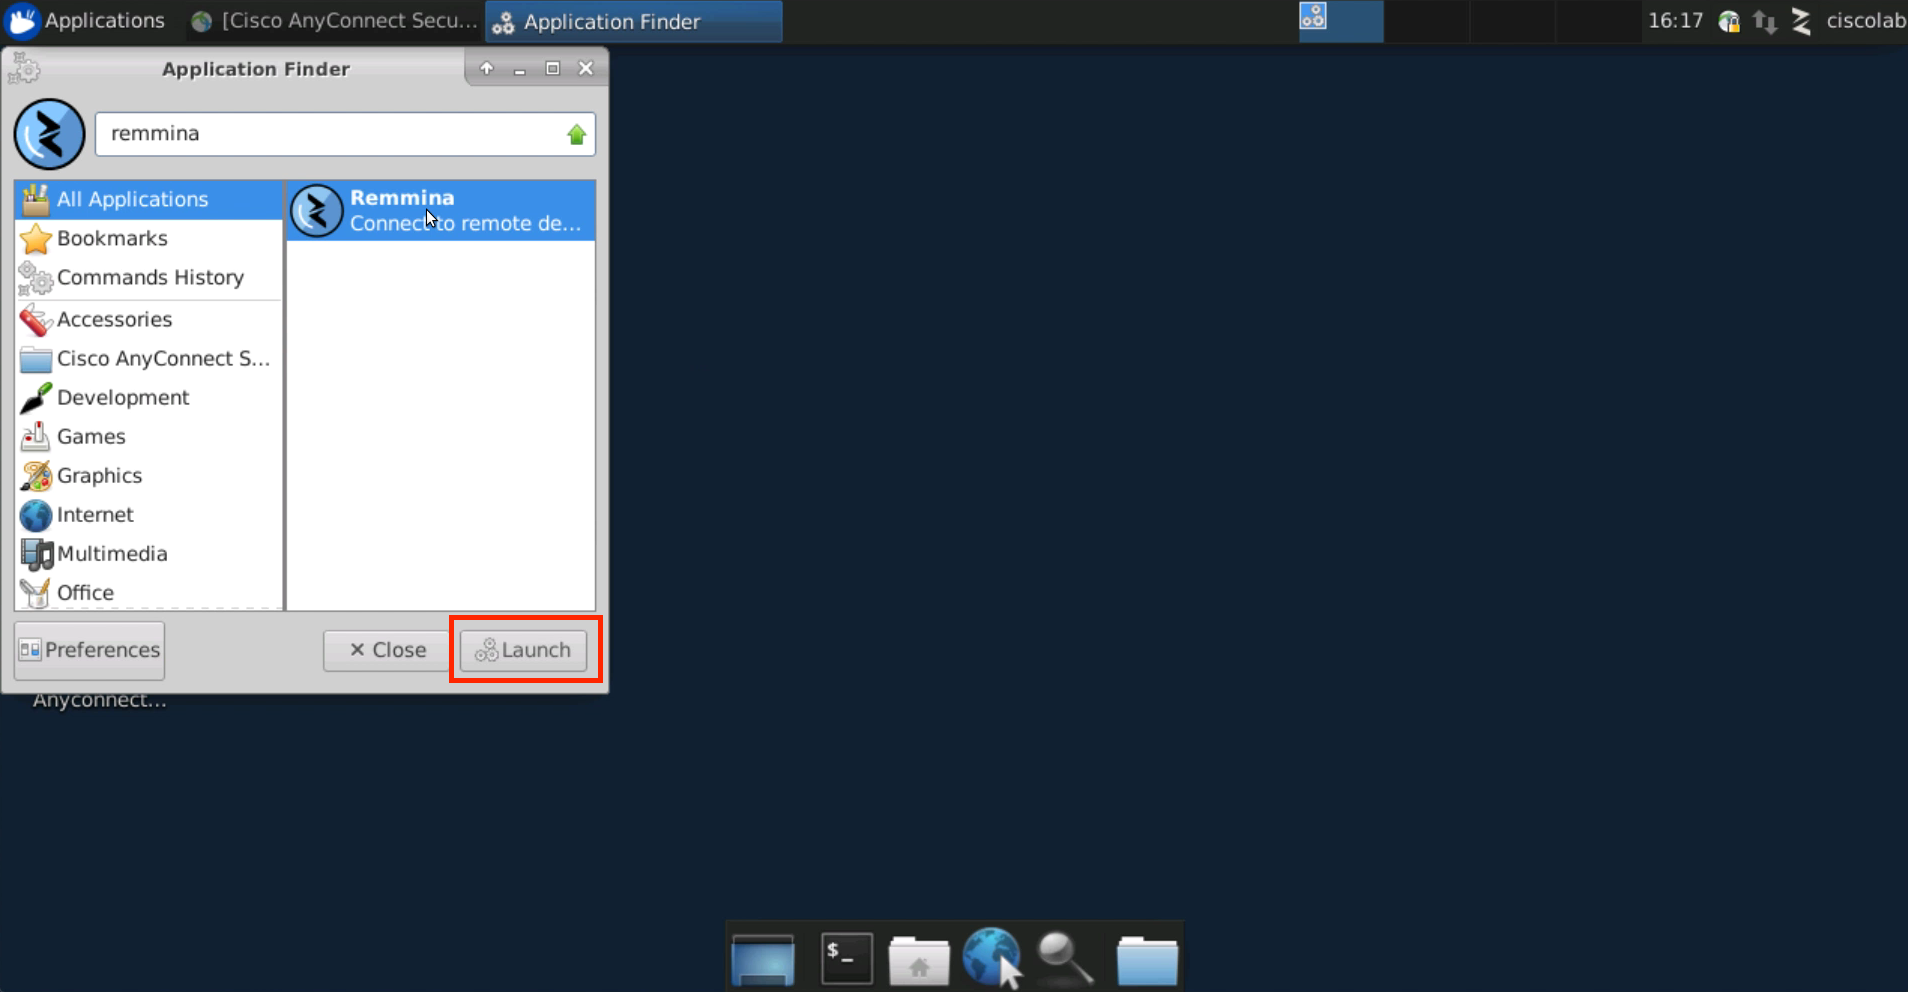
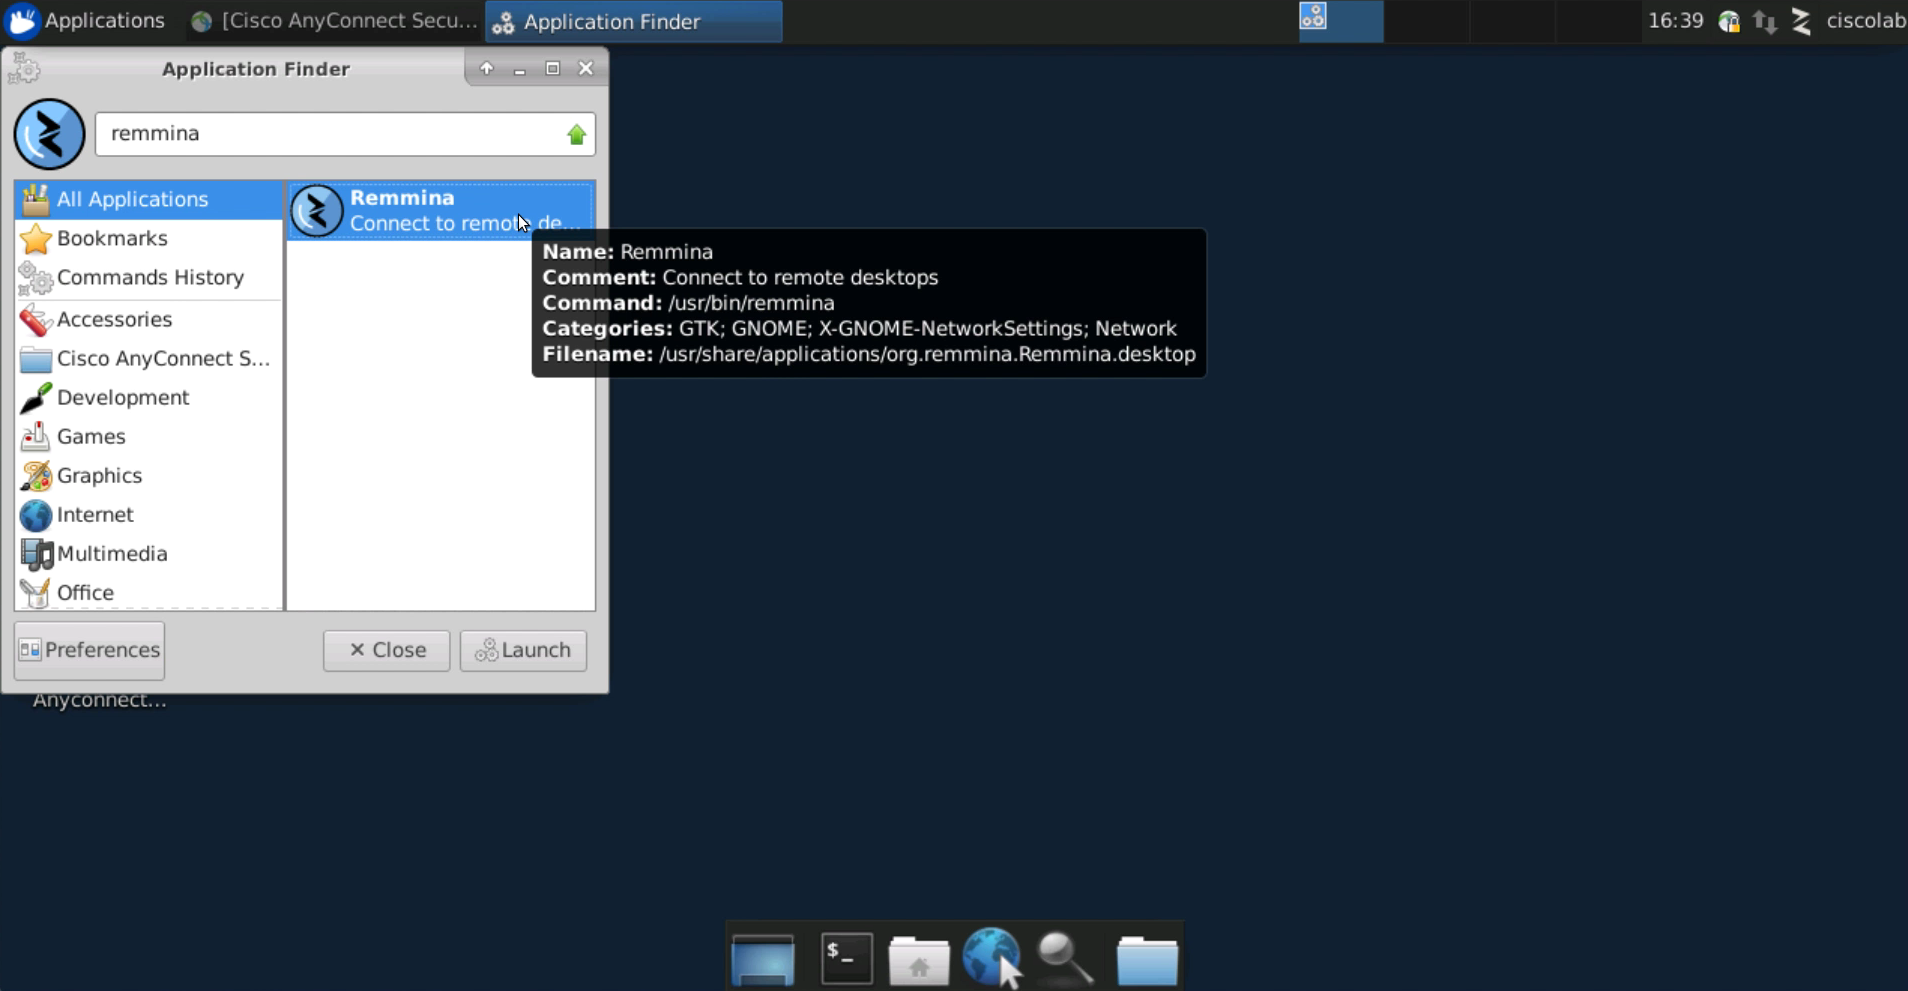
Click on the magnifying glass at the bottom of the screen to search for an application, and search for Remmina. Remmina is a Remote Desktop application that can be used to connect to Microsoft servers running Terminal Services on TCP port 3389. Click on Remmina and select Launch.
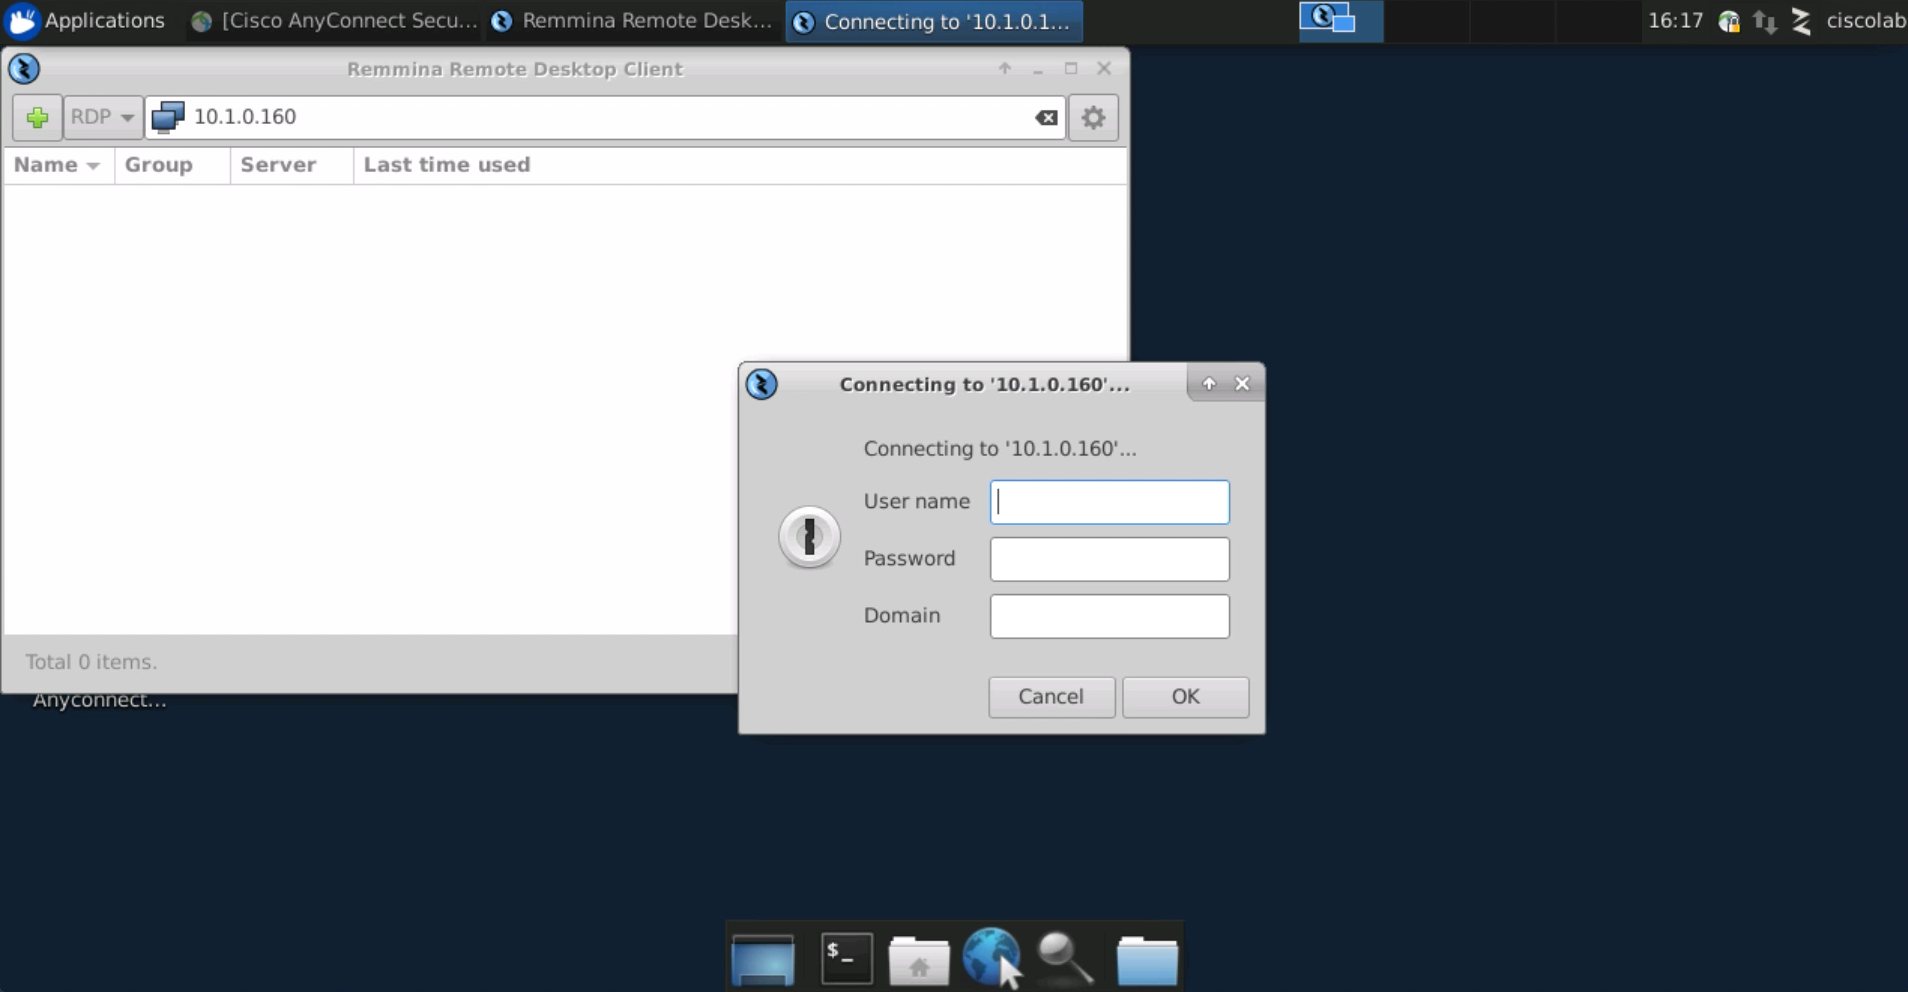
Enter the IP address of the IIS web server and click connect. You should be presented with a login dialogue. This is not what we expected to see, we actually expected the connection to time out. Recall that our policy is configured to allow SysAdmins, but not Employees to connect to the IIS server on TCP 3389. Let’s investigate further to see why we are being permitted to access RDP as an Employee.
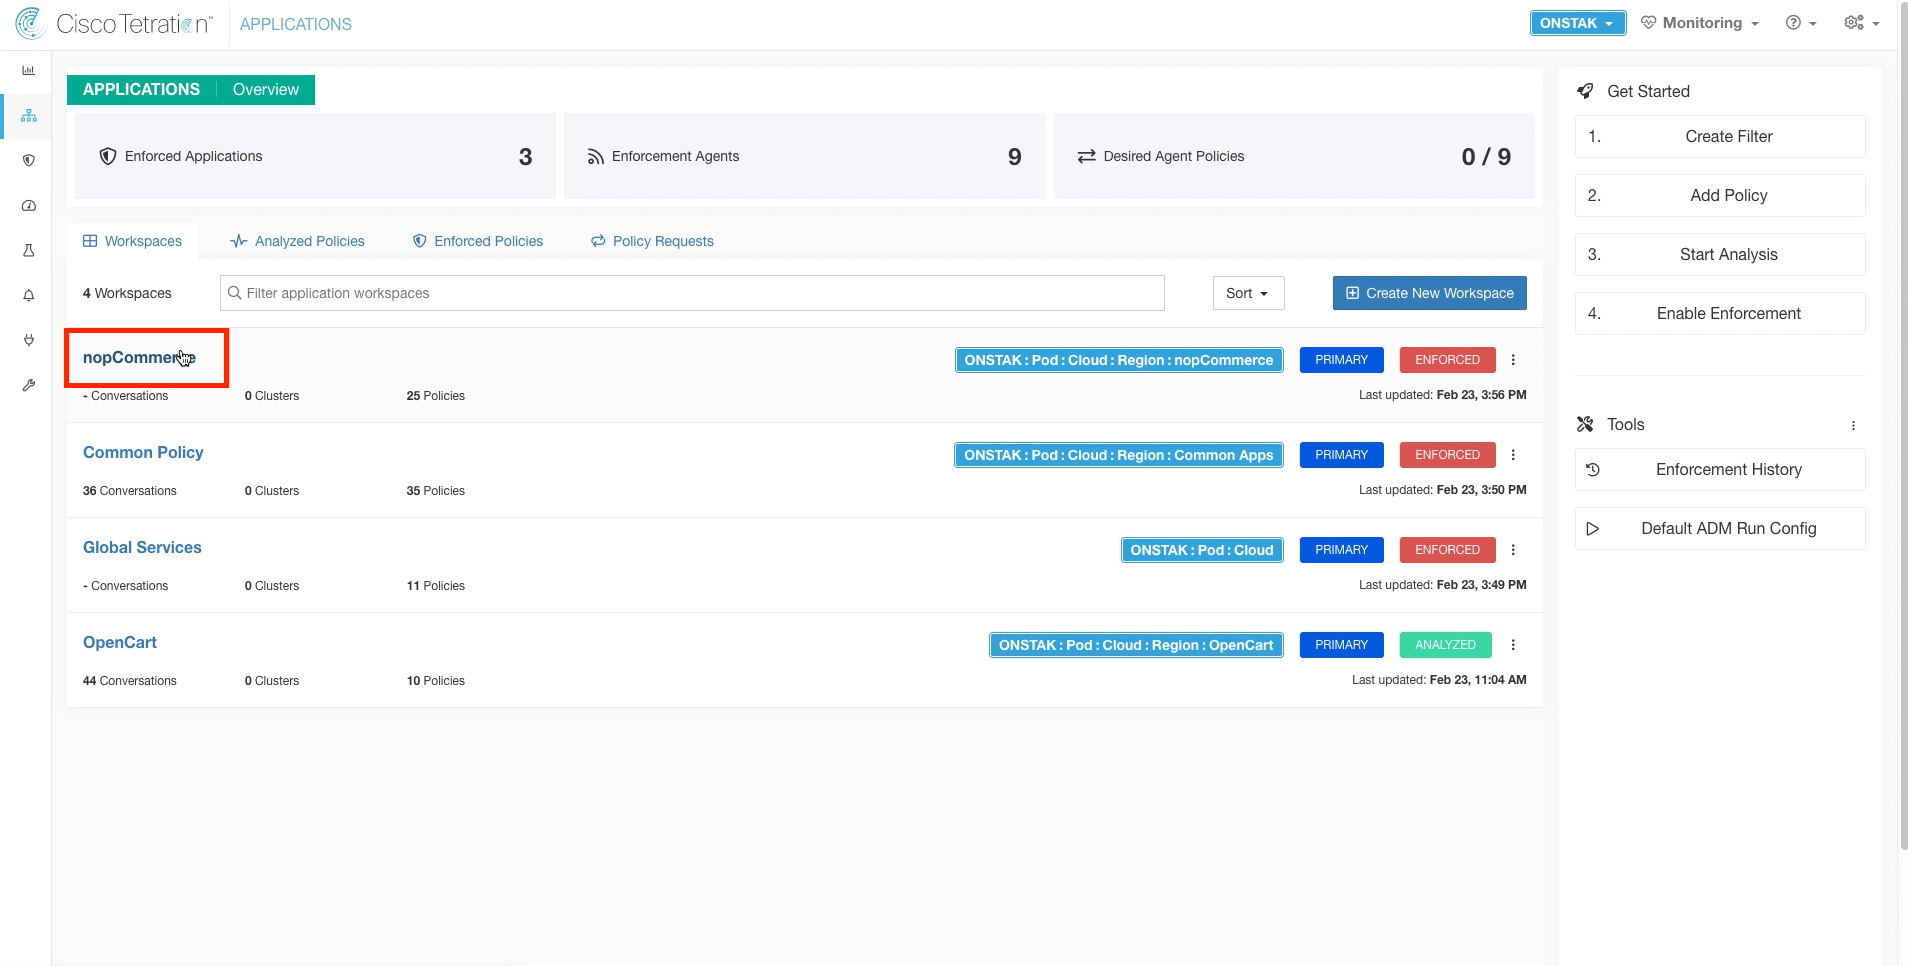
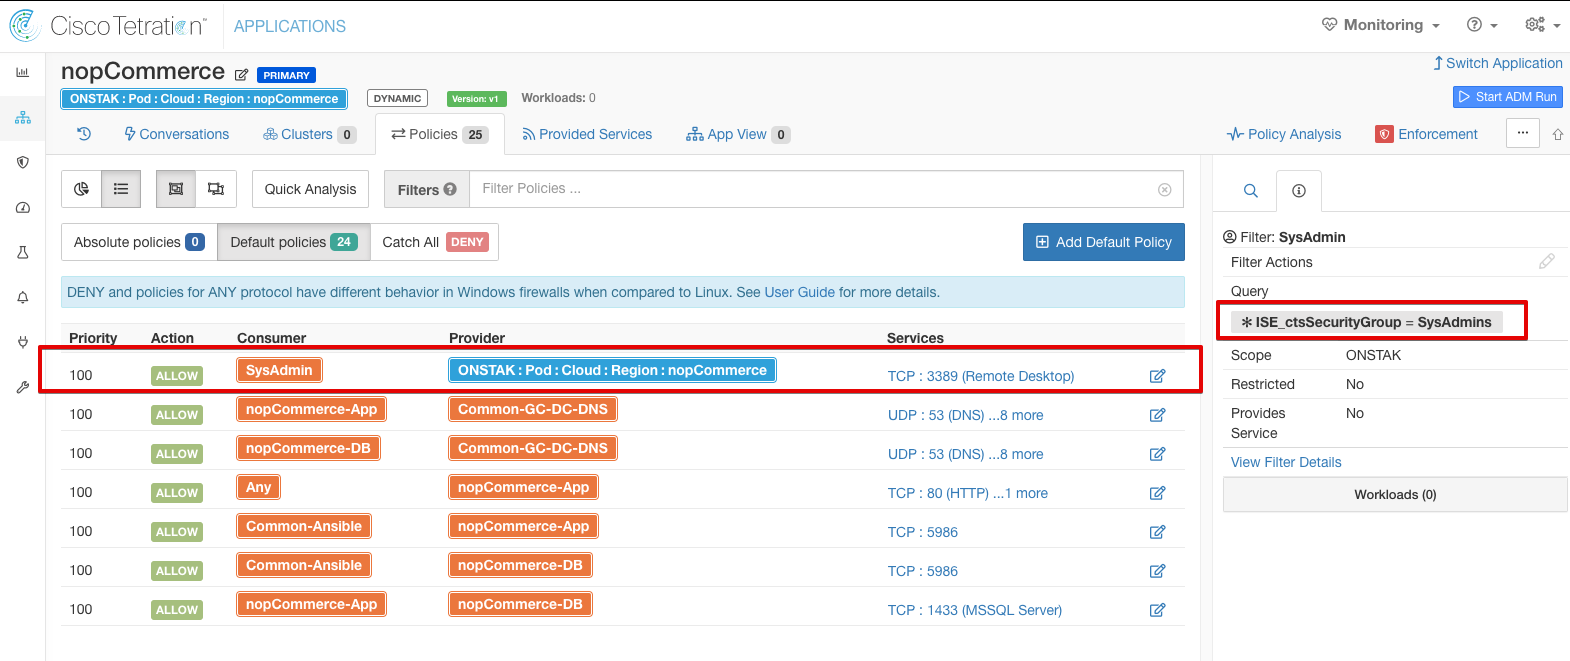
Navigate to the nopCommerce application.
Click on the Policy Analysis tab, and filter for the IP address of the employee desktop VPN.
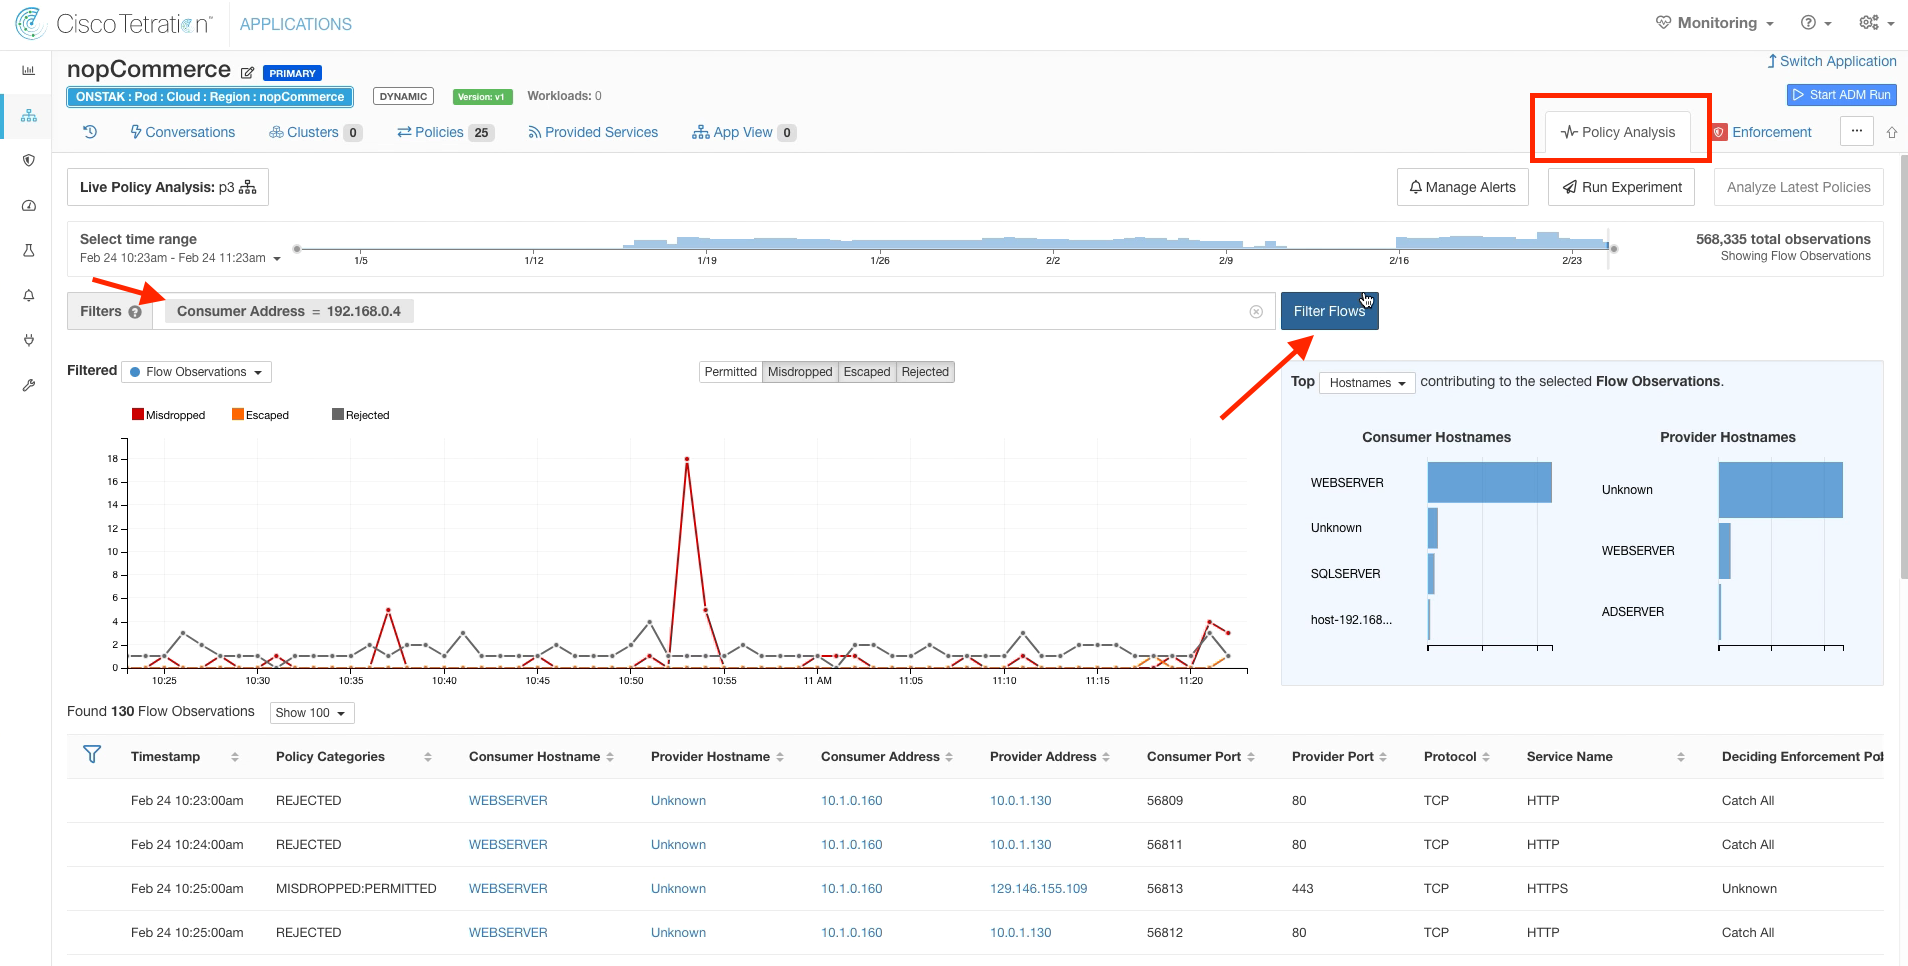
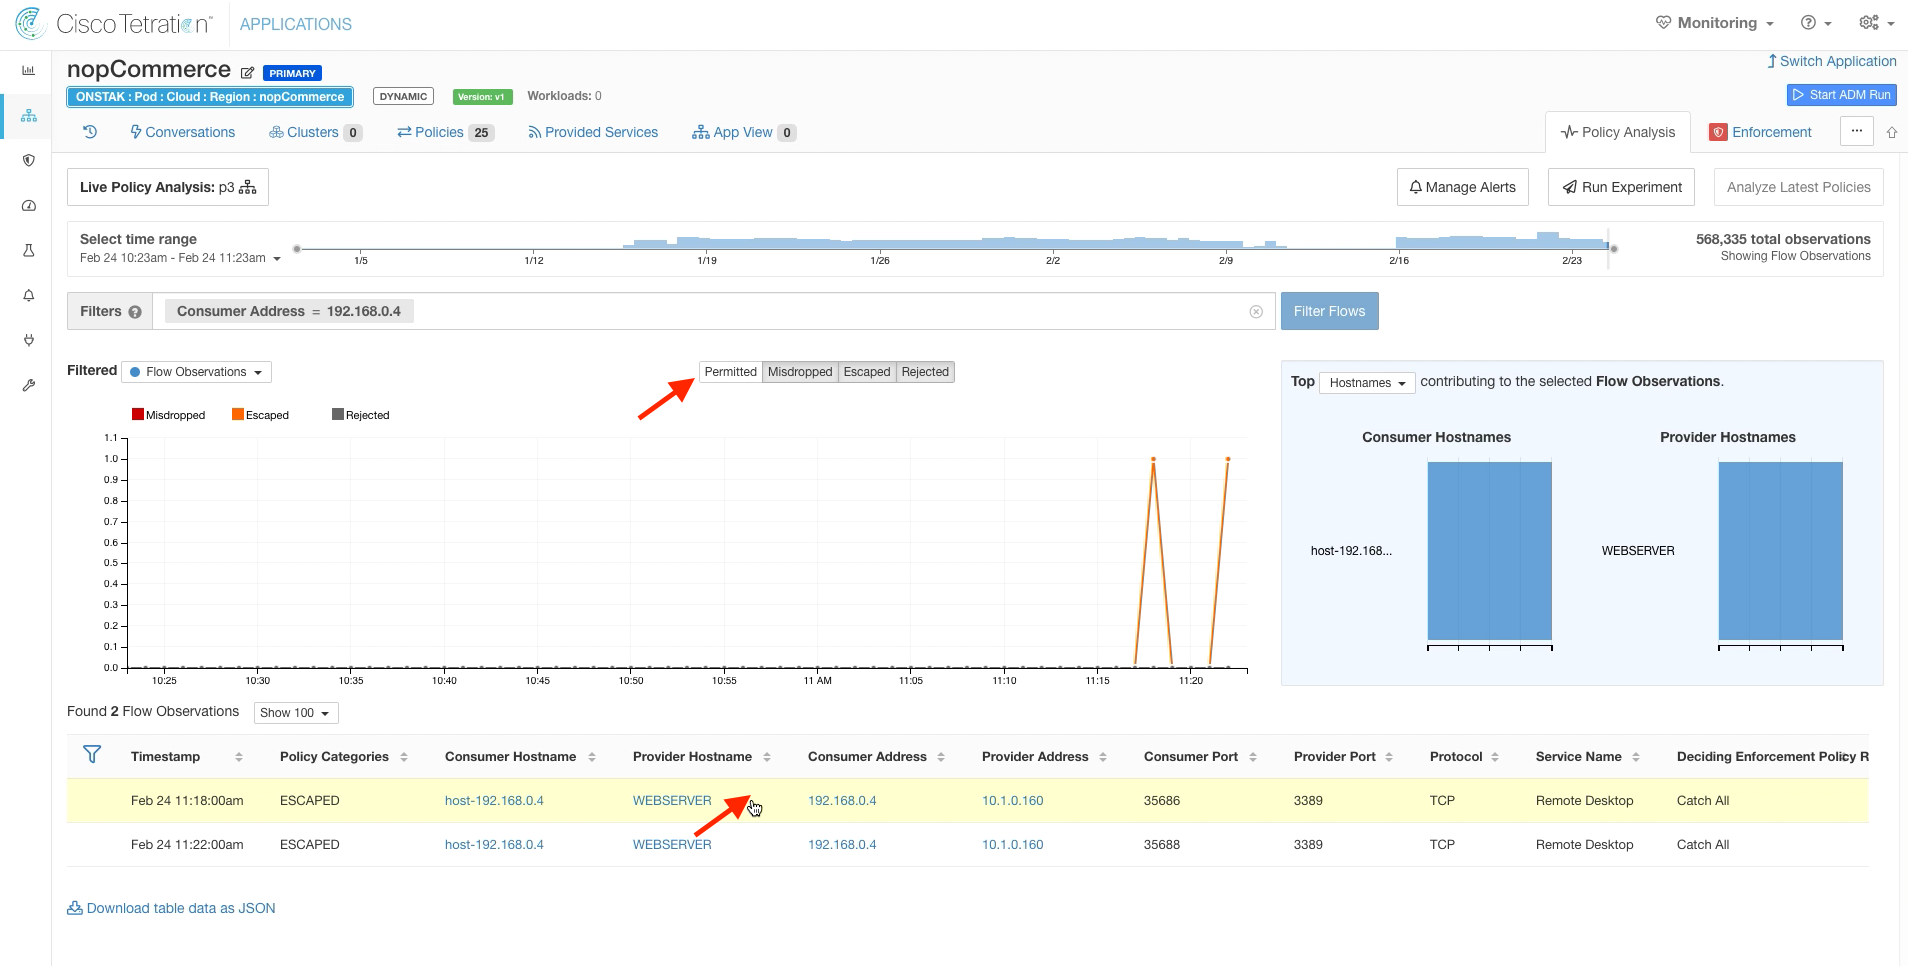
Turn off Permitted flows, and you should see some Escaped flows to the IIS web server. Click on one of those flows.
Click on Quick Policy Analysis.
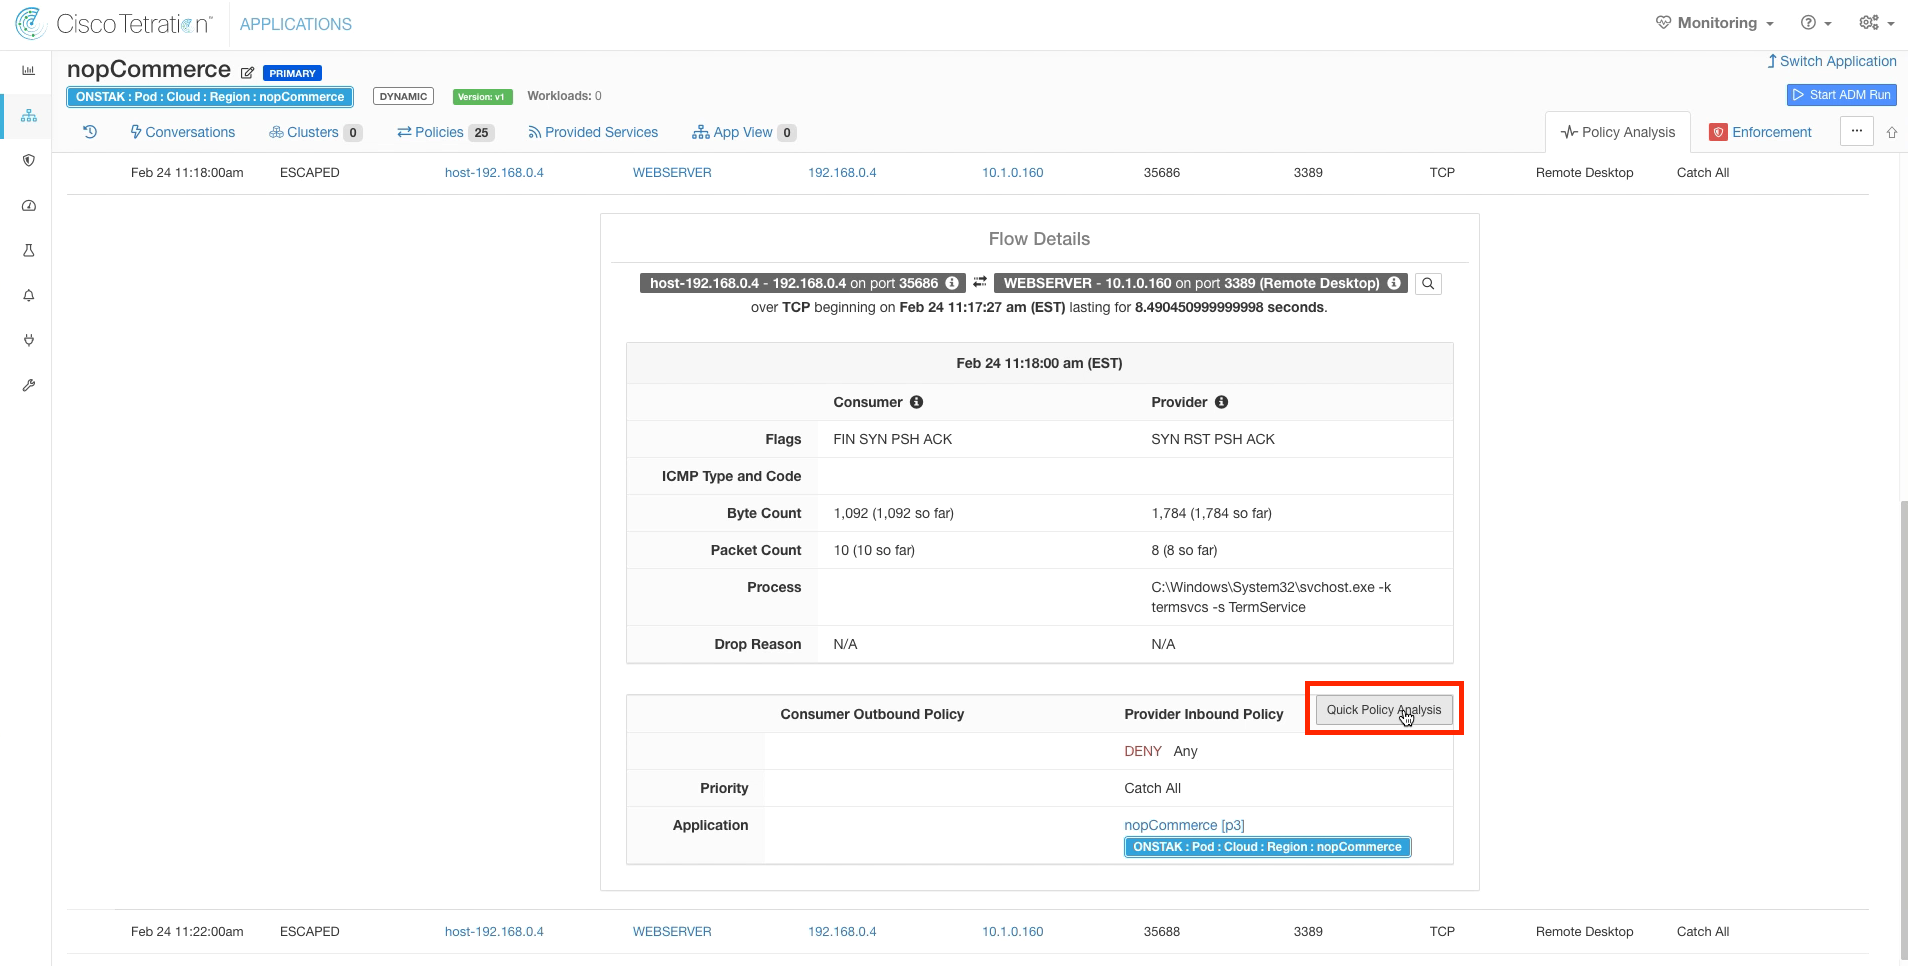
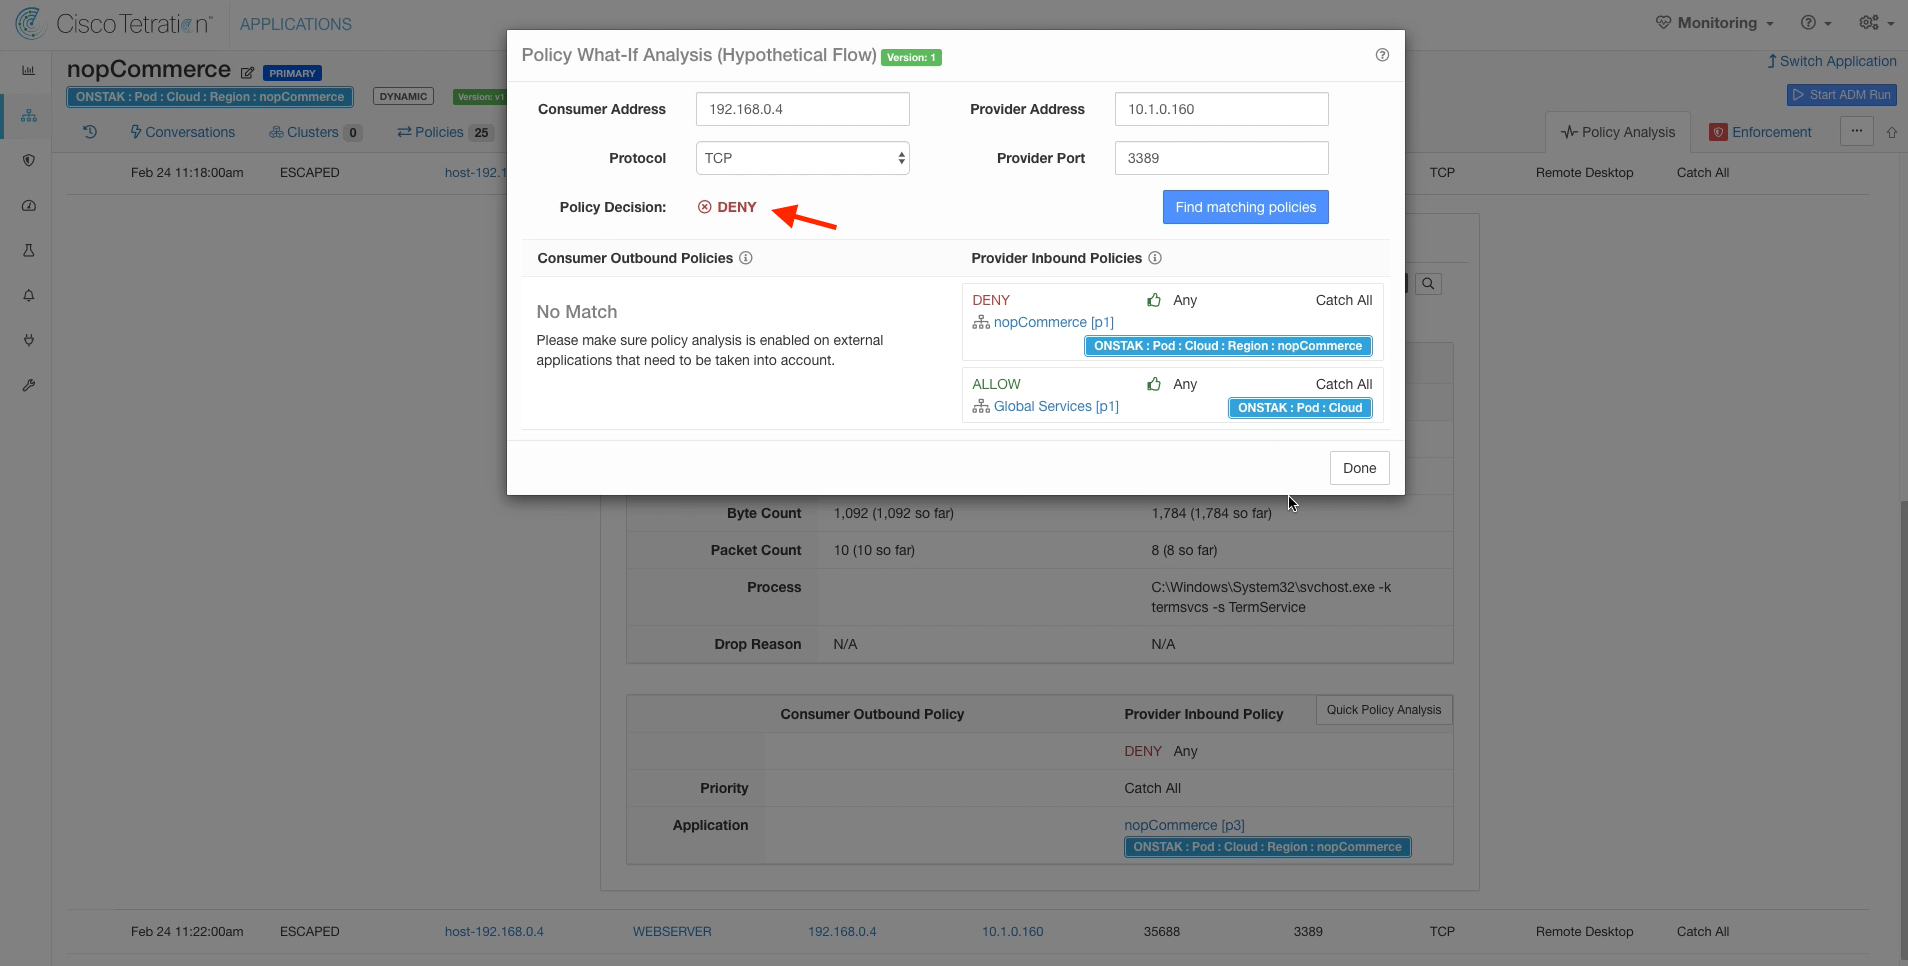
Click on Find matching policies, and you should see that the Policy Decision is DENY. This means our policy is configured correctly, the traffic should be getting denied but for some reason is being allowed. To troubleshoot further, we have to examine the Windows Firewall rules.
Open a session to the IIS Web Server.
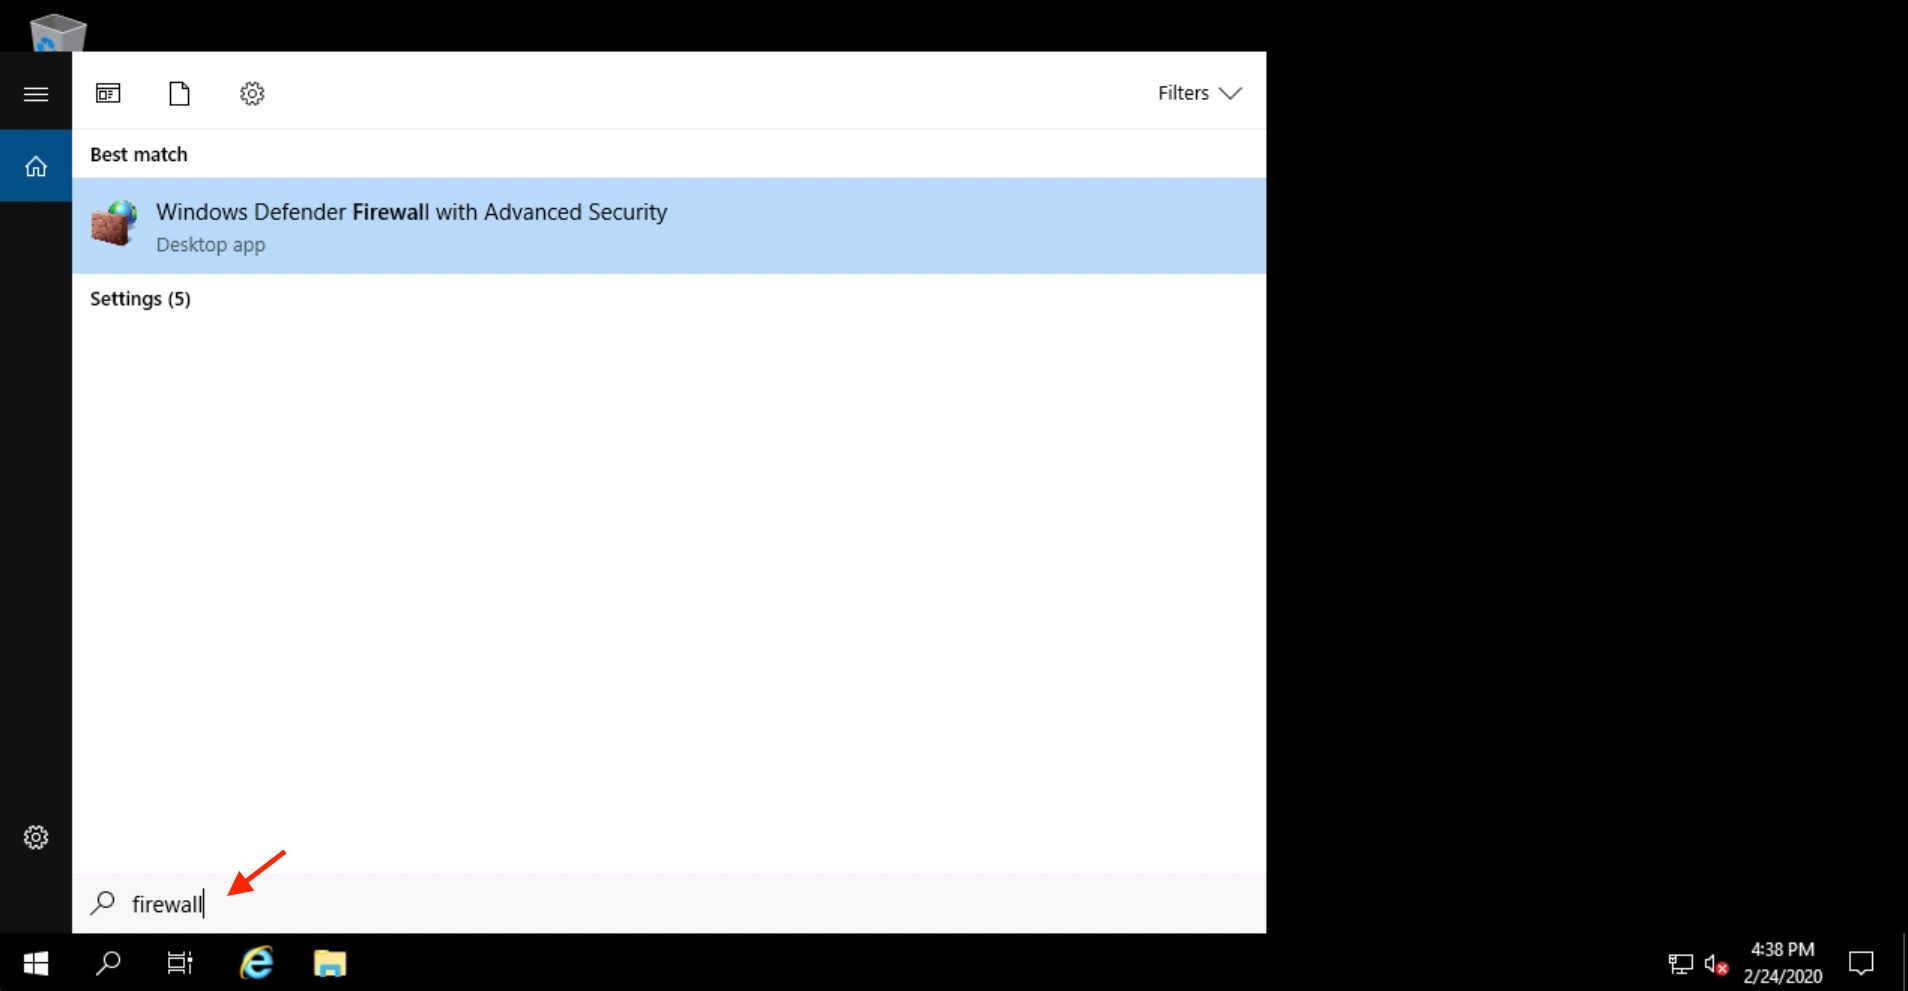
Click on the Search button in the toolbar and search for firewall. Then open the Windows Firewall control panel.
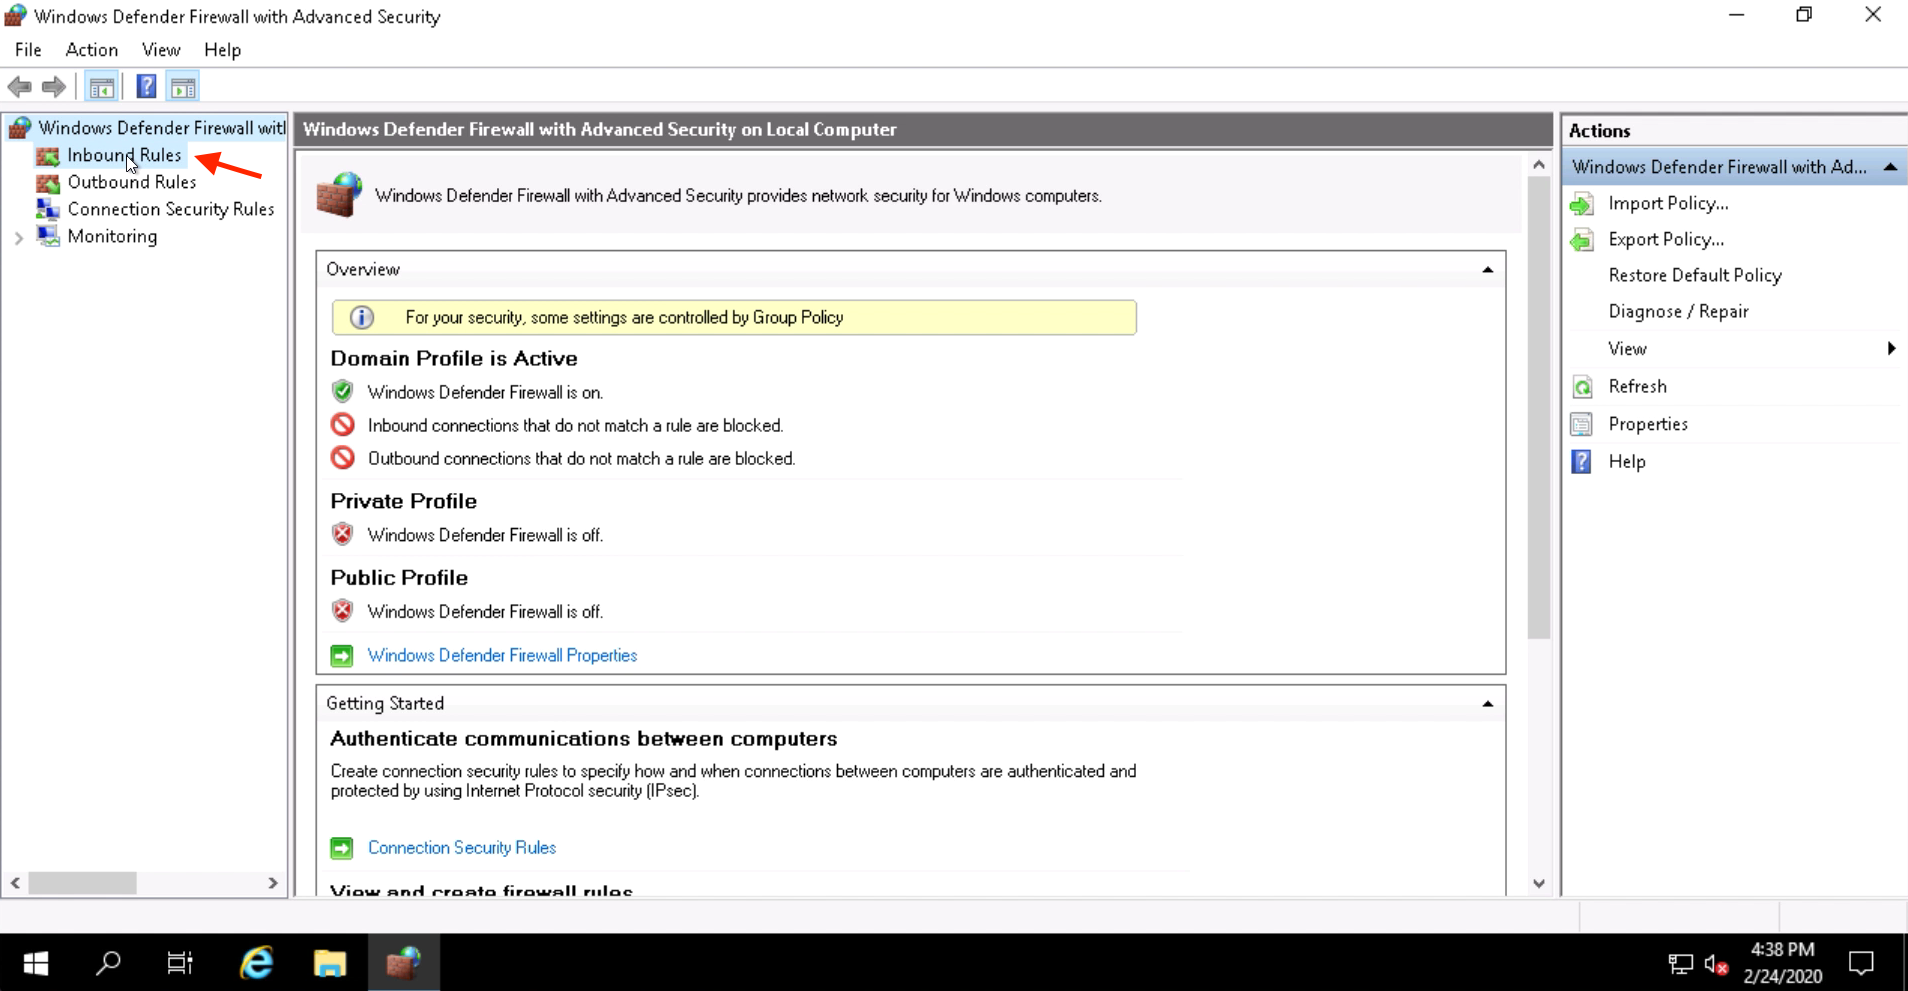
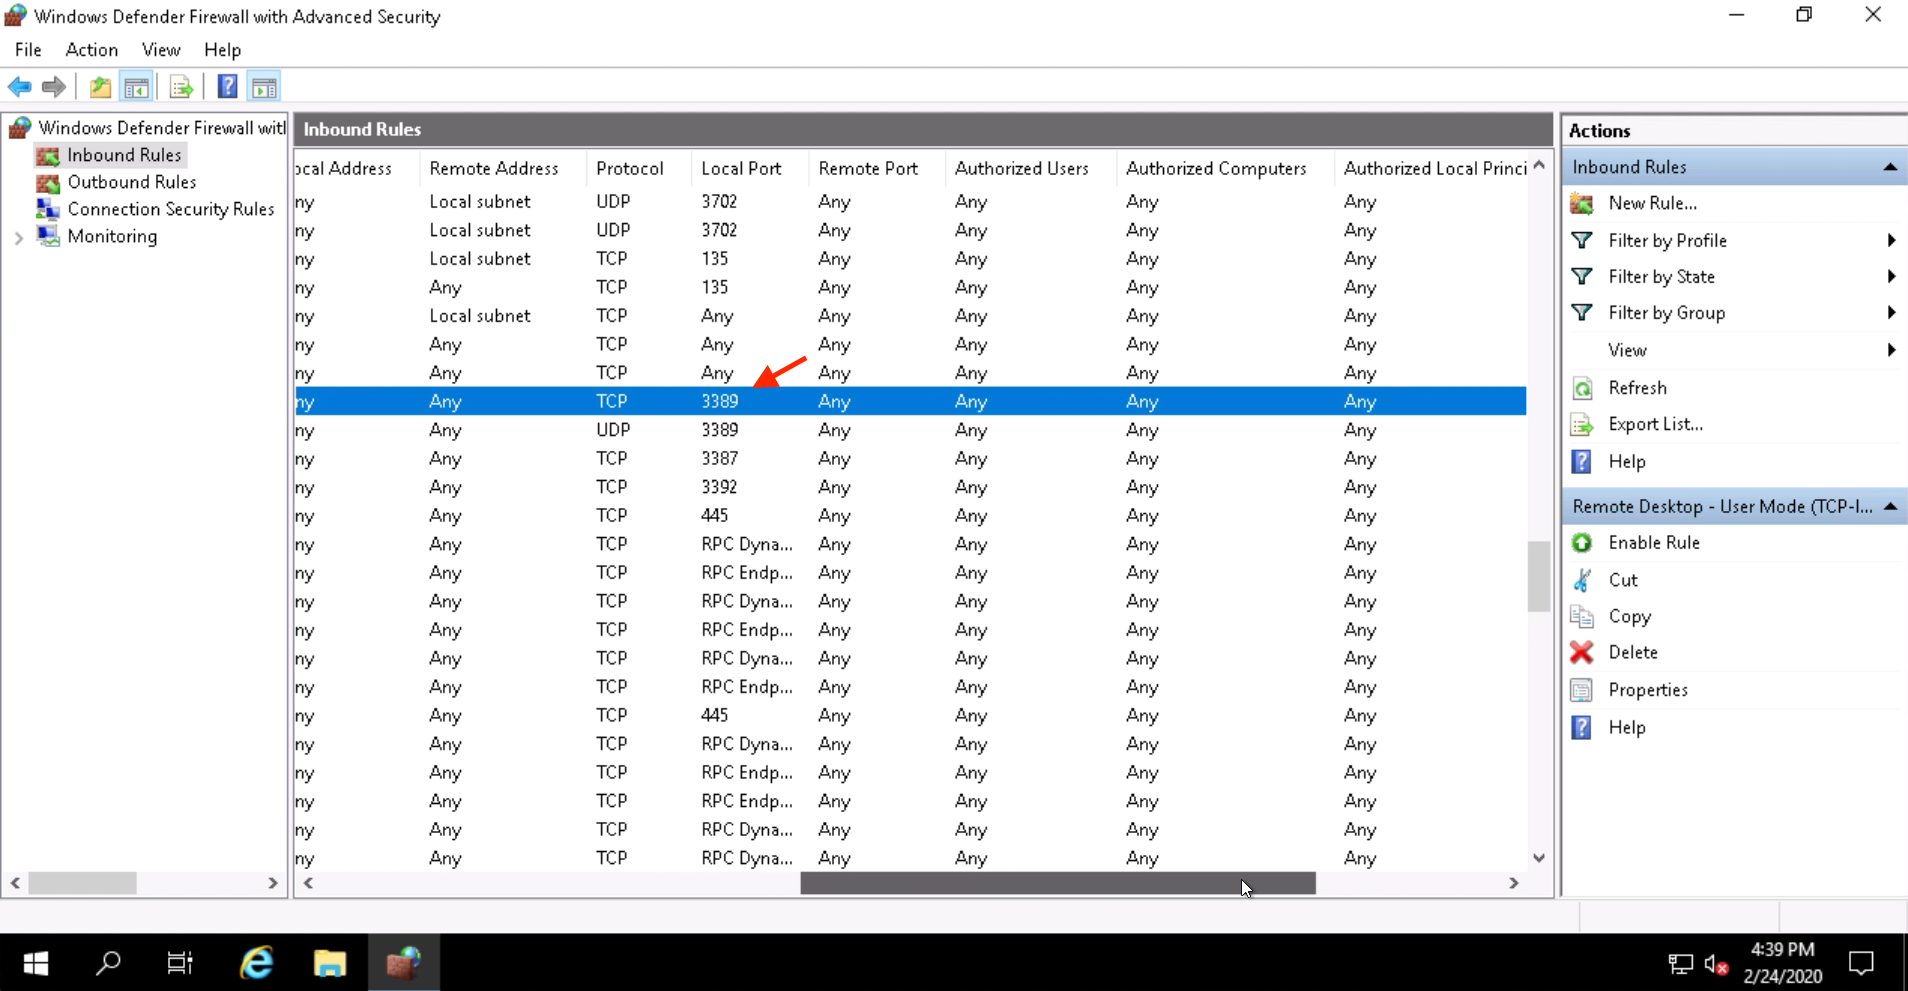
Click on Inbound Rules.
Locate the rule titled Remote Desktop - User Mode (TCP-In). Right click on the rule and select Disable Rule.
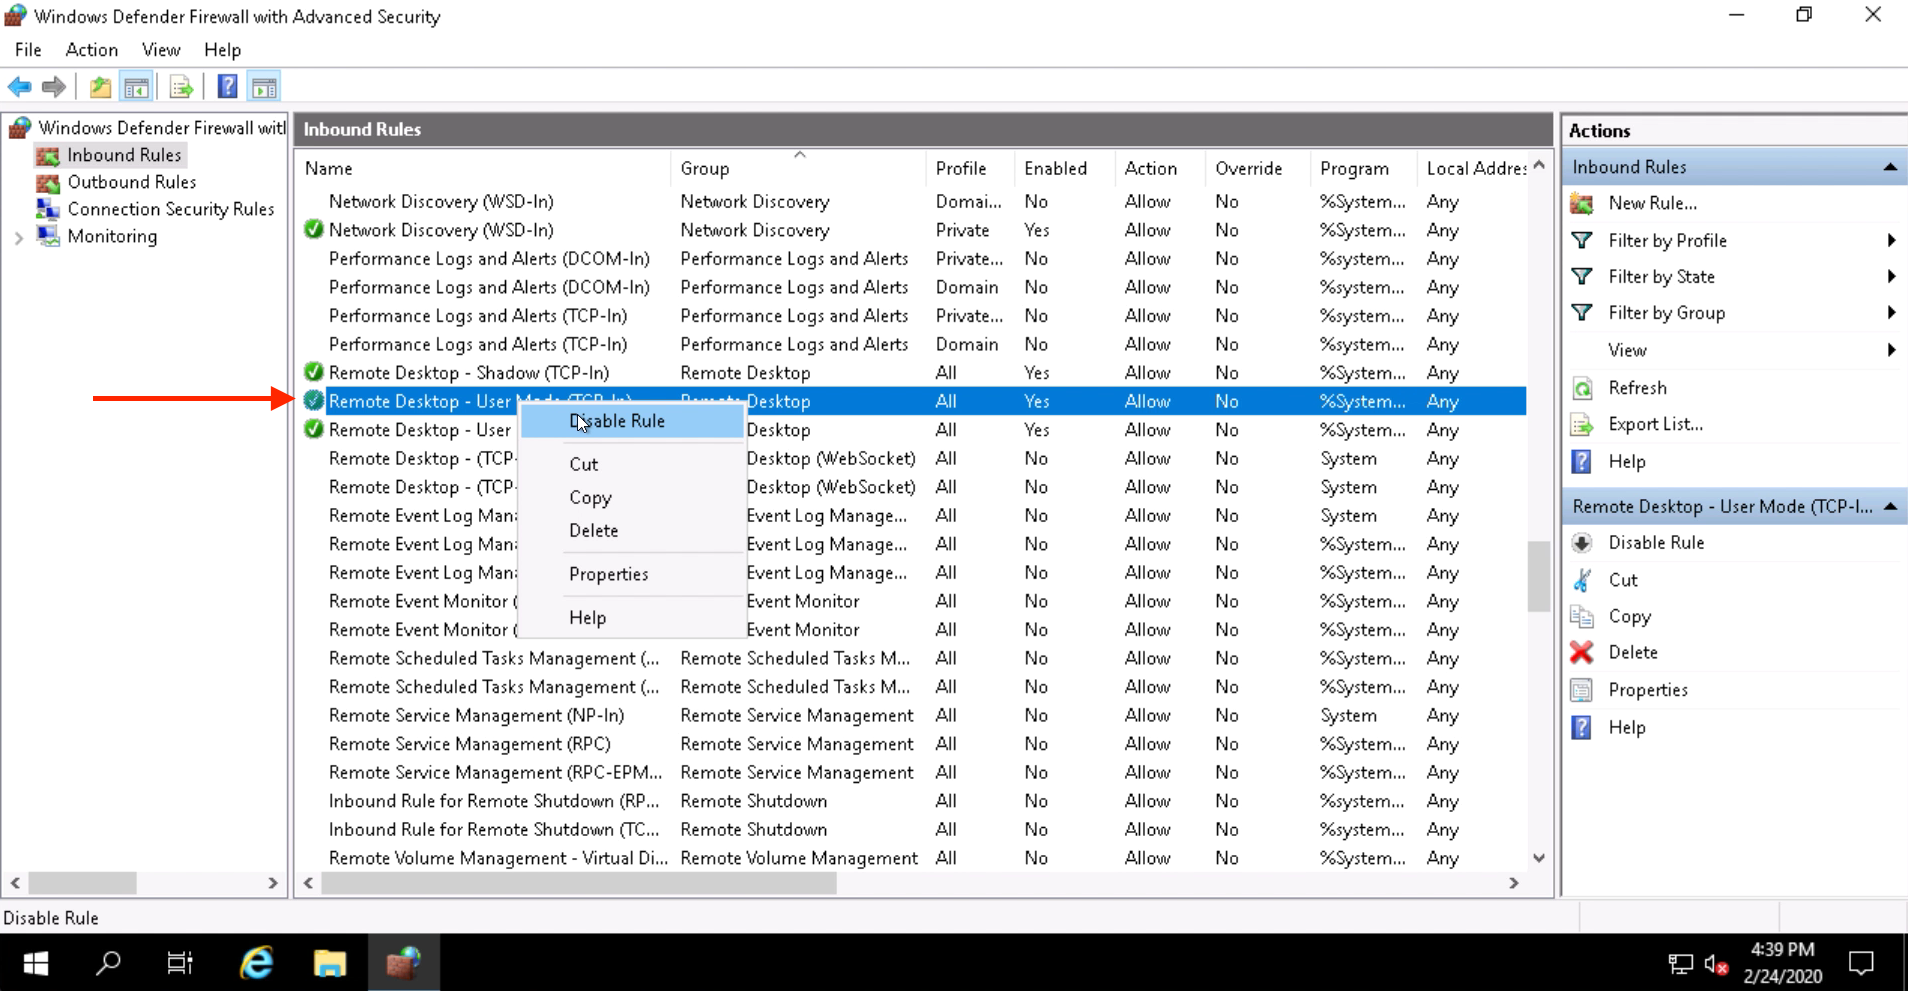
Scroll to the right and you will see that this rule is permitting traffic from anywhere to TCP 3389, which overrides our policy we defined in Tetration. This is occurring because way back when we set up our Agent Config Intent for Windows, we selected the “Preserve Rules” option. This caused the default rules that are configured in the Windows Firewall to be preserved when we turned on enforcement.
It might seem logical to go ahead and turn off Preserve Rules now in the Windows Config Intent. It is not recommended to disable Preserve Rules after going into enforcement. This may cause undesirable behavior, such as the agents becoming unable to check in with the Tetration cluster.
From the employee desktop, attempt another Remote Desktop session to the IIS web server using the Remmina application. This time, the connection should not be successful.

Open a session to the SysAdmin desktop, and launch the Remmina application.
Open a connection to the IIS web server. A login dialogue should be displayed. This is successful because we have a specific rule allowing SysAdmins to connect to the nopCommerce scope on TCP 3389.

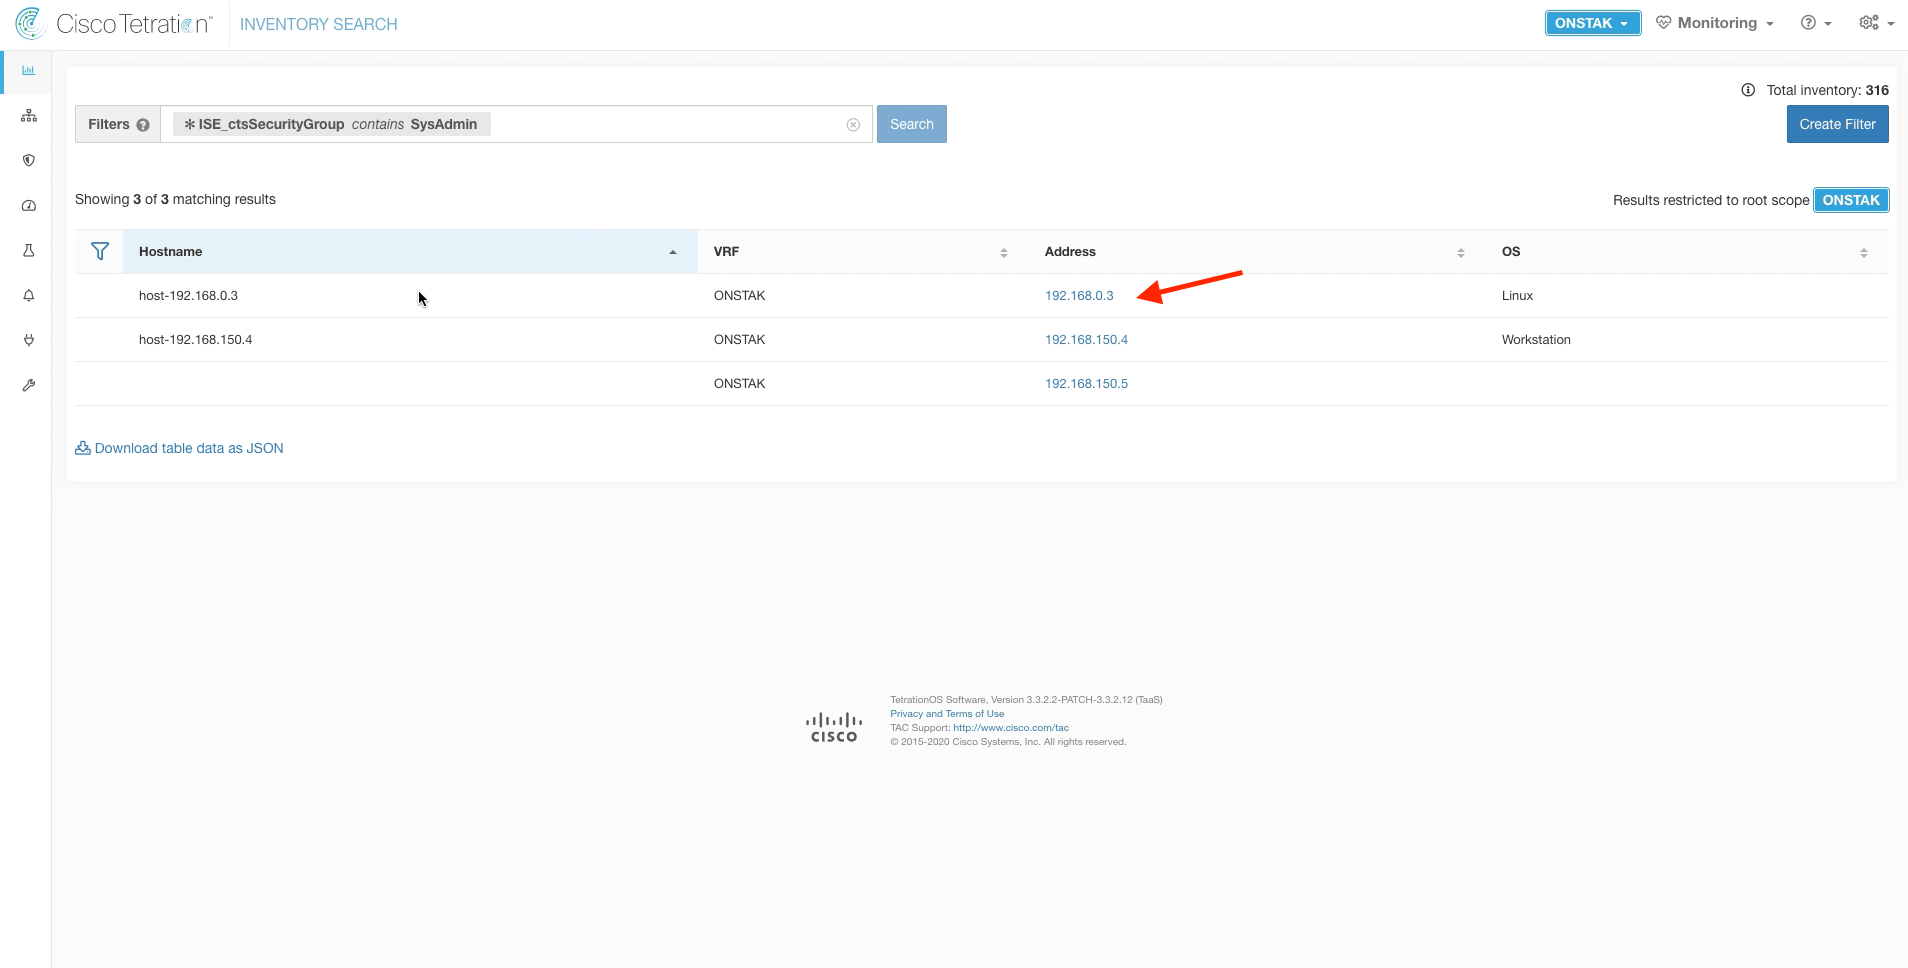
Navigate to Inventory Search.
Search for the VPN client IP of the SysAdmin desktop using the query * ISE_ctsSecurityGroup contains SysAdmin. Click on the IP address to enter the Workload Profile.
Click on the link next to User Annotations.

Here we see the IP address is annotated with the Security Group named SysAdmins.
In our nopCommerce policy, we have created a rule that allows this security group to access all systems in the scope on TCP 3389.
YOU HAVE COMPLETED THIS MODULE
| Return to Table of Contents | Go to Top of the Page | Continue to the Next Module |