Cisco Tetration - Hands-On Lab
Module14: Policy Creation - ADM and Clusters - NopCommerce
In this module we will create an Application Workspace for the NopCommerce application which consists of an IIS web server and a MS-SQL database server. We will first run ADM, and then adjust the discovered cluster queries to use AWS tags. Then we will refine the discovered policies. We will also take a look at Policy Requests. When policies are created that allow a cluster in one application workspace to talk to a cluster in a different application workspace, policies must be created in both workspaces to allow the communication. Policy requests are a way to notify the administrator of the other workspace that matching policies need to be created. The administrator must then go into the other workspace and accept the policy requests. By accepting the requests, the rules are automatically created in the other workspace. Auto-pilot rules can also be set up to automatically accept any incoming policy requests to an application workspace.
In this module, we’ll be configuring rules from the Windows IIS and MSSQL servers to the Common Policy workspace to allow communications such as Microsoft RPC, Kerberos, LDAP, DNS, and etc. The rules will be initially discovered by ADM, and will be created in the Common Policy workspace using the Policy Request functionality described above.
Steps for this Module
Step 001 - Navigate to Applications
Step 002 - Create a new Workspace
Step 003 - Assign Workspace to nopCommerce Scope
Step 004 - Begin ADM Run
Step 005 - Examine member workloads
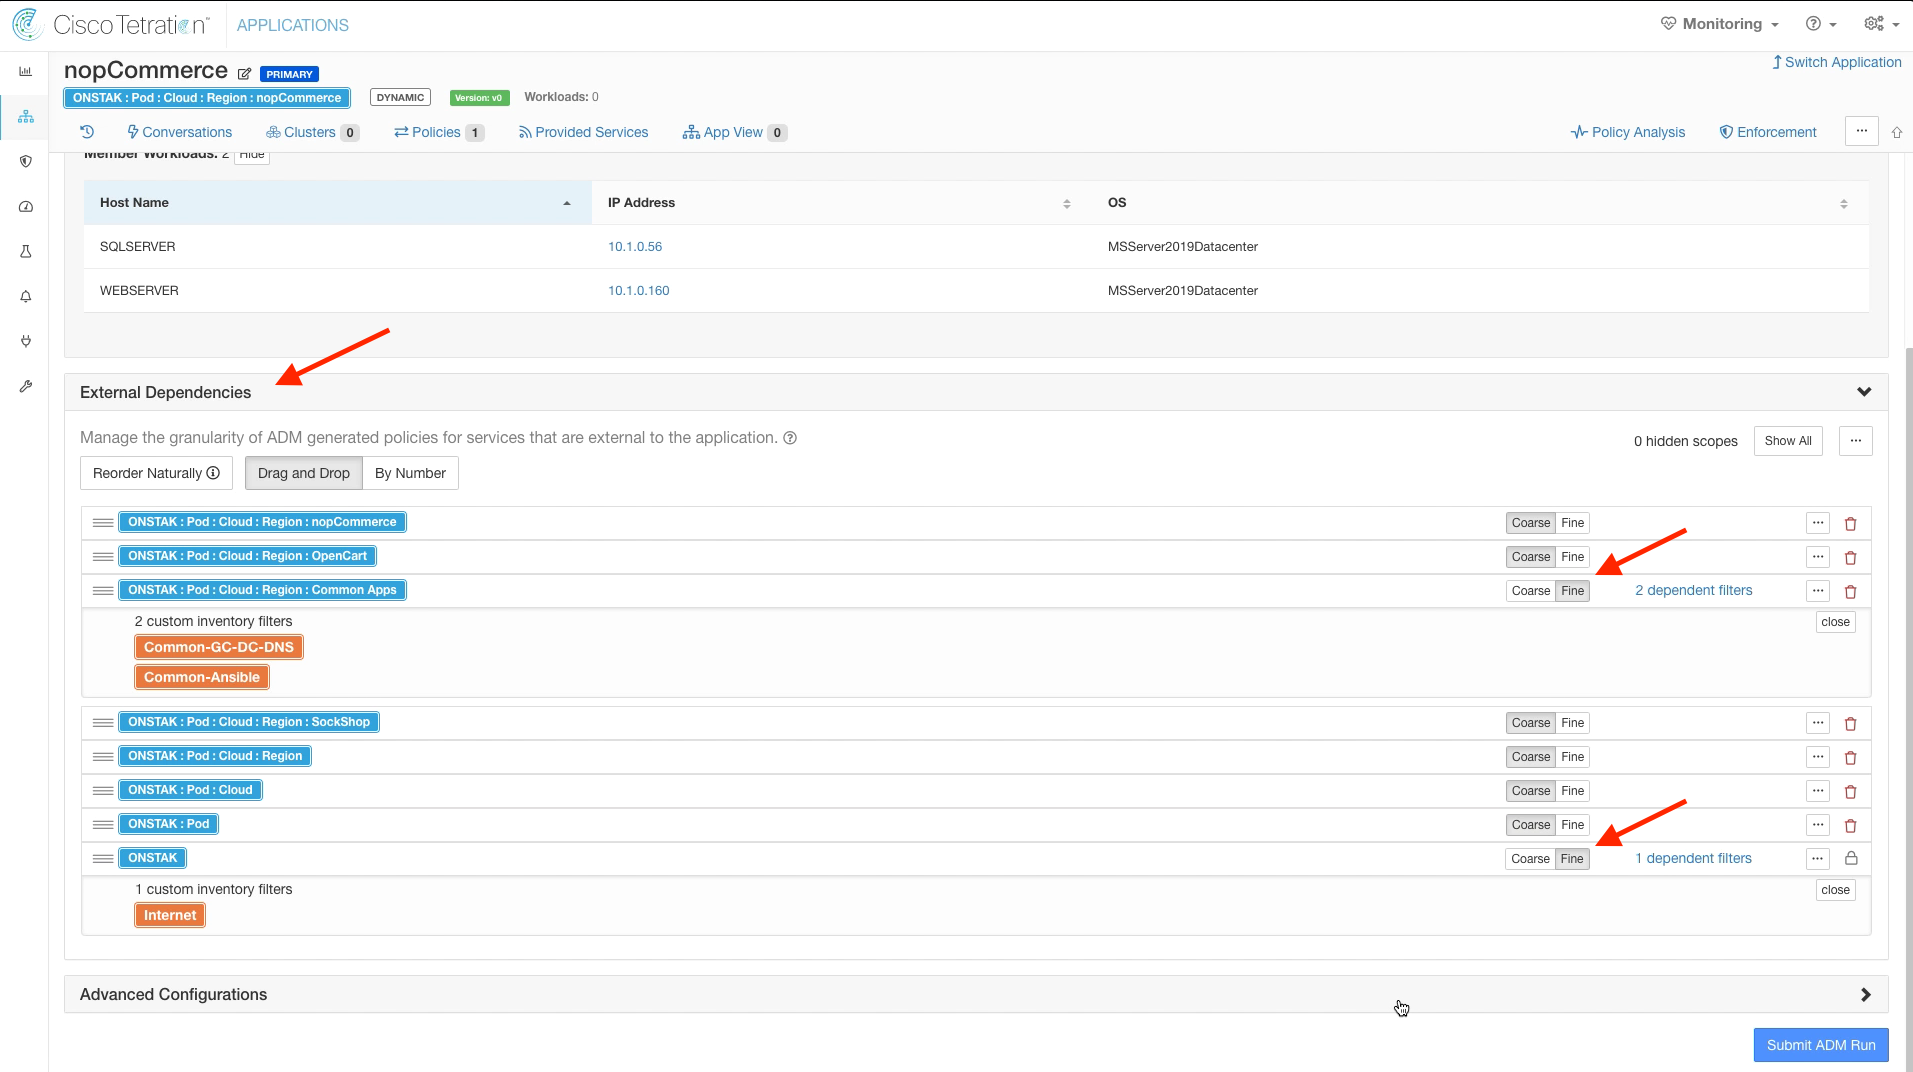
Step 006 - Modify External Dependencies
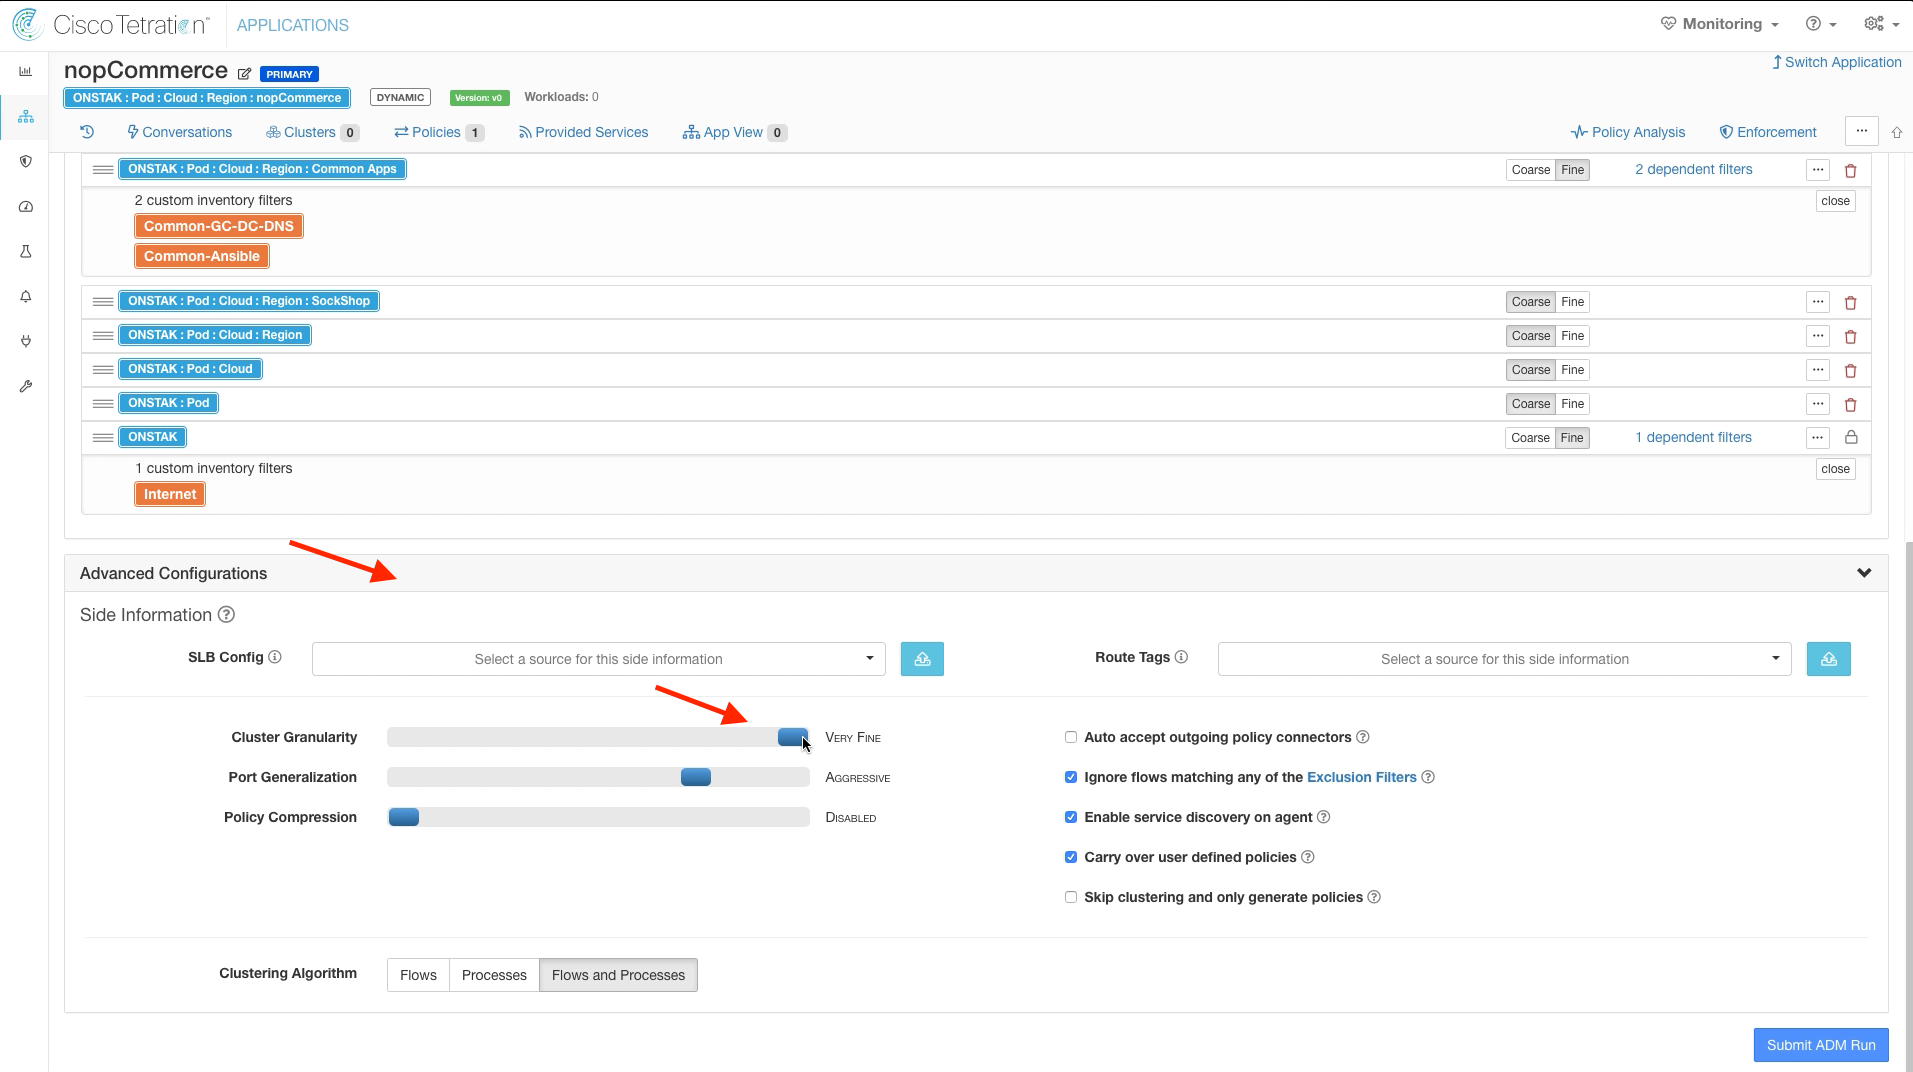
Step 007 - Modify Cluster Granularity
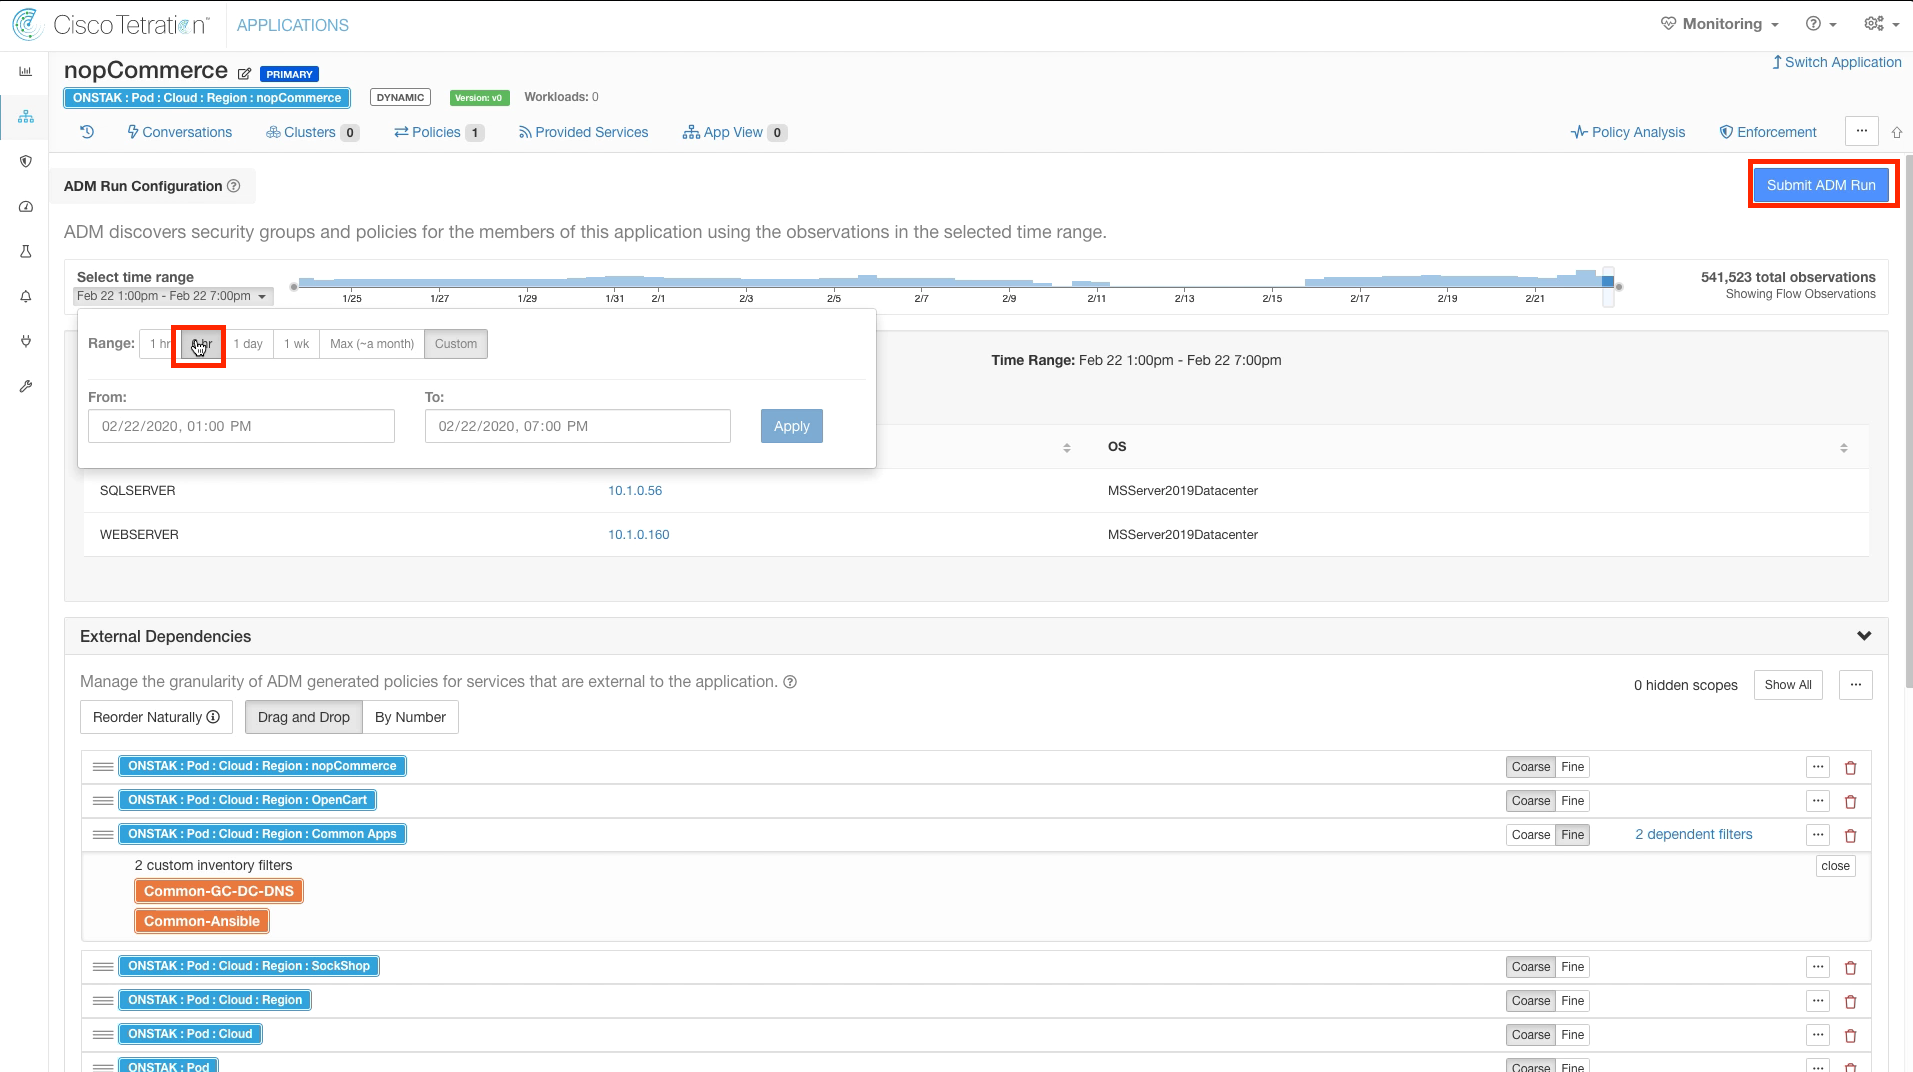
Step 008 - Change ADM time range
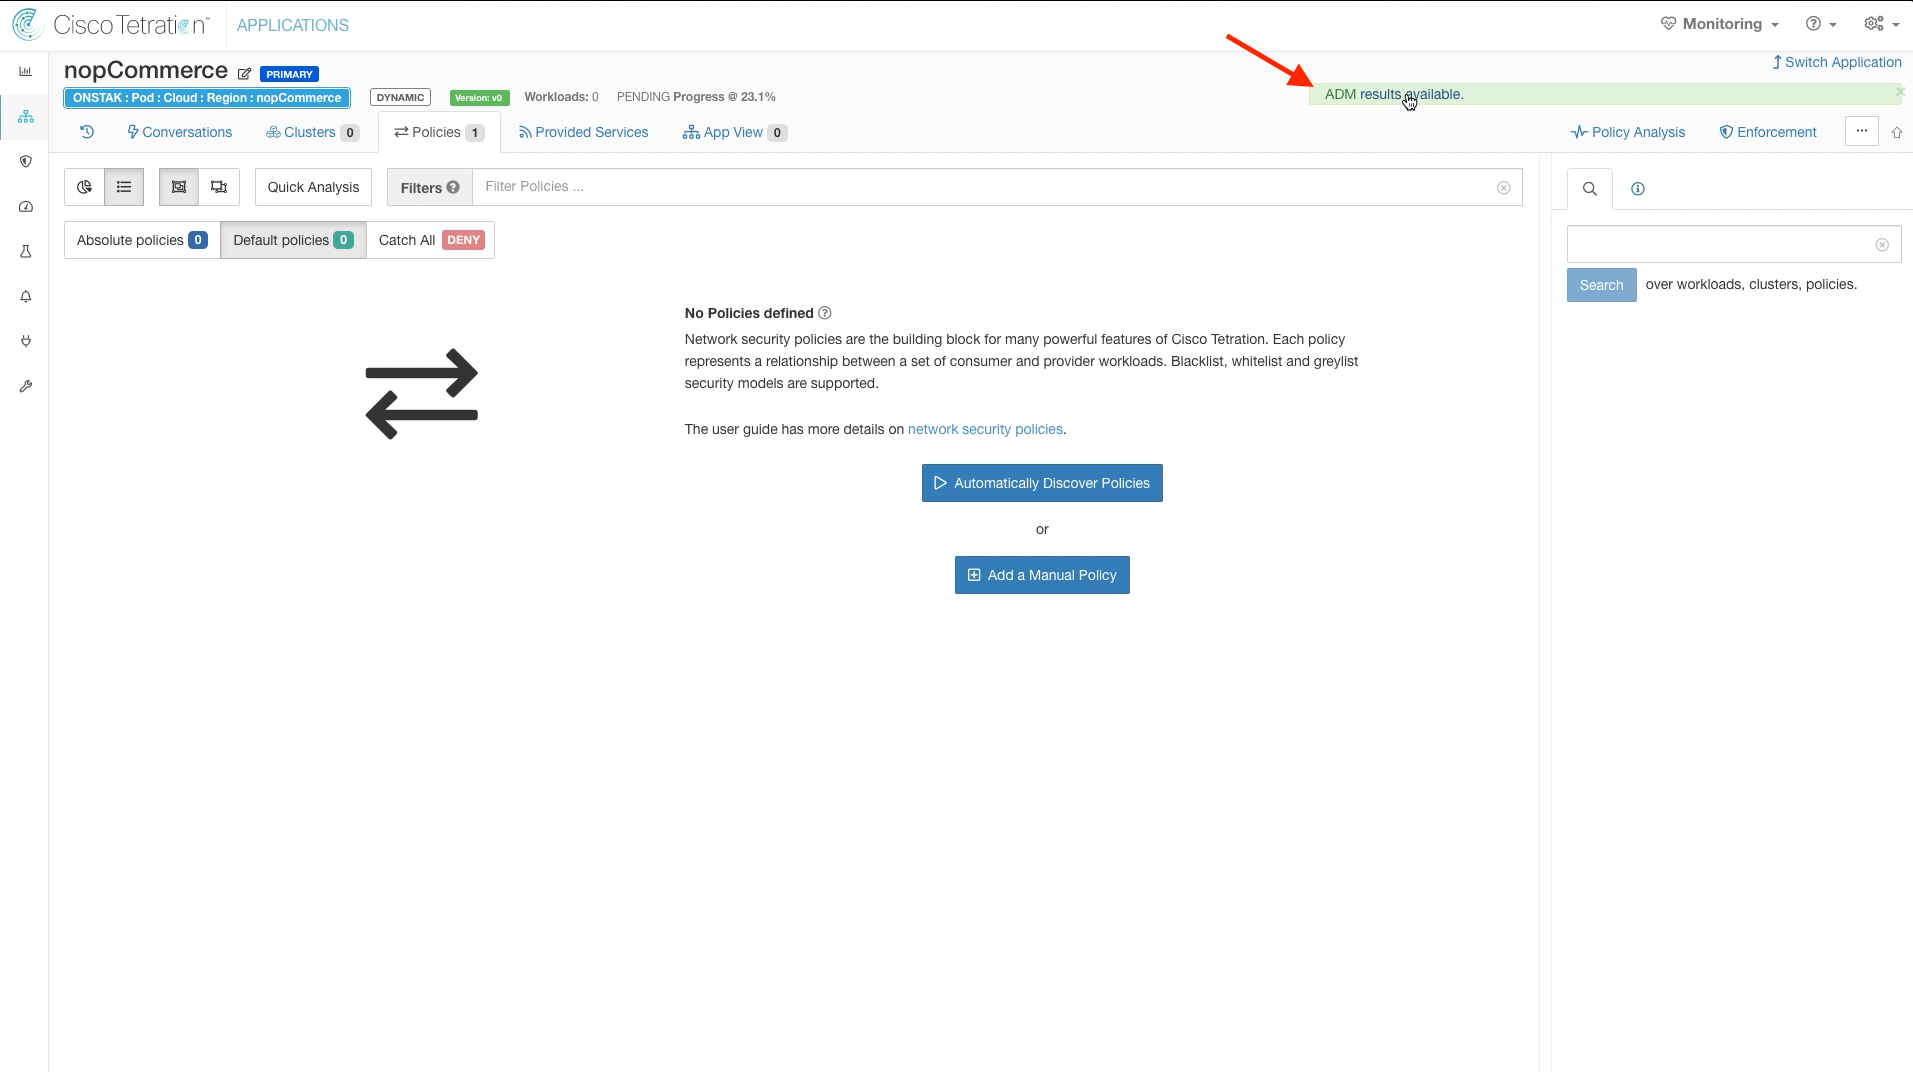
Step 009 - View ADM results
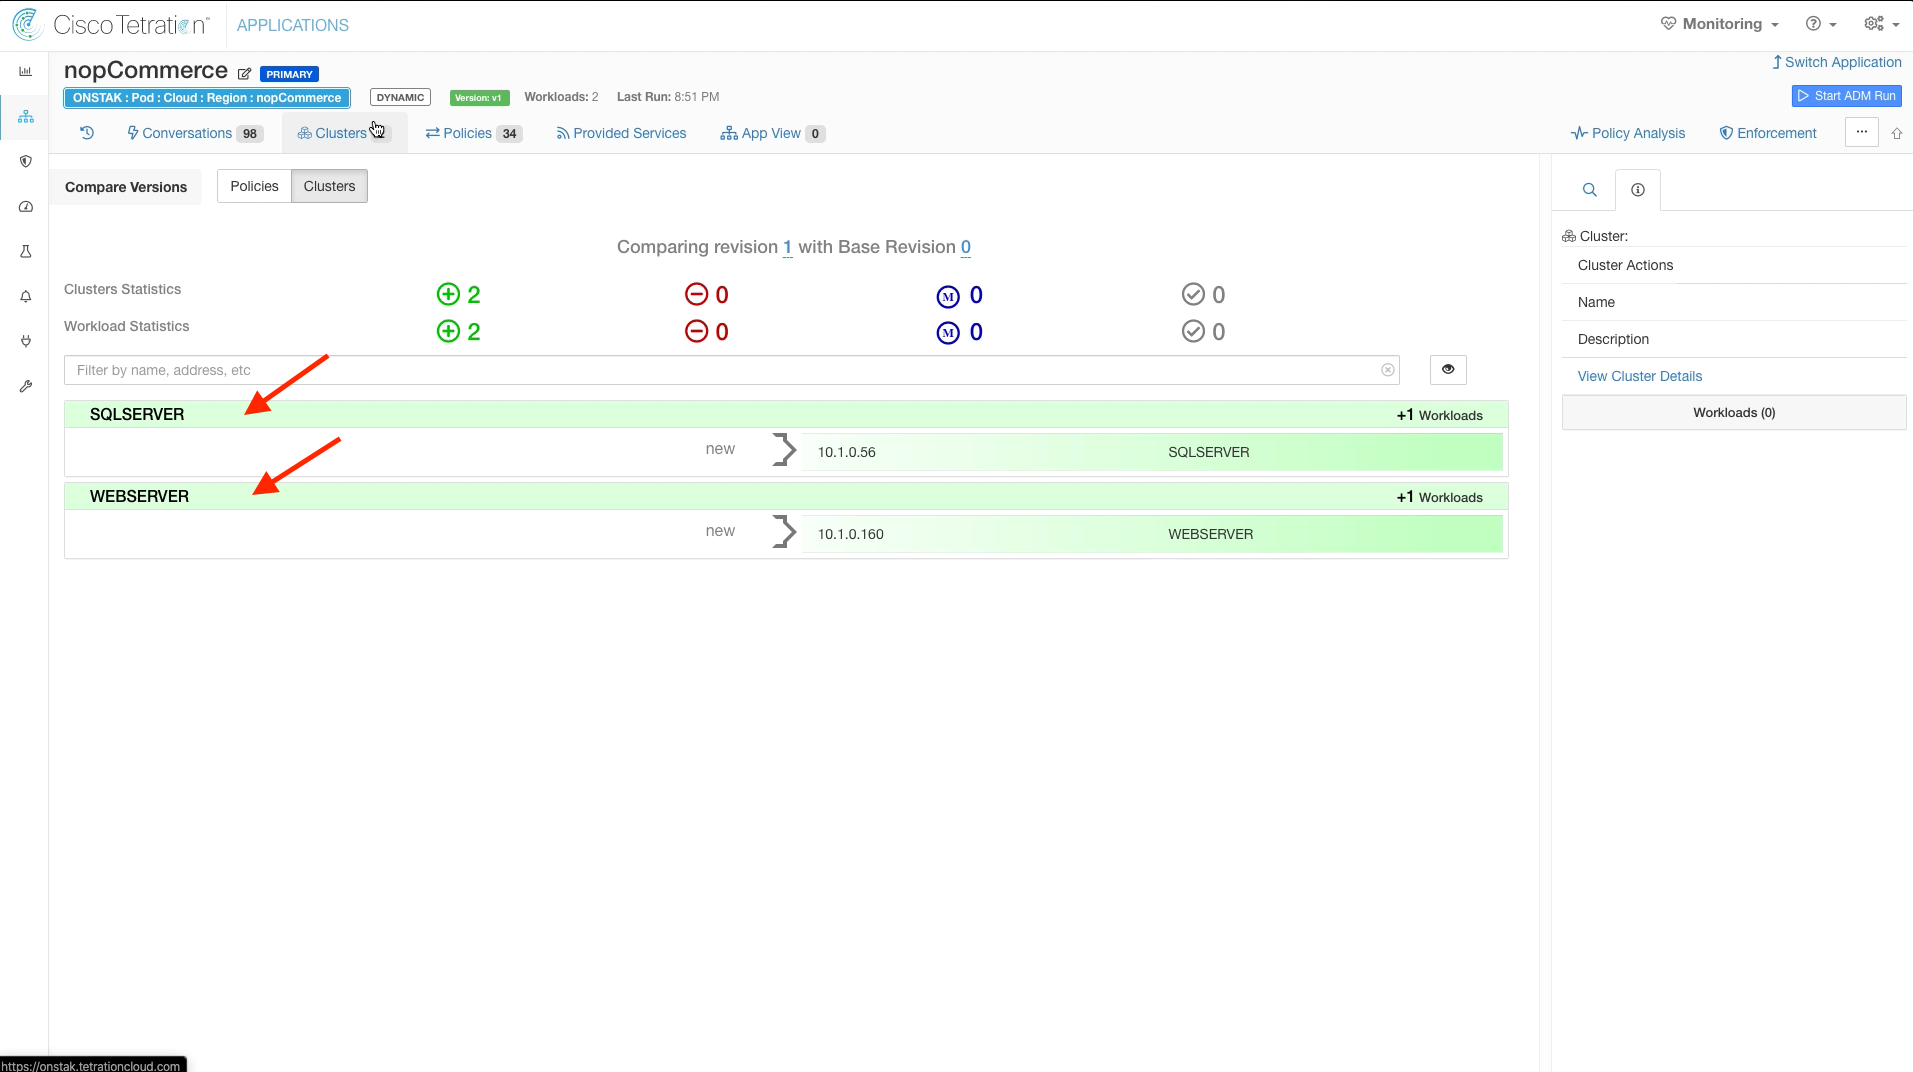
Step 010 - Expand clusters
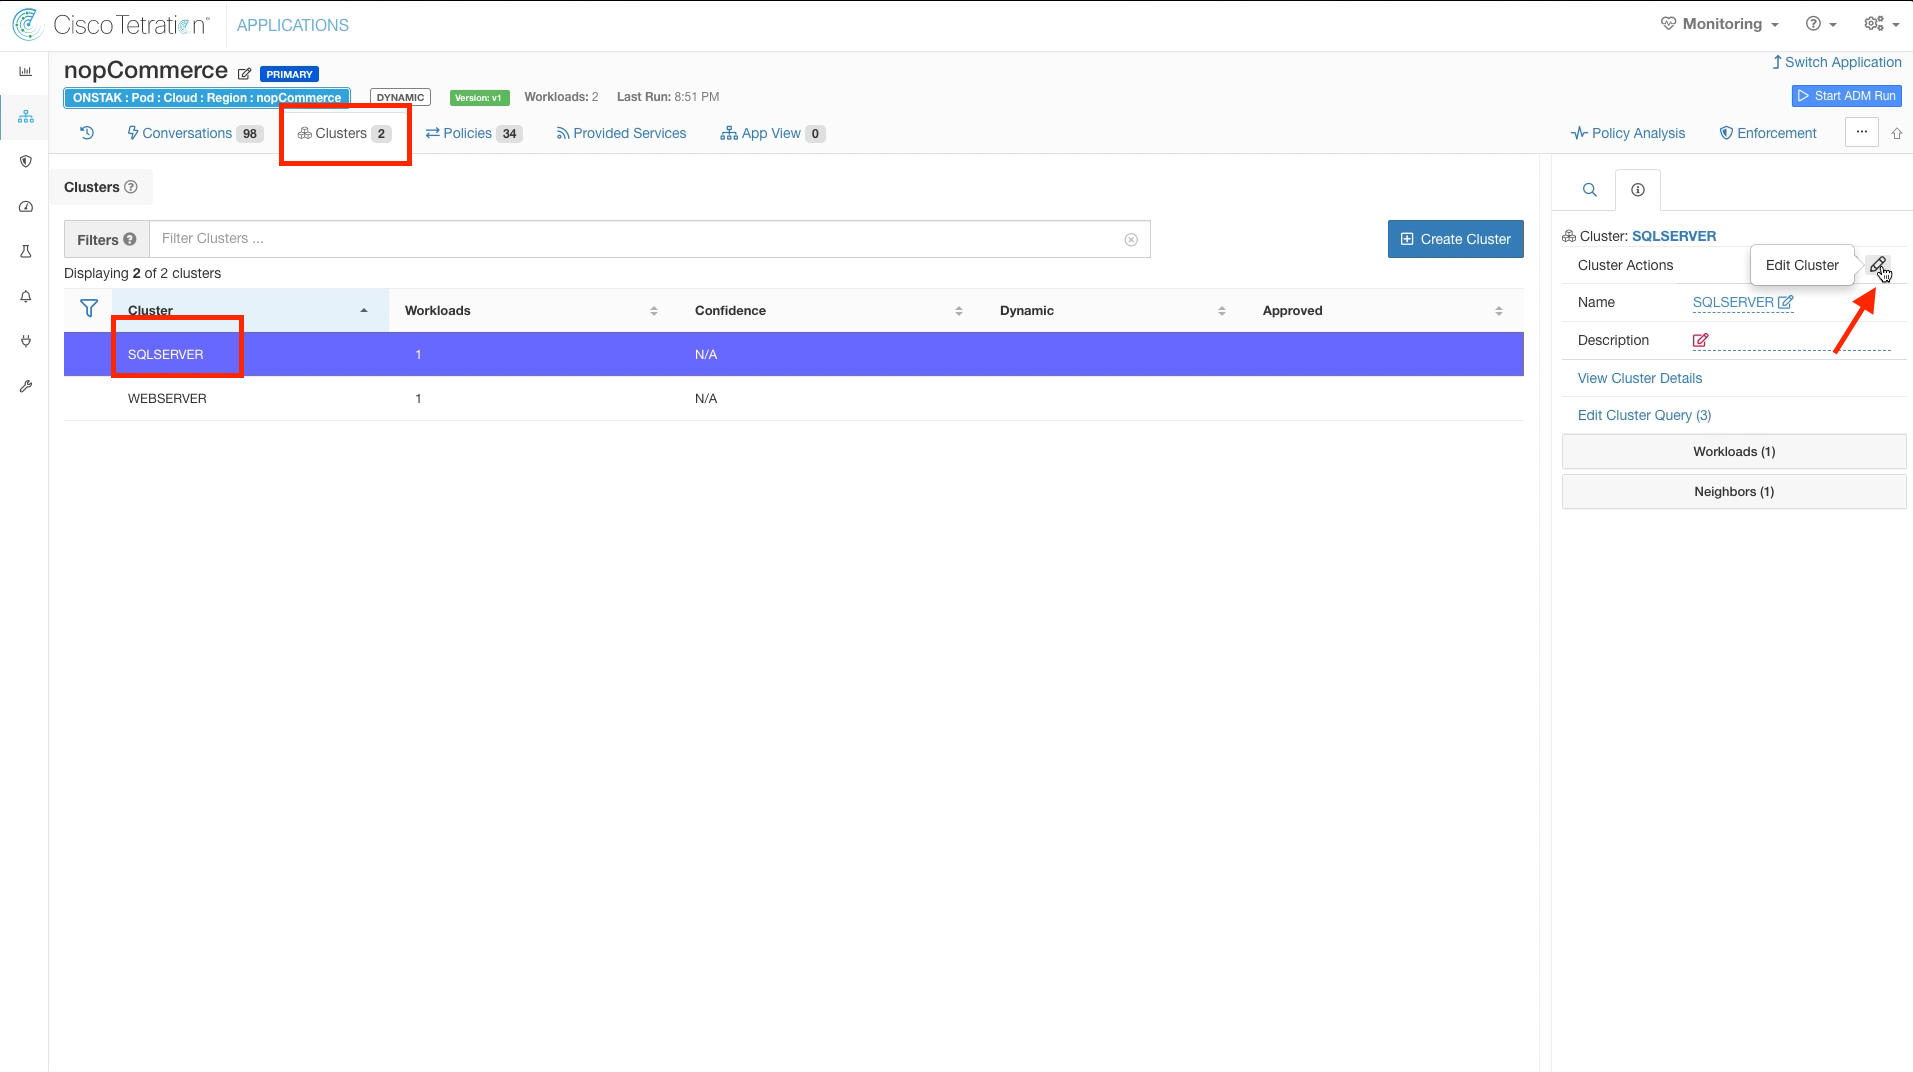
Step 011 - Edit SQLSERVER cluster
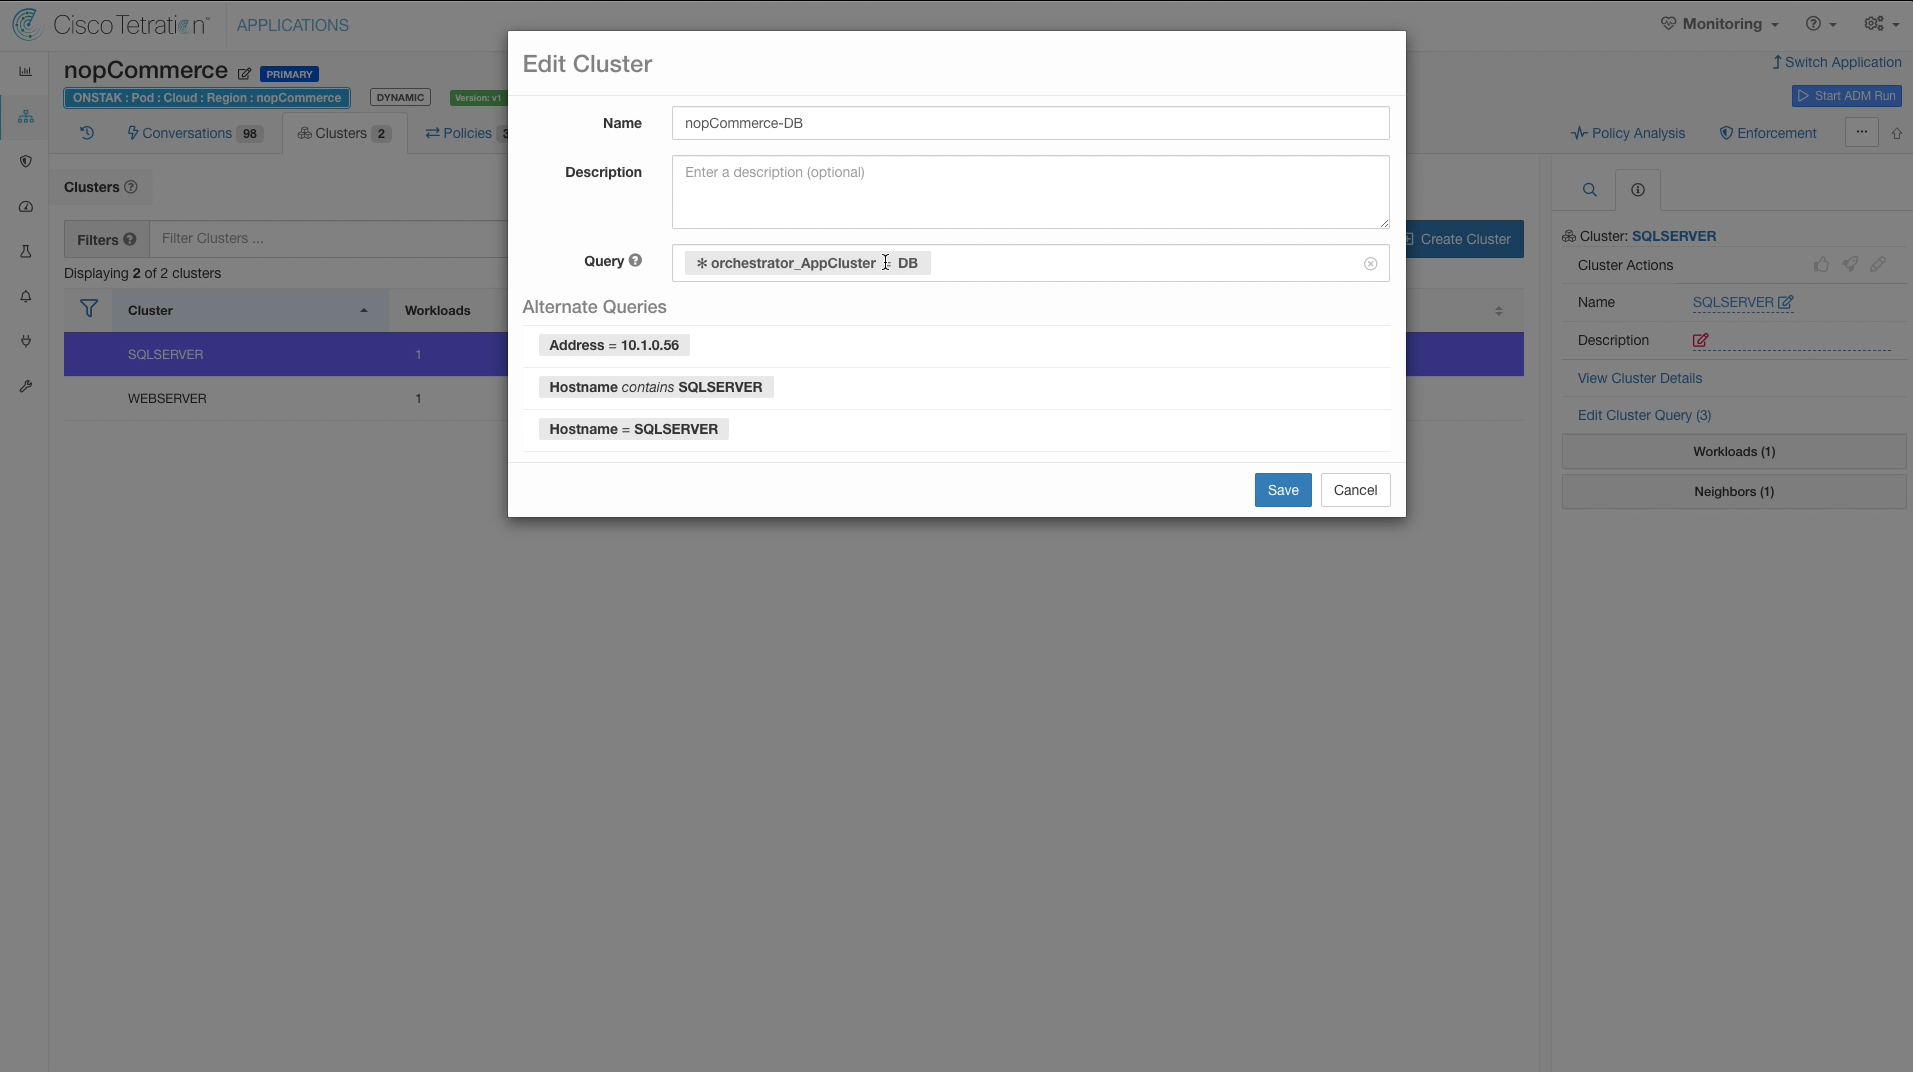
Step 012 - Modify cluster name and query
Step 013 - Edit WEBSERVER cluster
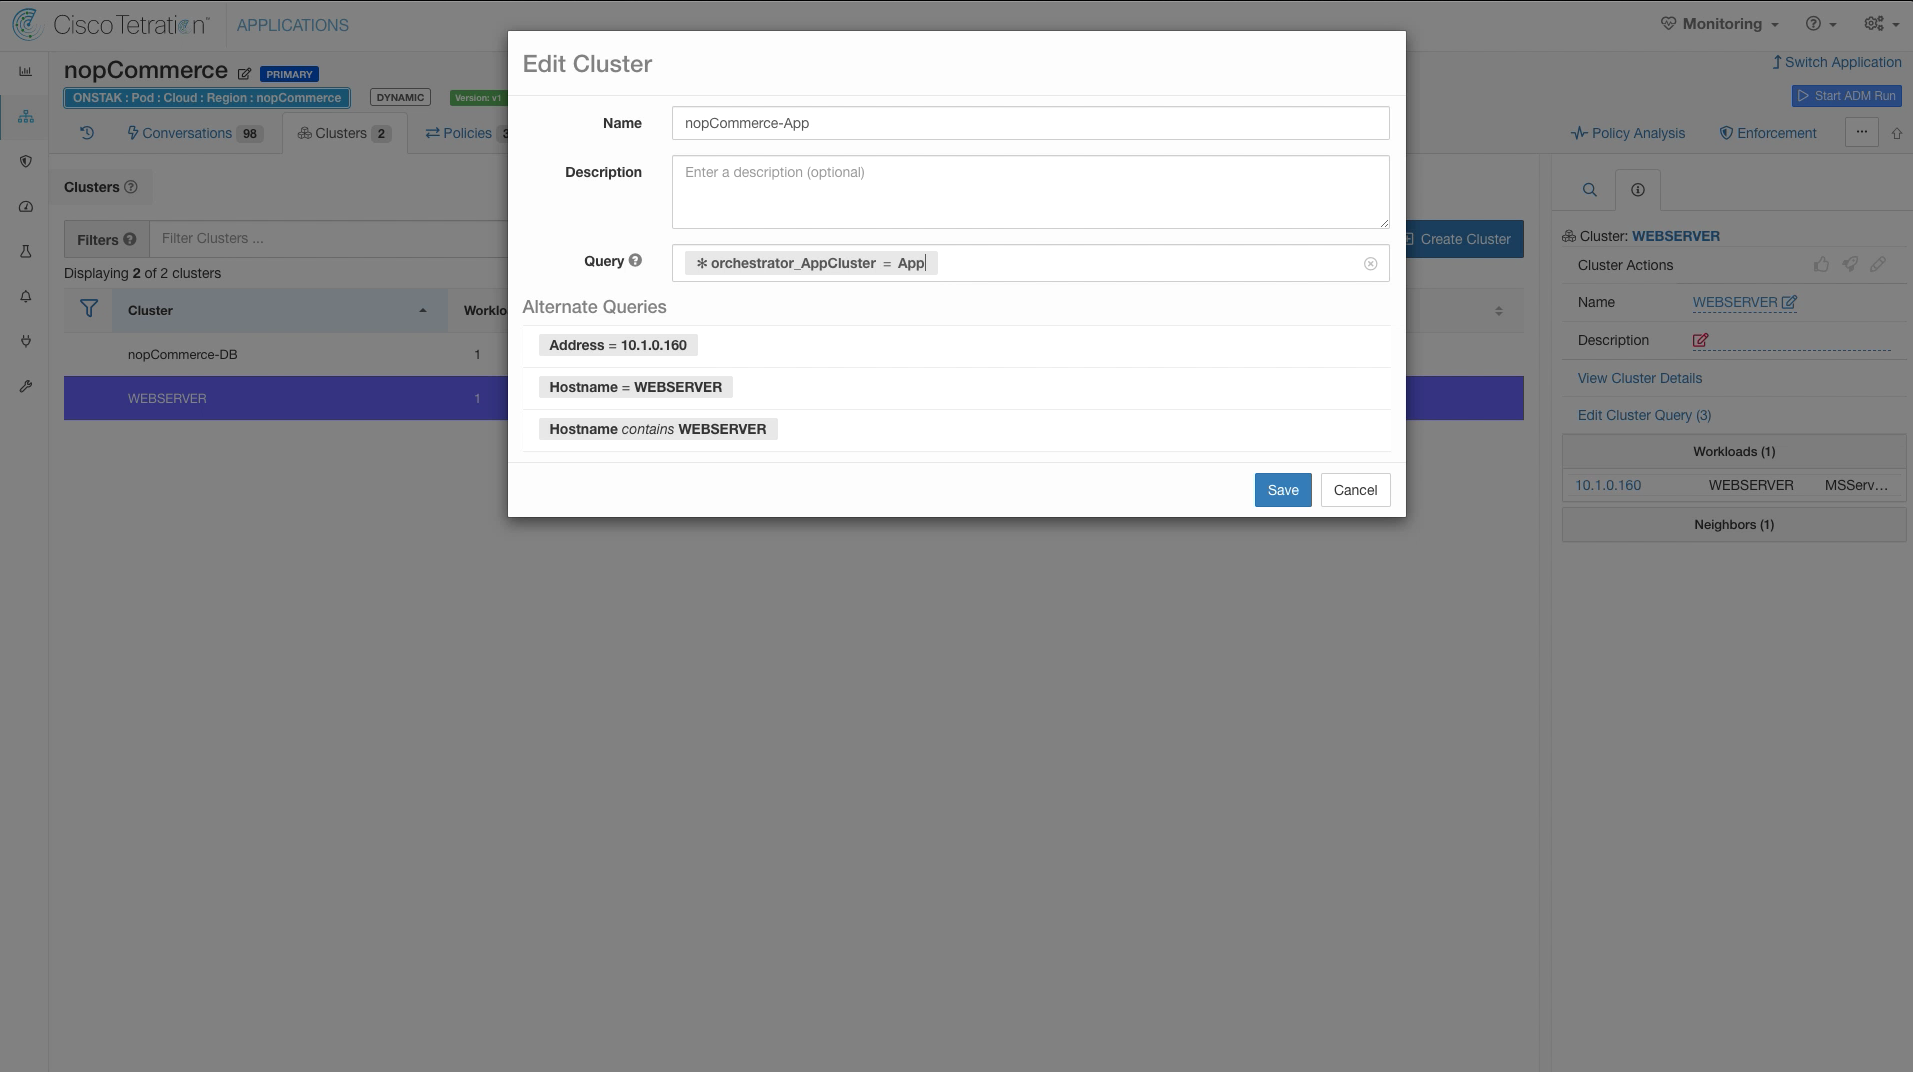
Step 014 - Modify cluster name and query
Step 015 - Promote App cluster to Inventory Filter
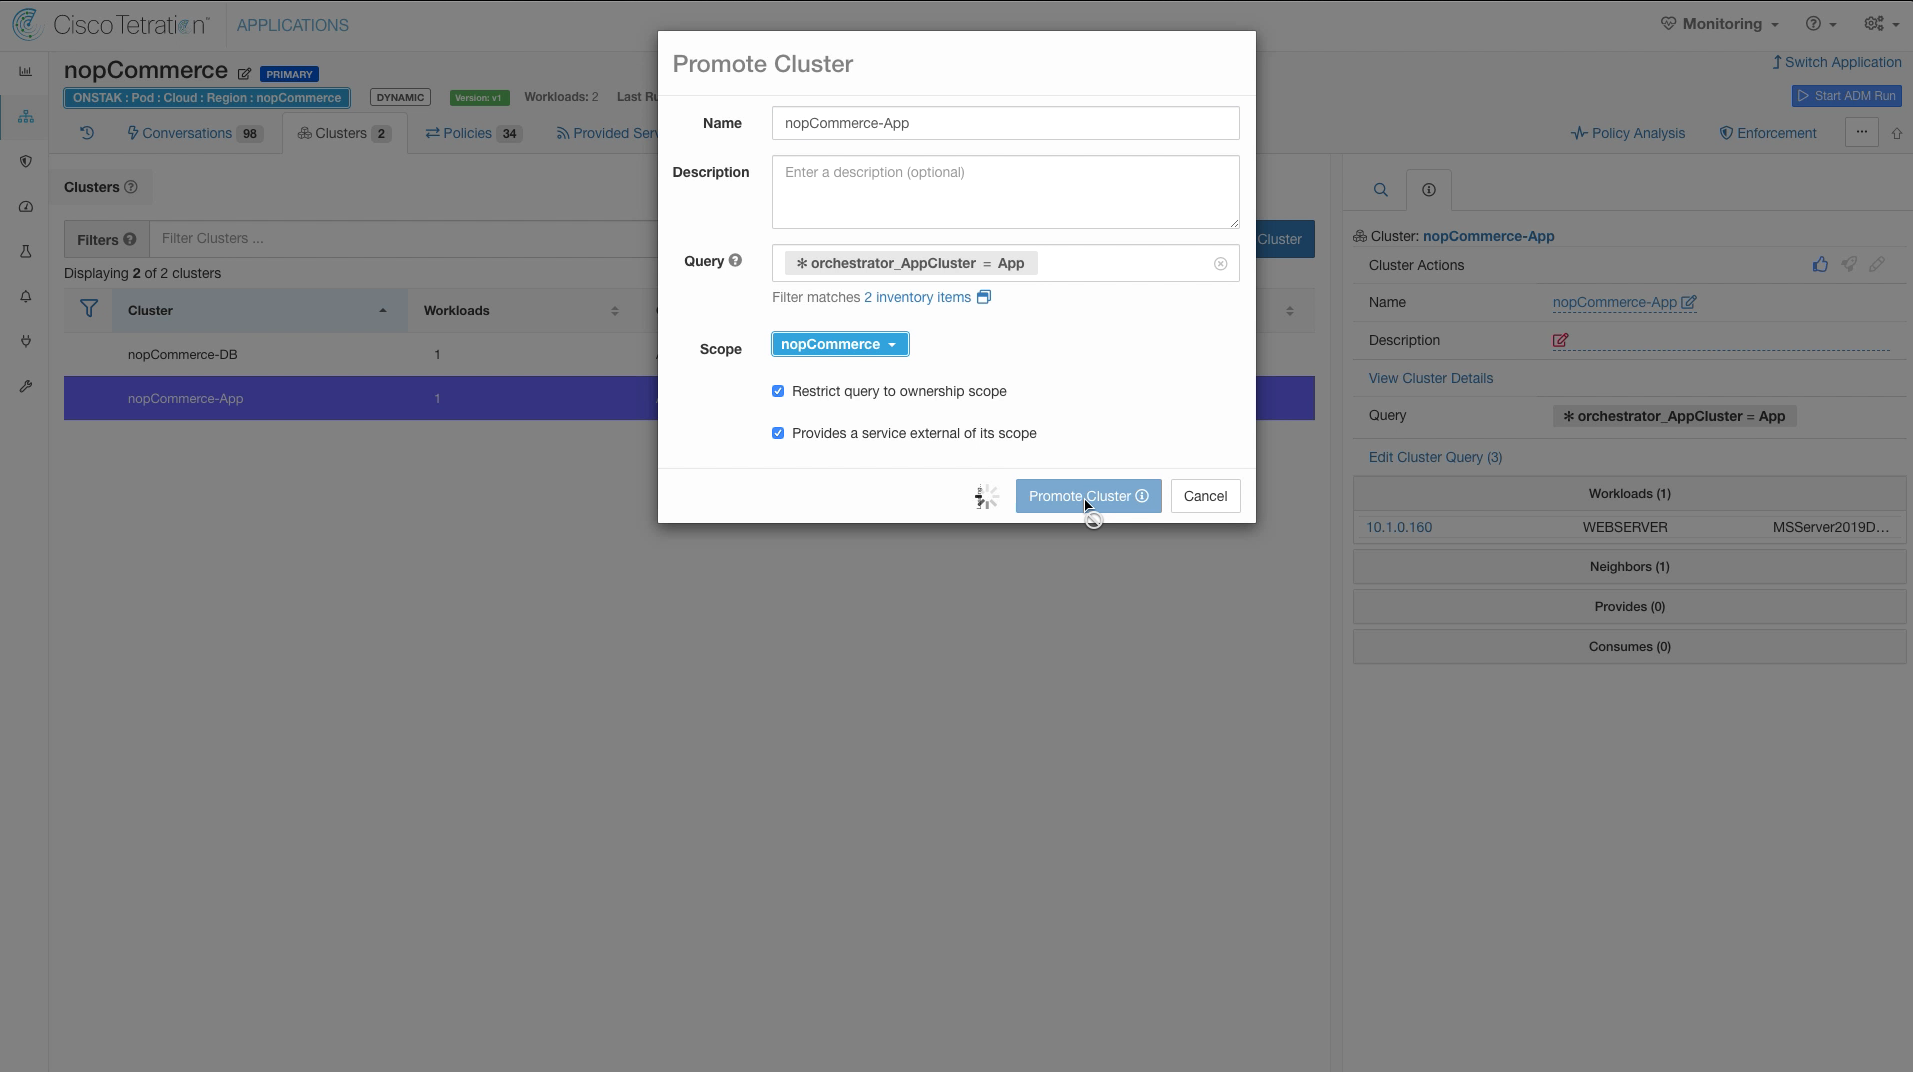
Step 016 - Select Promote Cluster
Step 017 - Promote DB cluster to Inventory filter
Step 018 - Select Promote Cluster
Step 019 - Delete services for nopCommerce-App to Root scope rule
Step 020 - Delete nopCommerce-App to Root scope rule
Step 021 - Delete services for nopCommerce-DB to Root scope rule
Step 022 - Delete nopCommerce-DB to Root scope rule
Step 023 - Delete individual ports in Win ephemeral port range
Step 024 - Add Windows ephemeral port range
Step 025 - Delete individual ports and add Windows ephemeral port range
Step 026 - Modify Root scope to nopCommerce App rule for TCP 80, 443
Step 027 - Change Root scope to Any
Step 028 - Select to Switch Application
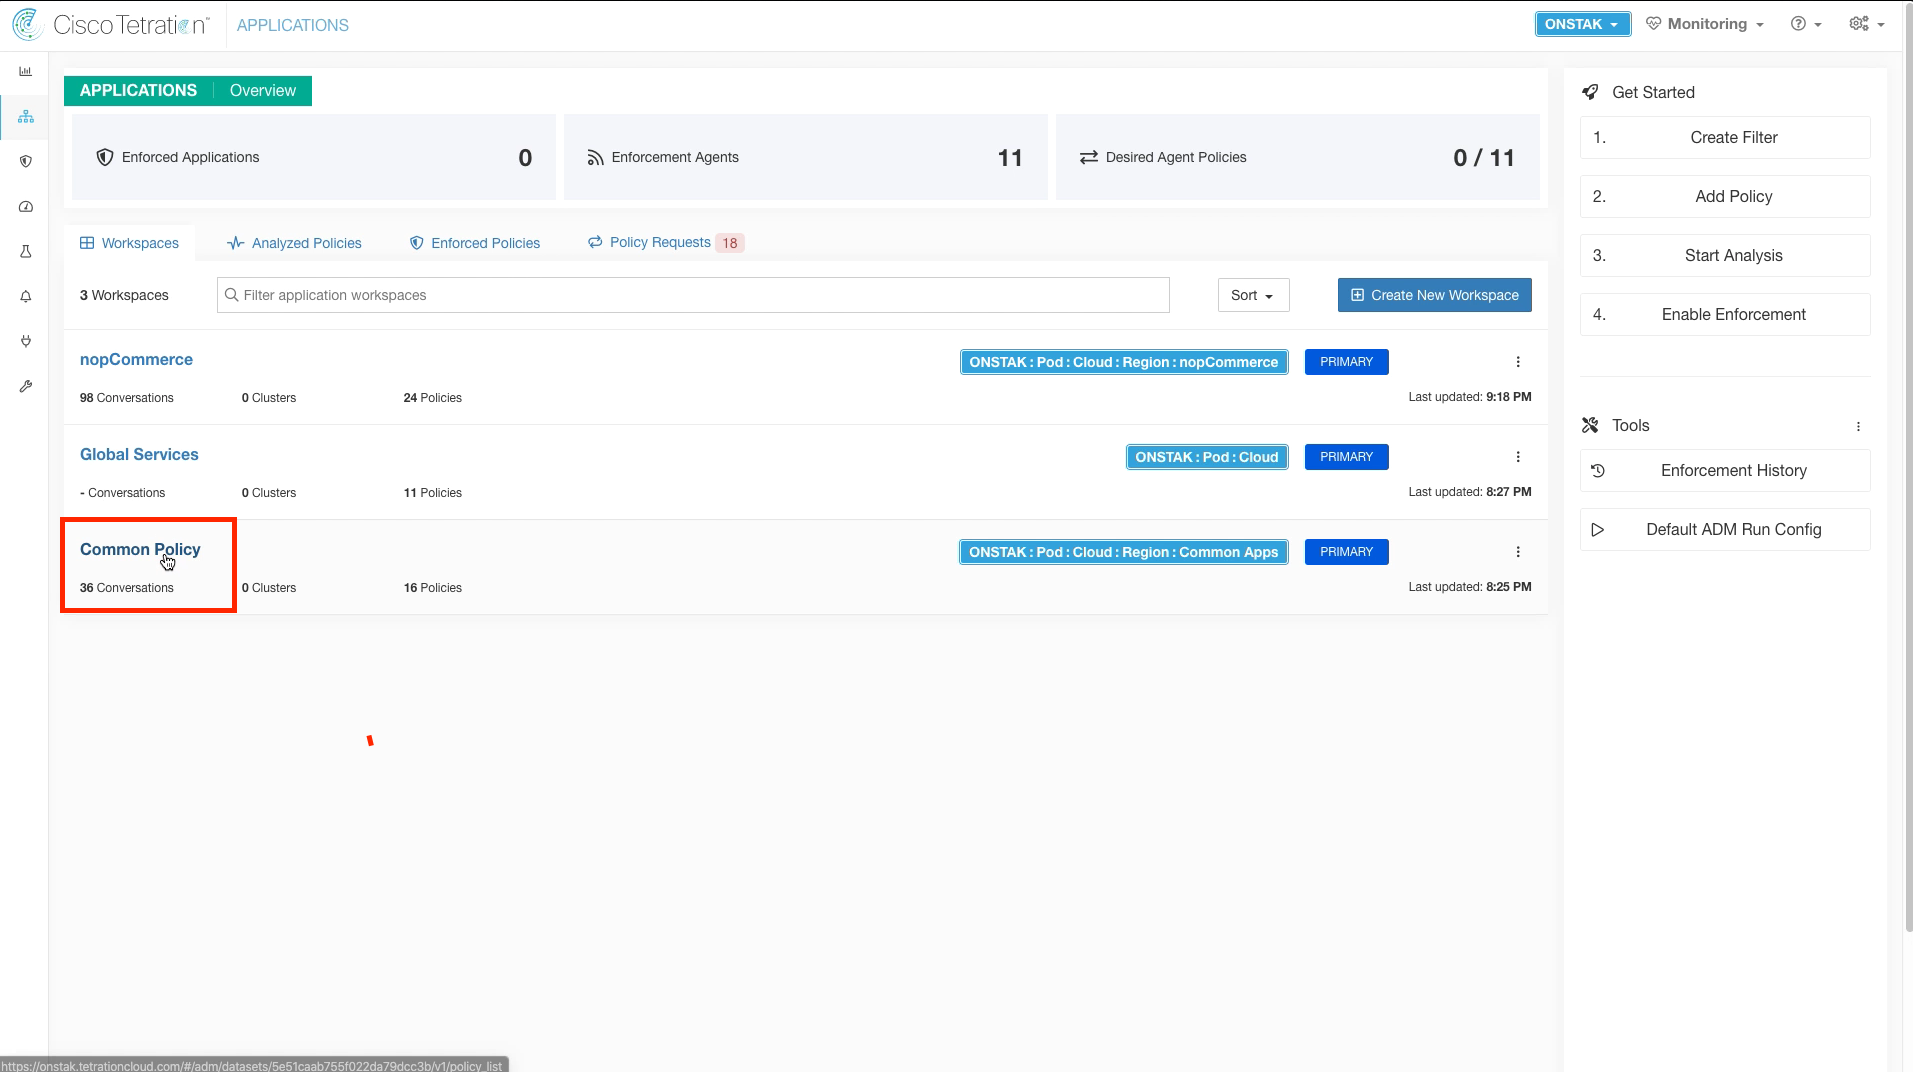
Step 029 - Navigate to Common Policy
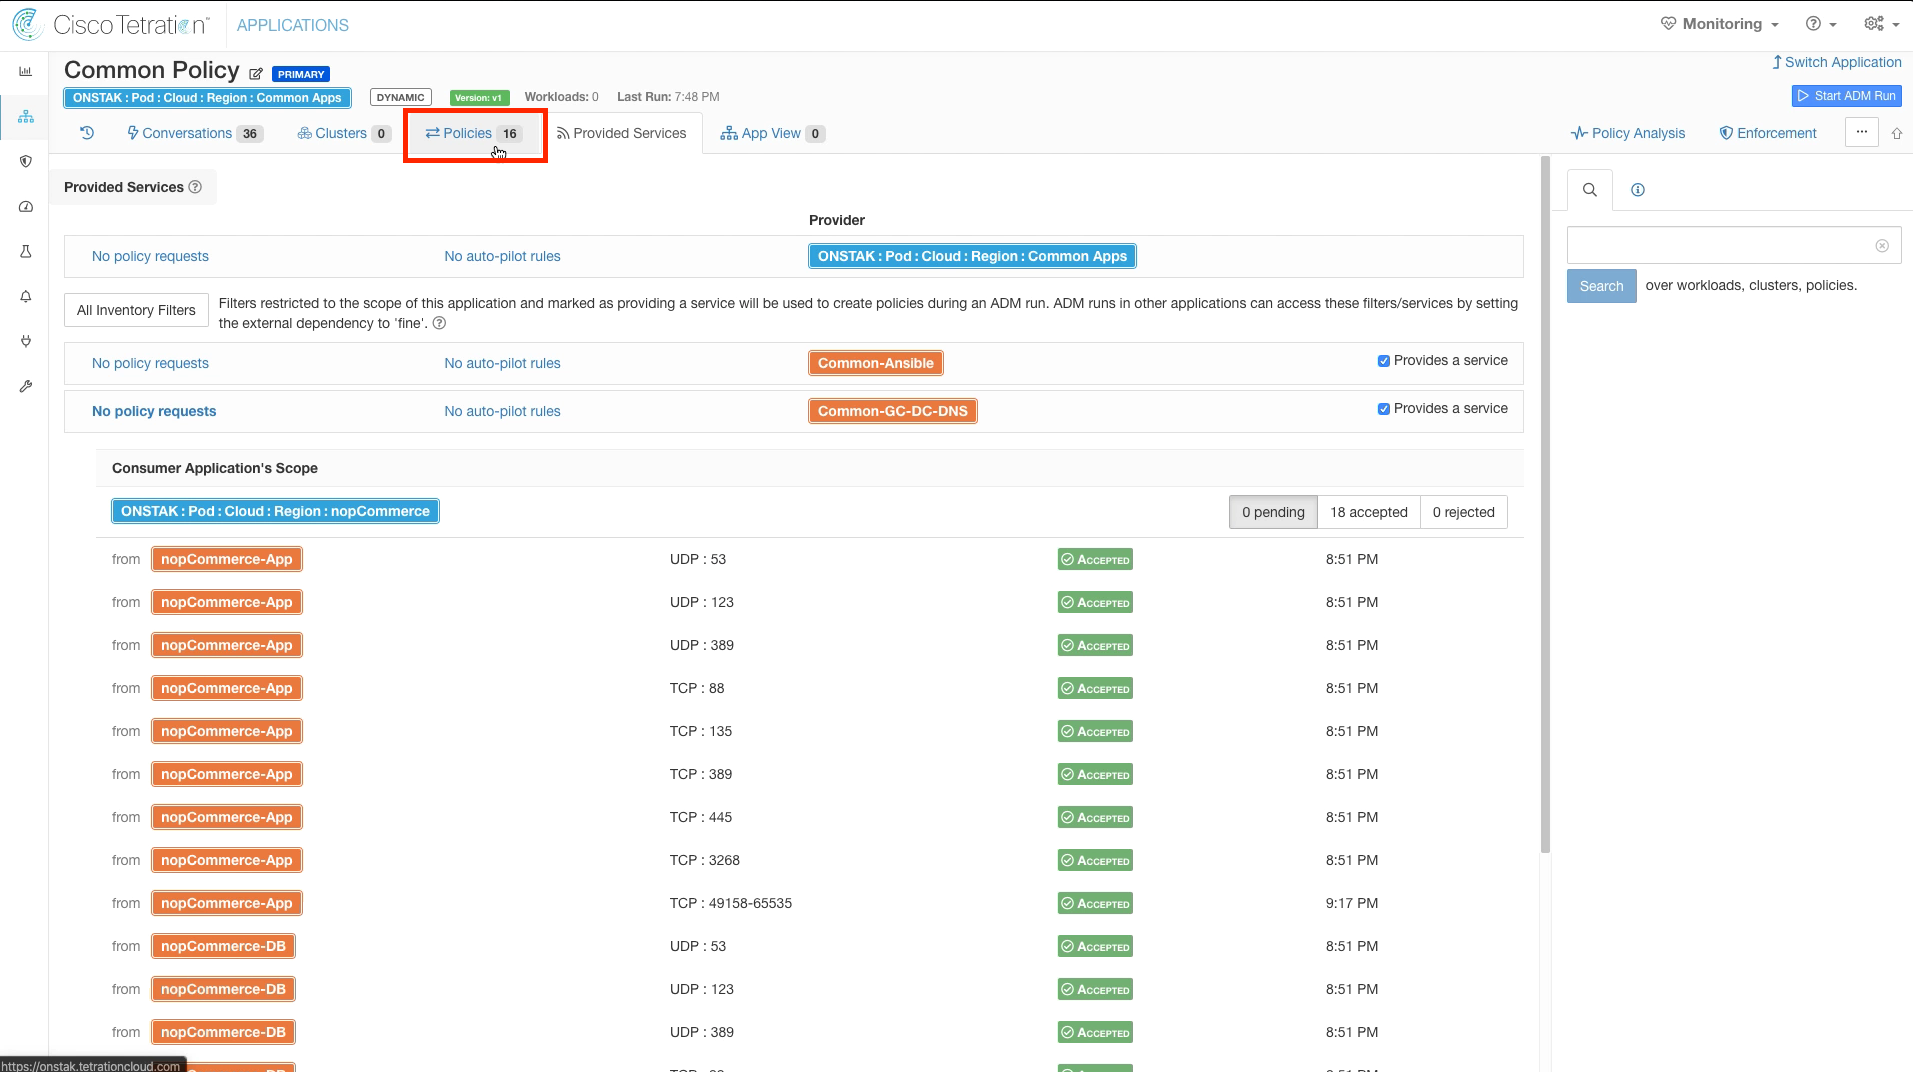
Step 030 - Click on Provided Services
Step 031 - View Policy Requests
Step 032 - Accept all Policy Requests
Step 033 - View Policies
Step 034 - View the rules and services created by accepting the Policy Requests - Common Policy
Step 035 - View the rules and services created by accepting the Policy Requests - Common Policy
Step 036 - View the rules and services created by accepting the Policy Requests - nopCommerce
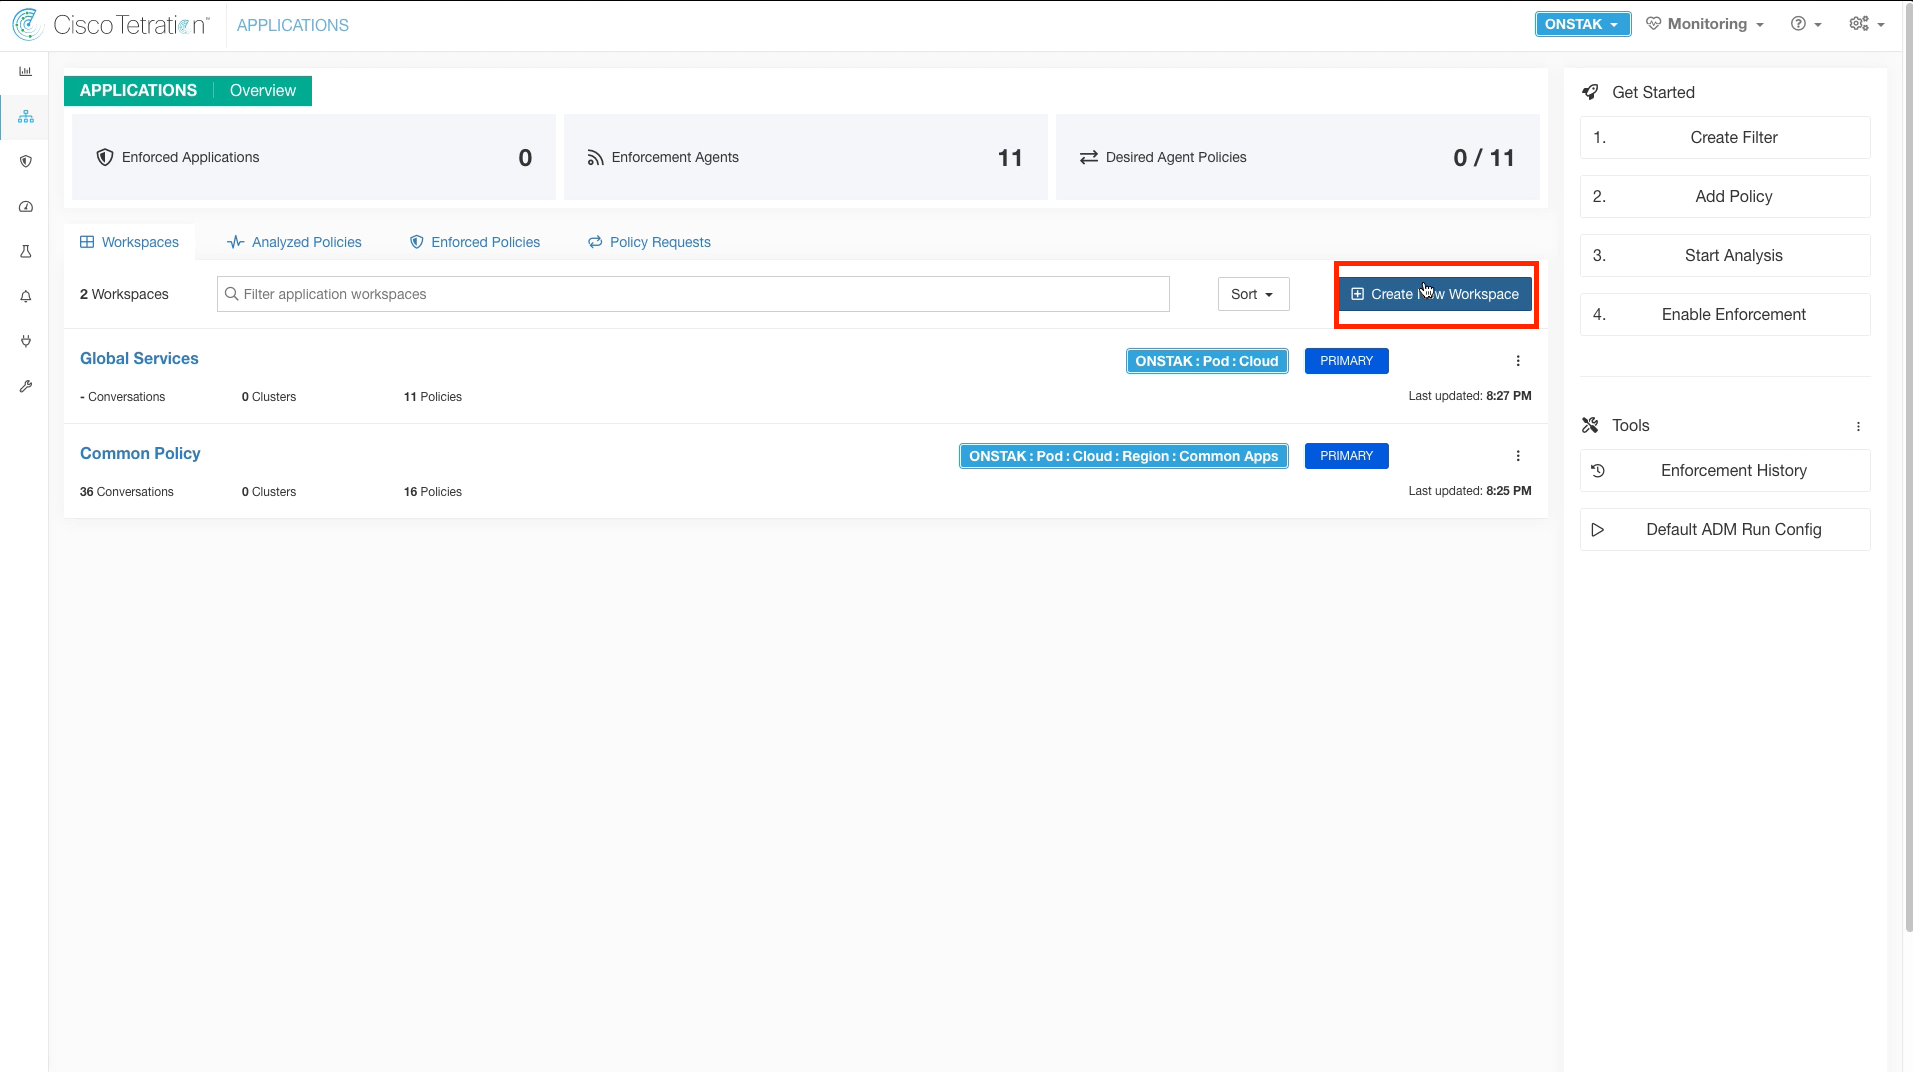
Navigate to Applications.
Create a new Application Workspace.
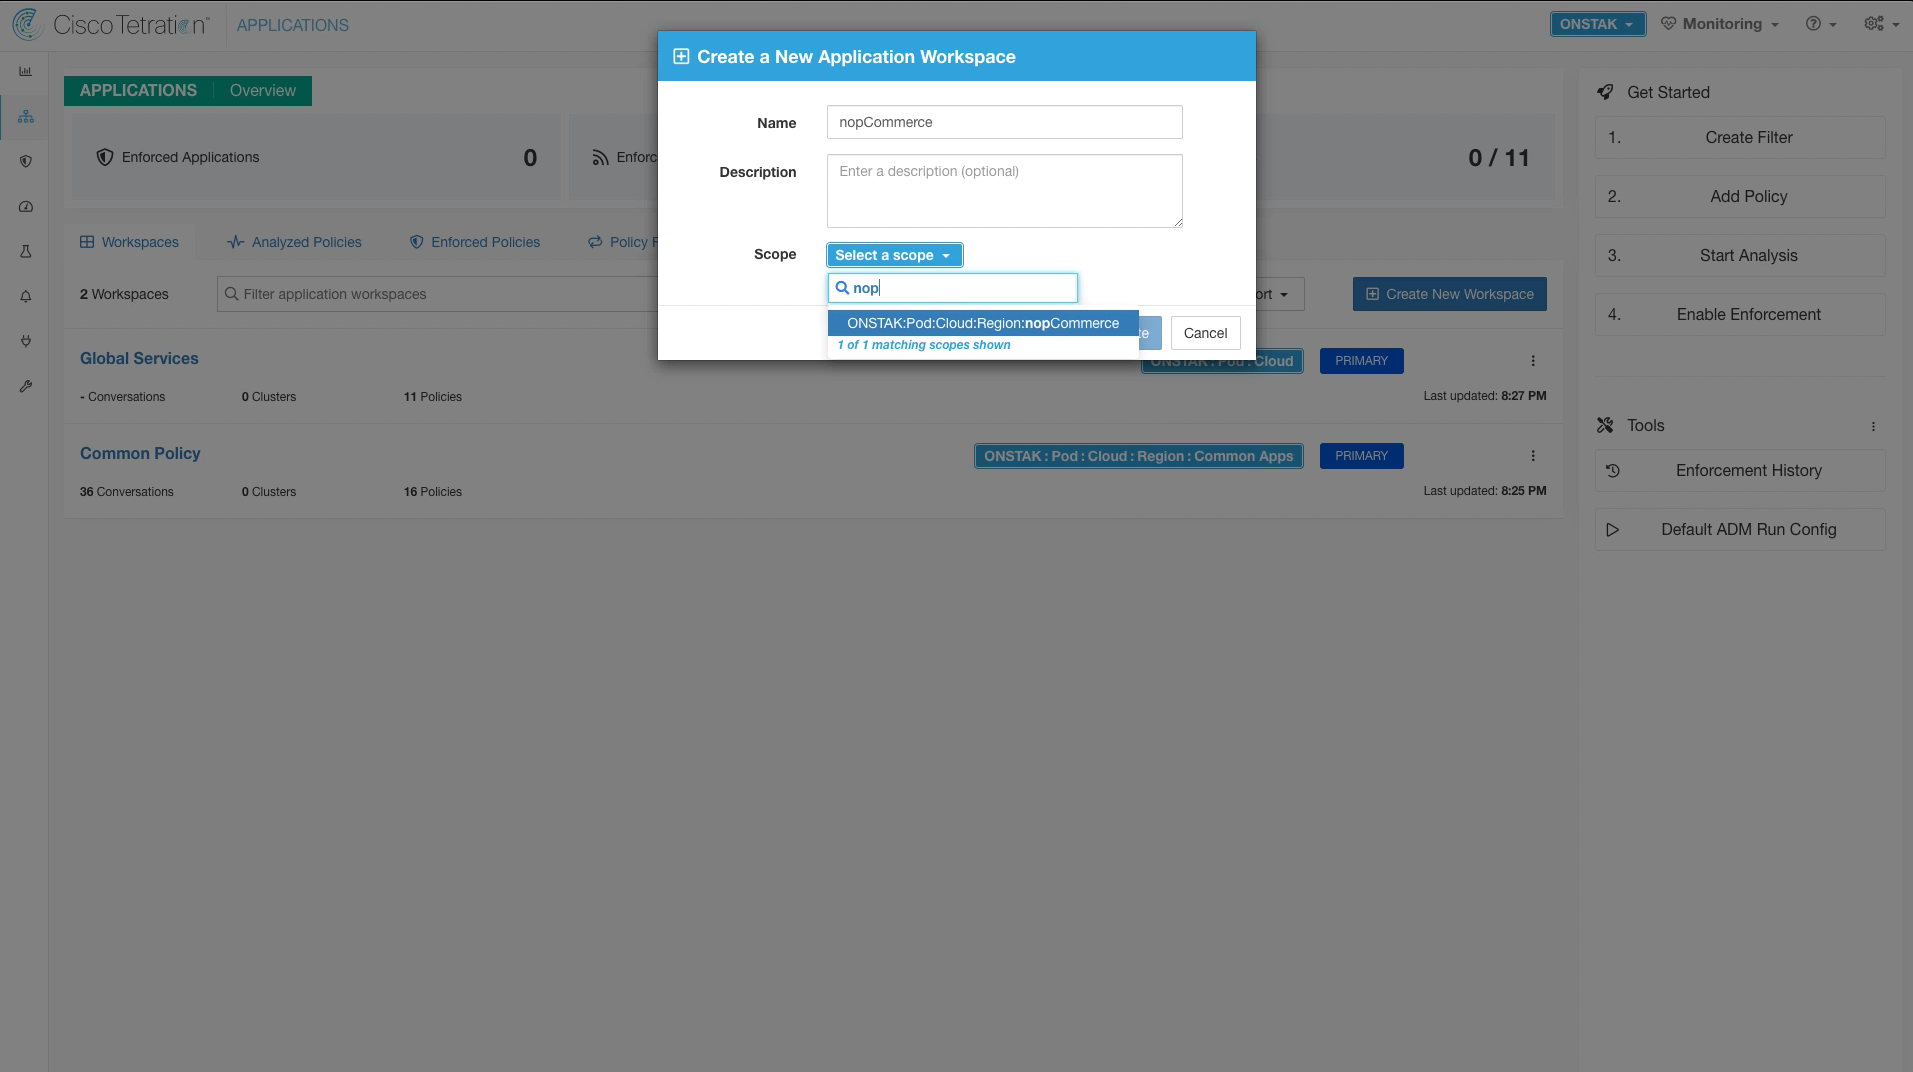
Name the Application Workspace nopCommerce and set the Scope to nopCommerce.
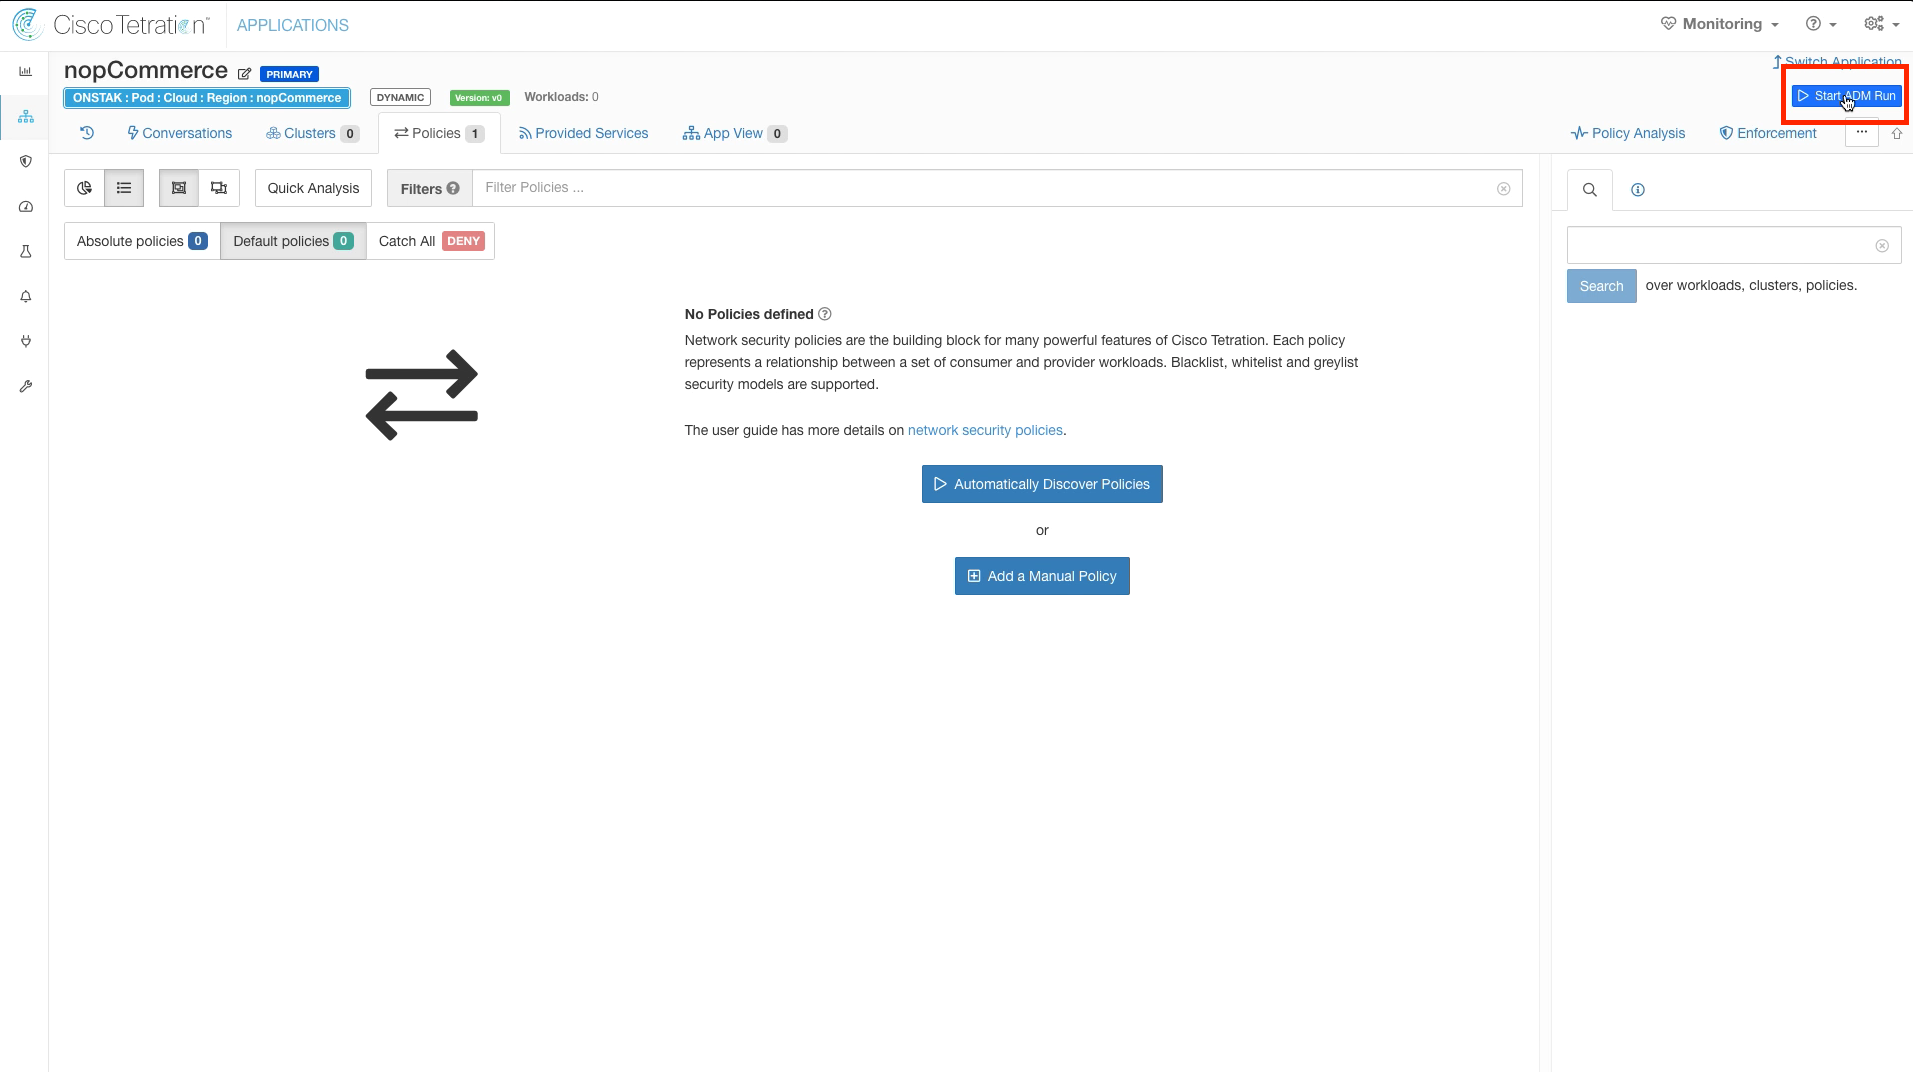
Select Start ADM Run.
Click the Show button under Member workloads to display the associated machines. The Microsoft IIS and SQL servers should be shown here.

Expand External Dependencies and set the scopes for Common Apps and the Root scope to Fine.
The External Dependencies Coarse/Fine setting controls whether rules that include inventory that exists in other Scopes will be toward the Scope or toward clusters. Since we have promoted the clusters in the Common Policy scope to Inventory Filters, it makes sense to change this setting to Fine so any rules will be built toward the individual clusters rather than the entire scope. Leaving the default setting of Coarse will create a more broad policy which would allow access to all workloads in the target Scope, regardless of the cluster grouping.
Expand Advanced Configurations and set the Cluster Granularity to Very Fine.
Change the time range for the ADM run to six hours, and then submit the ADM run.
Once the ADM run is complete, select the ADM results available link.
Click to expand the SQLSERVER and WEBSERVER clusters. The clusters should contain the MS SQL server IP and the IIS server IP addresses respectively.
Click on the SQLSERVER cluster and select the pencil icon to edit the cluster.
Enter the cluster name and query as shown in the below image.
Click on the WEBSERVER cluster and select the pencil icon to edit the cluster.

Enter the cluster name and query as shown in the below image.
Click the rocket ship icon to promote the nopCommerce-App cluster to an Inventory Filter.
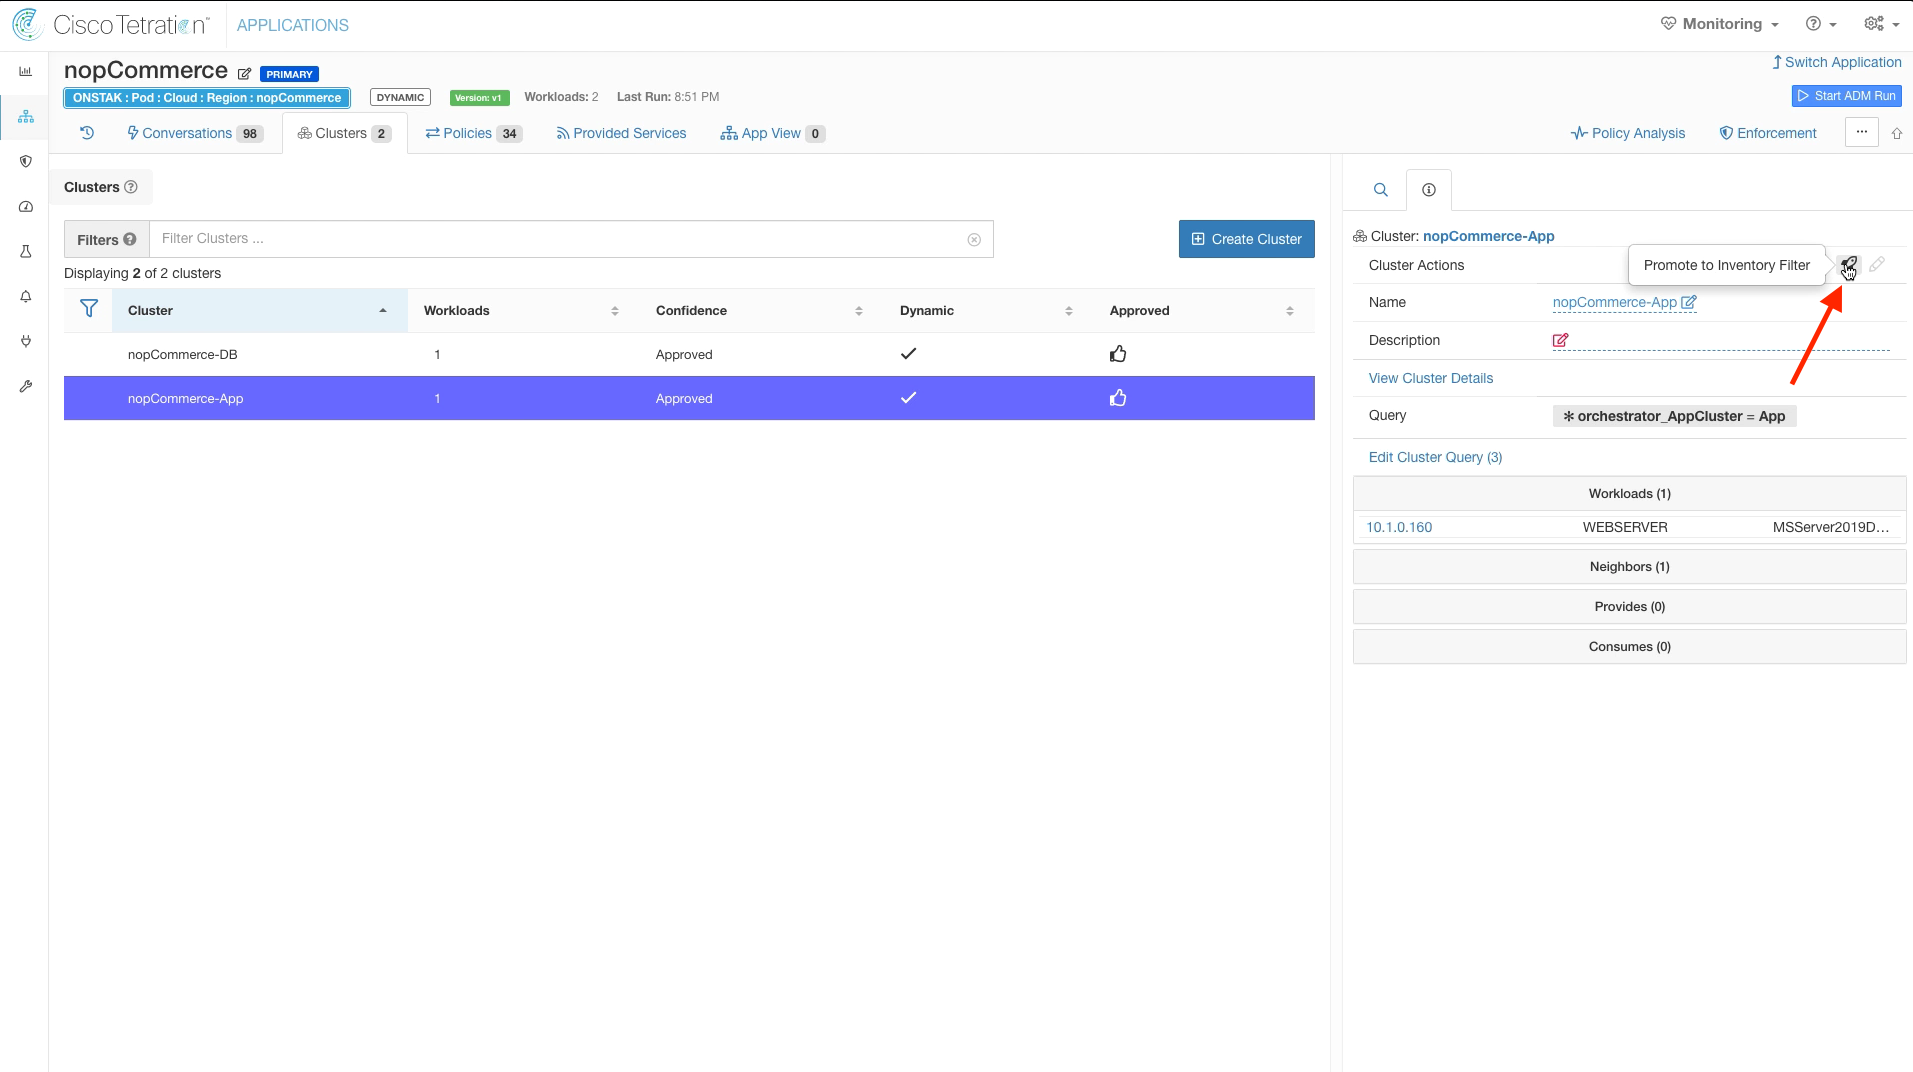
No changes are required here, select Promote Cluster.
Select the nopCommerce-DB cluster and promote it to an Inventory Filter.
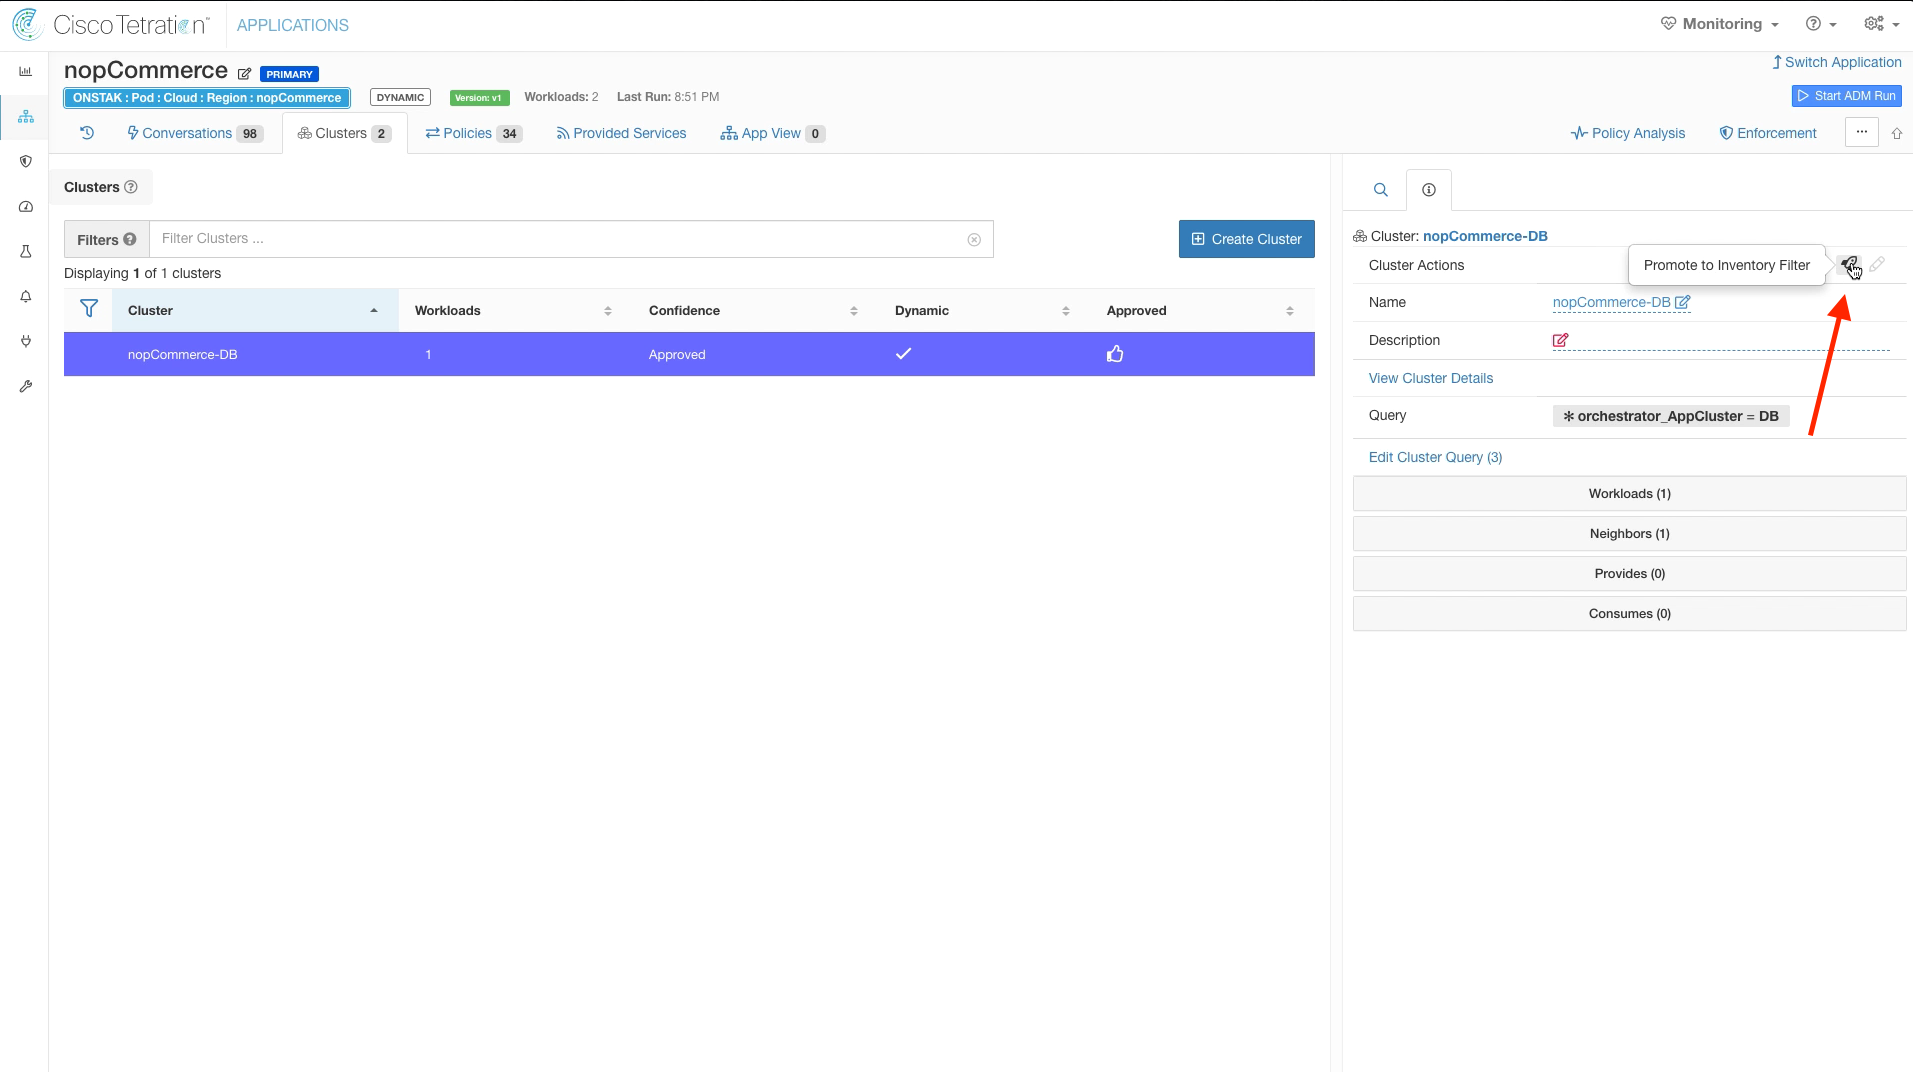
No changes are required here, click on Promote Cluster.

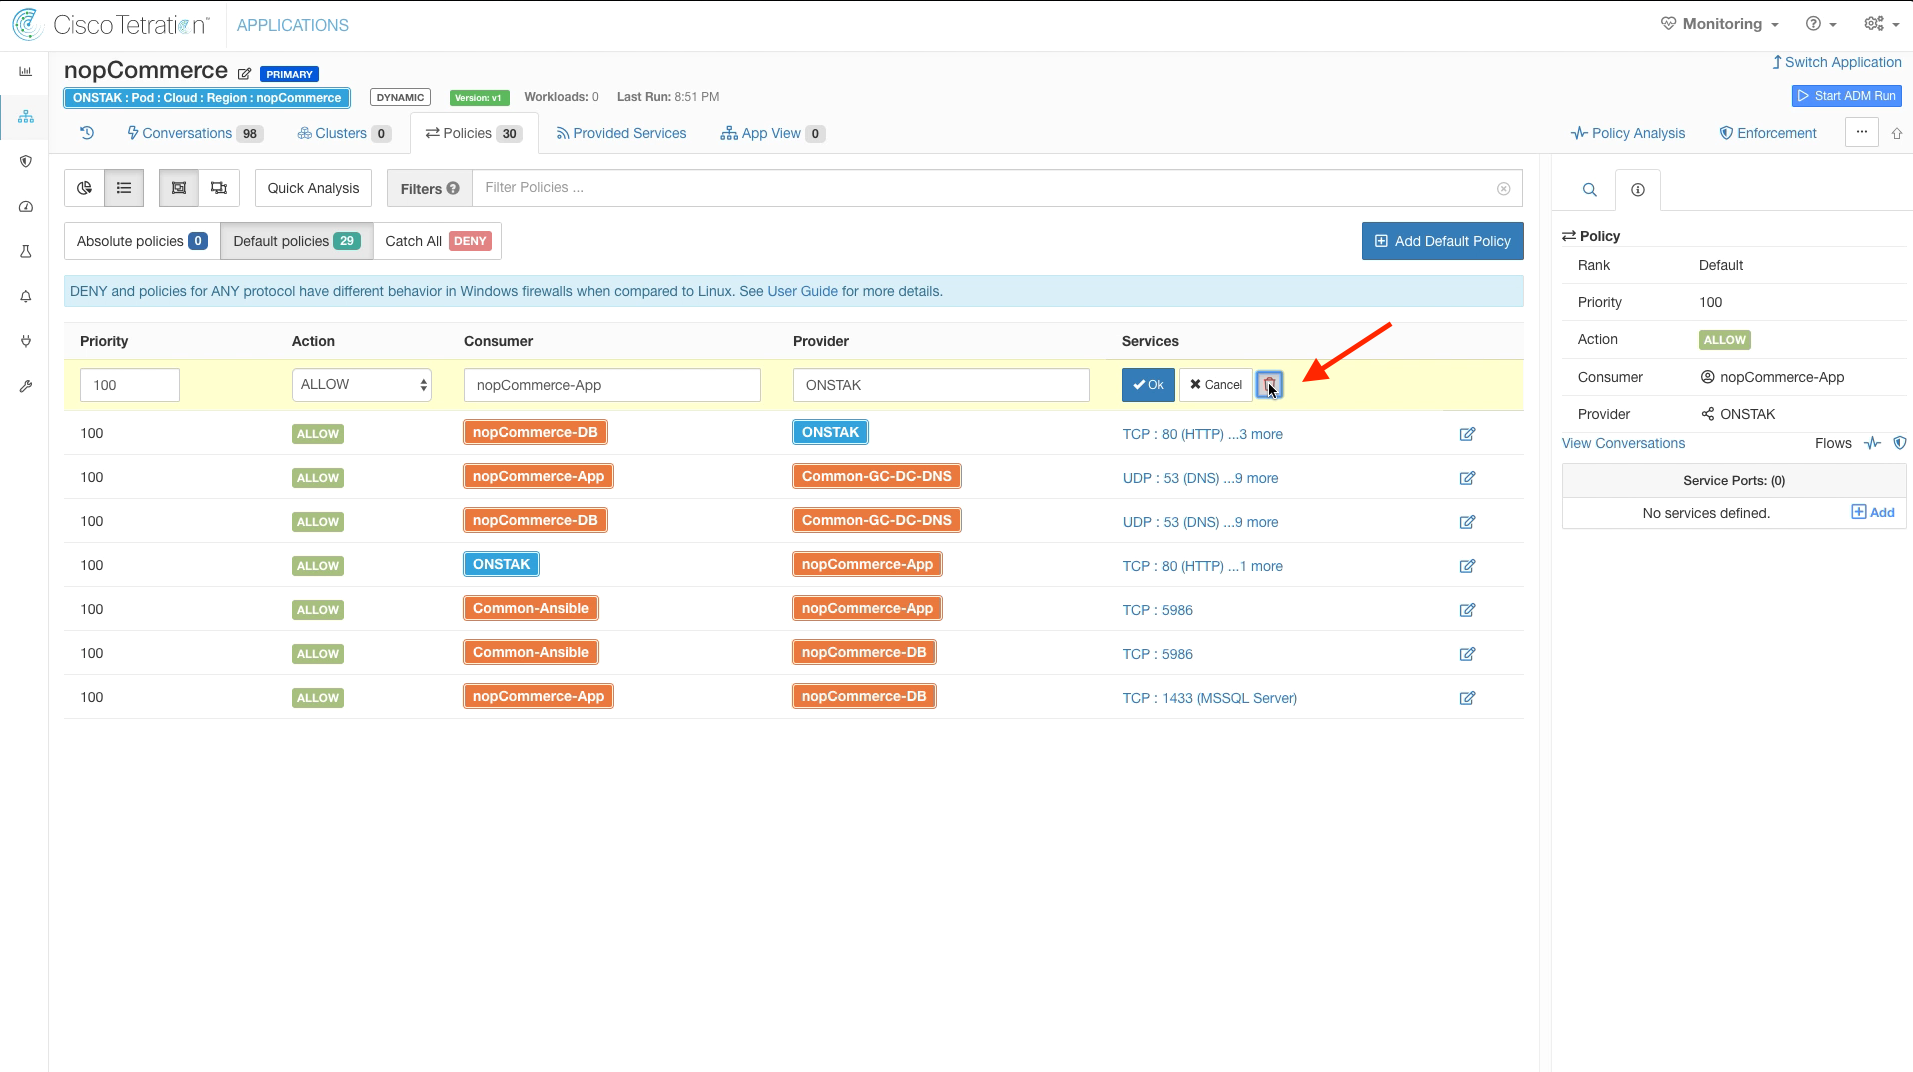
We will now begin manually tuning the policies that were generated by the ADM run. Click on the Policies tab. We can delete the first two rules that are from nopCommerce-App and nopCommerce-DB to the Root Scope on TCP ports 80, 443, 123, and 138. Recall that these rules are actually covered by our Global Services policies permitting outbound access to the Internet on these ports from Any-Internal.
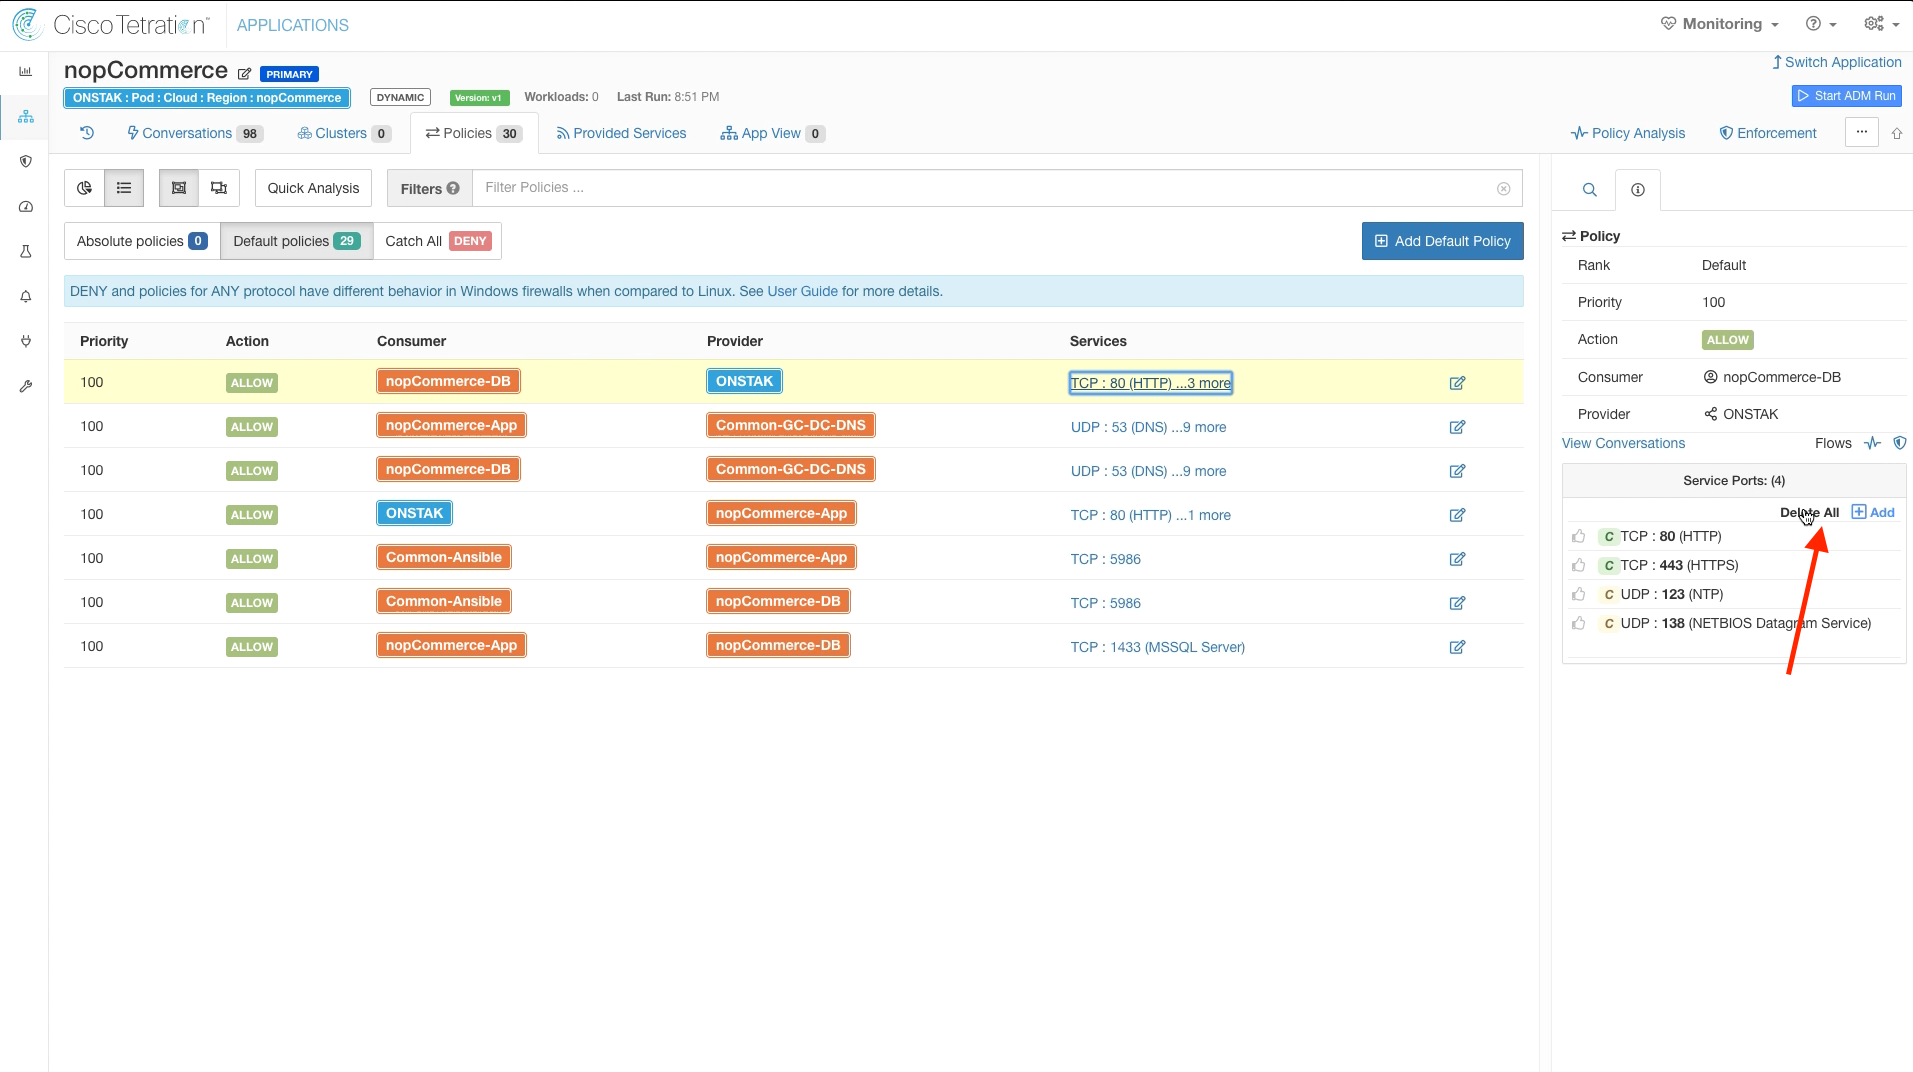
Delete all services from the rule with nopCommerce-App as Consumer and the Root scope as Provider.
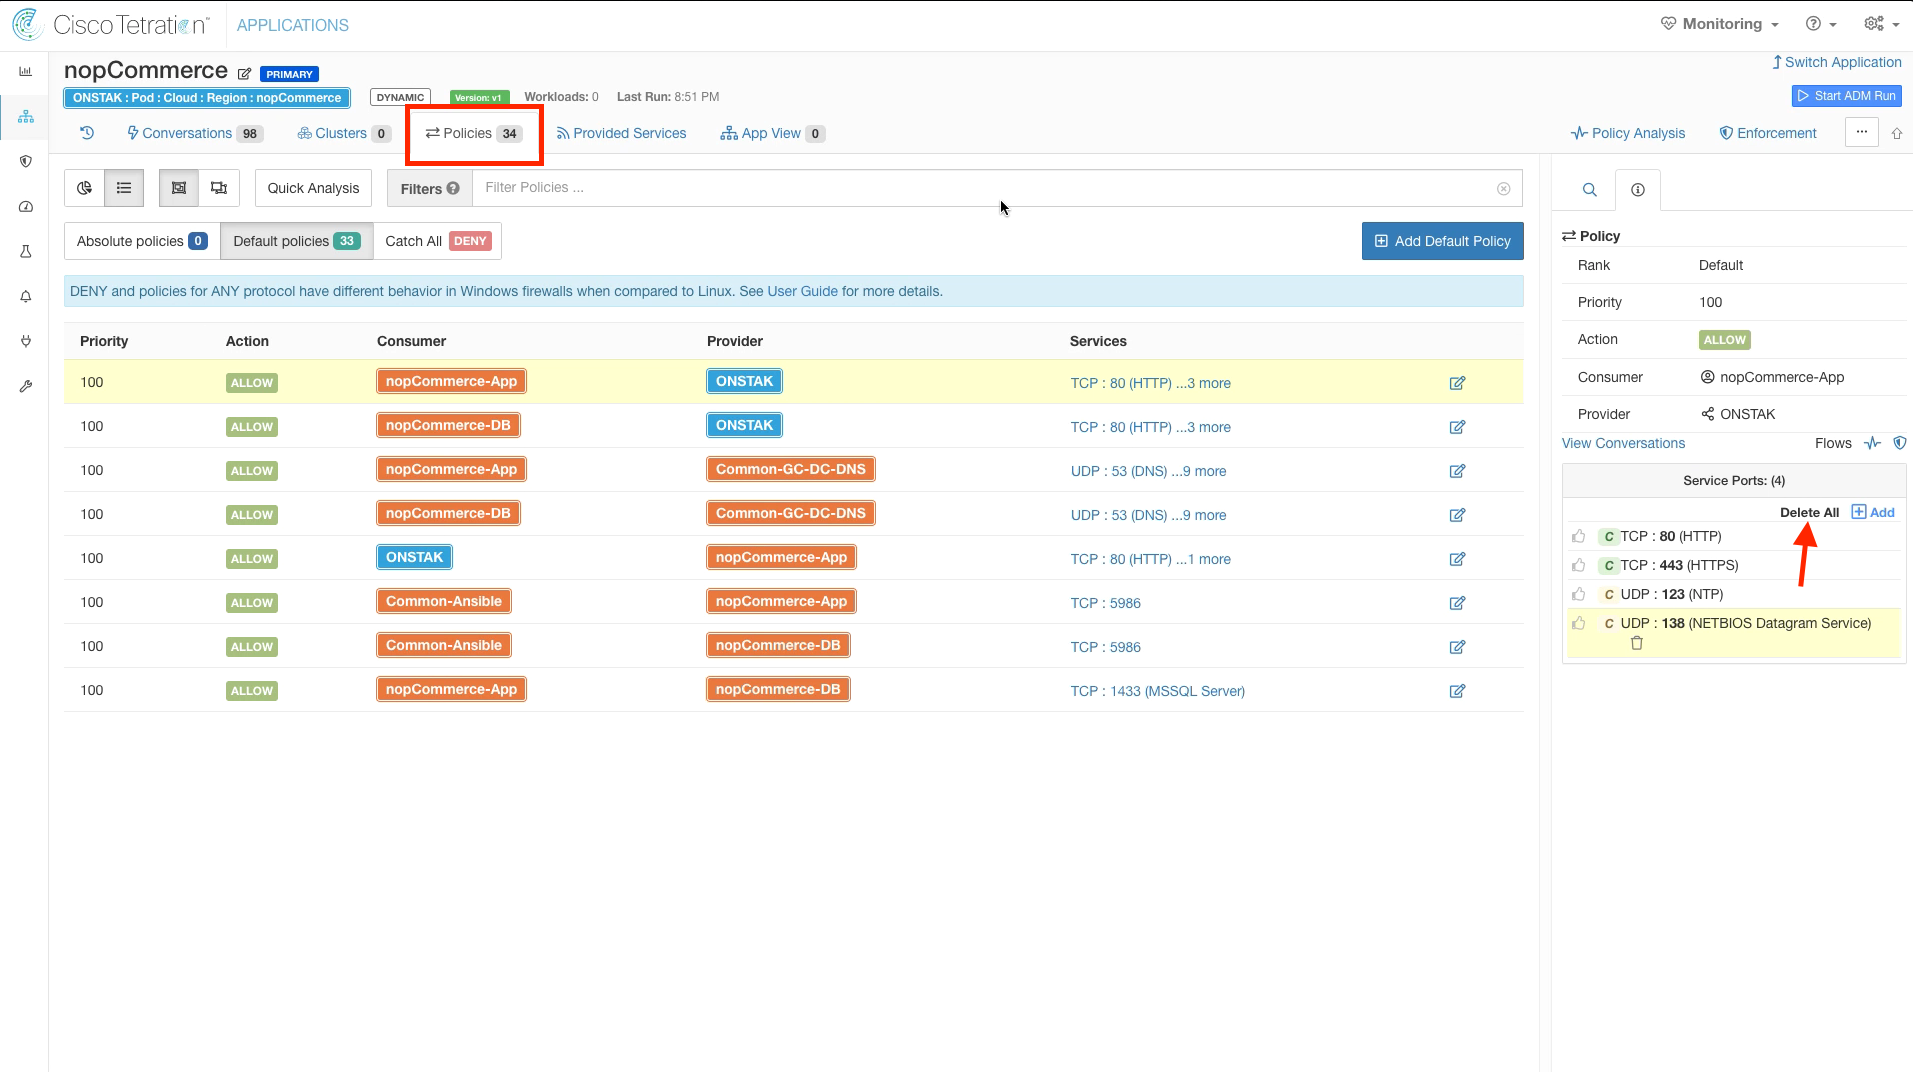
Click to edit the rule and then click the trash can to delete it.
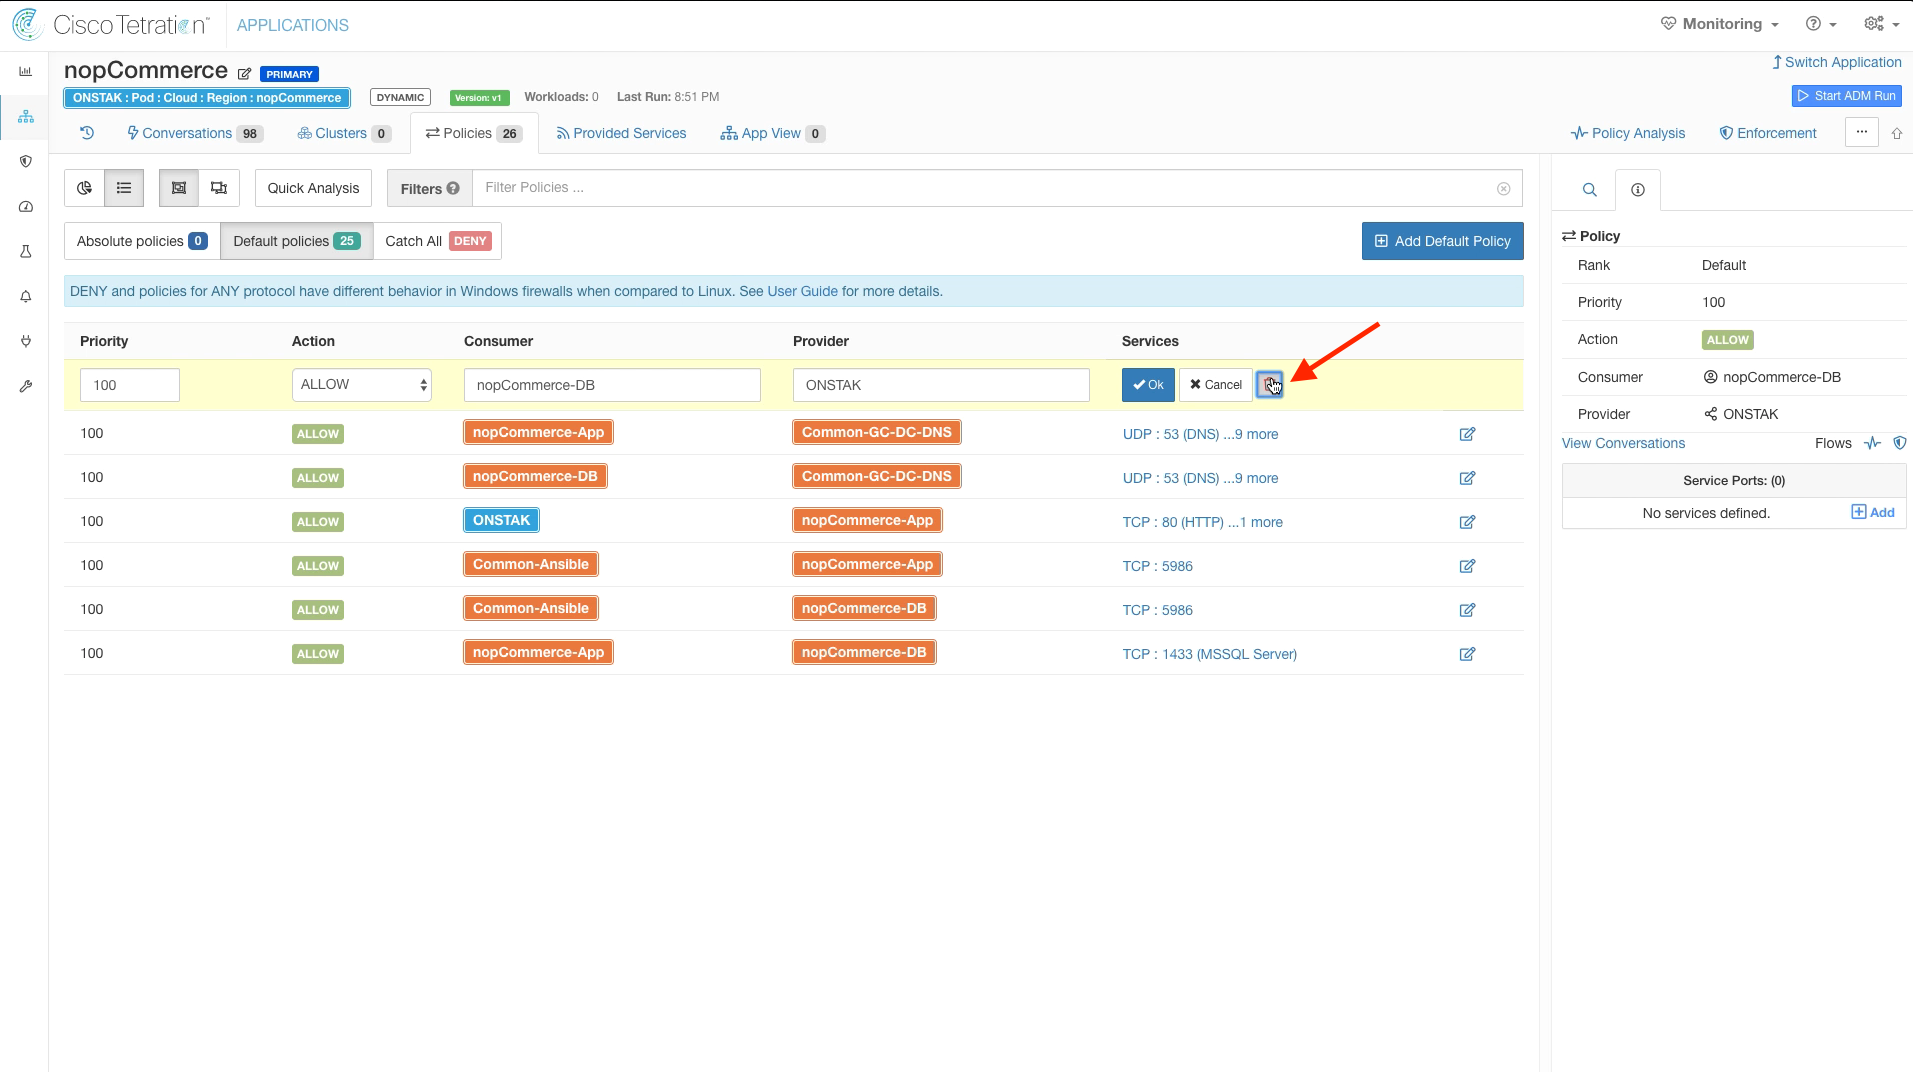
Delete all services from the rule with nopCommerce-DB as Consumer and the Root scope as Provider.
Click to edit the rule, and then click the trash can to delete the rule.
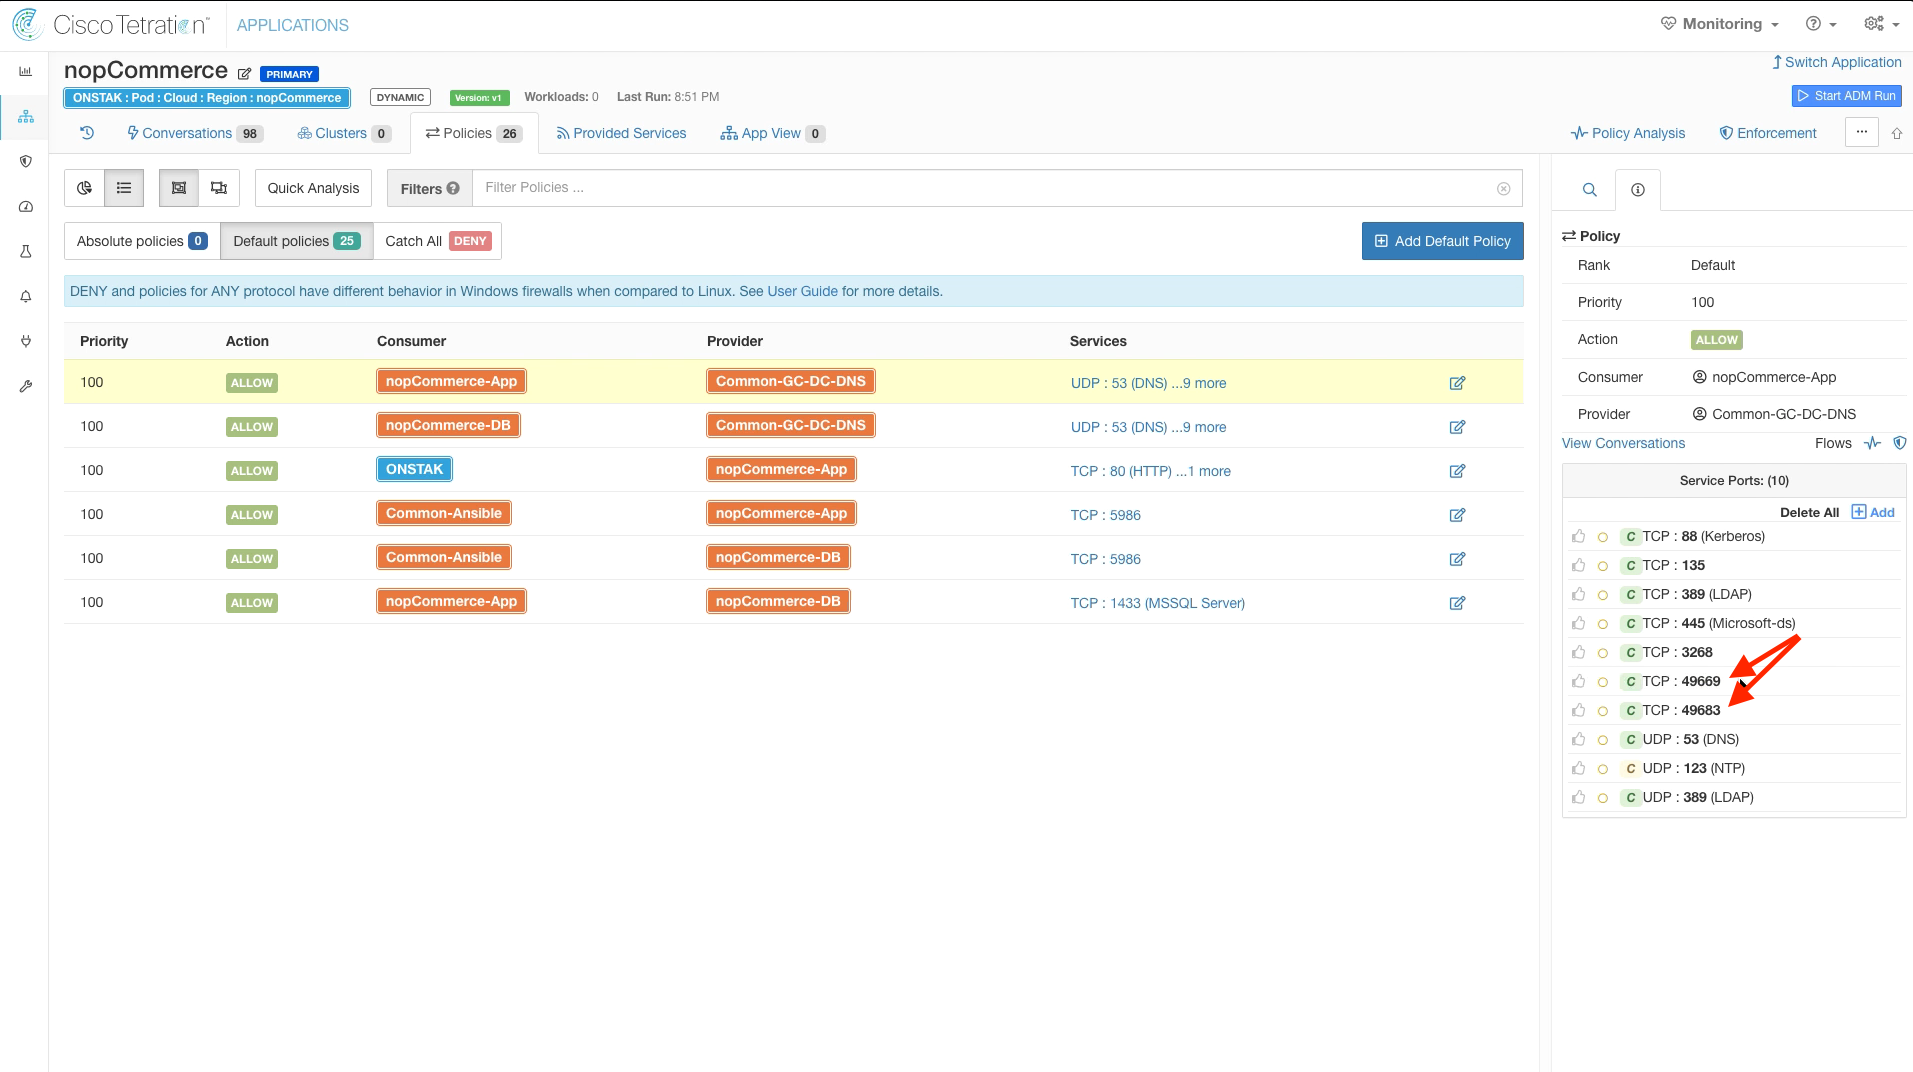
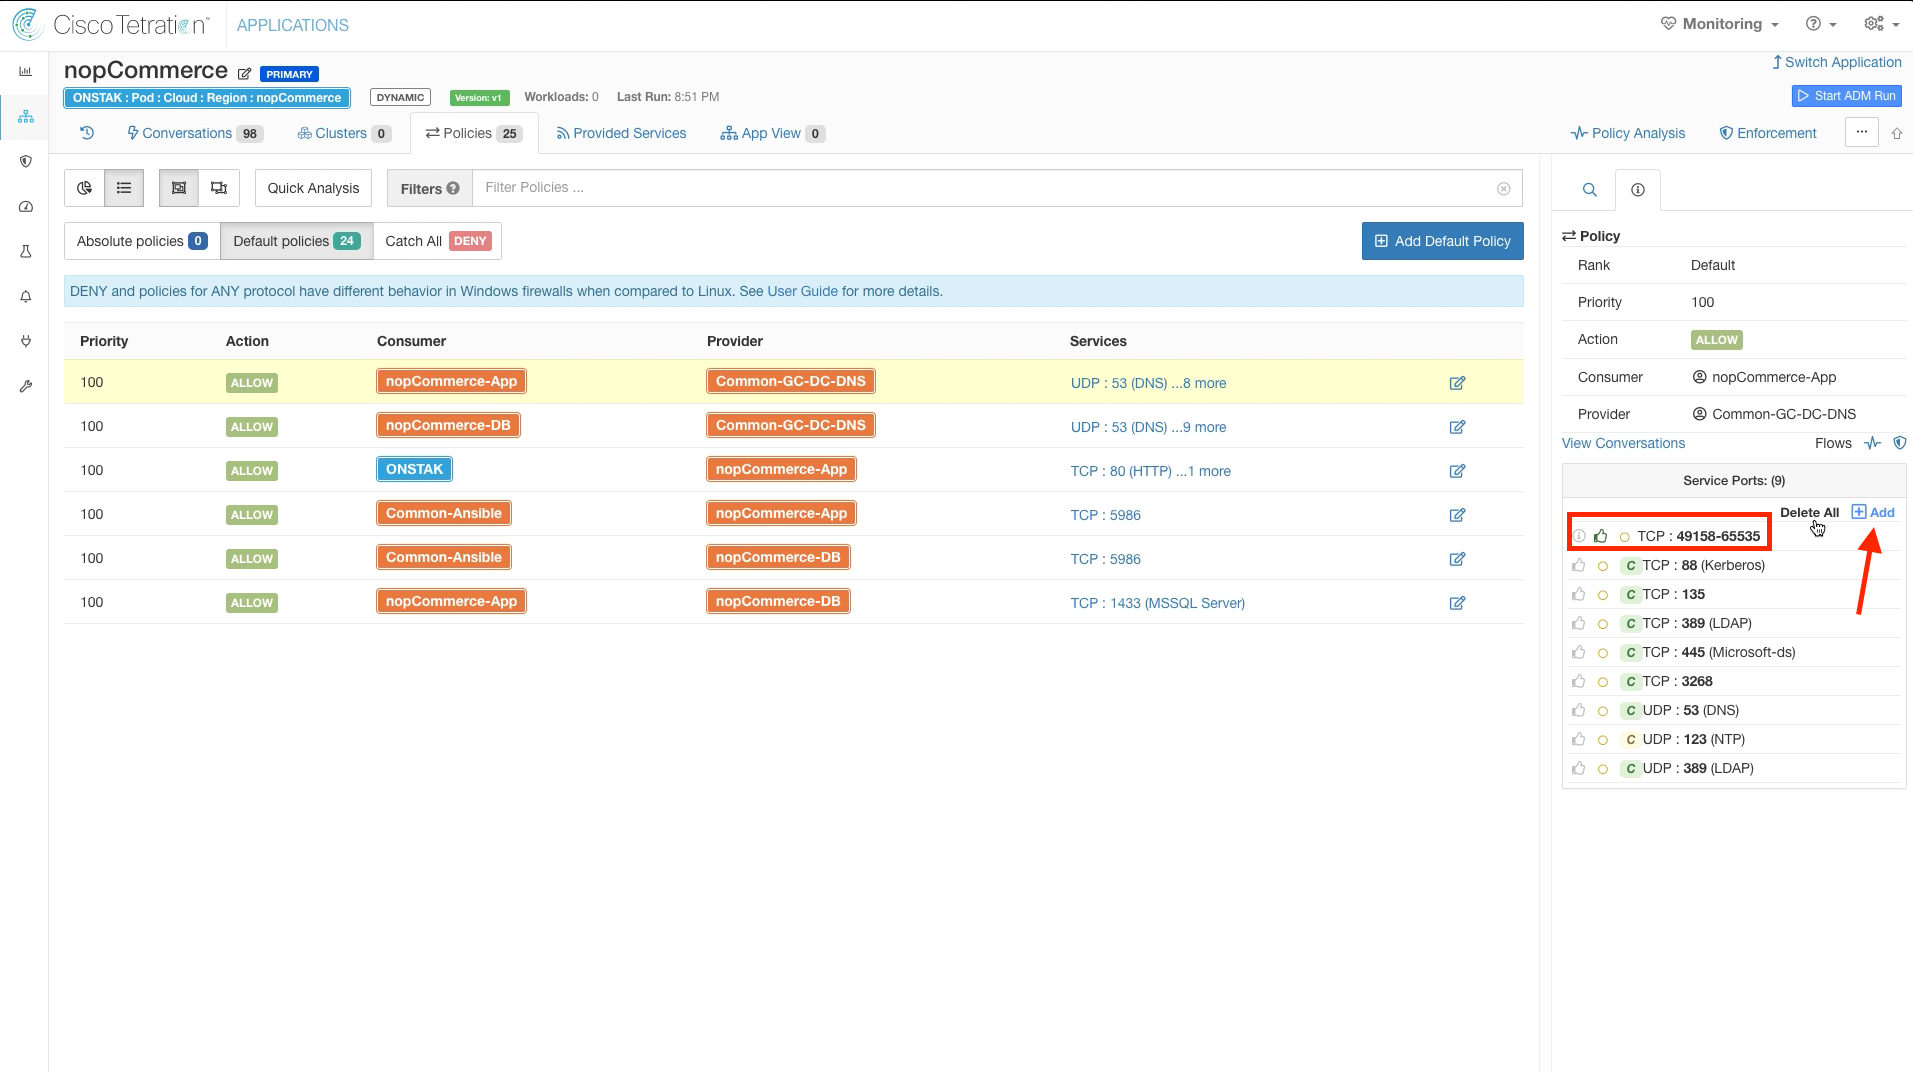
On the policy rule with nopCommerce-App as Consumer and Common-GC-DC-DNS, the ADM run has discovered communication on a few of the ports in the Windows ephemeral port range 49158-65535. Since Windows may open up communication on any ports in this range, we should delete the individual ports and enter the entire range in our rules.
Click to delete the TCP ports within the 49158-65535 range. The ports discovered in your ADM run may be different from the image, as Windows may have opened up different ports for the workloads in your student environment.
Add the Windows ephemeral port range 49158-65535 to the Service Ports.
We must repeat the same tasks for the rule with nopCommerce-DB as Consumer and Common-GC-DC-DNS as the provider. Delete the individual ports within the Windows ephemeral range 49158-65535, and then add the range 49158-65535 to the Service Ports.
Notice the orange circle next to the all of the Service Ports. This means that there are outstanding Policy Requests that have been issued to another workspace. If you click on the orange circle, it will tell you to which workspace the outgoing Policy Requests are pending. Whenever communication is required between workloads that are members of clusters in different workspaces, there must be matching rules in both workspaces in order for the rules to take affect. In this case we have configured rules in the nopCommerce workspace from nopCommerce-App and nopCommerce-DB to the Common-GC-DC-DNS cluster in the Common Policy workspace, but there are not yet matching rules in the Common Policy workspace. A Policy Request is sent by the nopCommerce workspace to the Common Policy workspace to create the rules in the Common Policy workspace. An administrator must review and approve the Policy Requests, as we will see in just a moment.

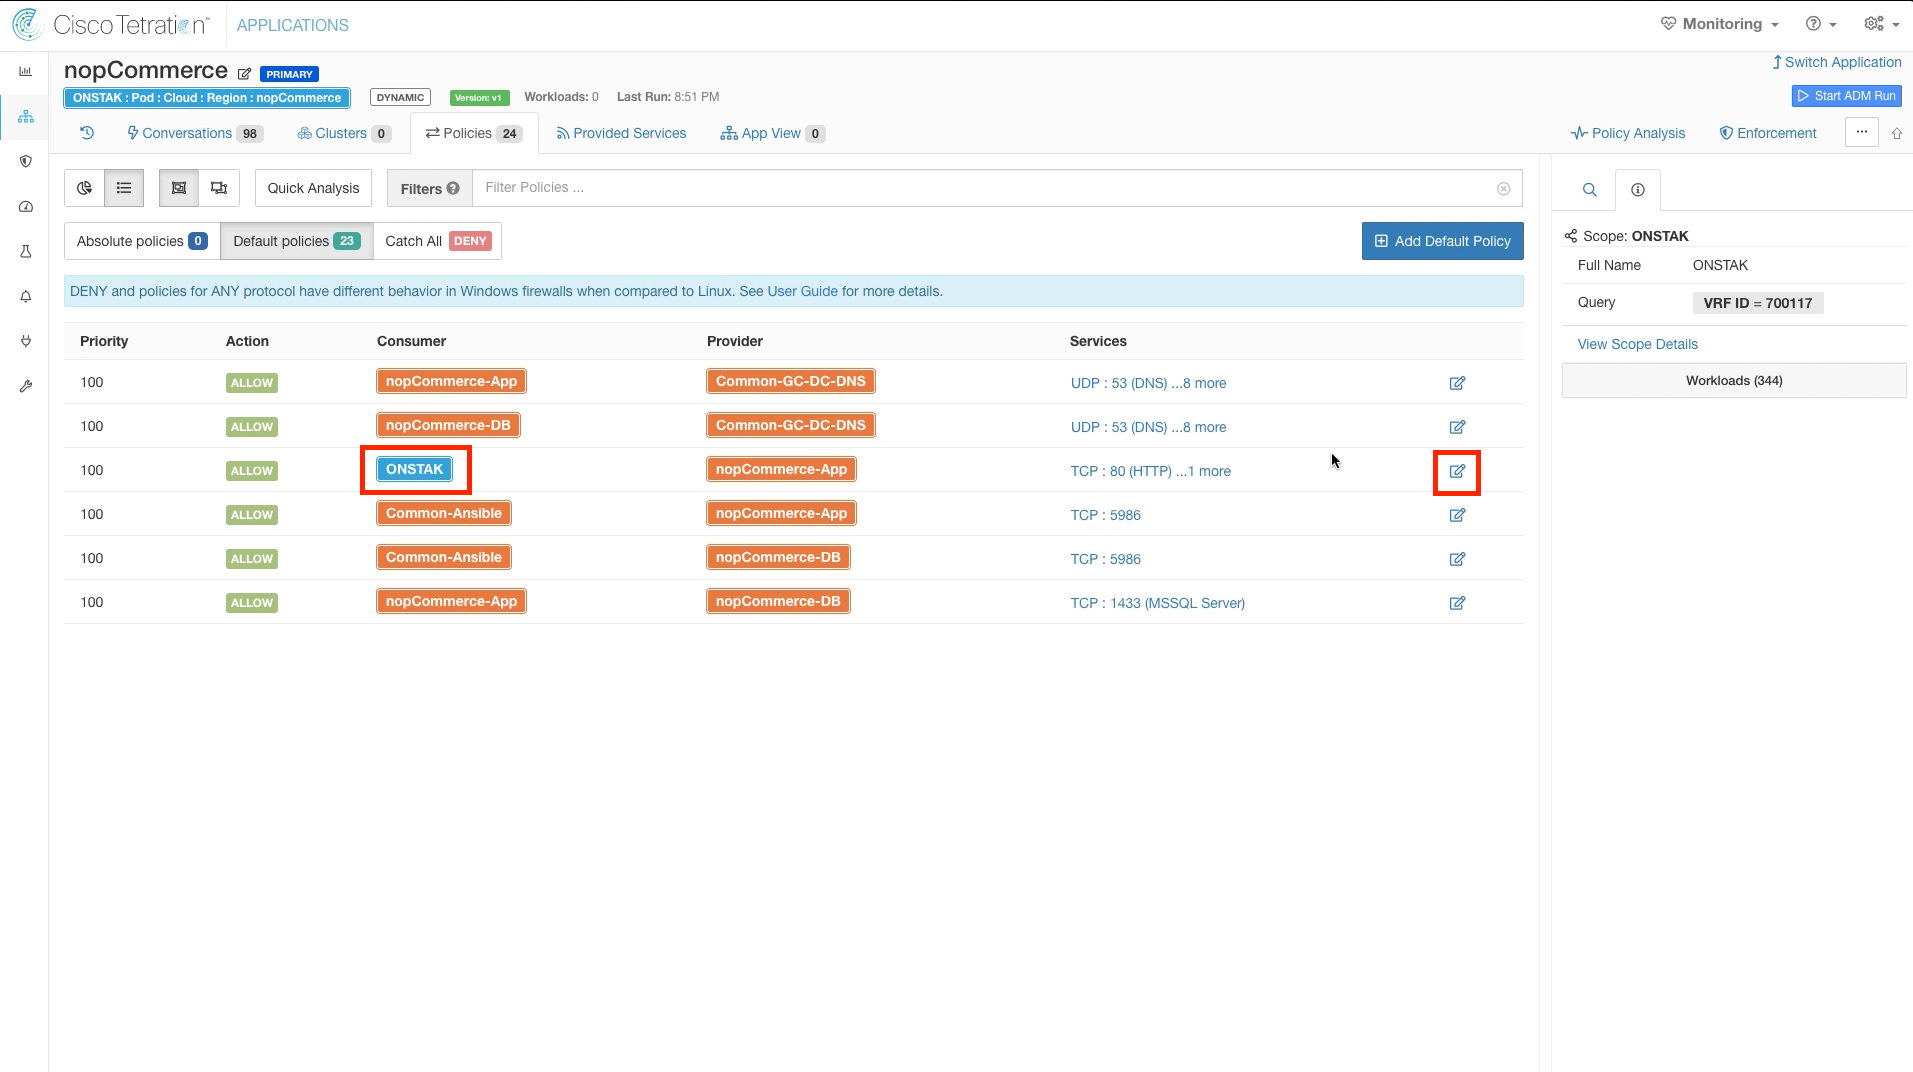
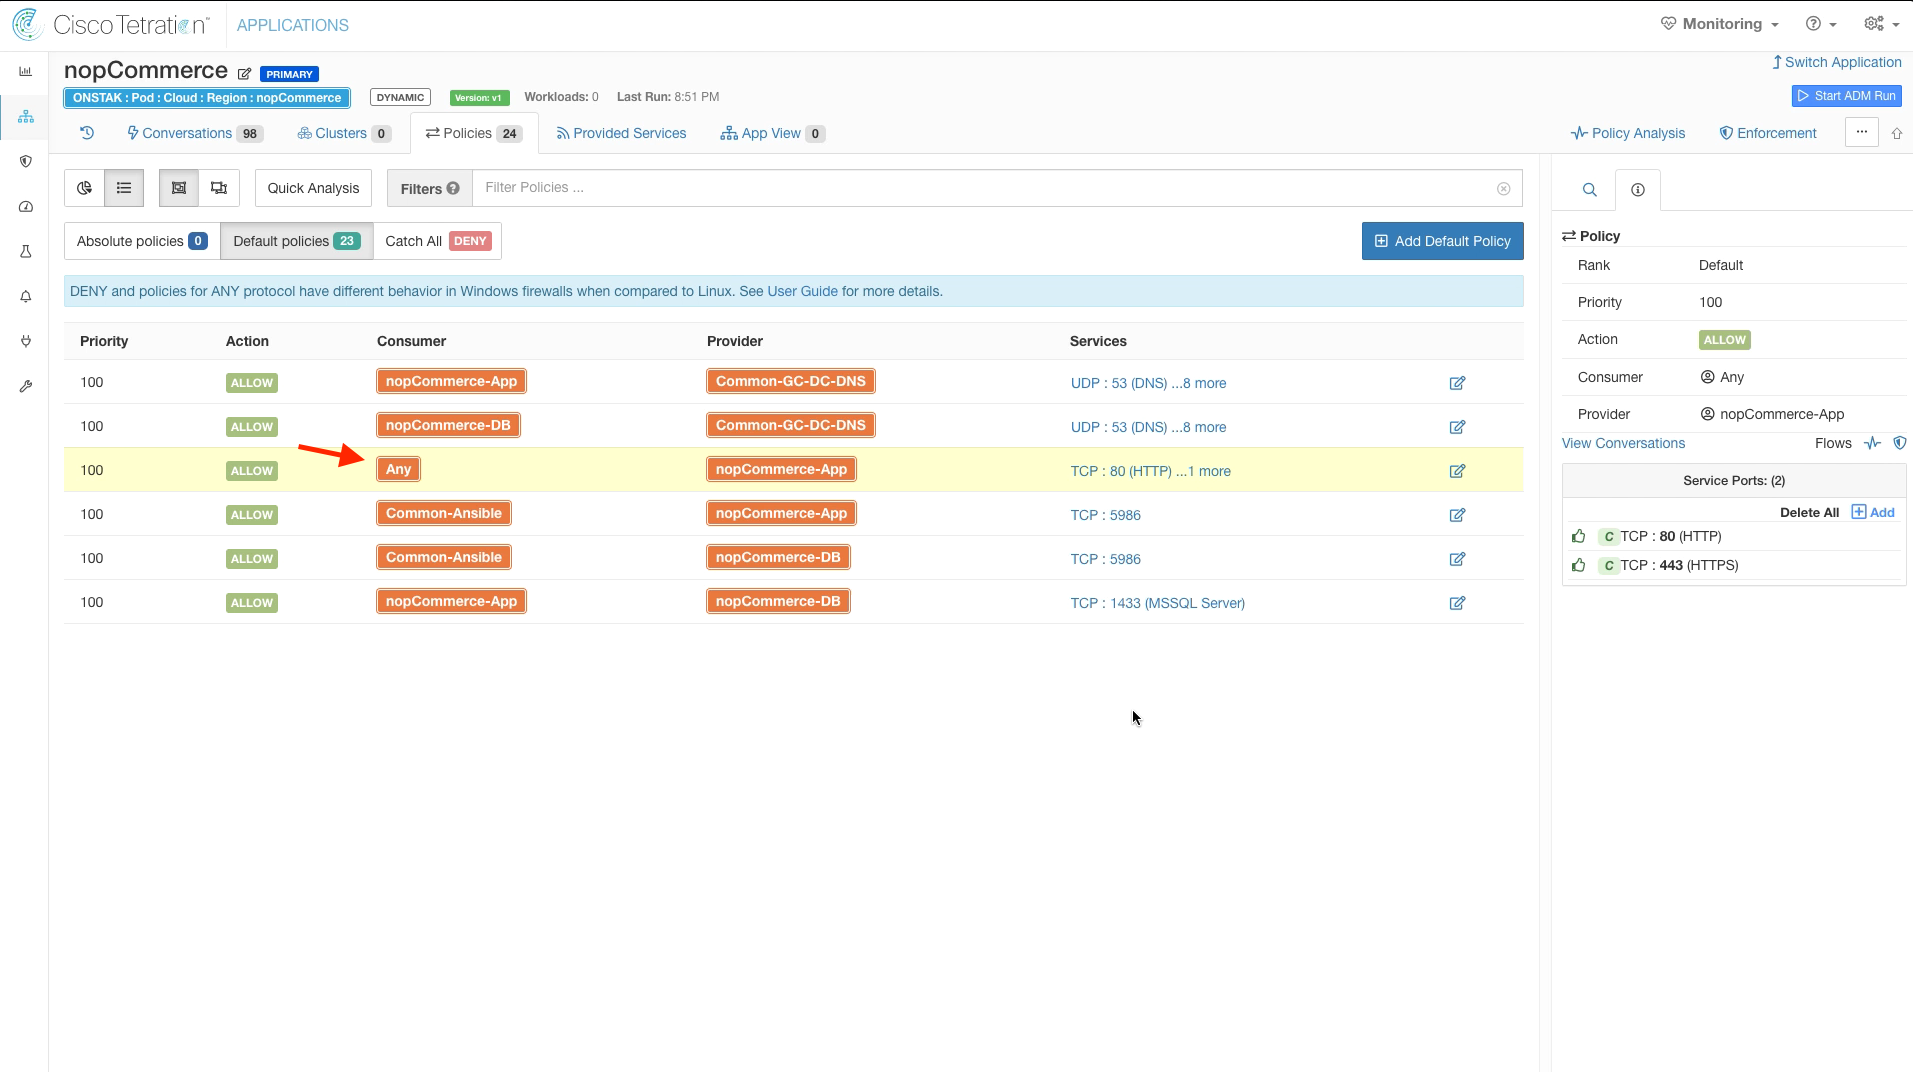
Edit the rule where the Root scope is a Consumer to nopCommerce-App as Provider for TCP ports 80 and 443. This is to allow inbound access to the web application both internally and externally, thus we will set the Consumer to Any. Change the Consumer from the root scope to Any.
The Consumer should now be set to Any as shown below.
Now we will address the outgoing Policy Requests for this application workspace to the Common Policy workspace. When the rules were created by ADM toward the Common-GC-DC-DNS Inventory Filter which is tied to the Common Policy scope, Policy Requests were sent to the Common Policy workspace to create matching rules within the Common Policy workspace. The outgoing Policy Requests are indicated by the orange circle next to the ports in the list of Services for the rules. Matching rules in the Common Policy workspace are required in order to allow the intended communication.
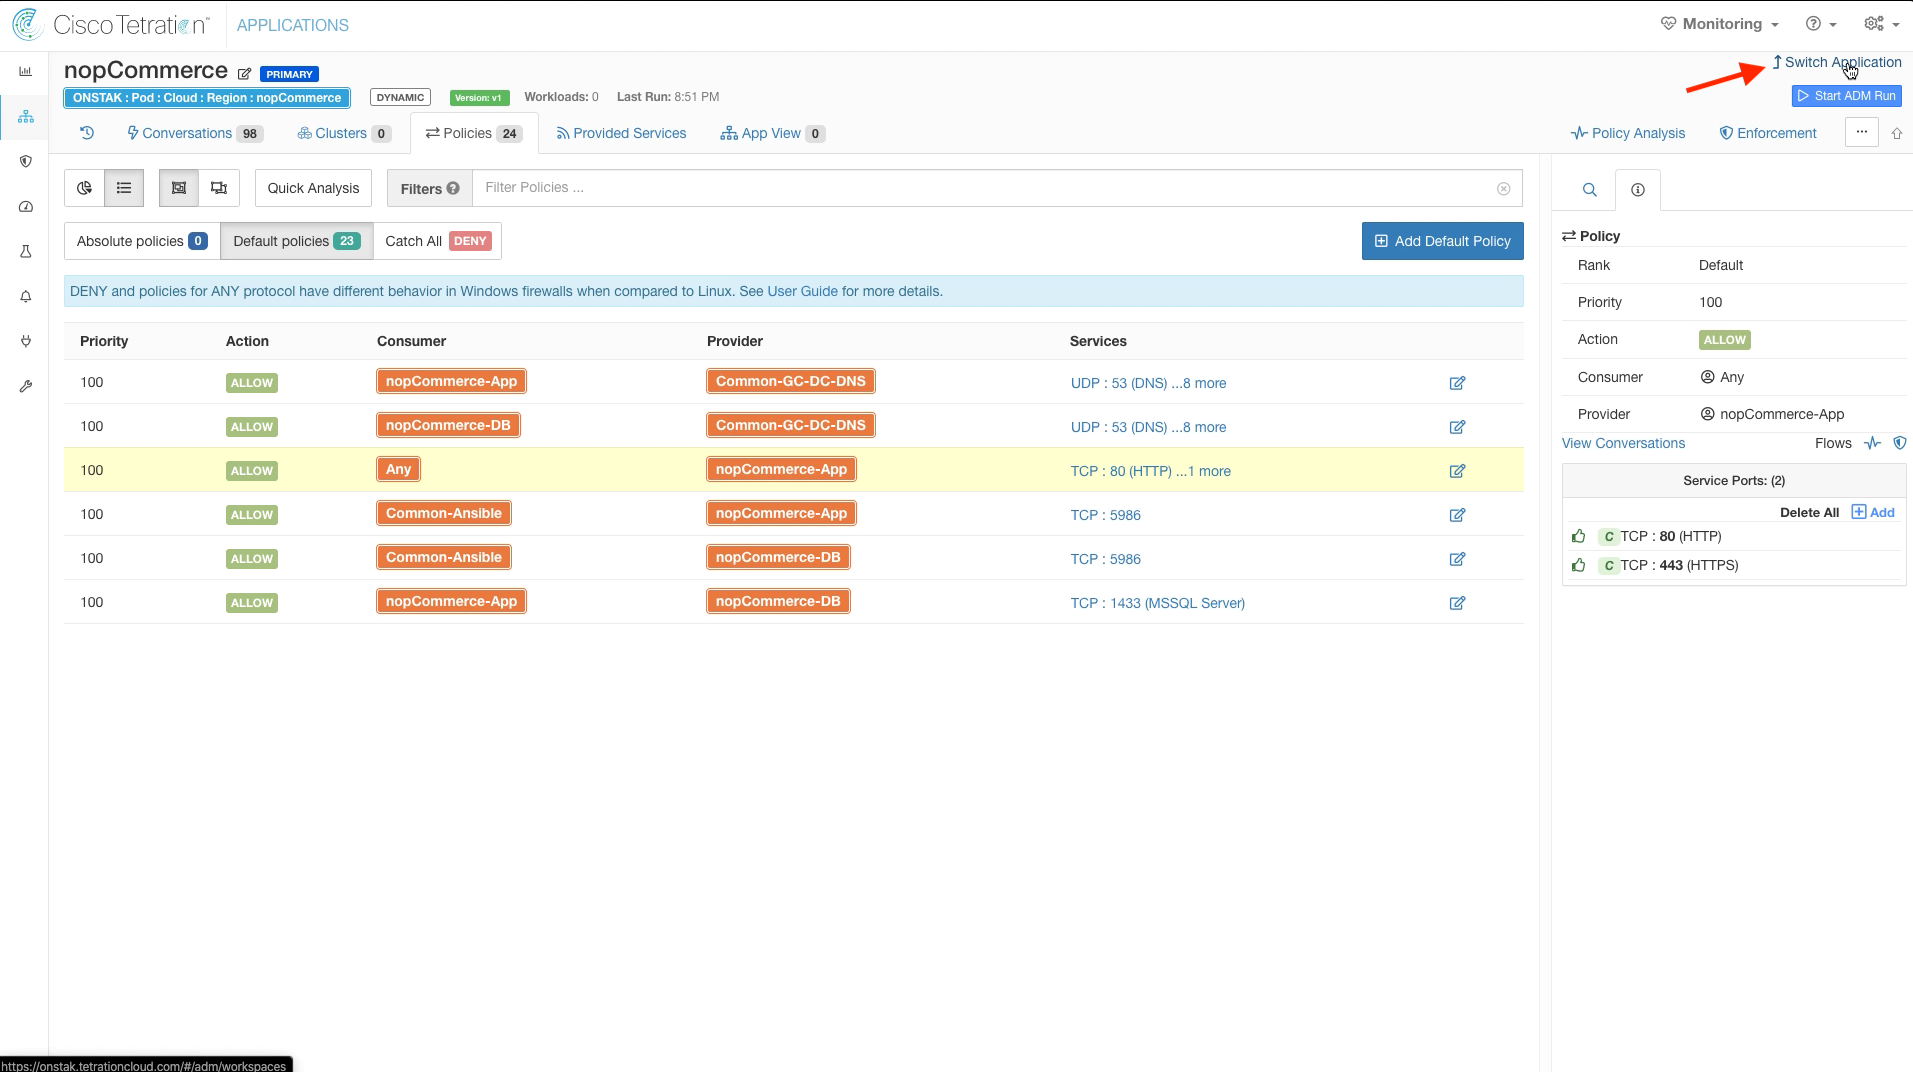
Click on Switch Application.
Select the Common Policy App Workspace.
Click on Provided Services.
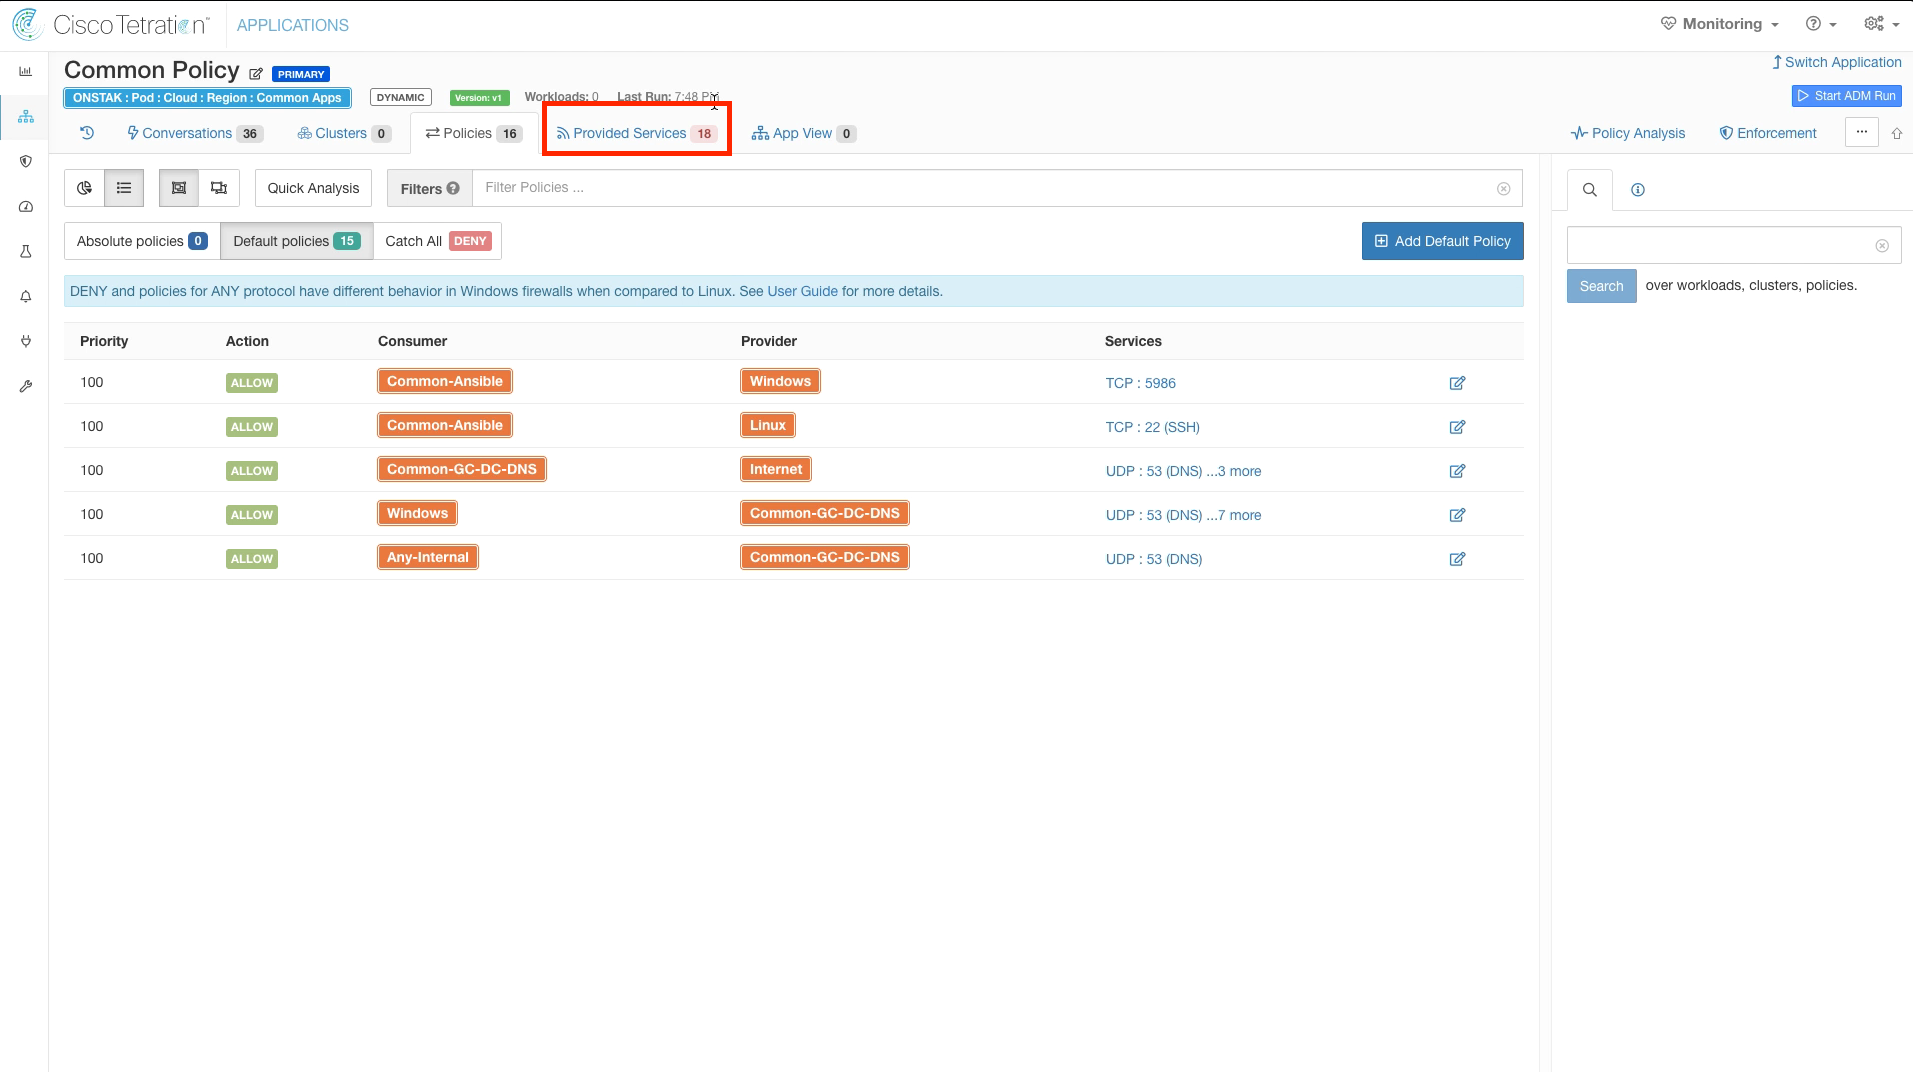
Notice that we have 18 incoming Policy Requests that are in Pending state. The administrator of this workspace must accept the requests to allow the policies to be created in the Common Policy workspace to complete the configuration. It is also possible to set up Auto-Pilot rules so that incoming Policy Requests for specific TCP/UDP ports are automatically accepted.
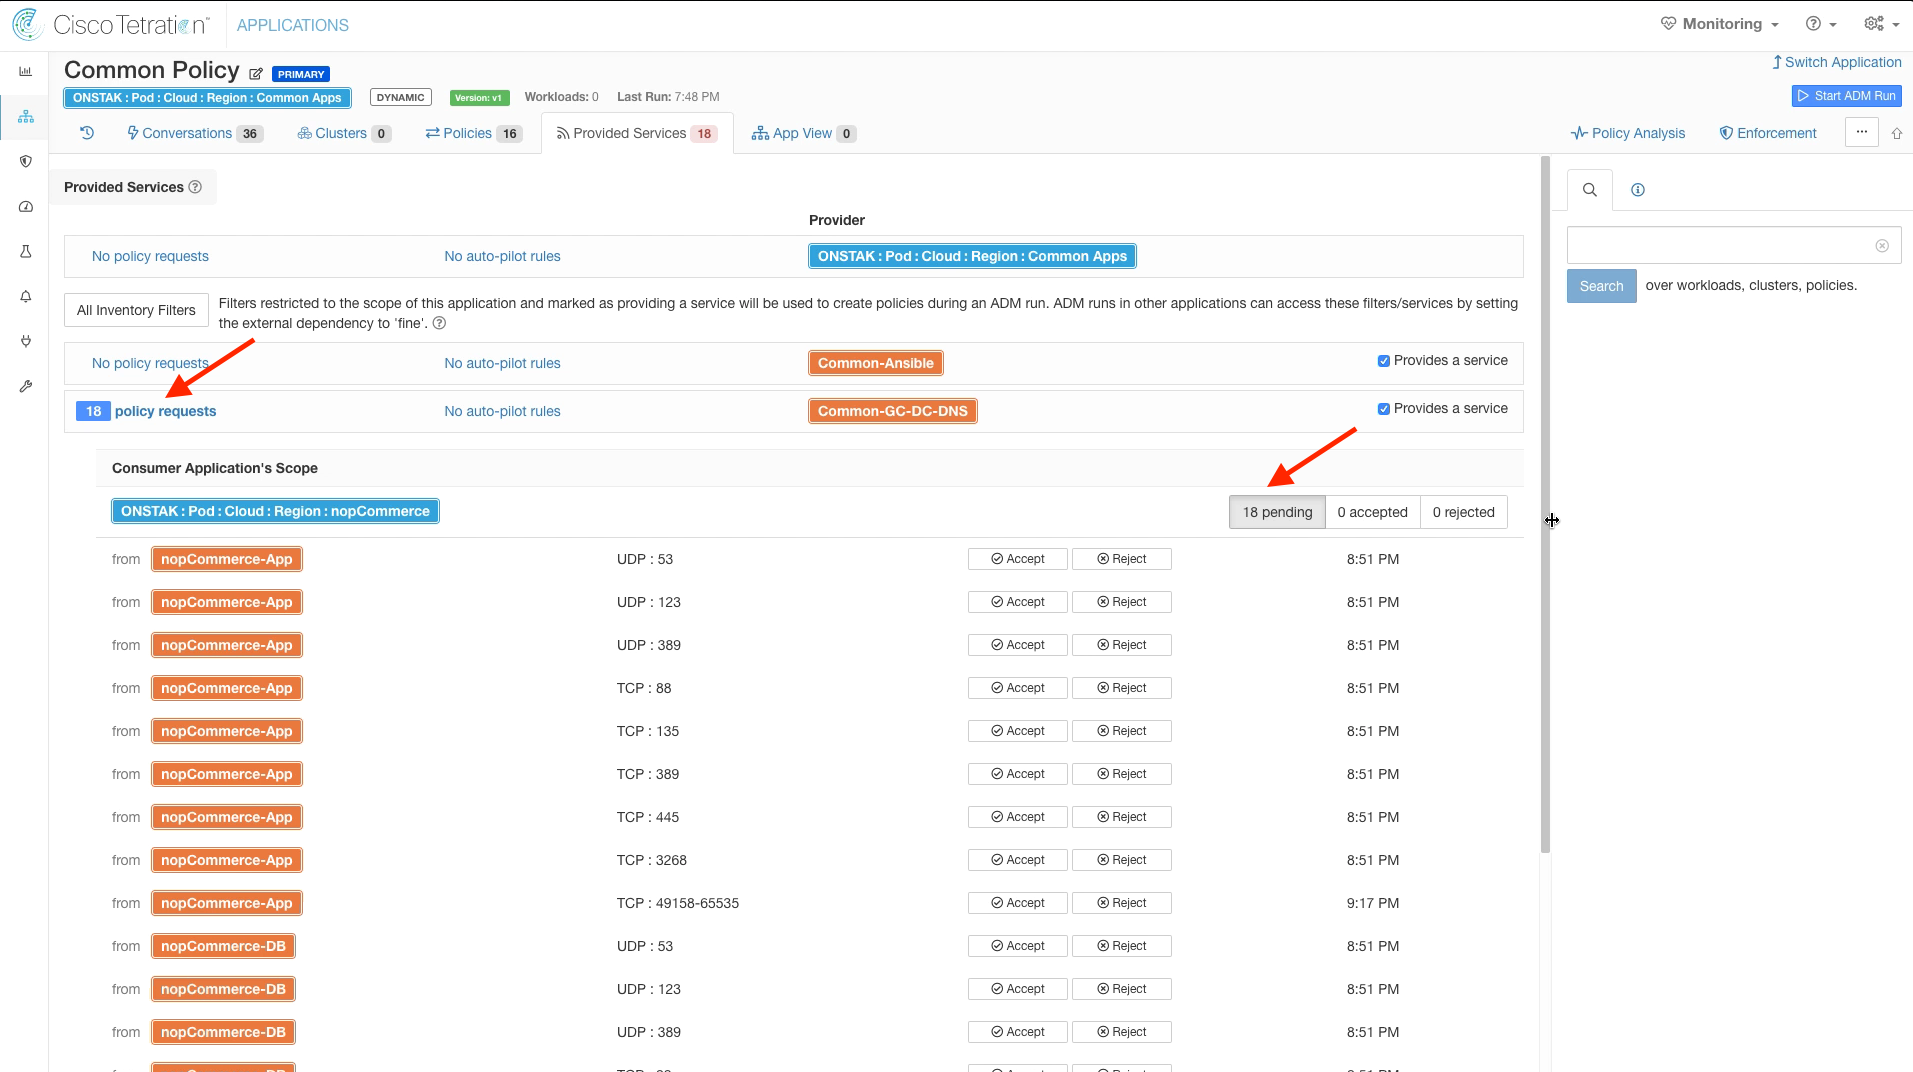
Click Accept on each of the 18 Policy Requests.
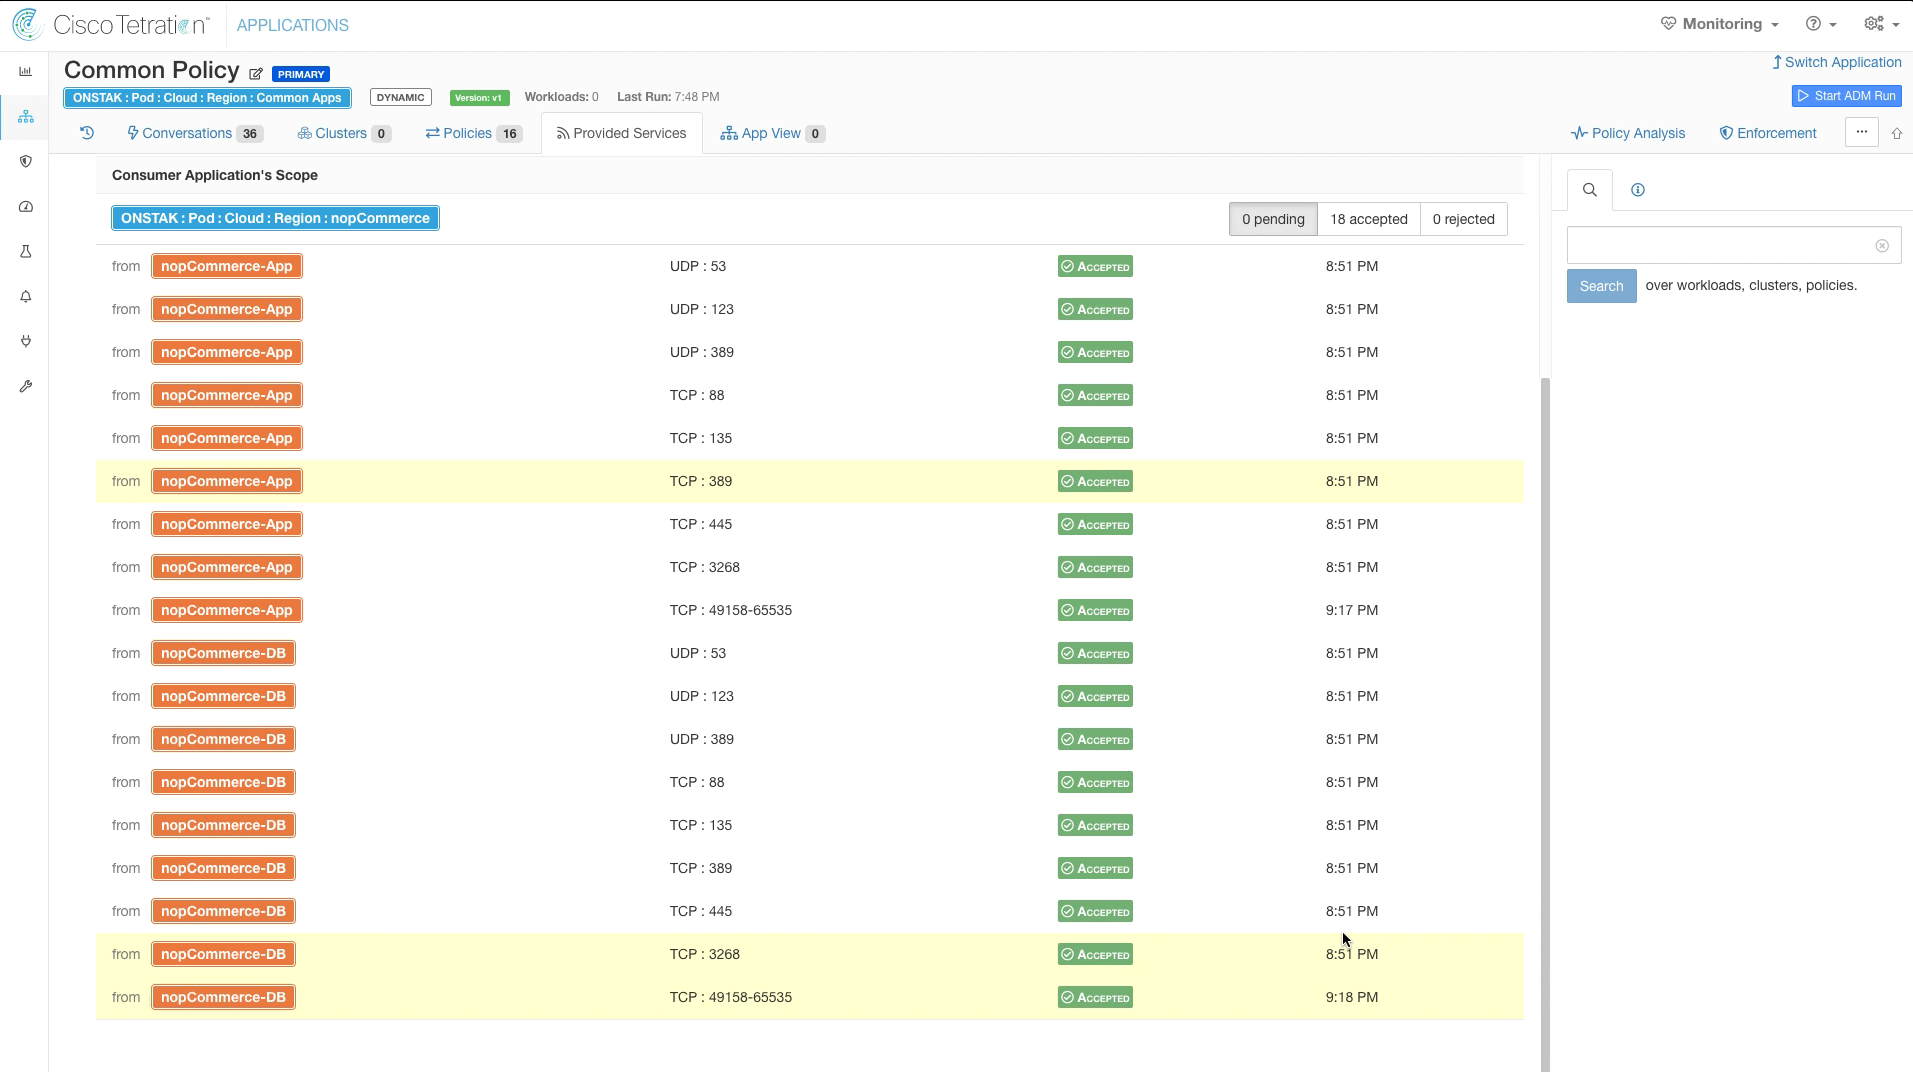
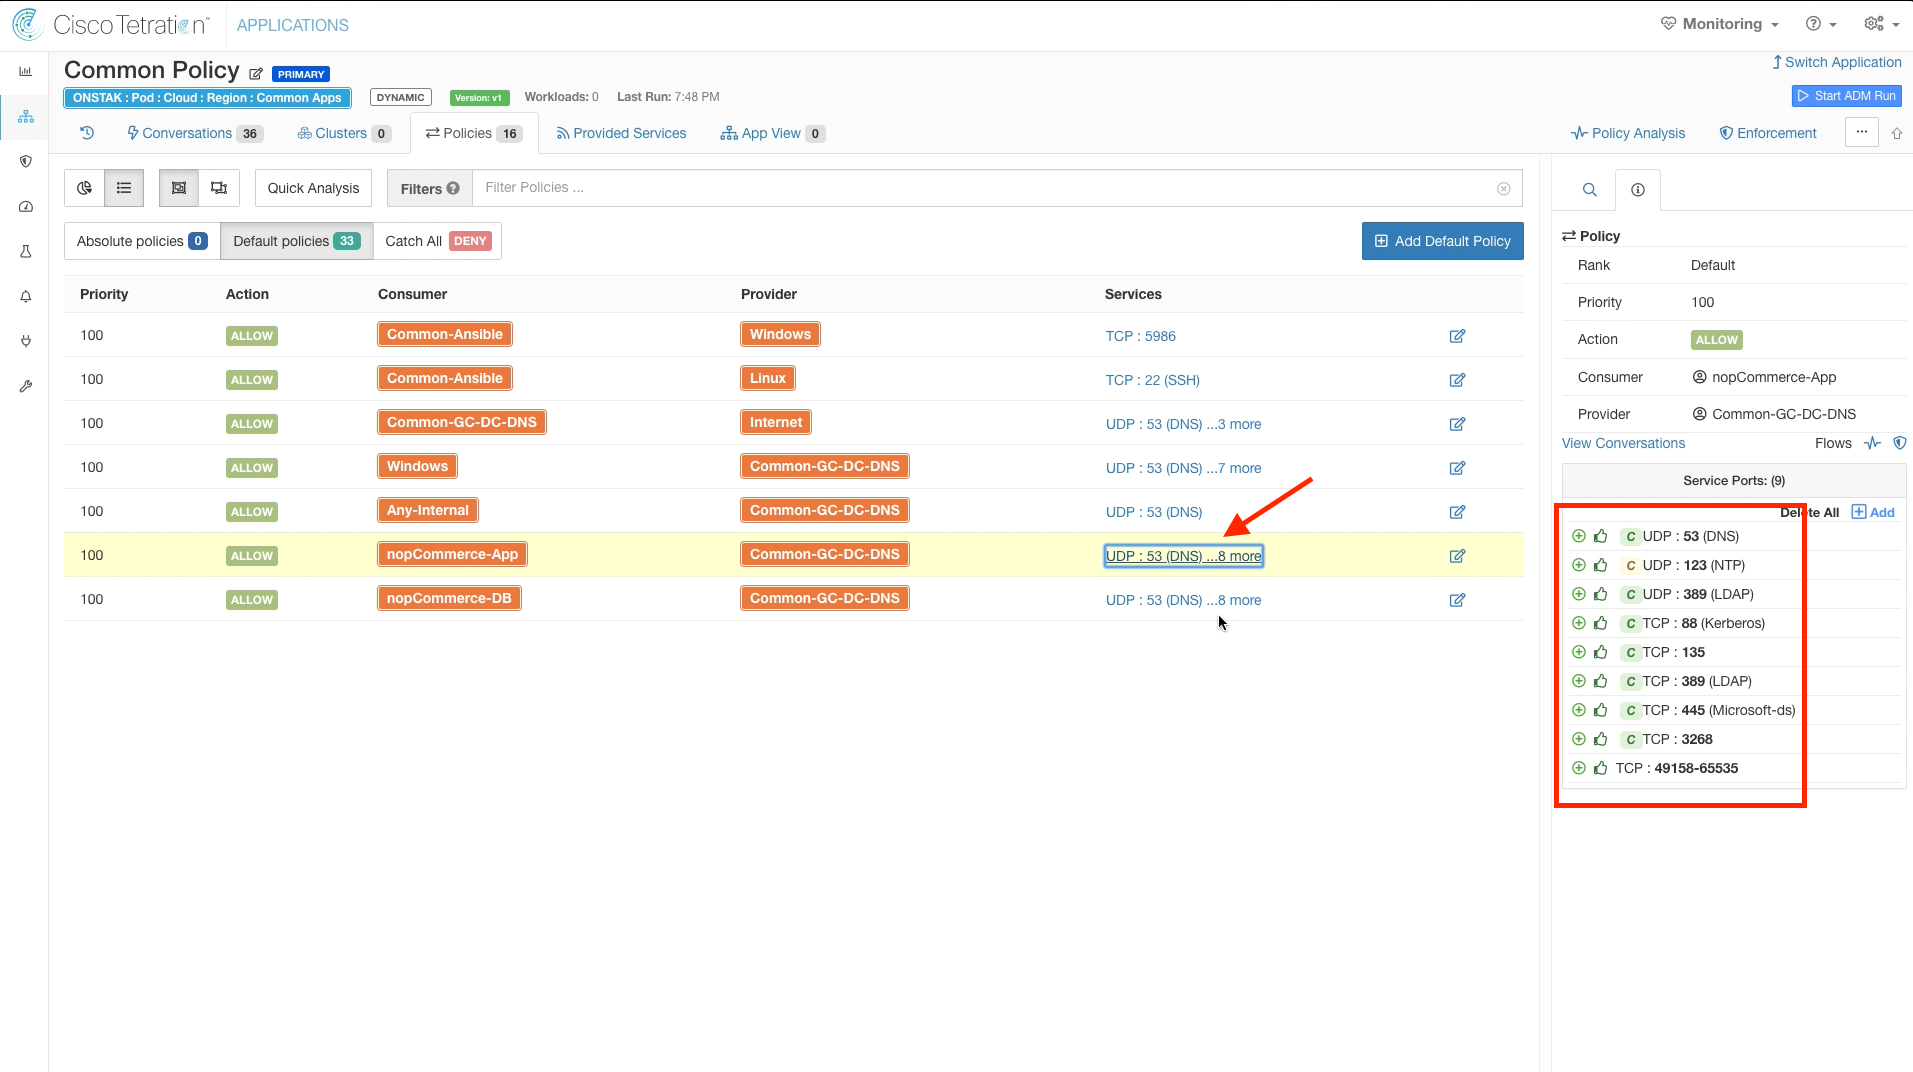
Click on Policies to view the policies in the Common Policy workspace.
There are now two new rules that have been created, one from nopCommerce-App to Common-GC-DC-DNS each with 9 services as shown in the below image.
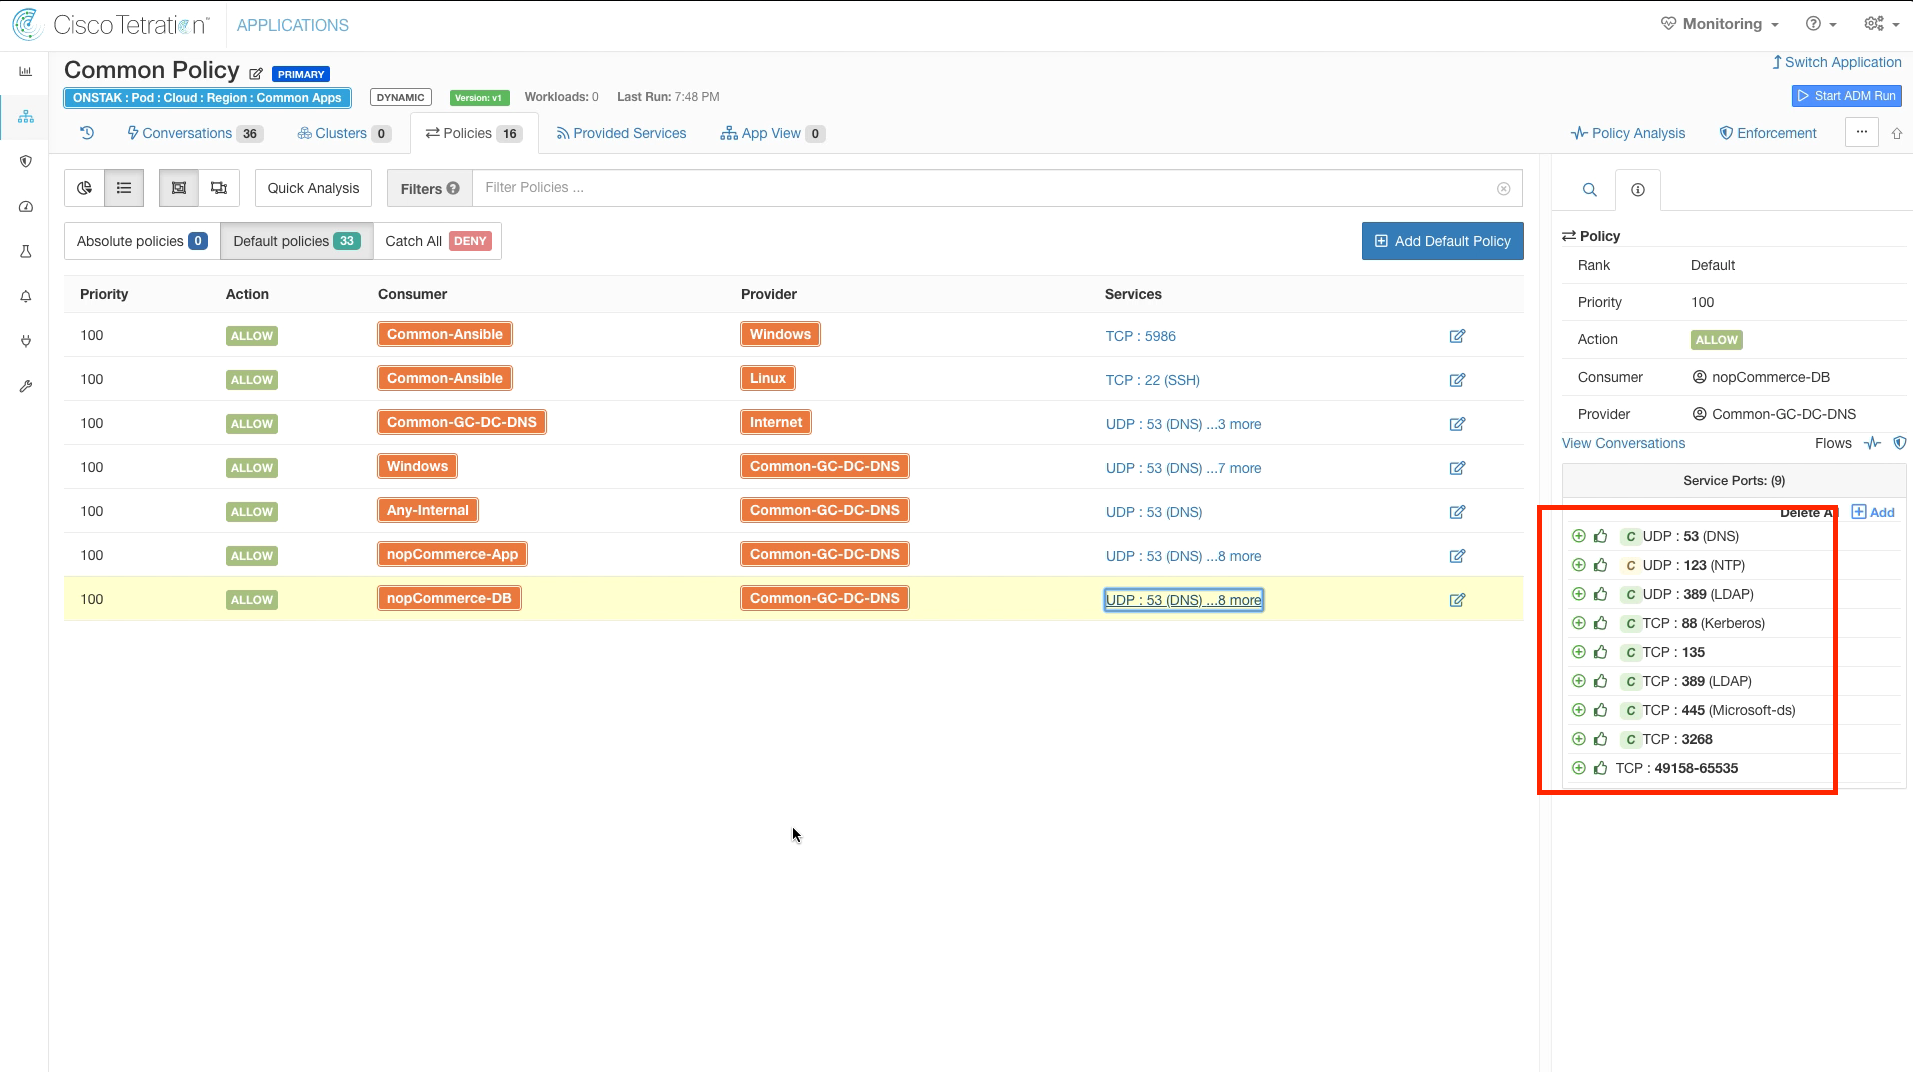
Below shows the services in the second rule from nopCommerce-DB to Common-GC-DC-DNS. Notice that the services all show a thumbs up and are colored green, this indicates that they have been approved by an administrator.
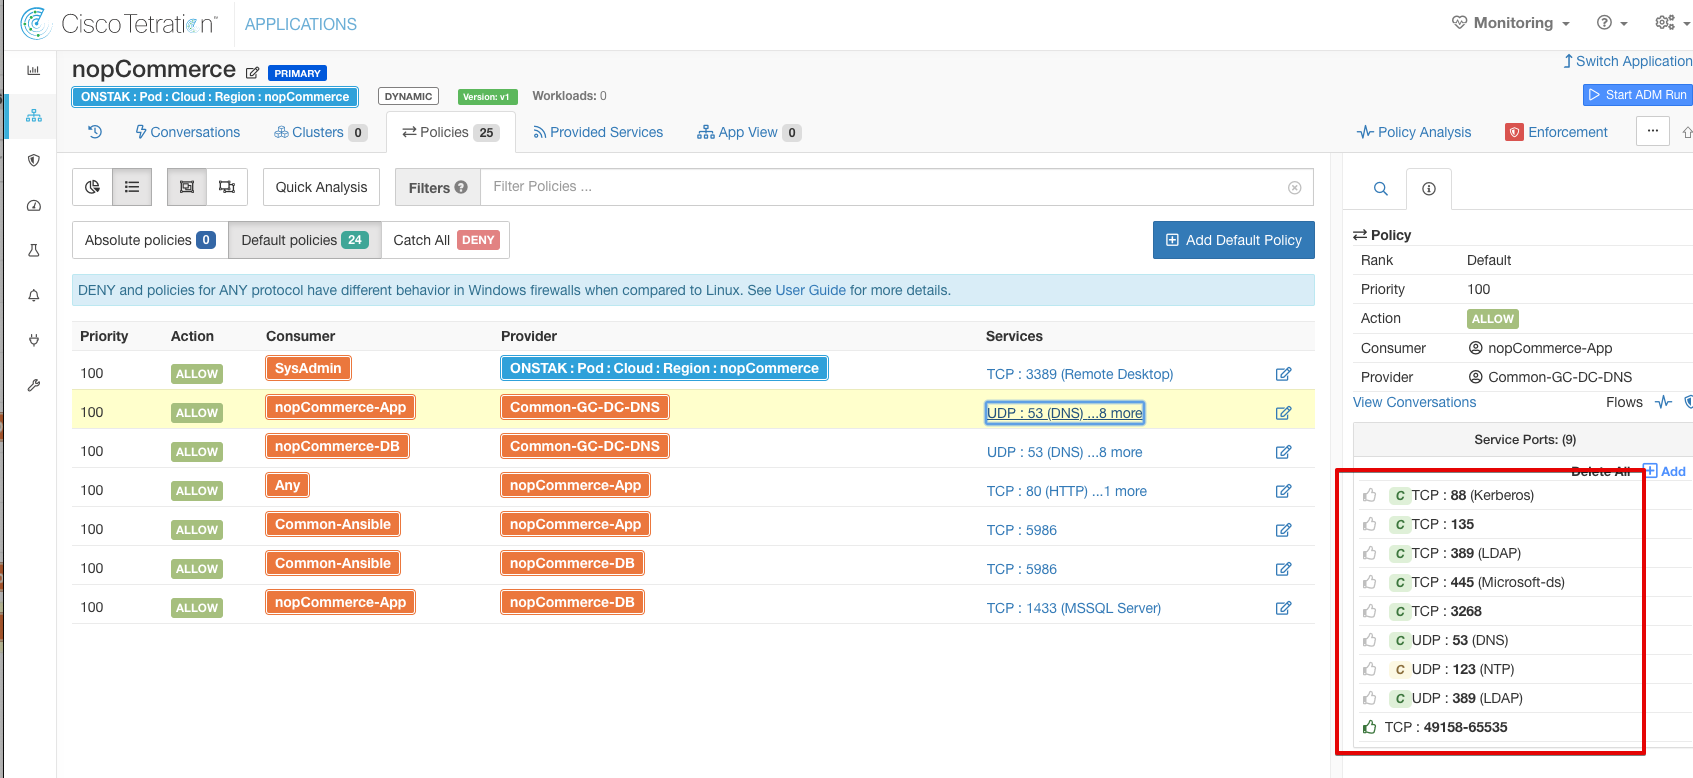
Switch Application and go back to the nopCommerce Application Workspace. Select the rule from nopCommerce-App to Common-GC-DC-DNS and select Services. Notice that the orange circles next to each service have now disappeared.
The above exercise was intended to demonstrate Provided Services and Policy Requests. In a real world scenario where there could be hundreds or possibly even thousands of workspaces in an organization, the strategy shown of creating specific rules from each workspace to the Common Policy workspace would not be desirable. Instead, we would recommend creating more broad rules in the Common Policy workspace to cover all workspaces accessing common services. For example, in our Common Policy we could have collapsed the rules allowing nopCommerce-App and nopCommerce-DB to Common-GC-DC-DNS to a single more broad rule such as Windows to Common-GC-DC-DNS. This would keep the size of the Common Policy ruleset more manageable.
YOU HAVE COMPLETED THIS MODULE
| Return to Table of Contents | Go to Top of the Page | Continue to the Next Module |