Cisco Tetration - Hands-On Lab
Module09: Edge Appliance - ISE
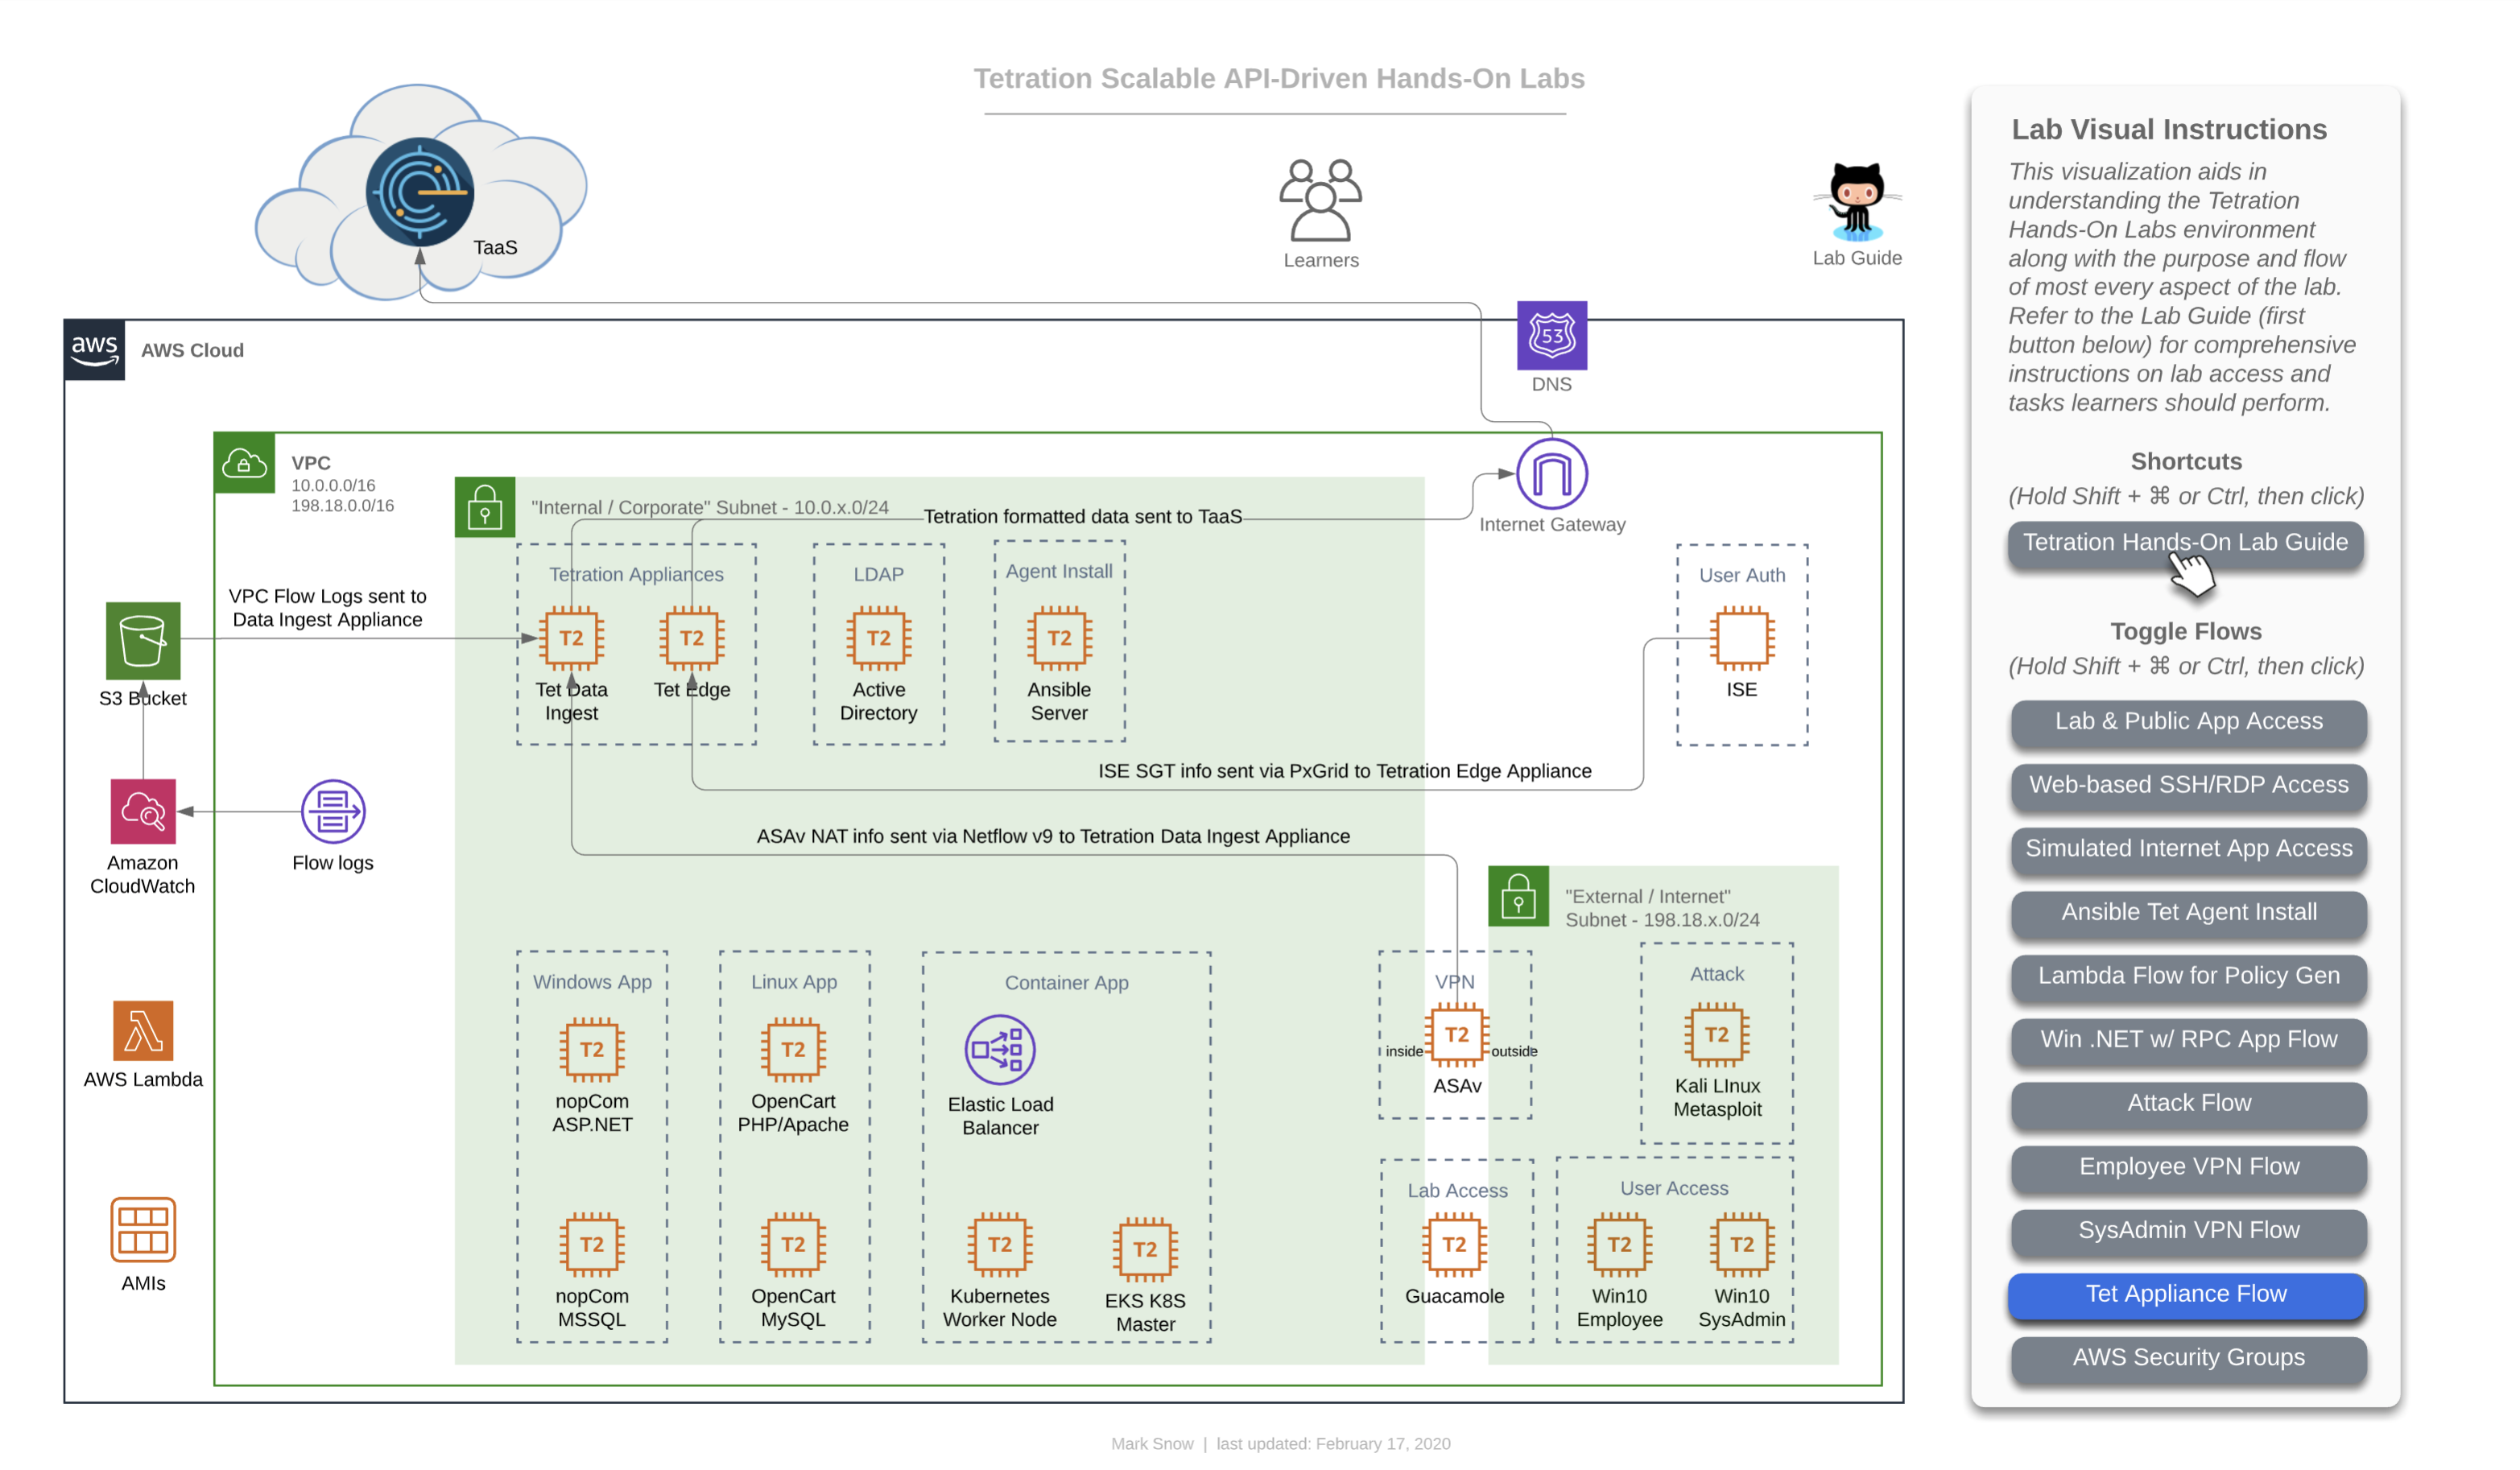
This diagram depicts the flow of traffic used by various devices to utimately ingest information into the Tetration cluster. The Tetration Edge appliance is used to subscribe to the pxGrid from ISE for SGT and user-based policy. The Tetration Data Ingest appliance is used to collect NetFlow v9 info from the ASAv which is useful in stitching together flows of traffic from outside the firewall all the way through being NAT’d by that ASAv and then traversing to the internal corporate network and making their way to app frontends. This same Tetration Data Ingest appliance is used to collect Flow Logs from an AWS VPC via an S3 bucket. This is useful for collecting traffic from any workload that may not have (or be able to have) a Tetration agent installed on it.
Steps for this Module
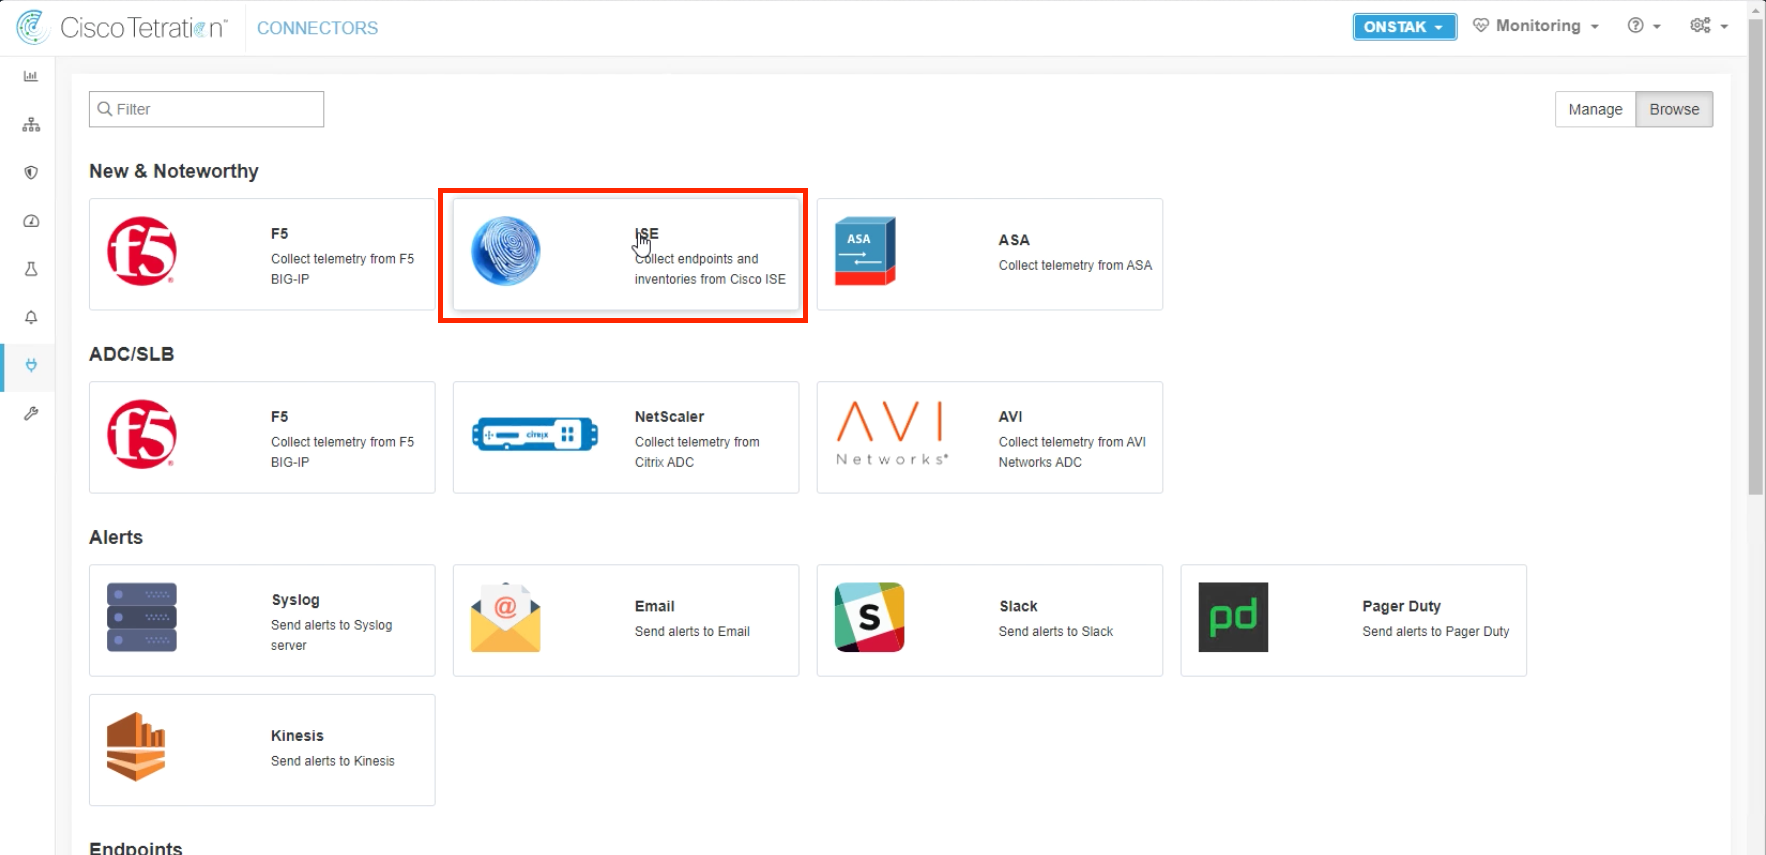
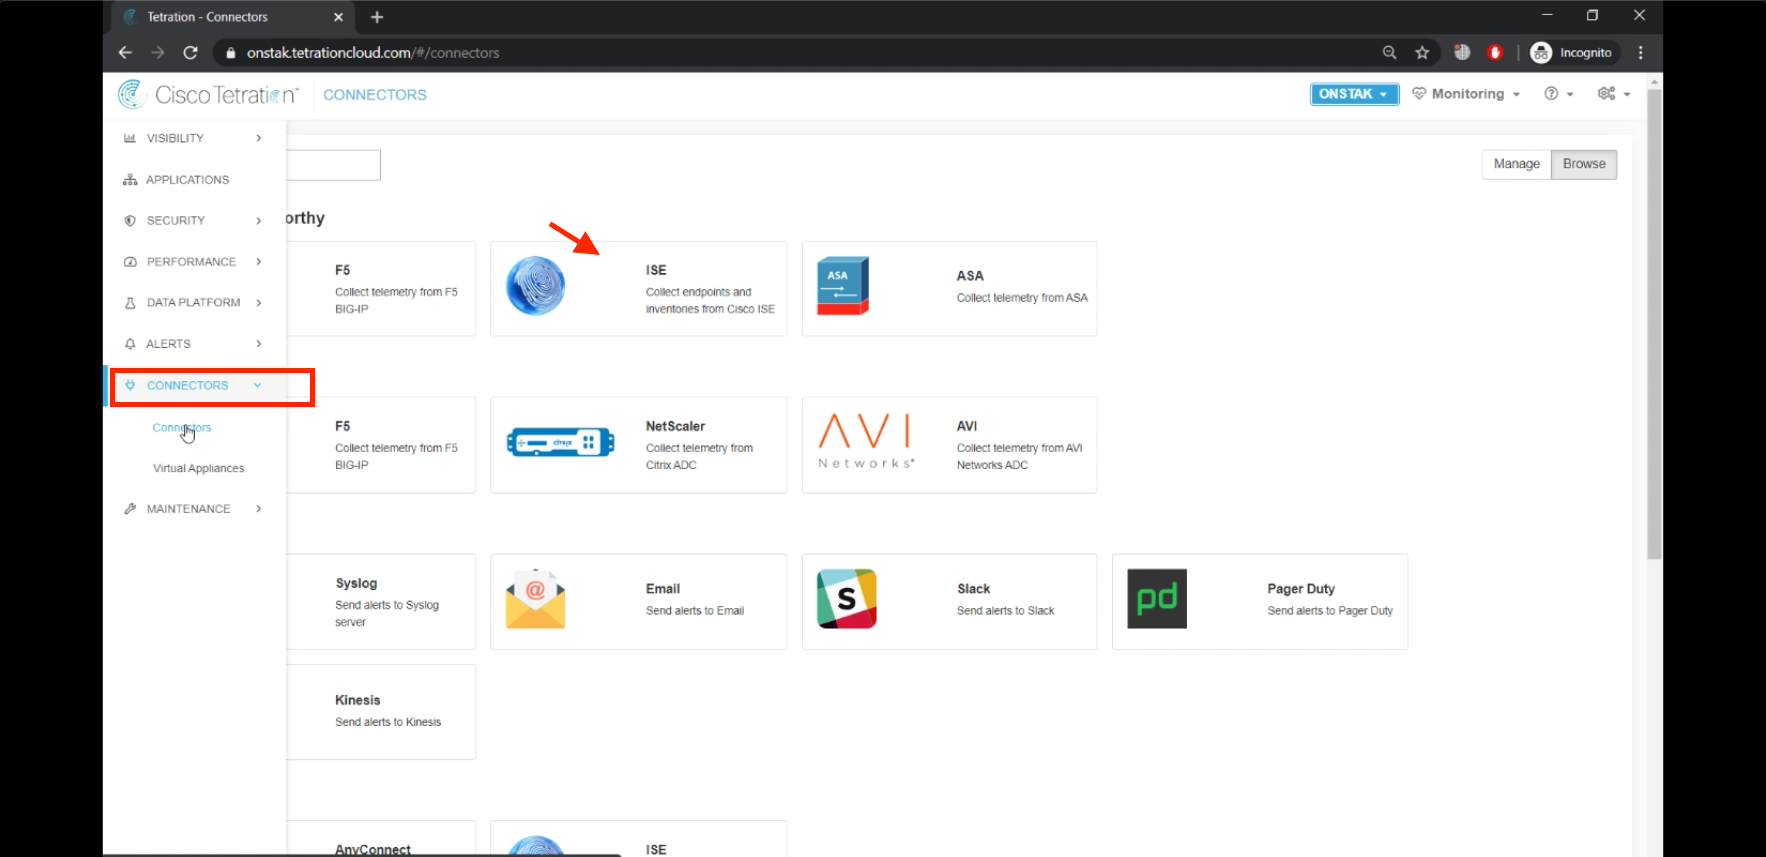
Step 001 - Navigate to Connectors
Step 002 - Click on ISE
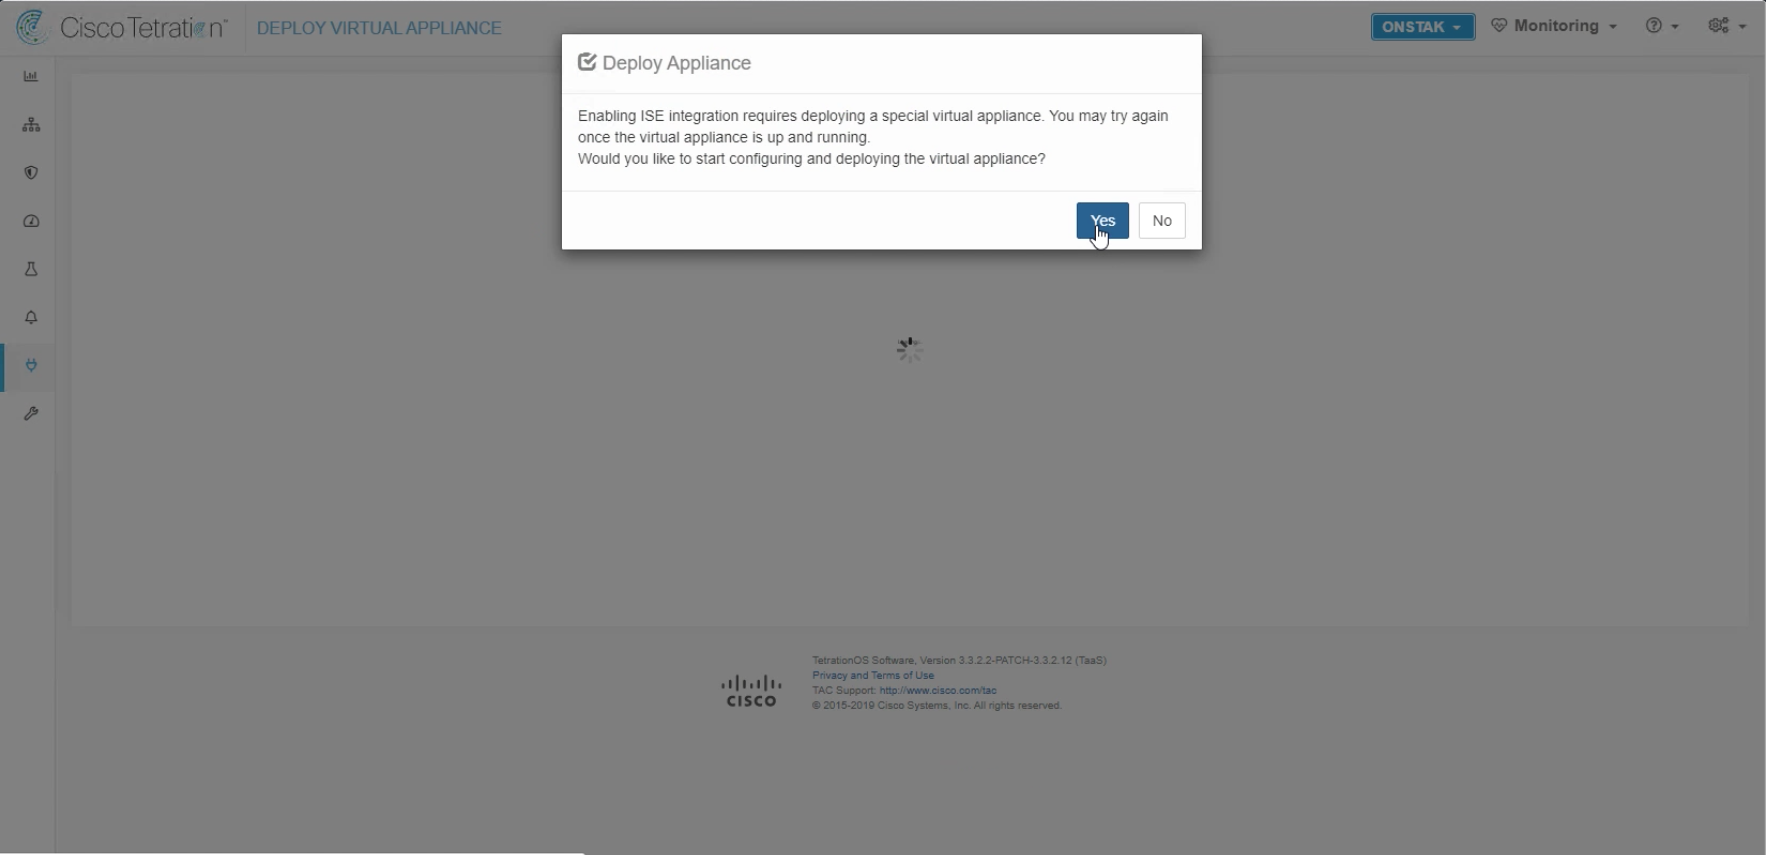
Step 003 - Enable the ISE connector
Step 004 - Begin deploying the virtual appliance
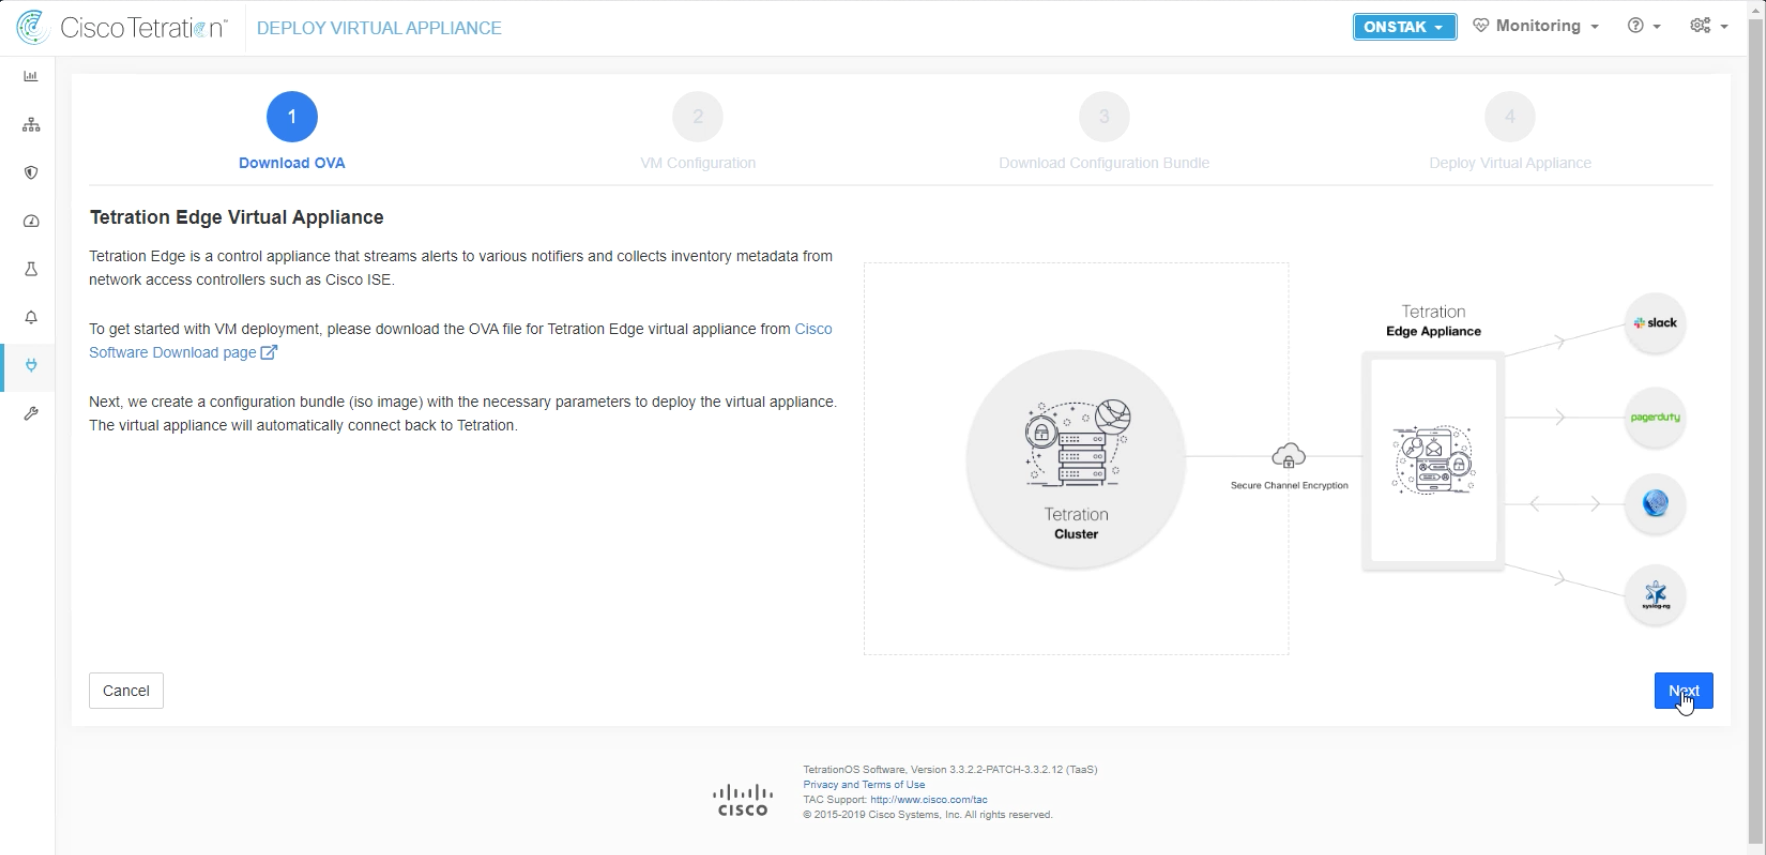
Step 005 - Begin deploying Tetration Edge
Step 006 - Enter .iso file details
Step 007 - Complete .iso file details
Step 008 - Download Configuration Bundle
Step 009 - Finish deploying the virtual appliance
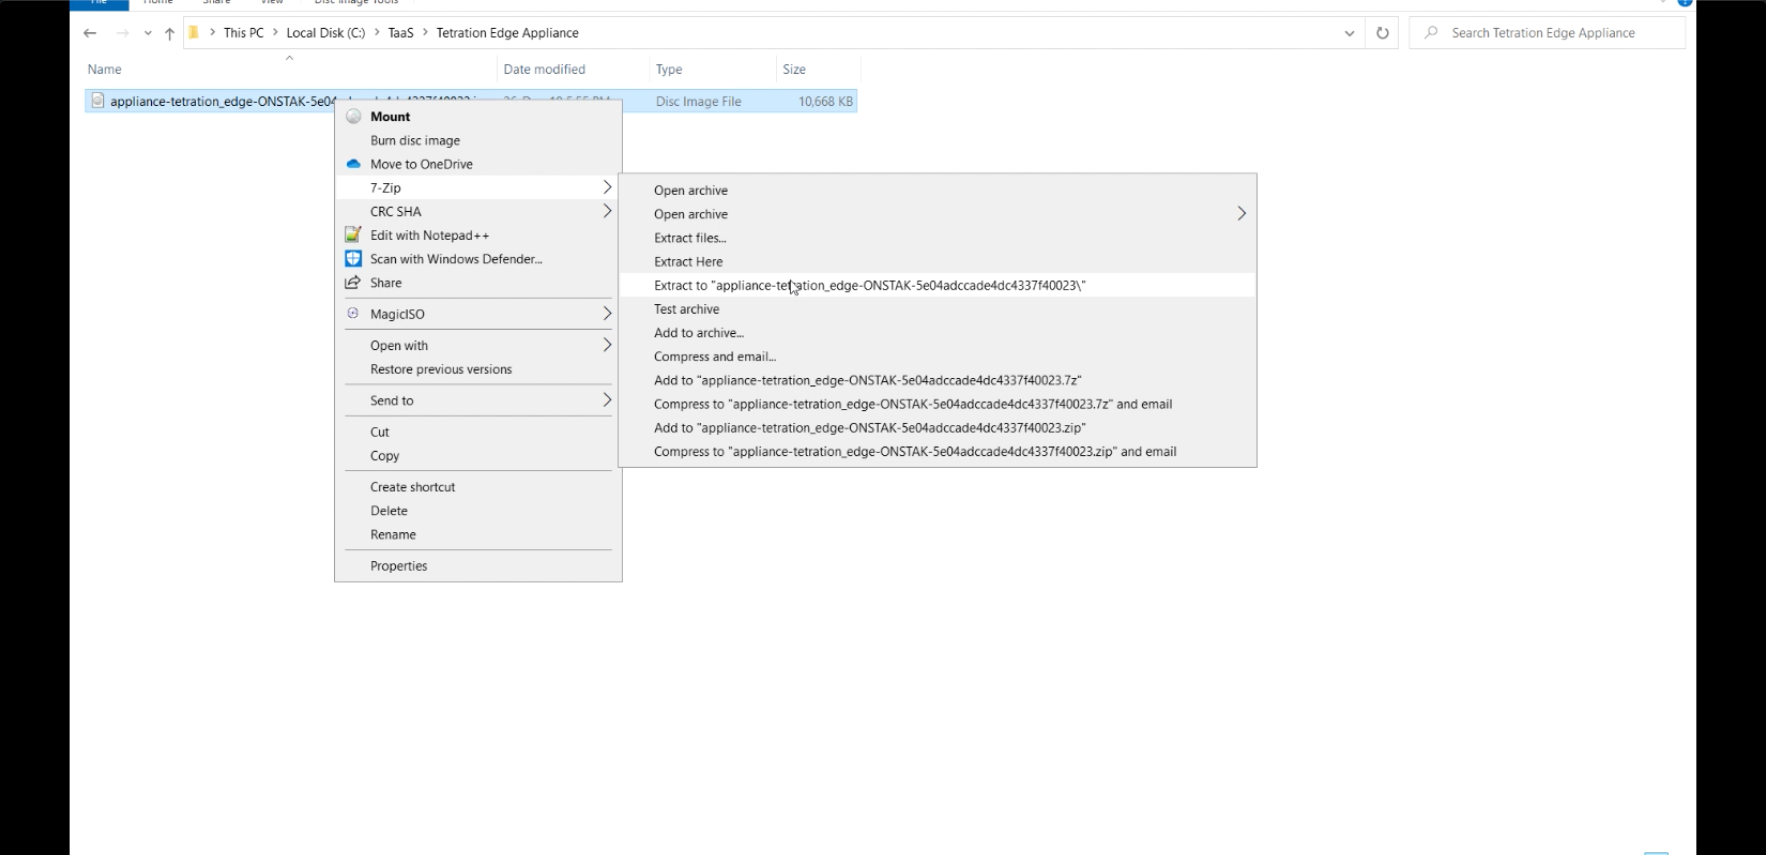
Step 010 - Extract the .iso file
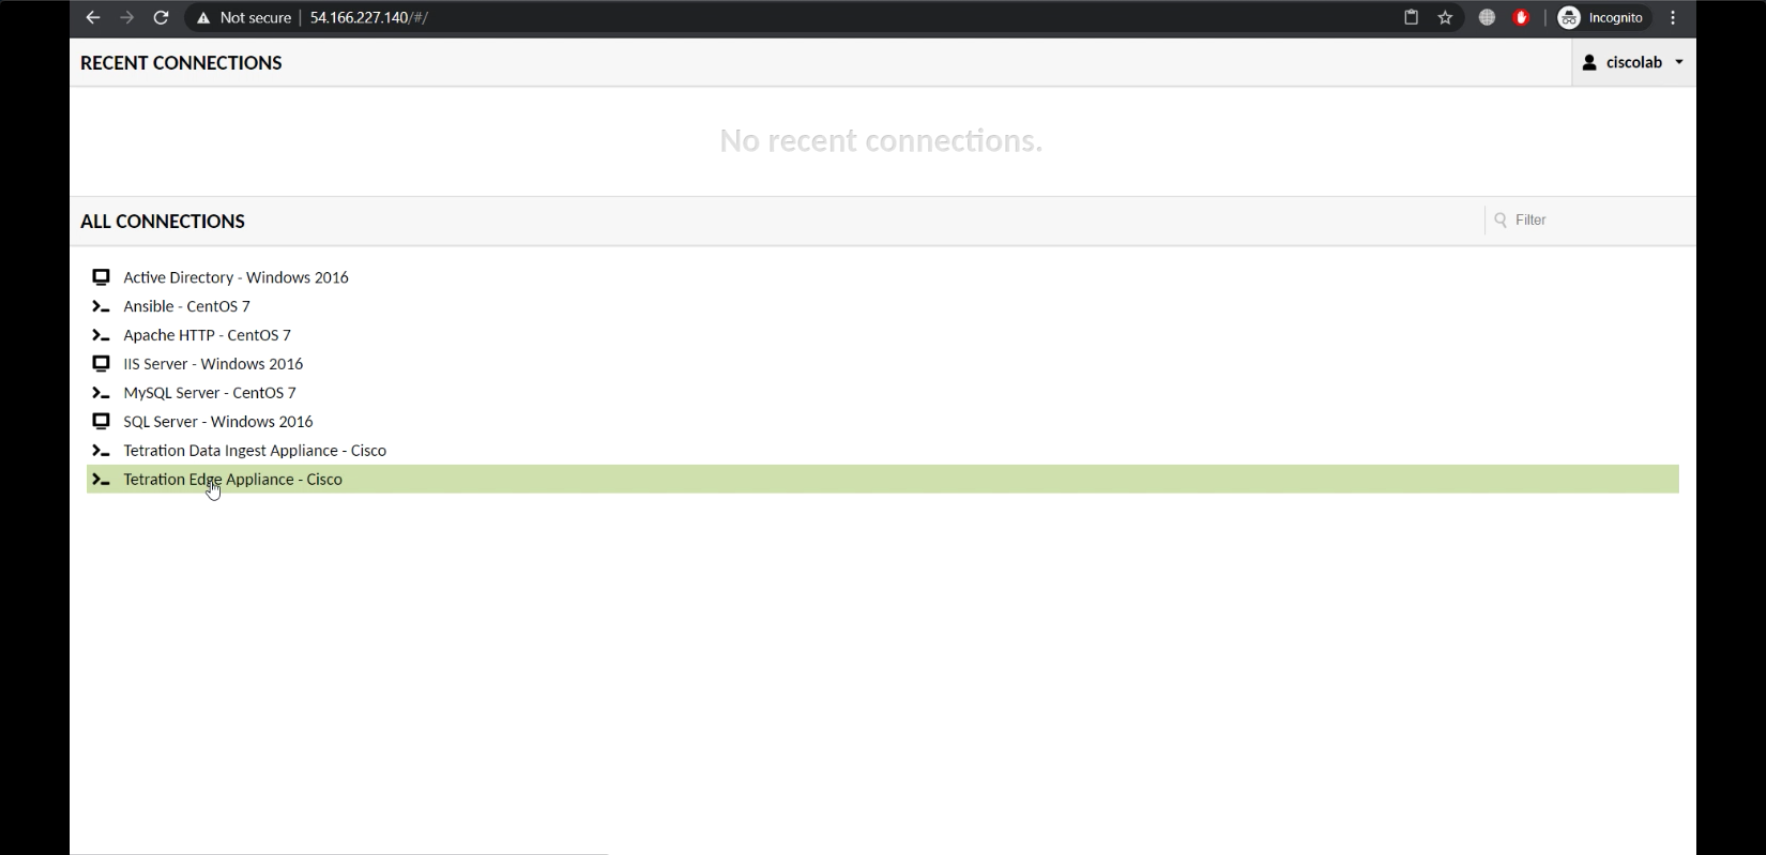
Step 011 - Open a session to the Tetration Edge appliance
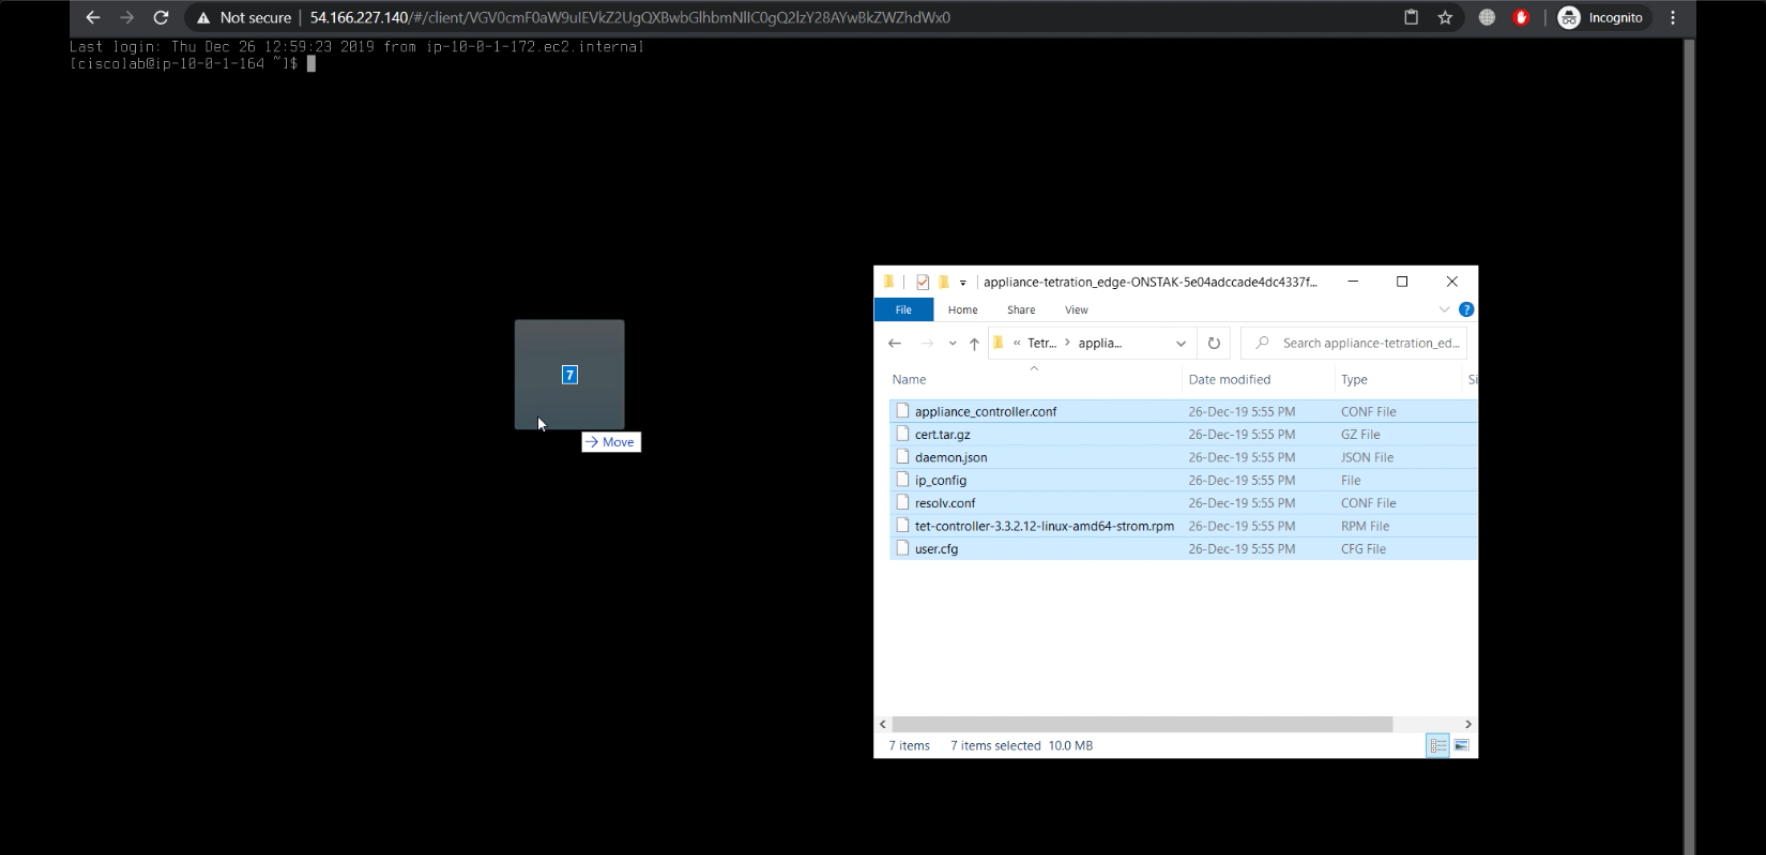
Step 012 - Copy the extracted files to the appliance
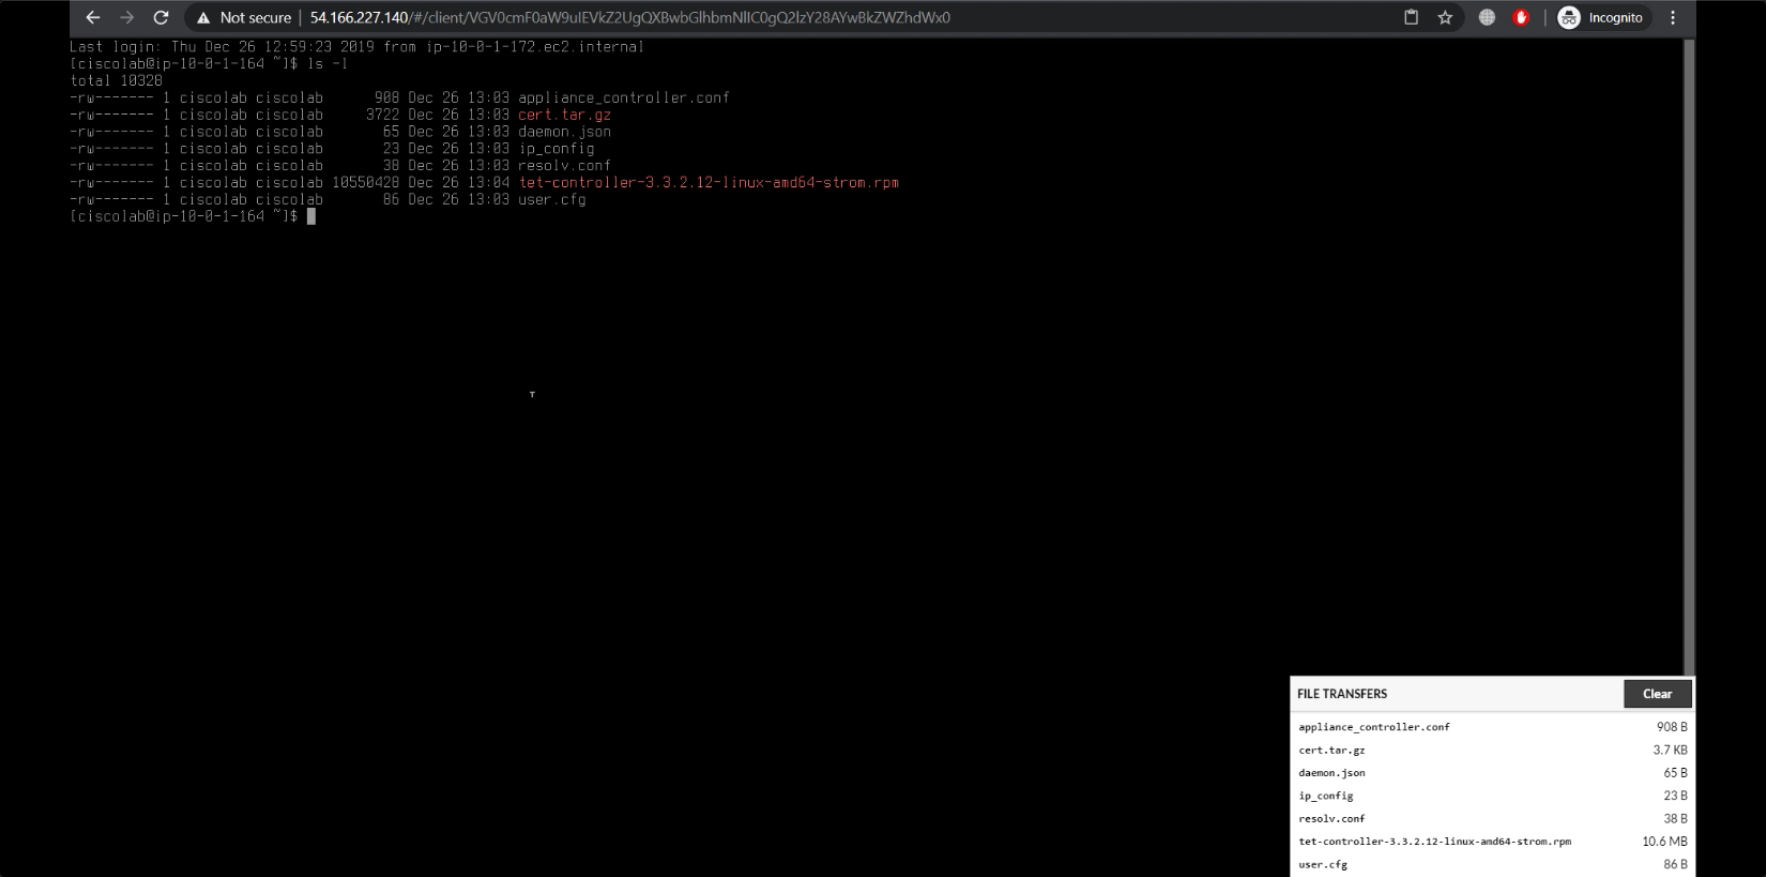
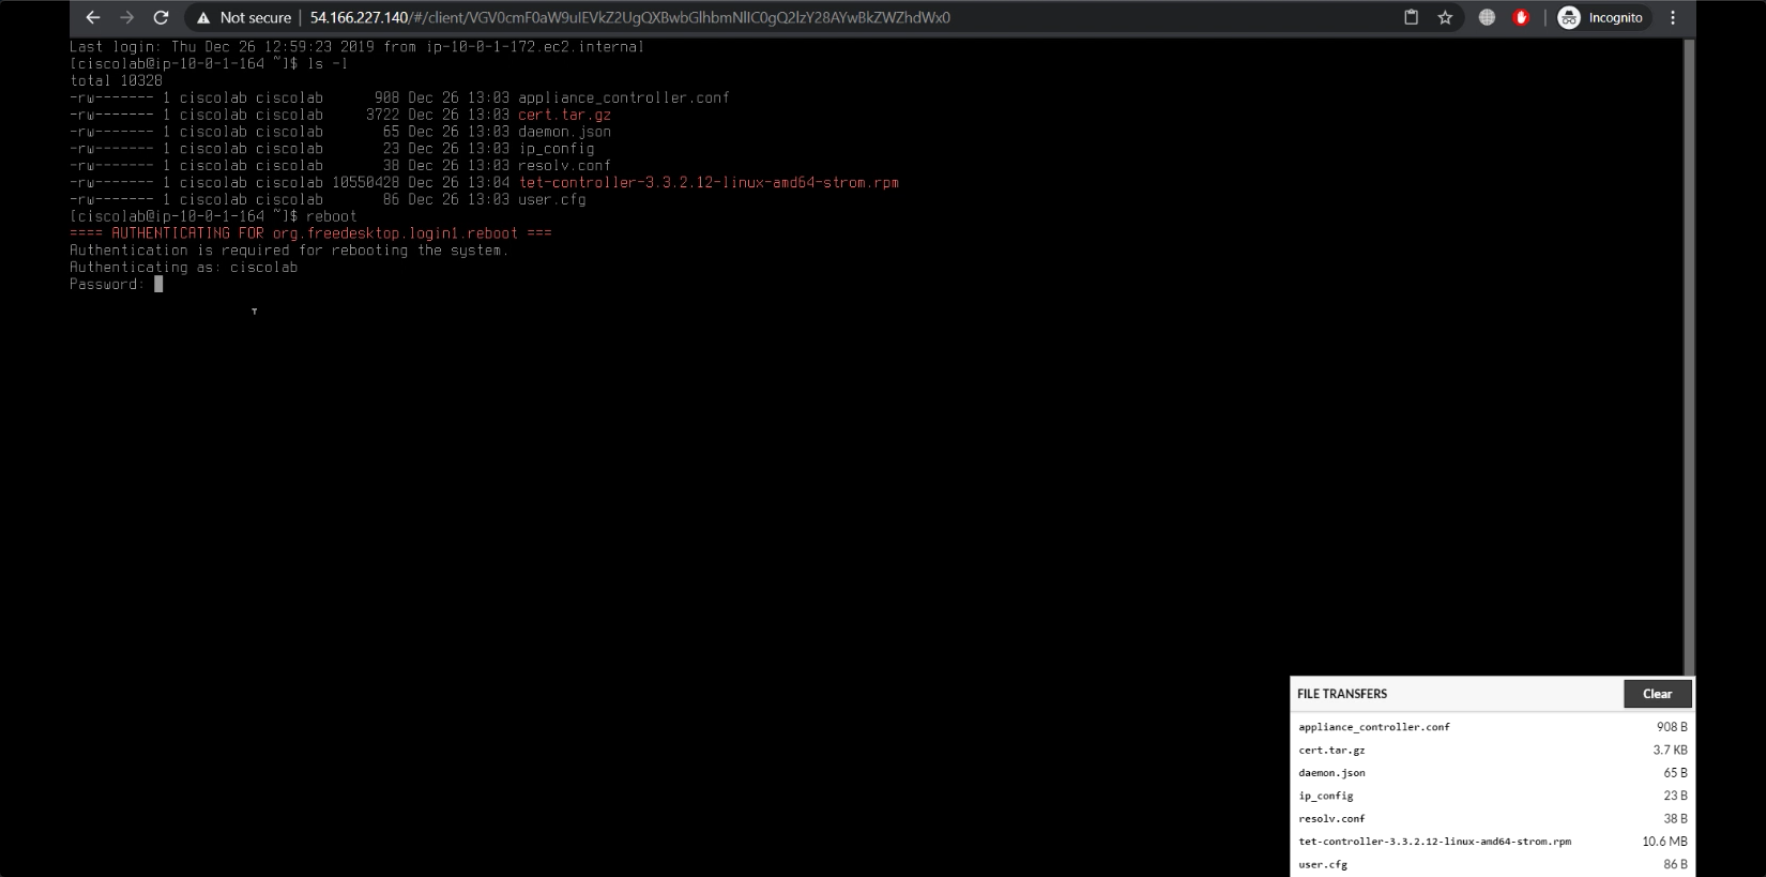
Step 013 - List the copied files
Step 014 - Reboot the appliance
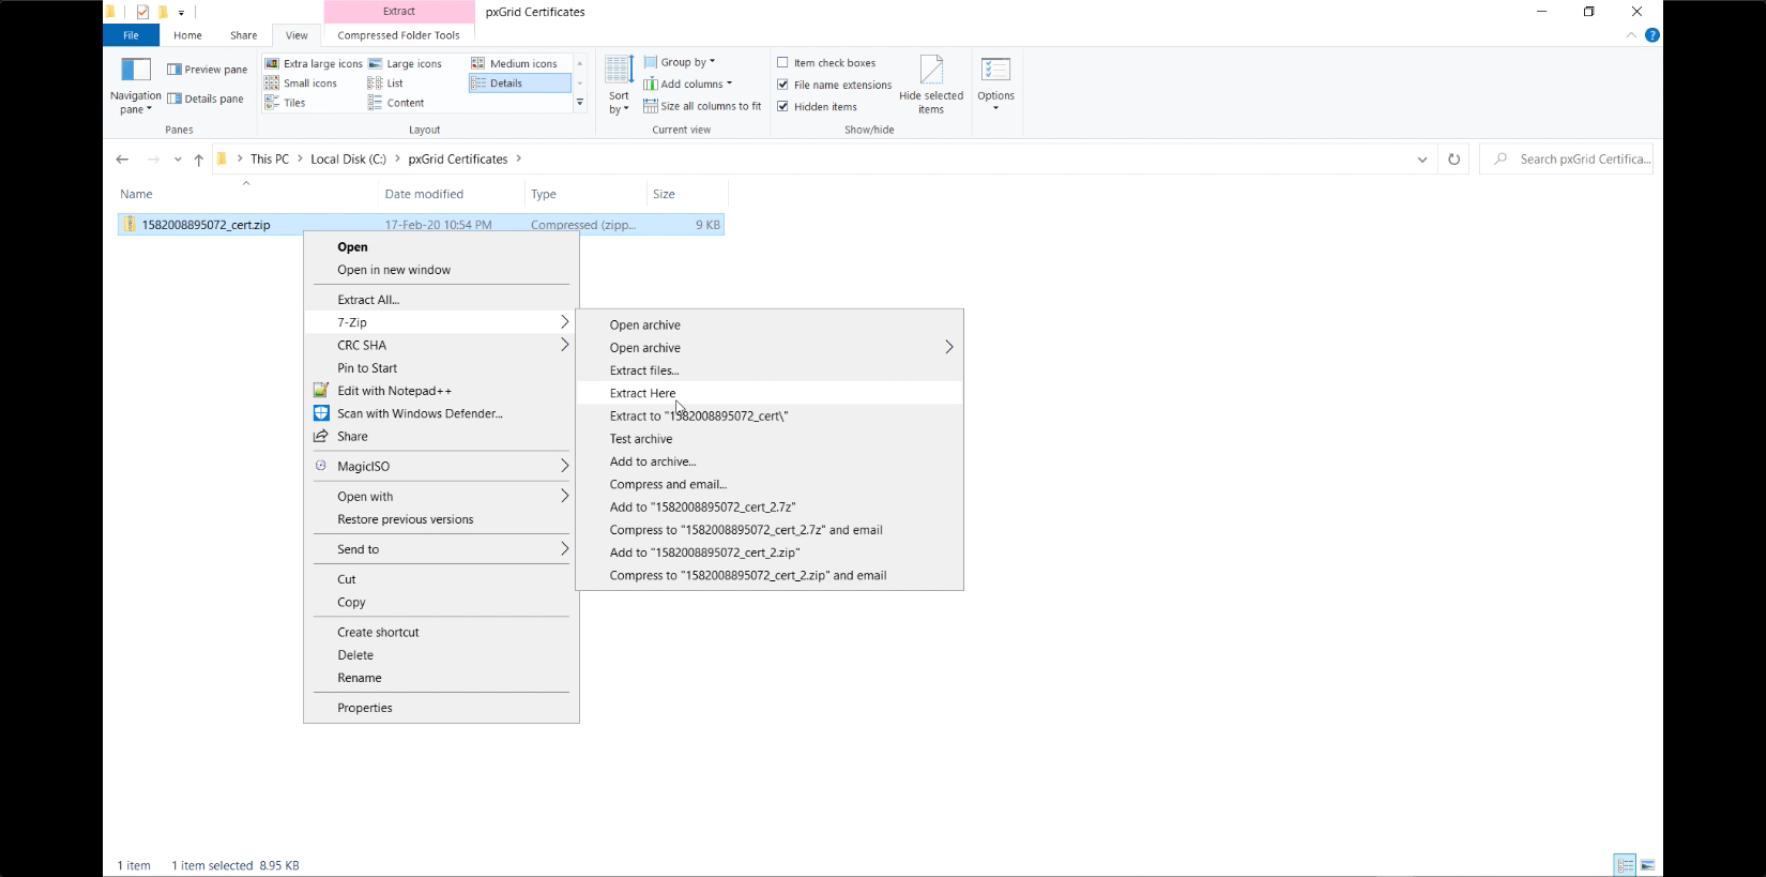
Step 015 - Extract the provided certificate data
Step 016 - Create an RSA key file
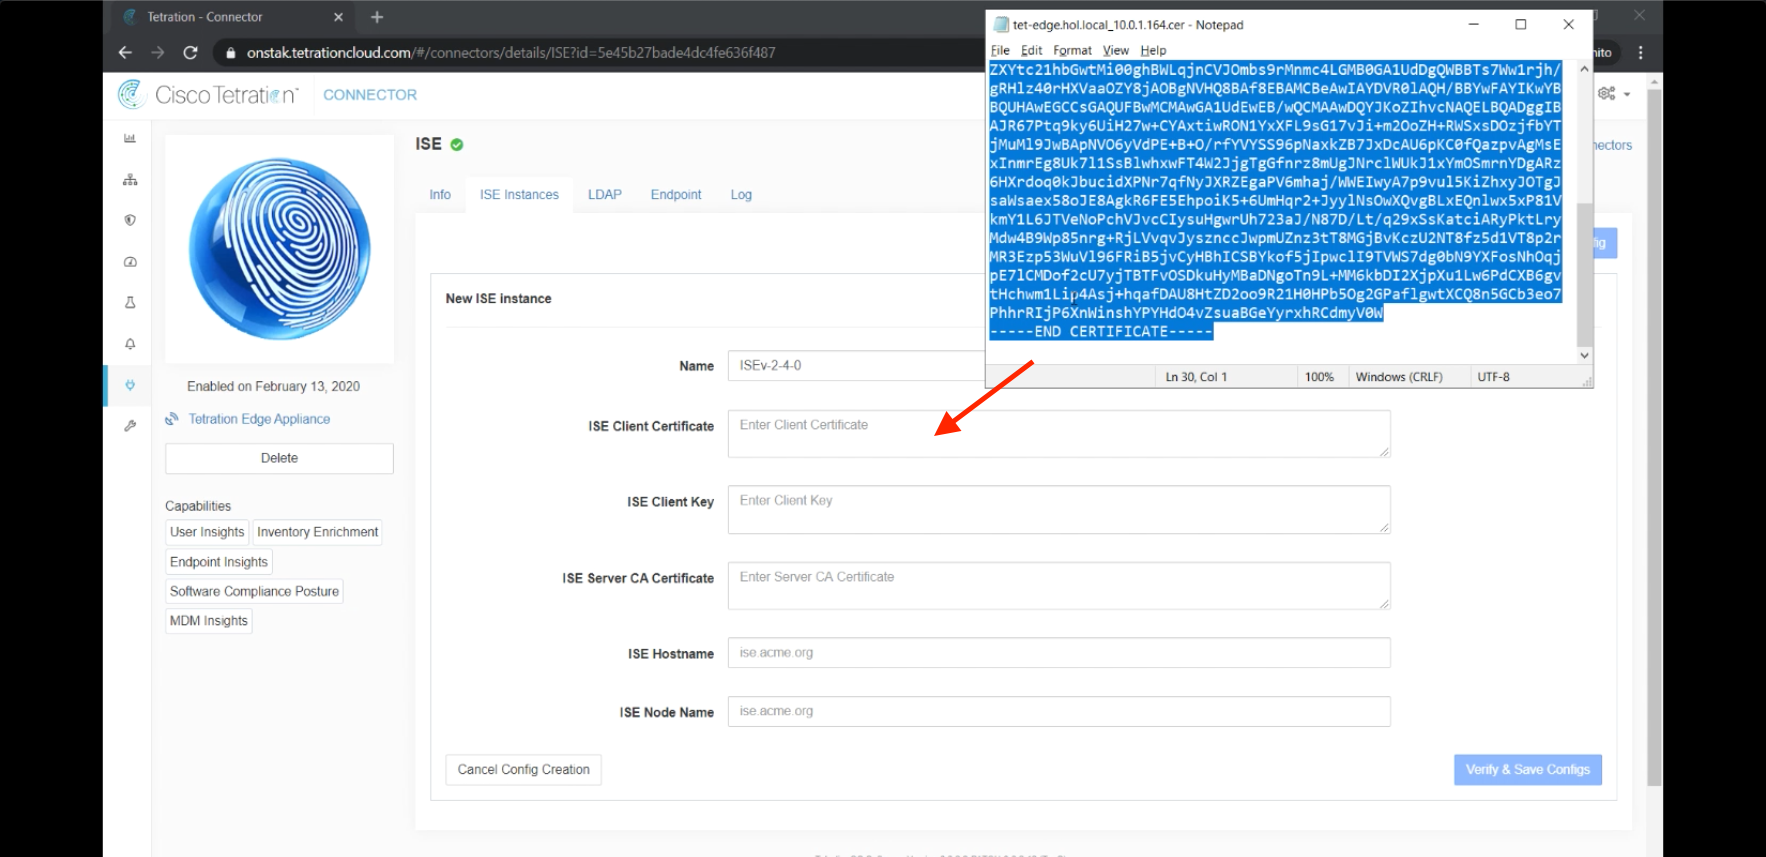
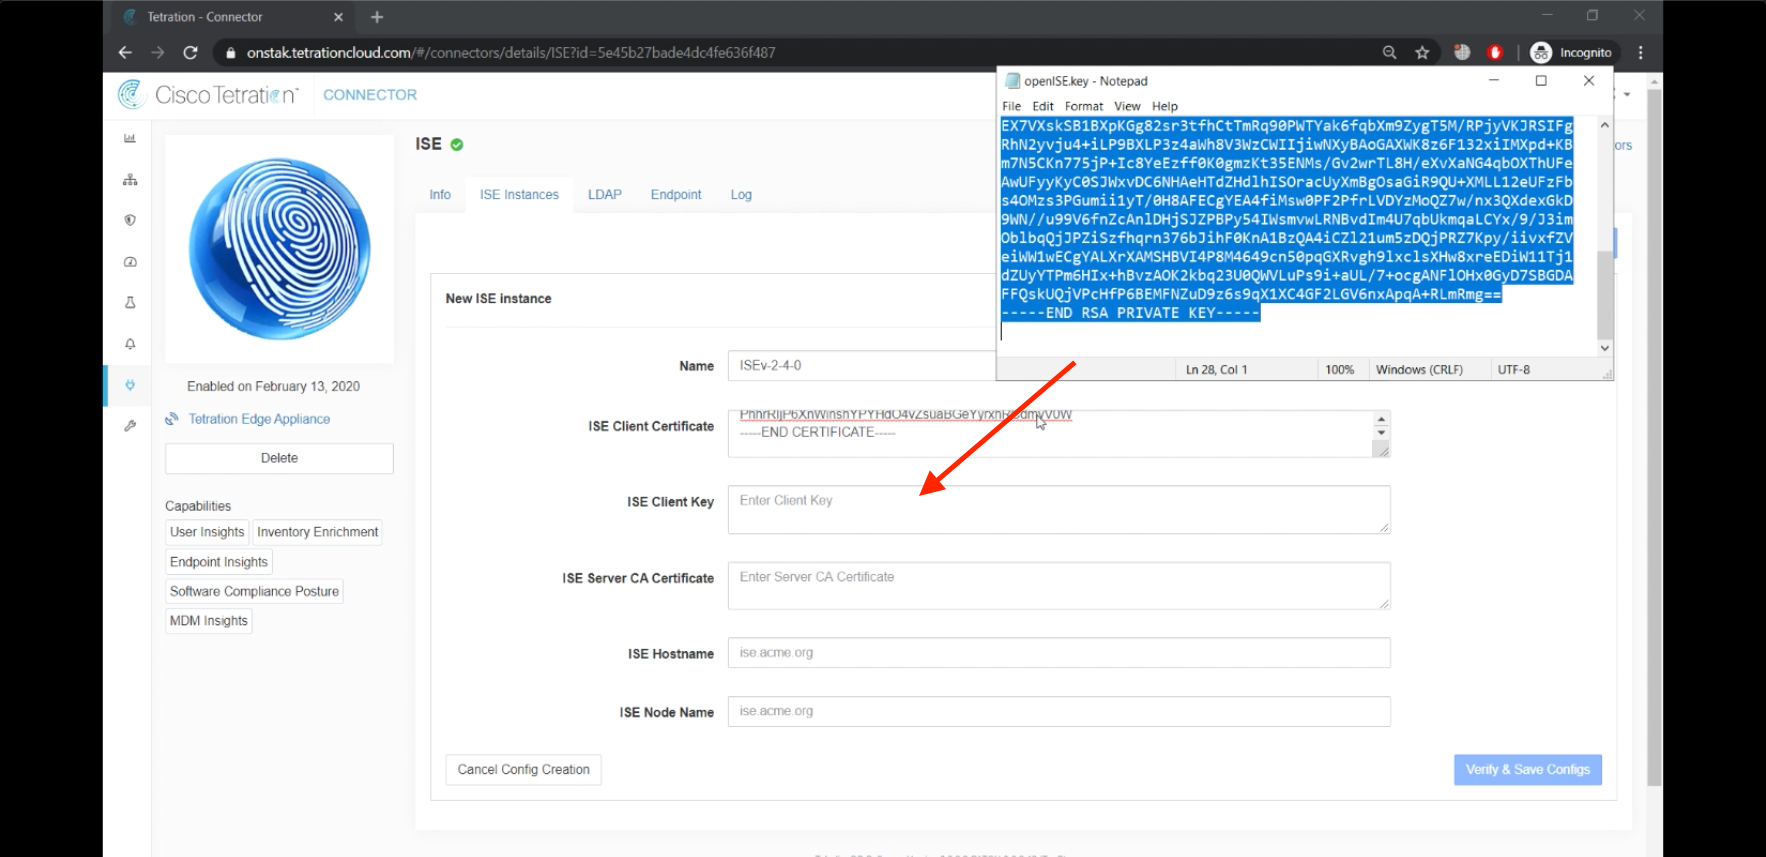
Step 017 - Open the certificates and key
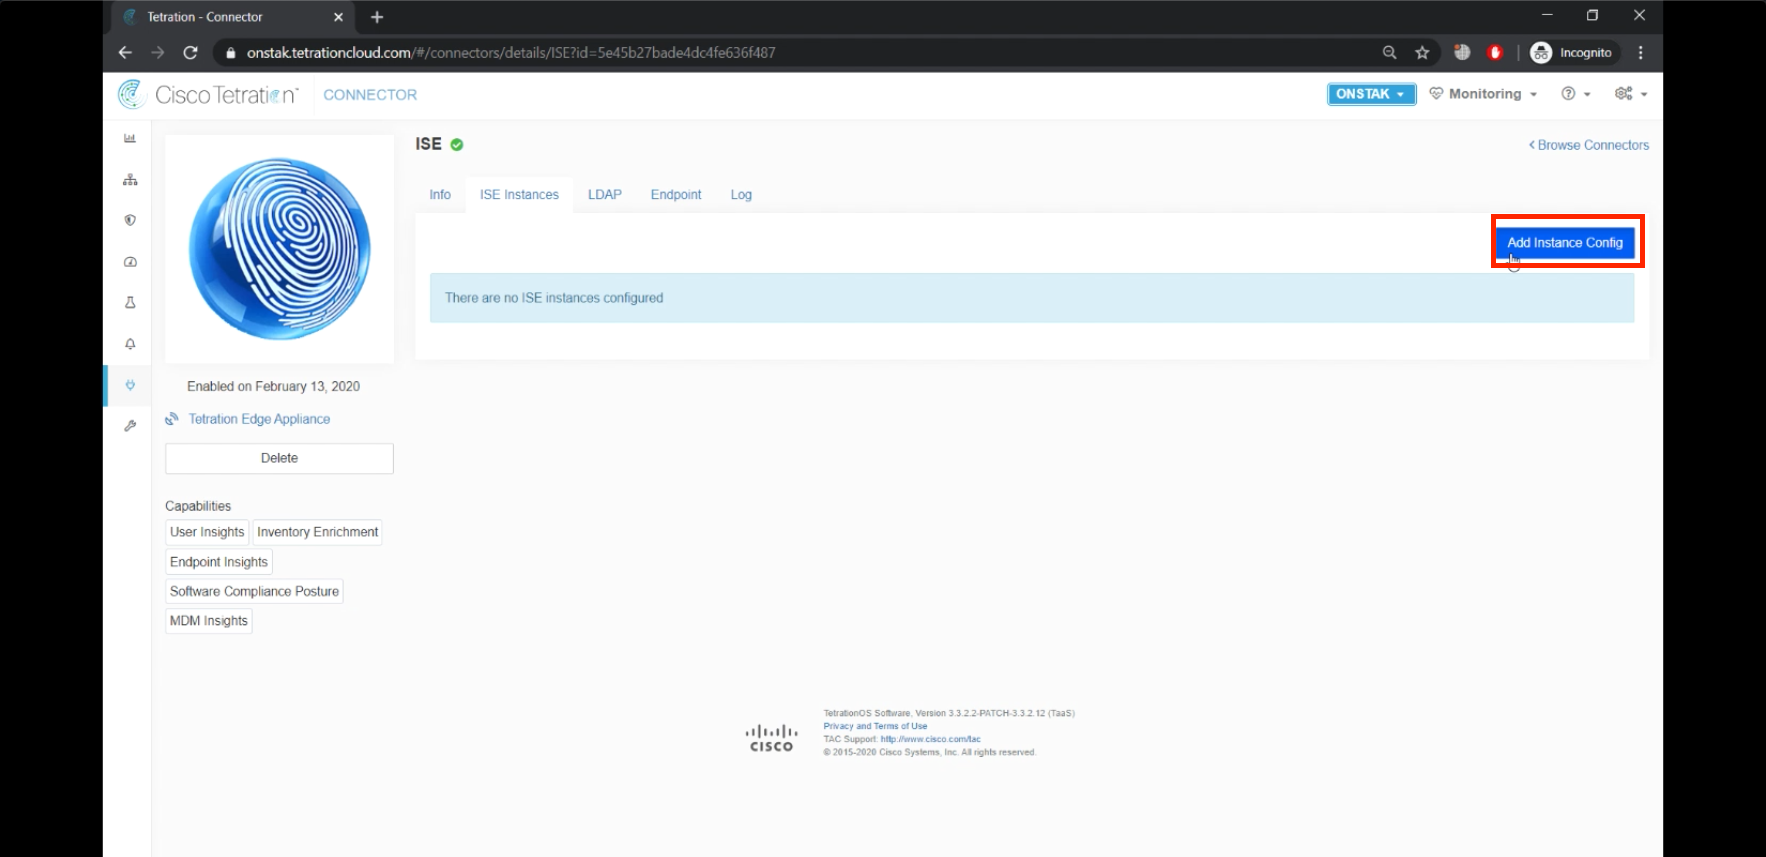
Step 018 - Navigate to the ISE connector
Step 019 - Add Instance Config
Step 020 - Copy/paste the ISE Client Certificate
Step 021 - Copy/paste the ISE Client Key
Step 022 - Copy/paste the ISE CA Certificate
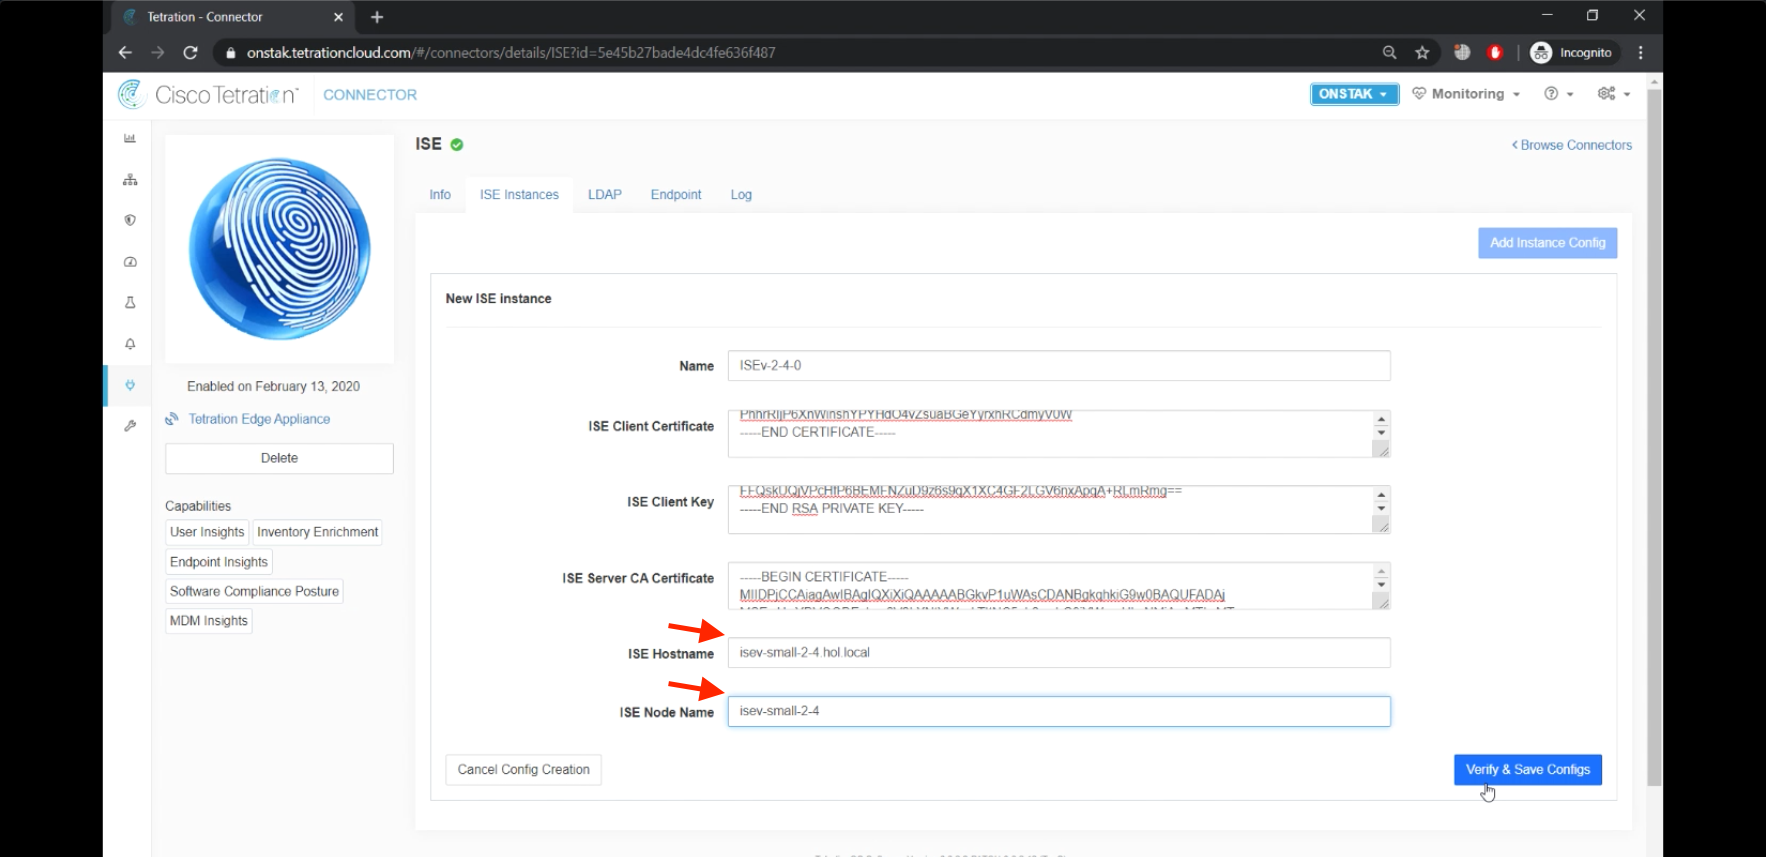
Step 023 - Enter the ISE hostname and node name
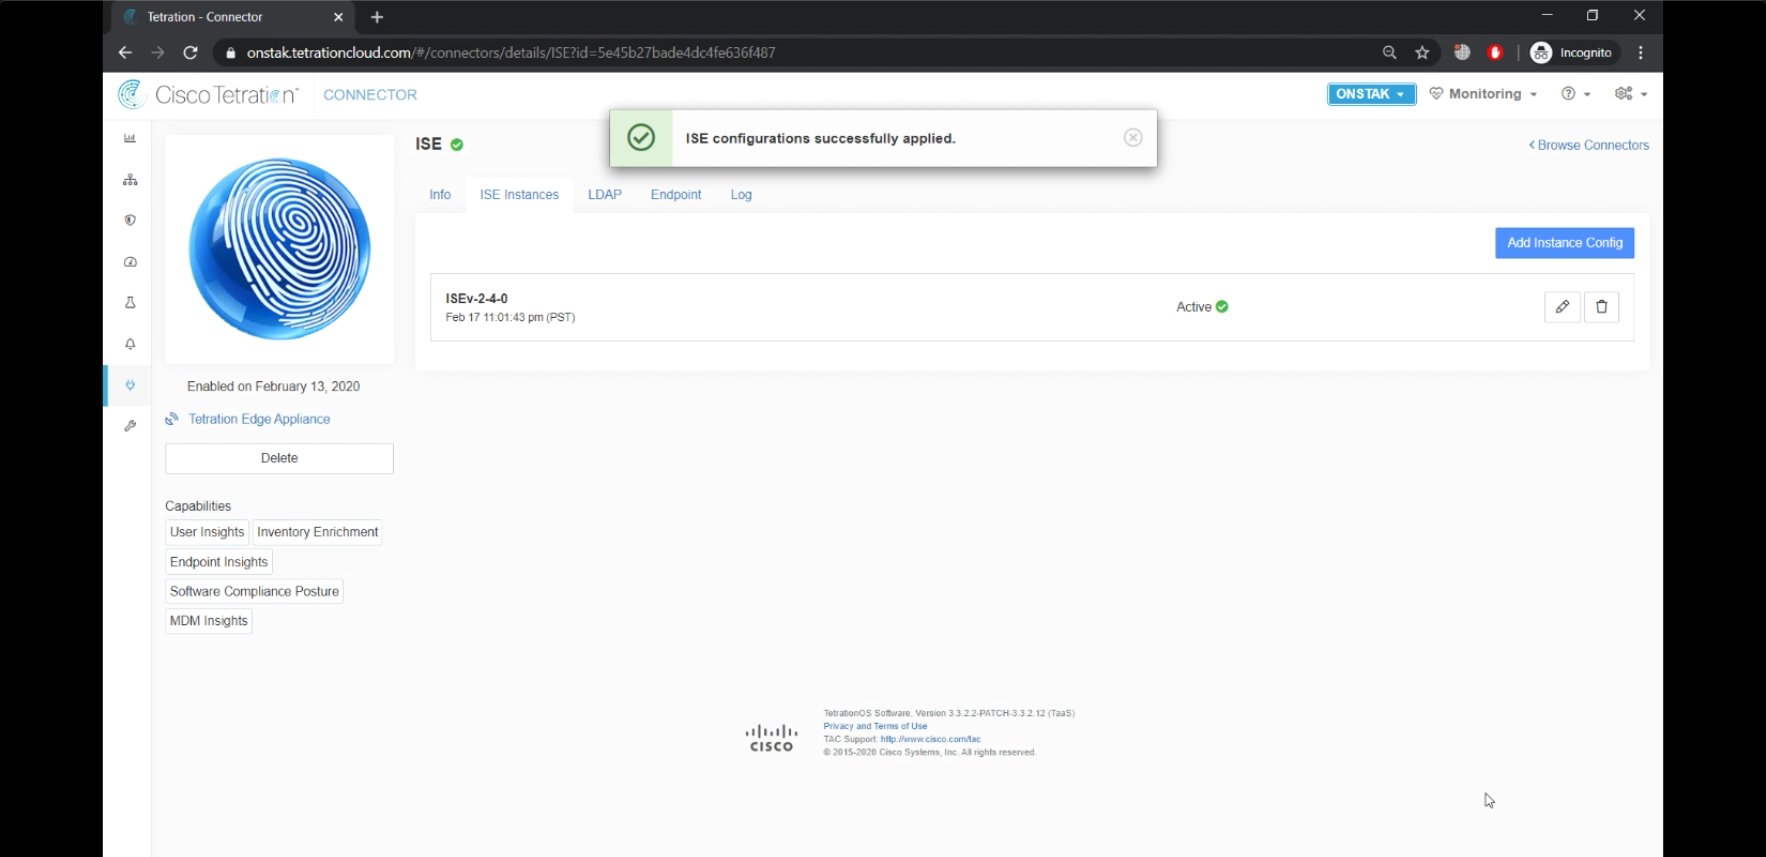
Step 024 - Configuration successfully applied
Step 025 - View the pxGrid certificates in ISE
Step 026 - Refresh to see the new tet-edge certificate
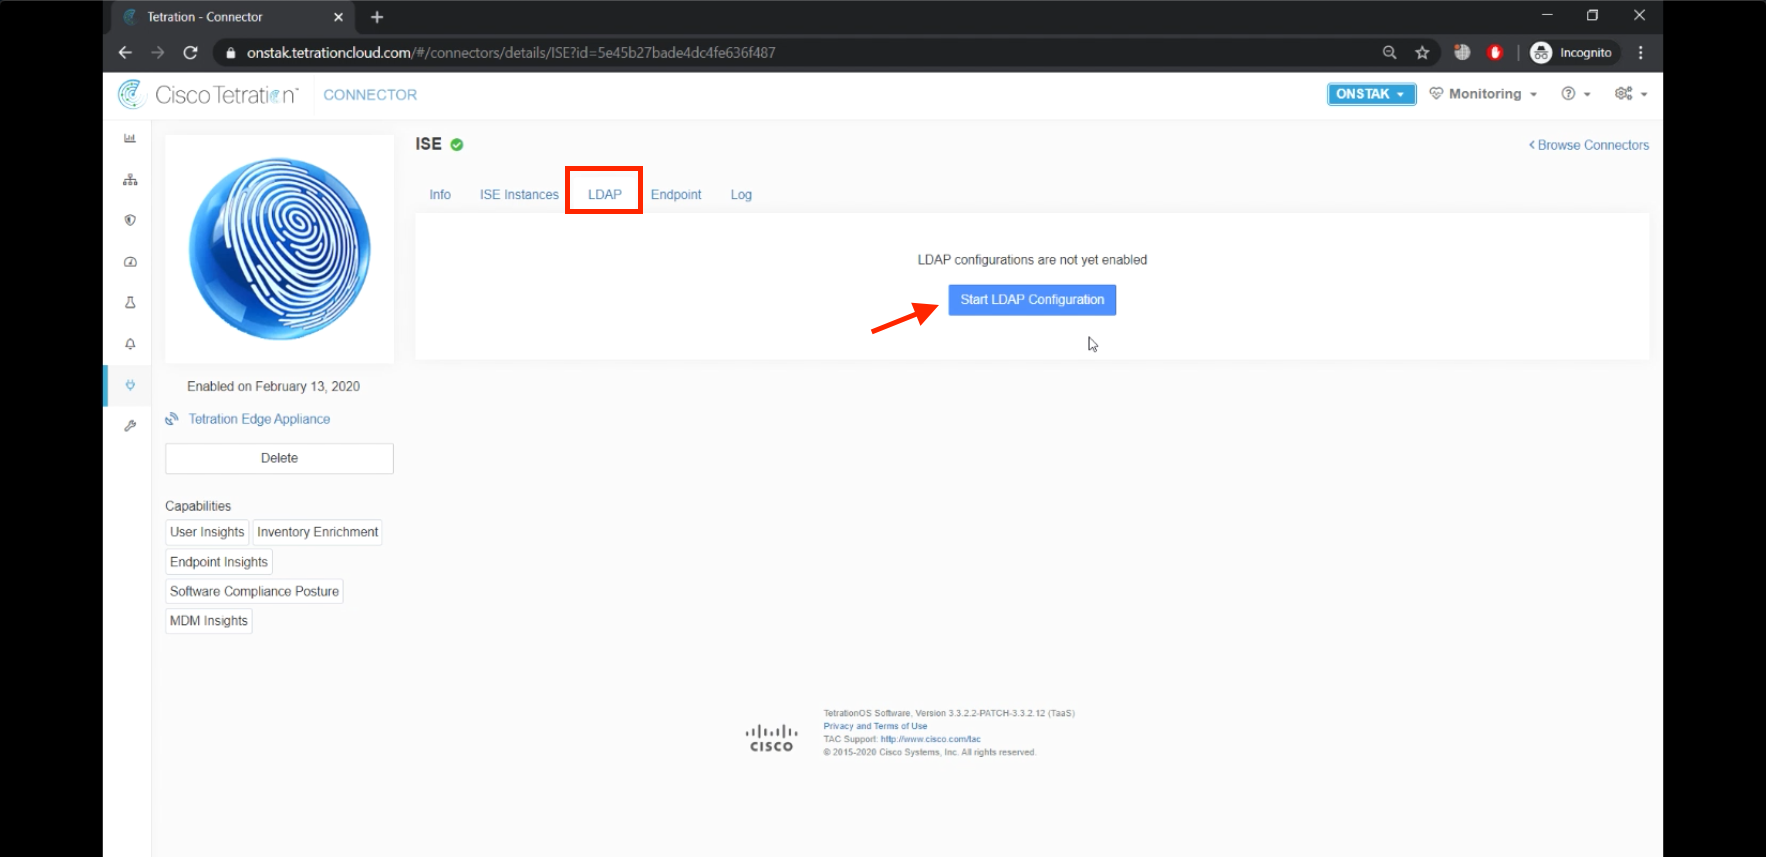
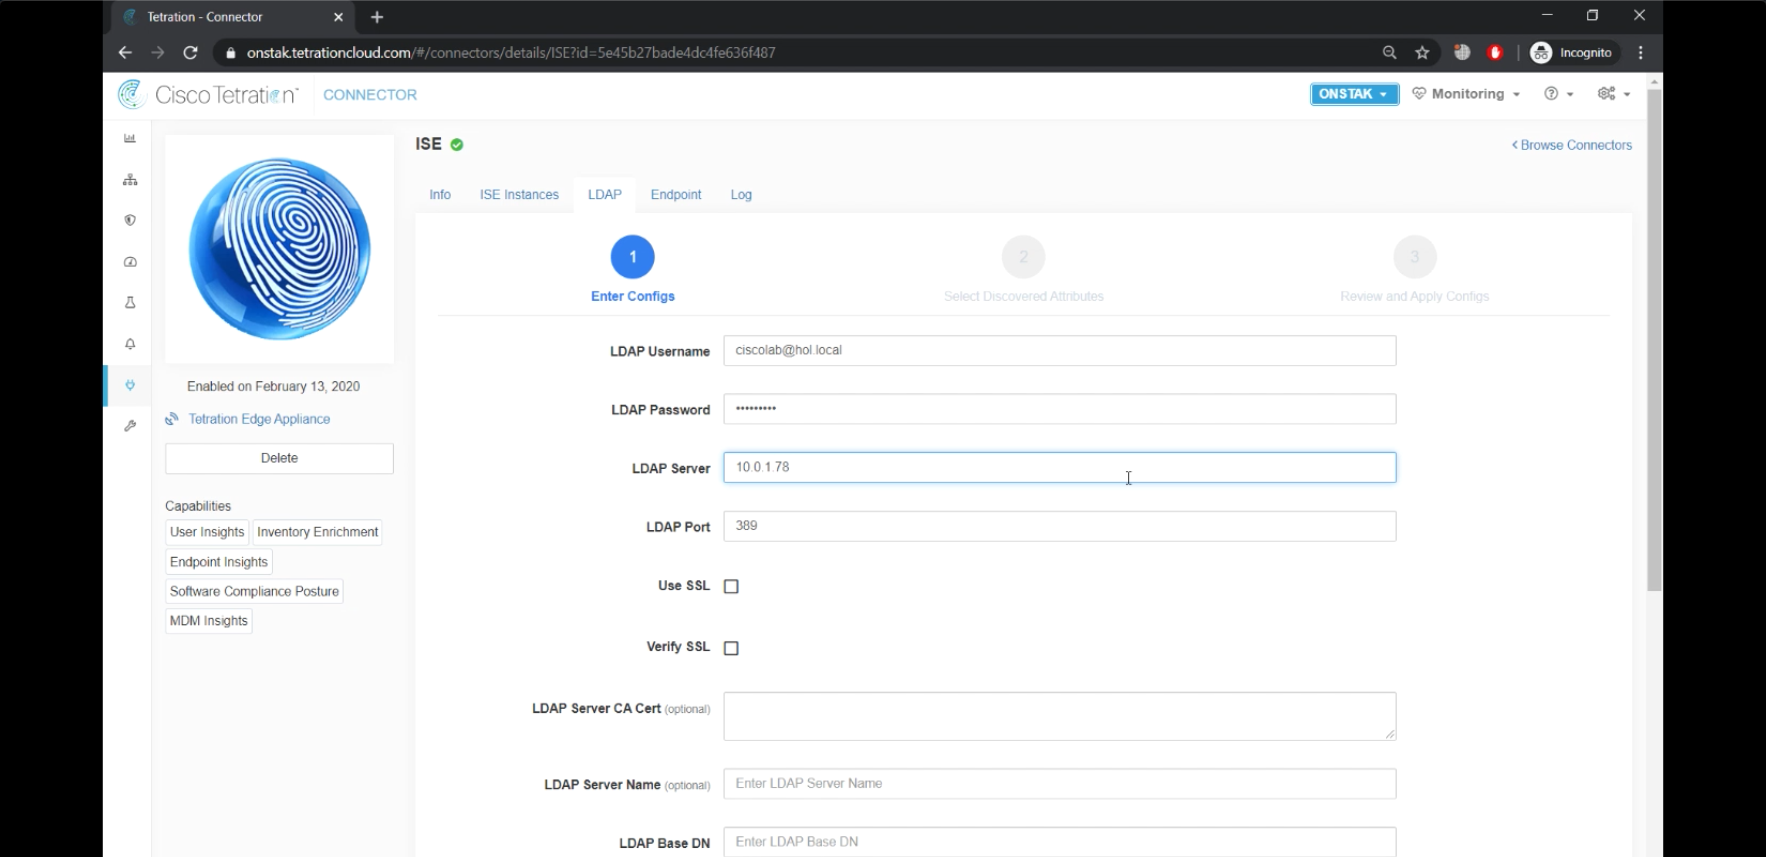
Step 027 - Begin LDAP configuration
Step 028 - Enter LDAP parameters
Step 029 - Enter LDAP parameters
Step 030 - Enter LDAP attributes
Step 031 - Apply LDAP configuration
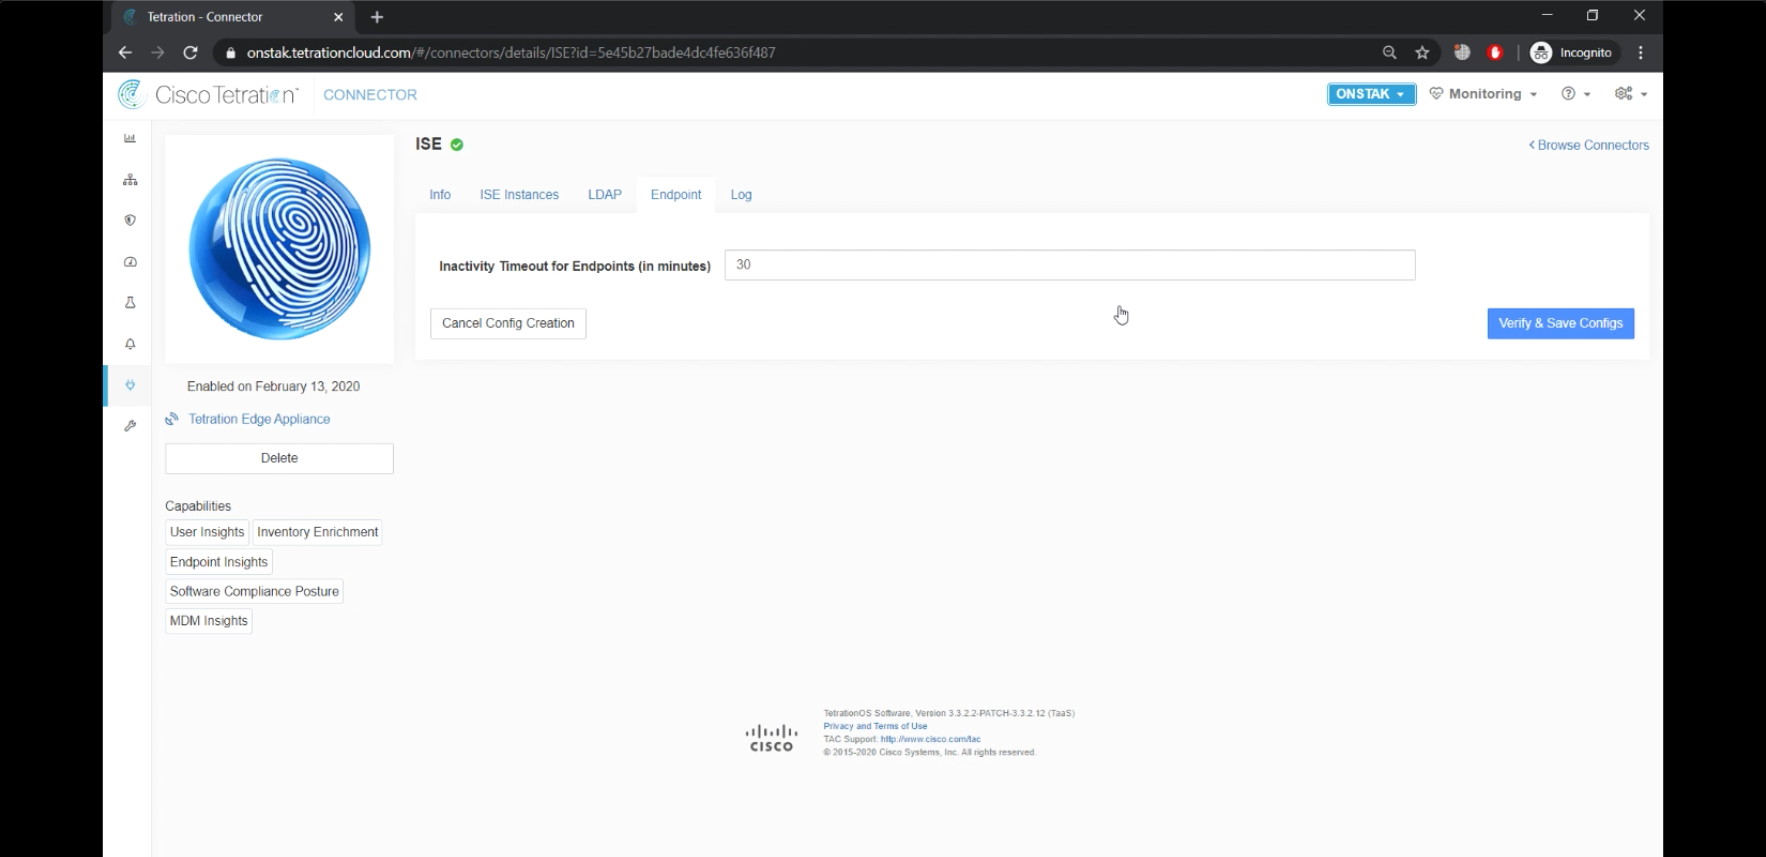
Step 032 - View endpoint timeout
Step 033 - Start Log configuration
Step 034 - Verify and Save Configs
Navigate to Connectors.

Click on ISE.
Click to Enable the ISE Connector.

Select Yes to begin deploying the virtual appliance.
The on-screen instructions refer to downloading an .ova file, this would be done if we were using an on-prem VMware installation. We have already deployed the Tetration Edge virtual appliance in AWS, so we can skip this step. Select Next.
Enter the information that will be populated into the Edge appliance. The IP addressing information is provided in your student workbook. Please make sure to enter the IP address of the Windows Active Directory server for the Name Server field. Do not enter 1.1.1.1 and 8.8.8.8 as shown in the diagram, or name resolution will not work from the Edge appliance to the ISE appliance and result in not being able to bring up the ISE integration.
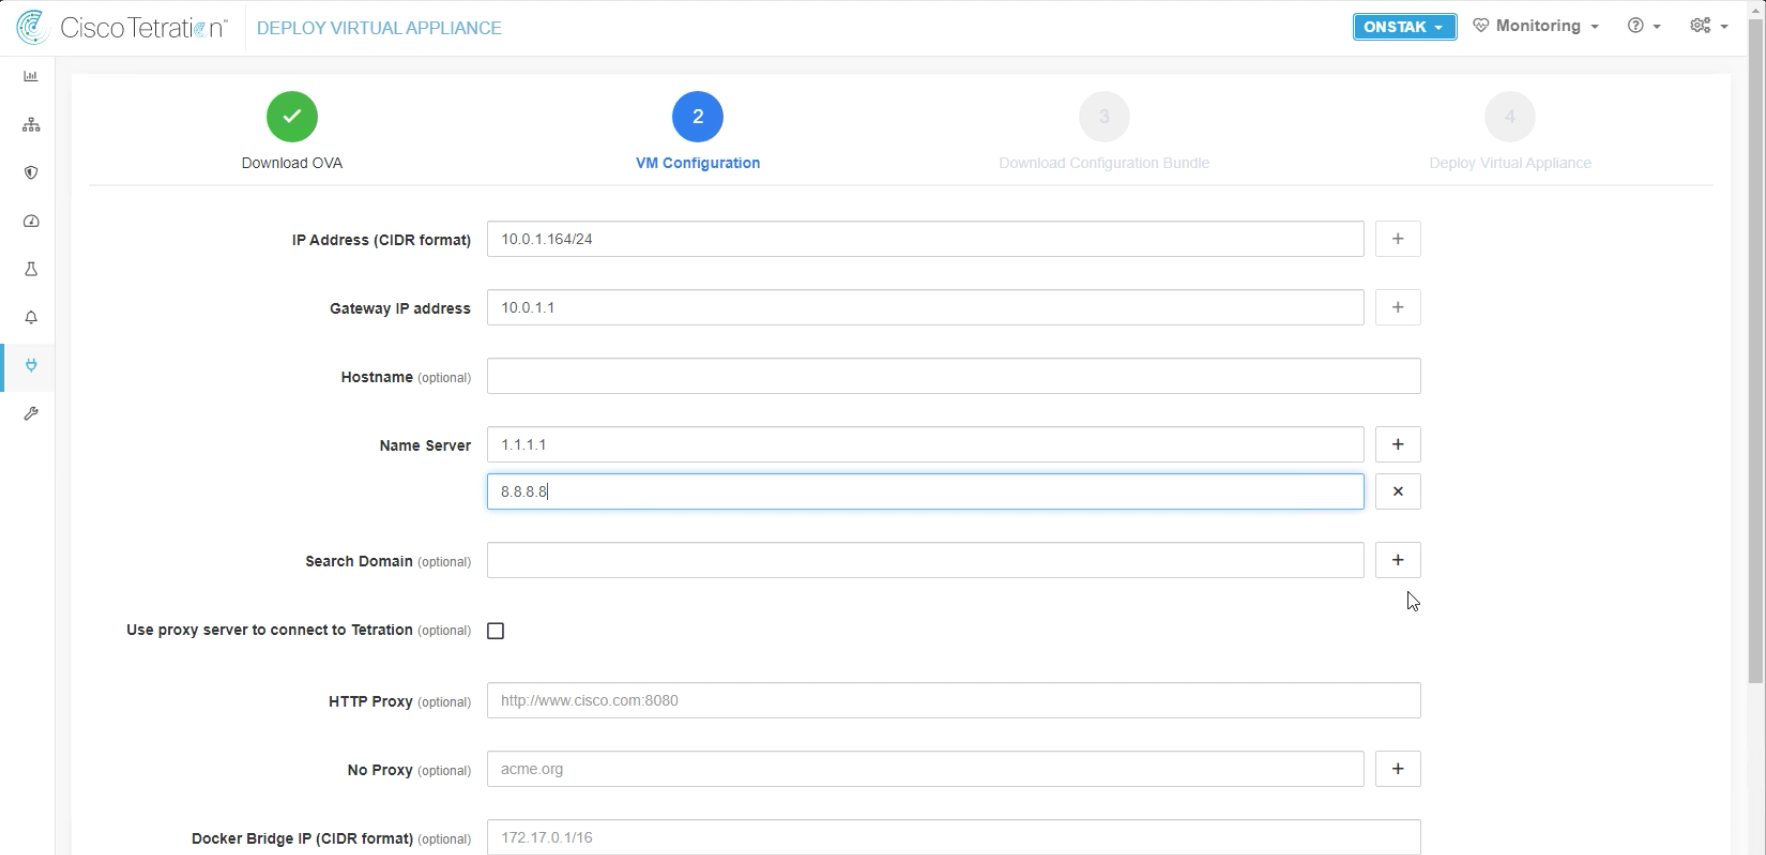
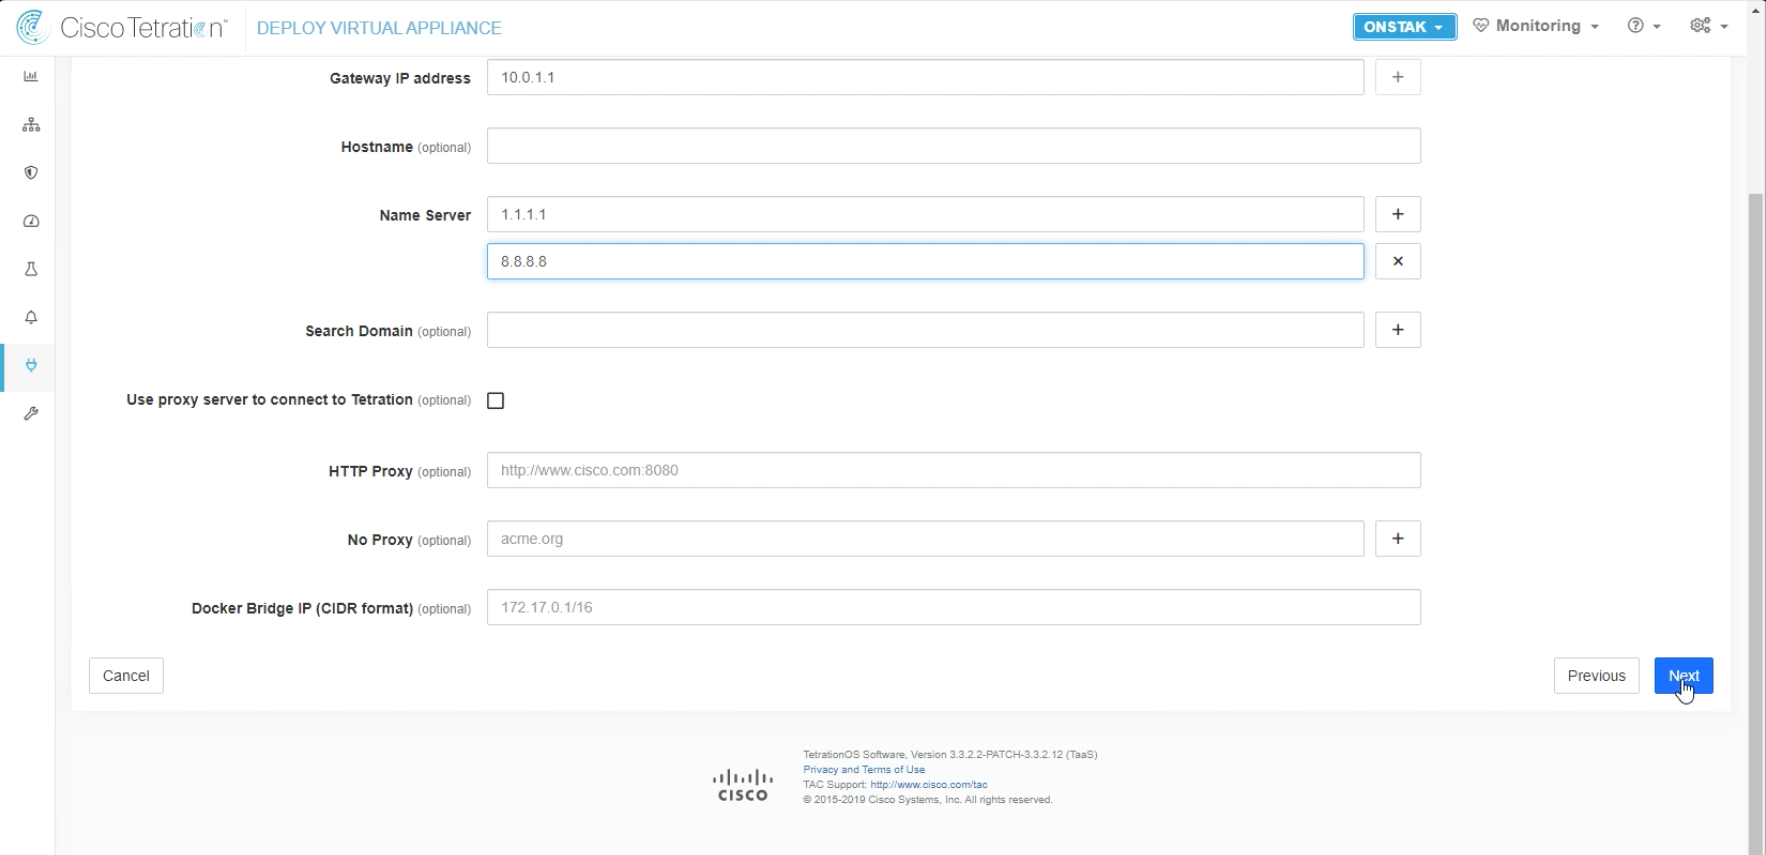
Enter the Search Domain hol.local and then select Next.
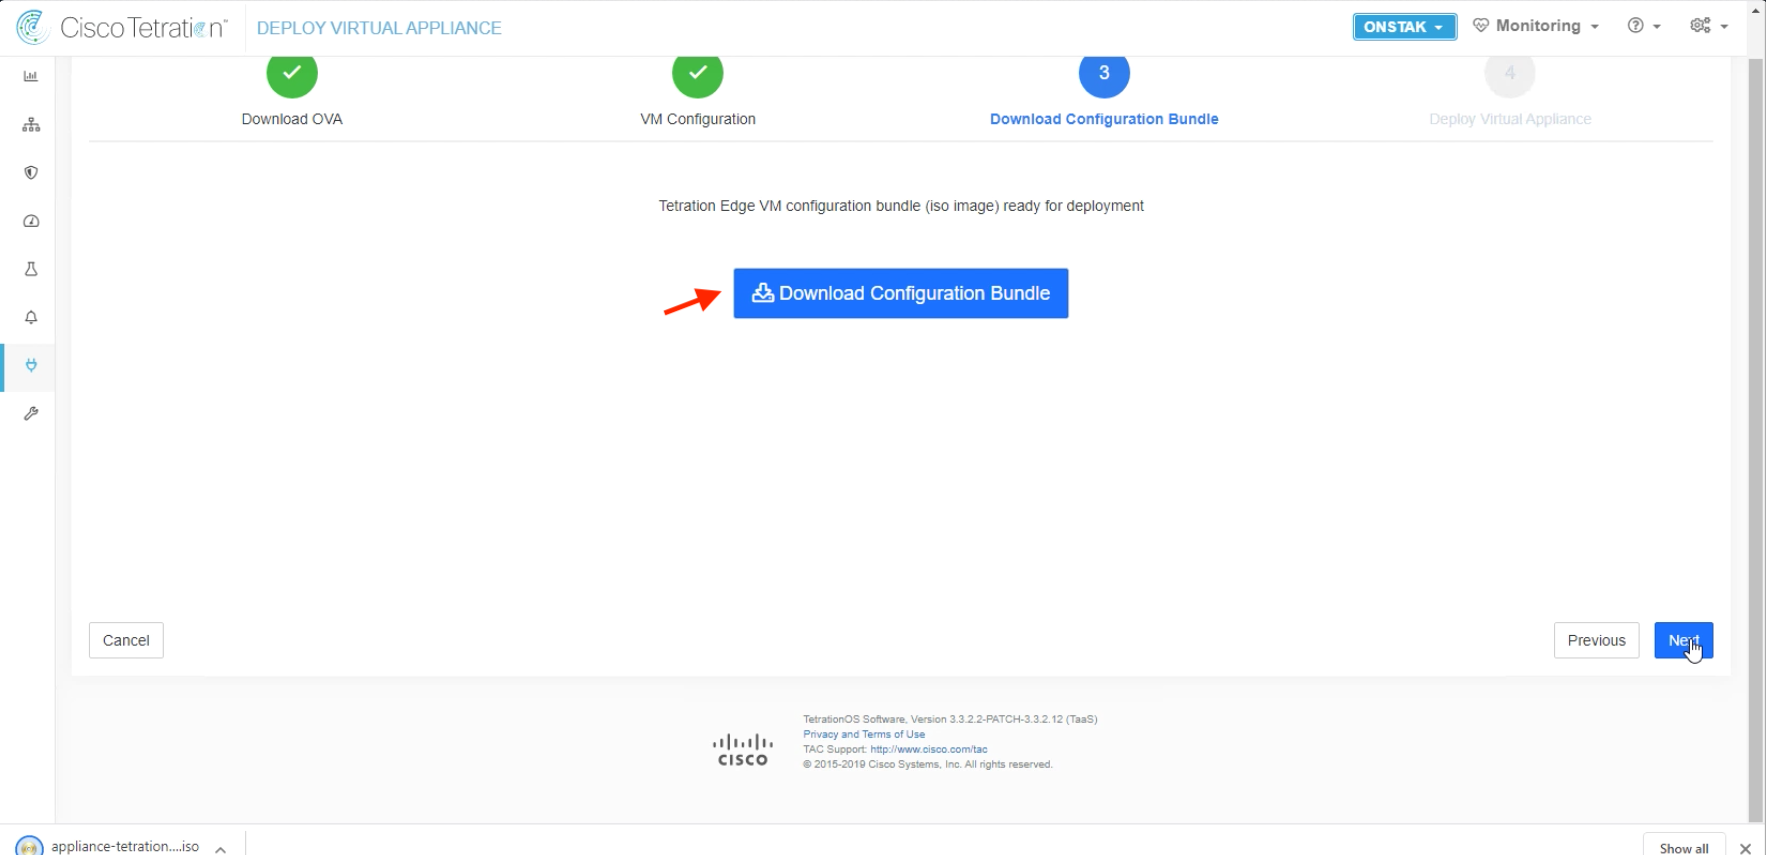
Click Download Configuration Bundle and save the .iso file to your desktop.
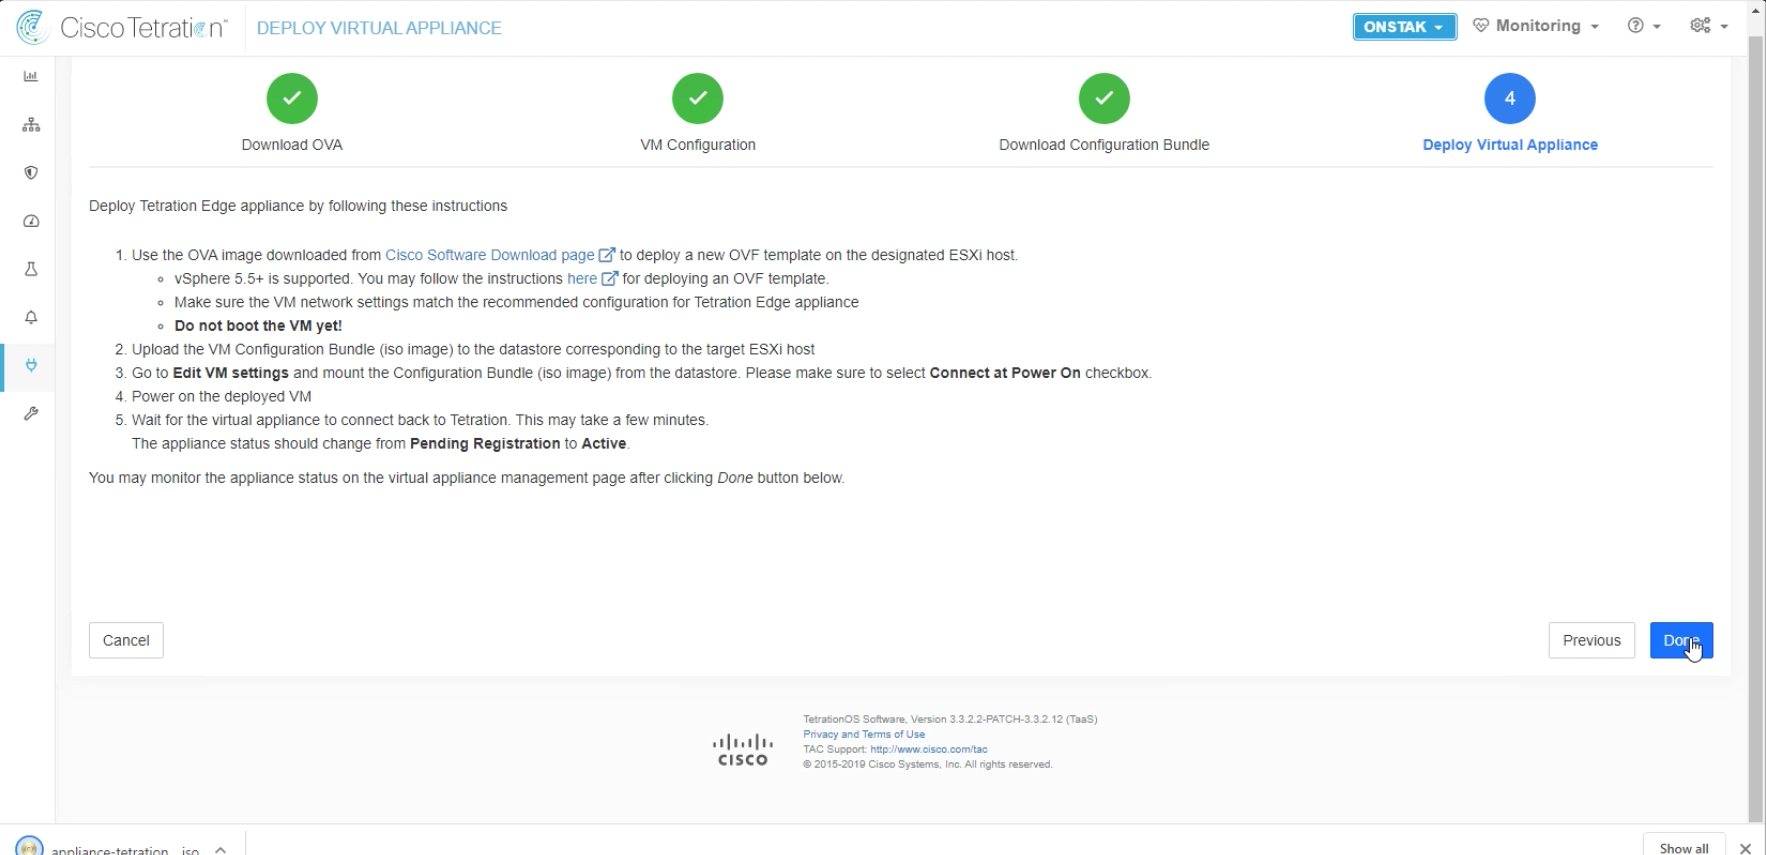
Click Done to complete the Deploy Virtual Appliance wizard.
Extract the contents of the .iso file.
Open a session to the Tetration Edge appliance.
Copy the extracted files from the .iso to the Tetration Edge appliance. You can drag and drop the files on the browser window to accomplish this.
Enter the command ls -l and ensure all of the files from the .iso were copied over.
Reboot the appliance by issuing the reboot command.
Extract the provided certificate data to your desktop.
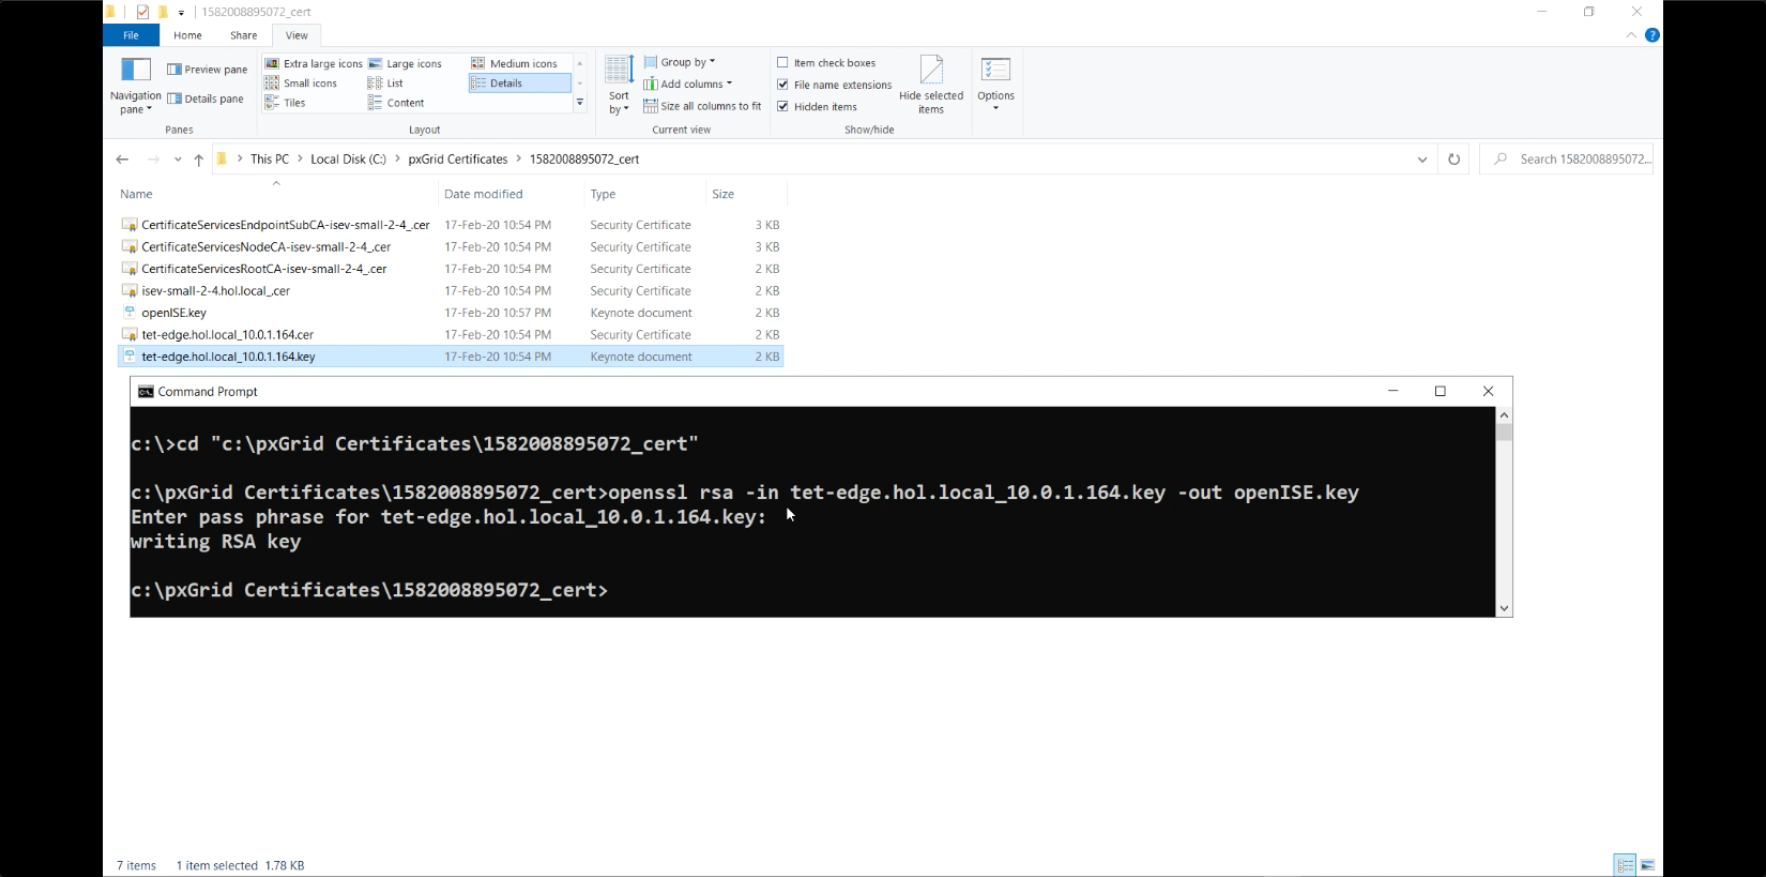
Open a command prompt and change directory into the folder where the certificate data was extracted. Enter the following command, substituting the correct IP address for the Tetration Edge appliance for 10.0.1.164.
openssl rsa -in tet-edge.hol.local_10.0.1.164.key -out openISE.key
Enter a passphrase that you will remember.
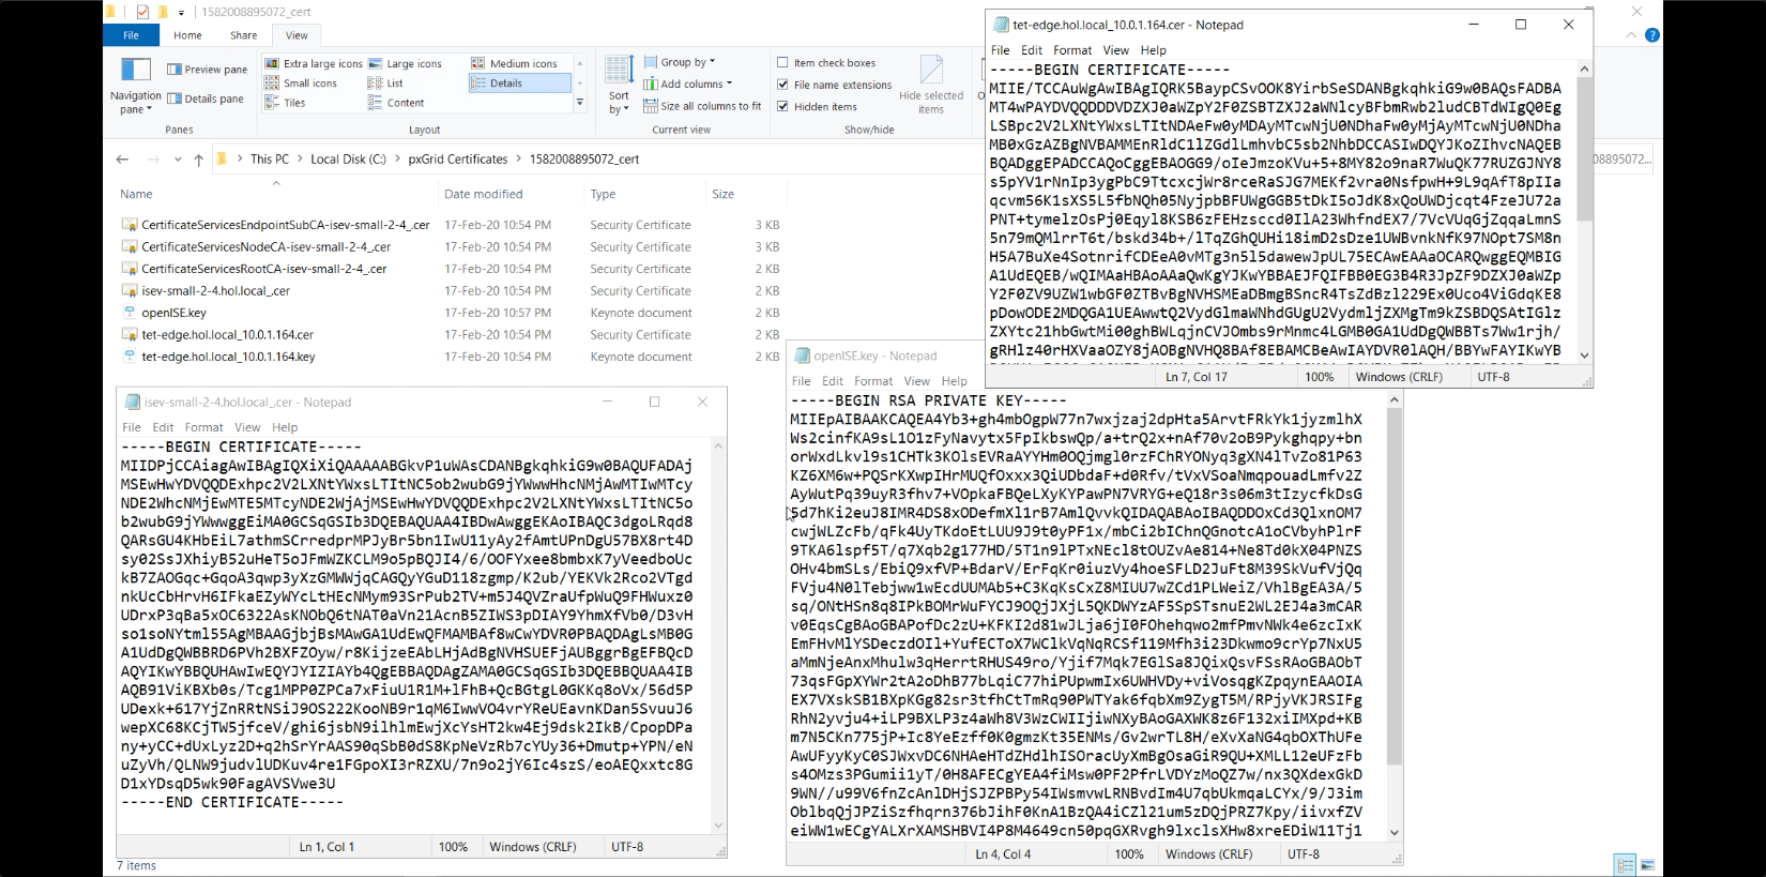
Open the certificates and key file in a text editor.
Navigate to Connectors and select ISE.
Click on Add Instance Config.
Paste the contents of file tet-edge.hol.local_10.0.1.164.cer to the ISE Client Certificate.
Paste the contents of the openISE.key file to the ISE Client Key.
Paste the contents of the file isev-small-2-4.hol.local_cer to the ISE Server CA Certificate.

Set the ISE Hostname to isev-small-2-4.hol.local and the ISE Node Name to isev-small-2-4. Then click Verify & Save configs.
You should receive the message “ISE configurations successfully applied”
Open a session to ISE and navigate to Administration > PxGrid Services > Web Clients.
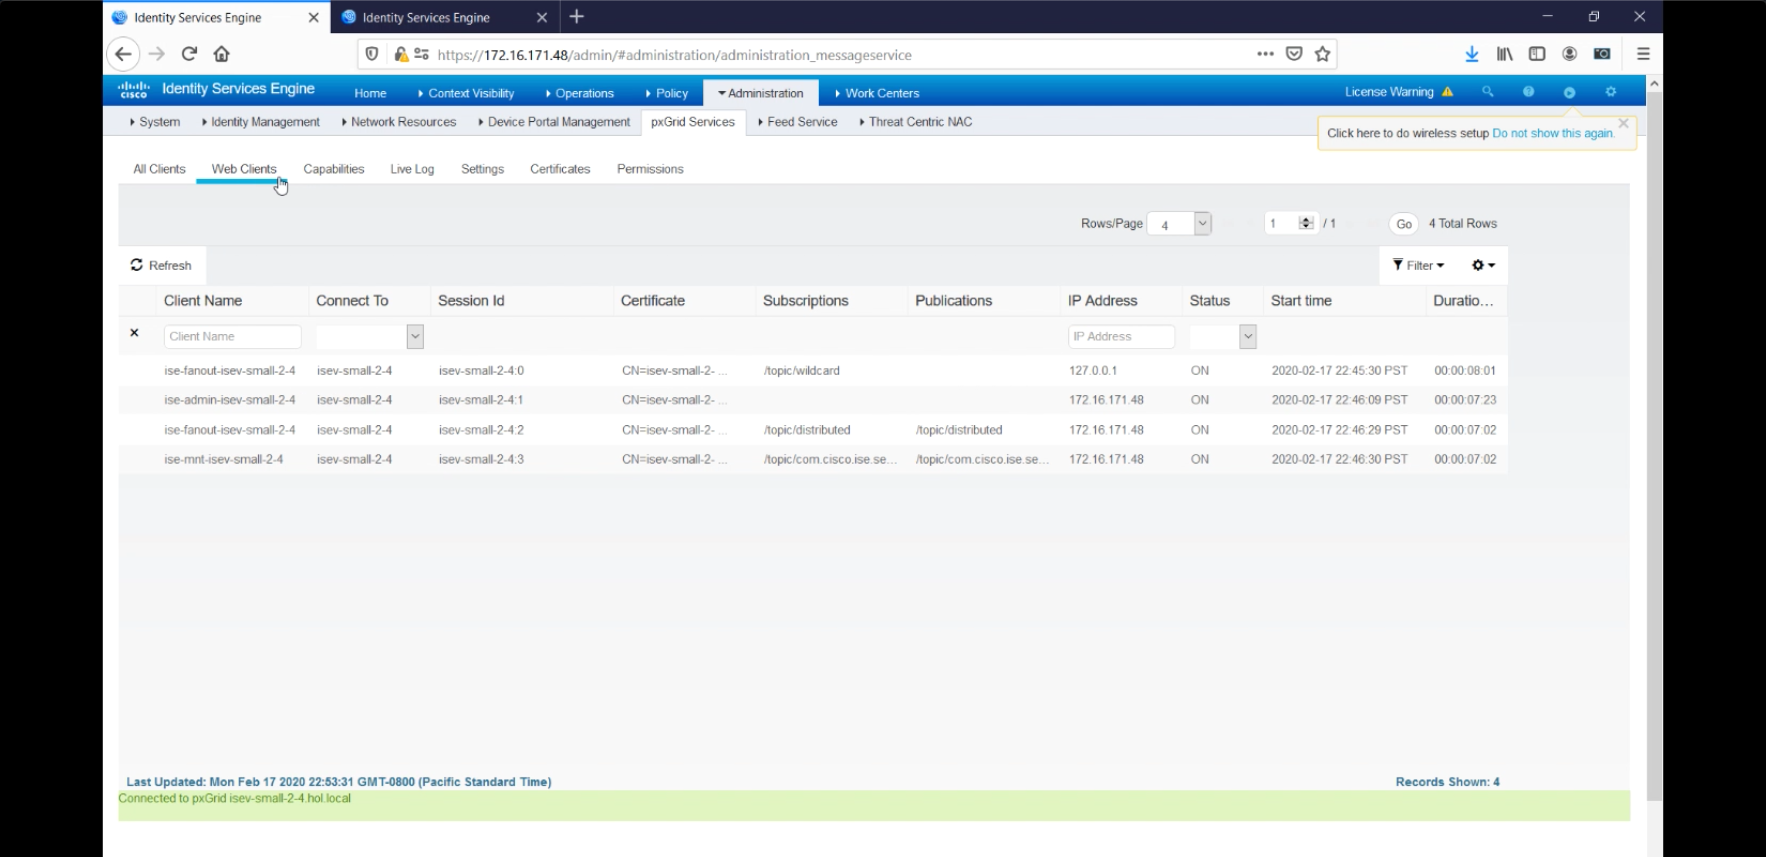
Click on Refresh to view the new certificate that was assigned to the Tetration Edge appliance.

Navigate back to Connectors and select the ISE connector. Click on the LDAP tab. In addition to ISE attributes, we can also bring in LDAP attributes from Active Directory which will be populated into Tetration as annotations.
Enter the LDAP configuration parameters as shown in the image. However, you must substitute the LDAP Server IP address with your Active Directory server IP address.
Enter the LDAP Base DN and Filter String as shown. Then select Next.
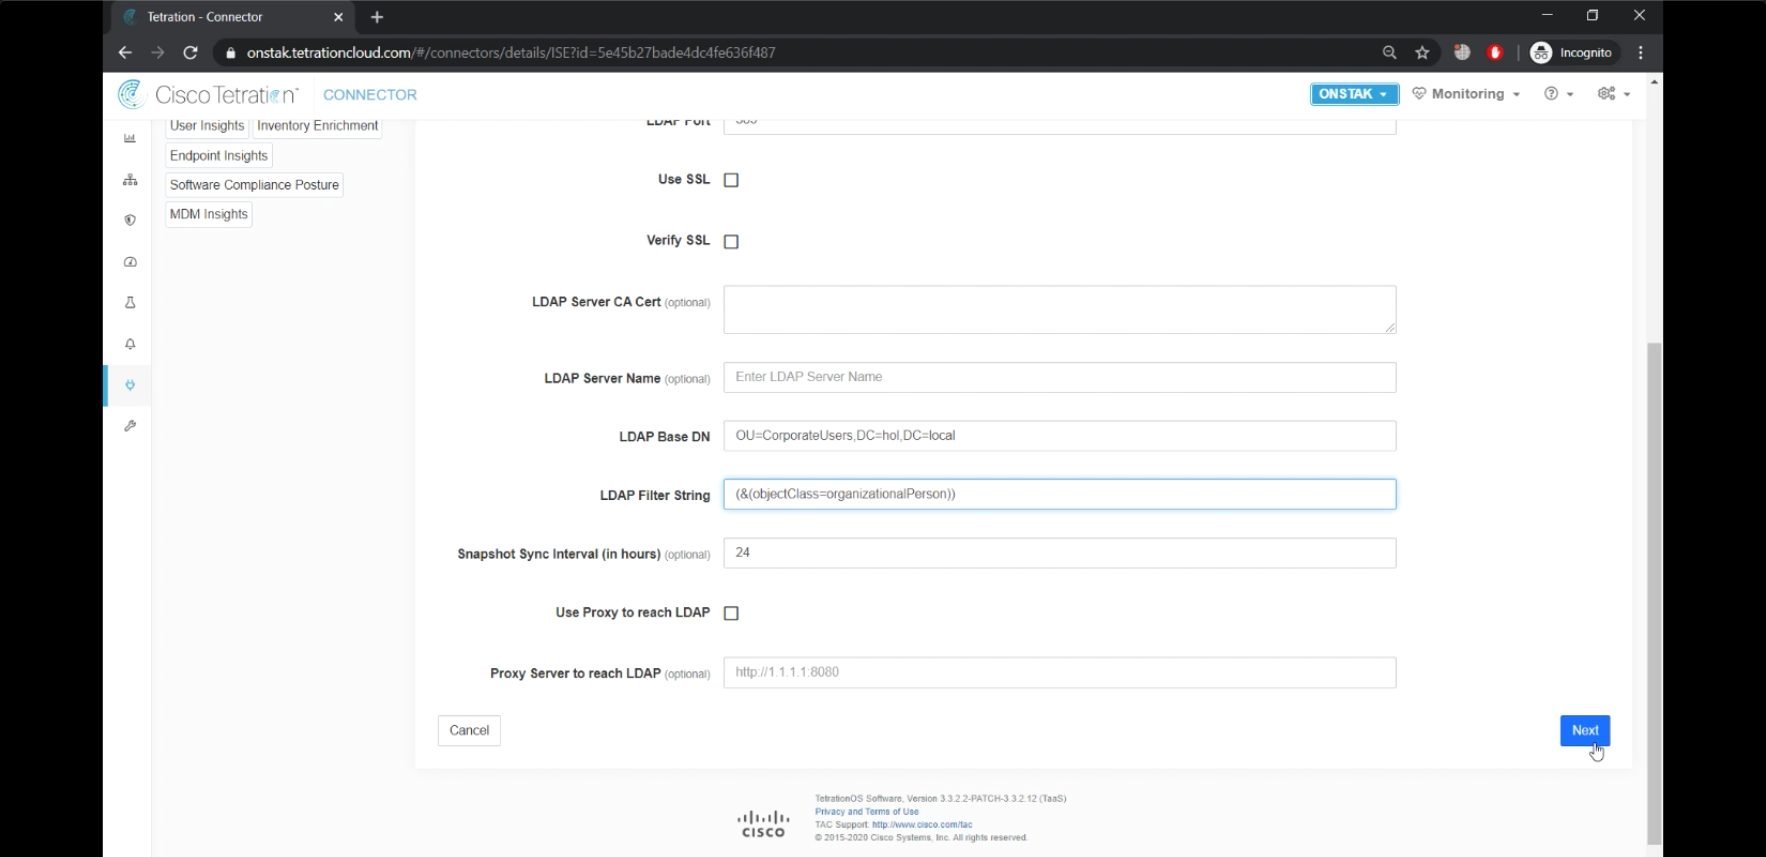
Enter the LDAP Username Attribute and the LDAP Attributes to Fetch as shown in the image.

Click Save & Apply Configs.

Click on the Endpoint tab. This displays the inactivity timeout for ISE endpoints.
Click the Log tab and select Start Log Configuration.
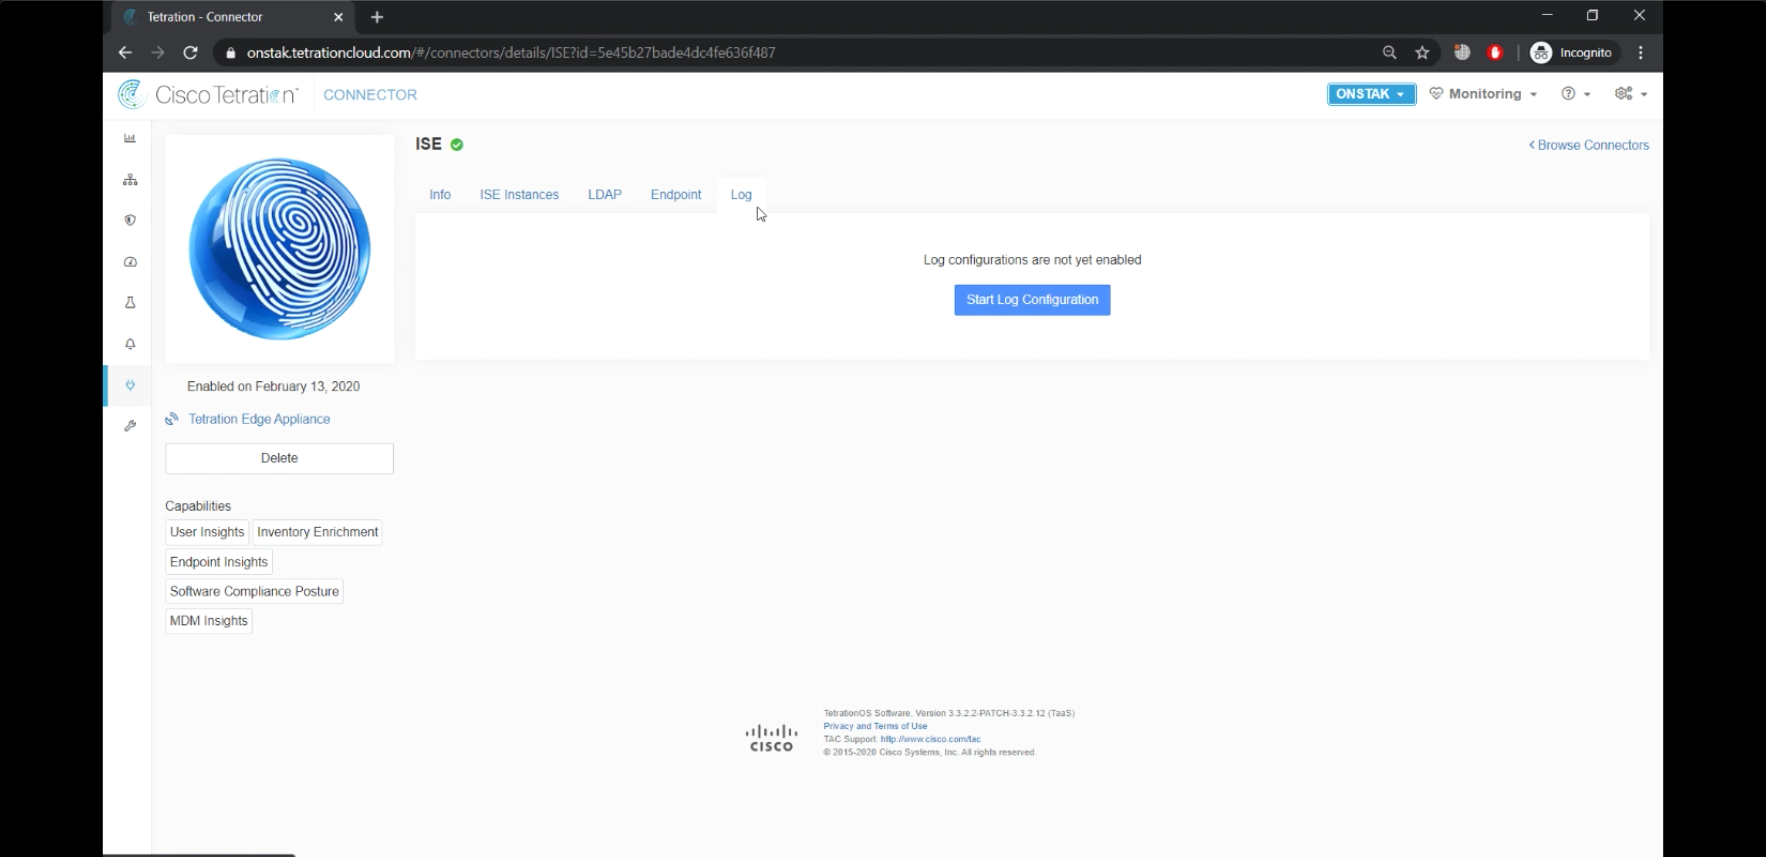
Enter the Logging Level of info, then Verify & Save Configs.

YOU HAVE COMPLETED THIS MODULE
| Return to Table of Contents | Go to Top of the Page | Continue to the Next Module |