Cisco Tetration - Hands-On Lab
Module06 - External Orchestrators
In this section we will configure External Orchestrators. Tetration provides the ability to pull in metadata such as tags and labels from various external sources such as VMware vCenter, AWS, Kubernetes, F5 Big-IP, Citrix Netscaler, Infoblox, DNS, and AVI Vantage. The metadata from the External Orchestrators are then utilized to annotate the associated workloads in Tetration. These are in addition to static annotations which we configured in the previous module. We’ll be configuring AWS as an External Orchestrator since all of our lab instances are deployed there. Each workload is deployed with a series of tags that will be propagated into Tetration as annotations which will be used throughout the remainder of the exercises. In addition, we’ll be configuring Kubernetes as an External Orchestrator to pull in the labels that are assigned to the microservices application as annotations.
Follow the below steps to deploy AWS and Kubernetes as External Orchestrators in Tetration.
Steps for this Module
Step 001 - Navigate to External Orchestrators
Step 002 - Create New Configuration
Step 003 - Specify AWS Parameters
Step 004 - Specify AWS Parameters
Step 005 - Verify AWS Status
Step 006 - Verify AWS Status
Step 007 - Create Kubernetes Configuration
Step 008 - Ignore certificate checking
Step 009 - Open a session to the Ansible machine
Step 010 - Display the eks_credentials file
Step 011 - Downloading the eks_credentials file
Step 012 - Downloading the eks_credentials file
Step 013 - Downloading the eks_credentials file
Step 014 - Open the eks_credentials file
Step 015 - Paste the eks_credentials contents
Step 016 - Enter the hostname of the Kubernetes API server
Step 017 - Verify Kubernetes orchestrator status
Step 018 - Verify Kubernetes orchestrator status
Step 019 - Navigate to Inventory Search
Step 020 - Click on Filters
Step 021 - View orchestrator annotations
Step 022 - Search for nopCommerce workloads
Step 023 - Search for nopCommerce web server
Step 024 - Search for Sock Shop namespace
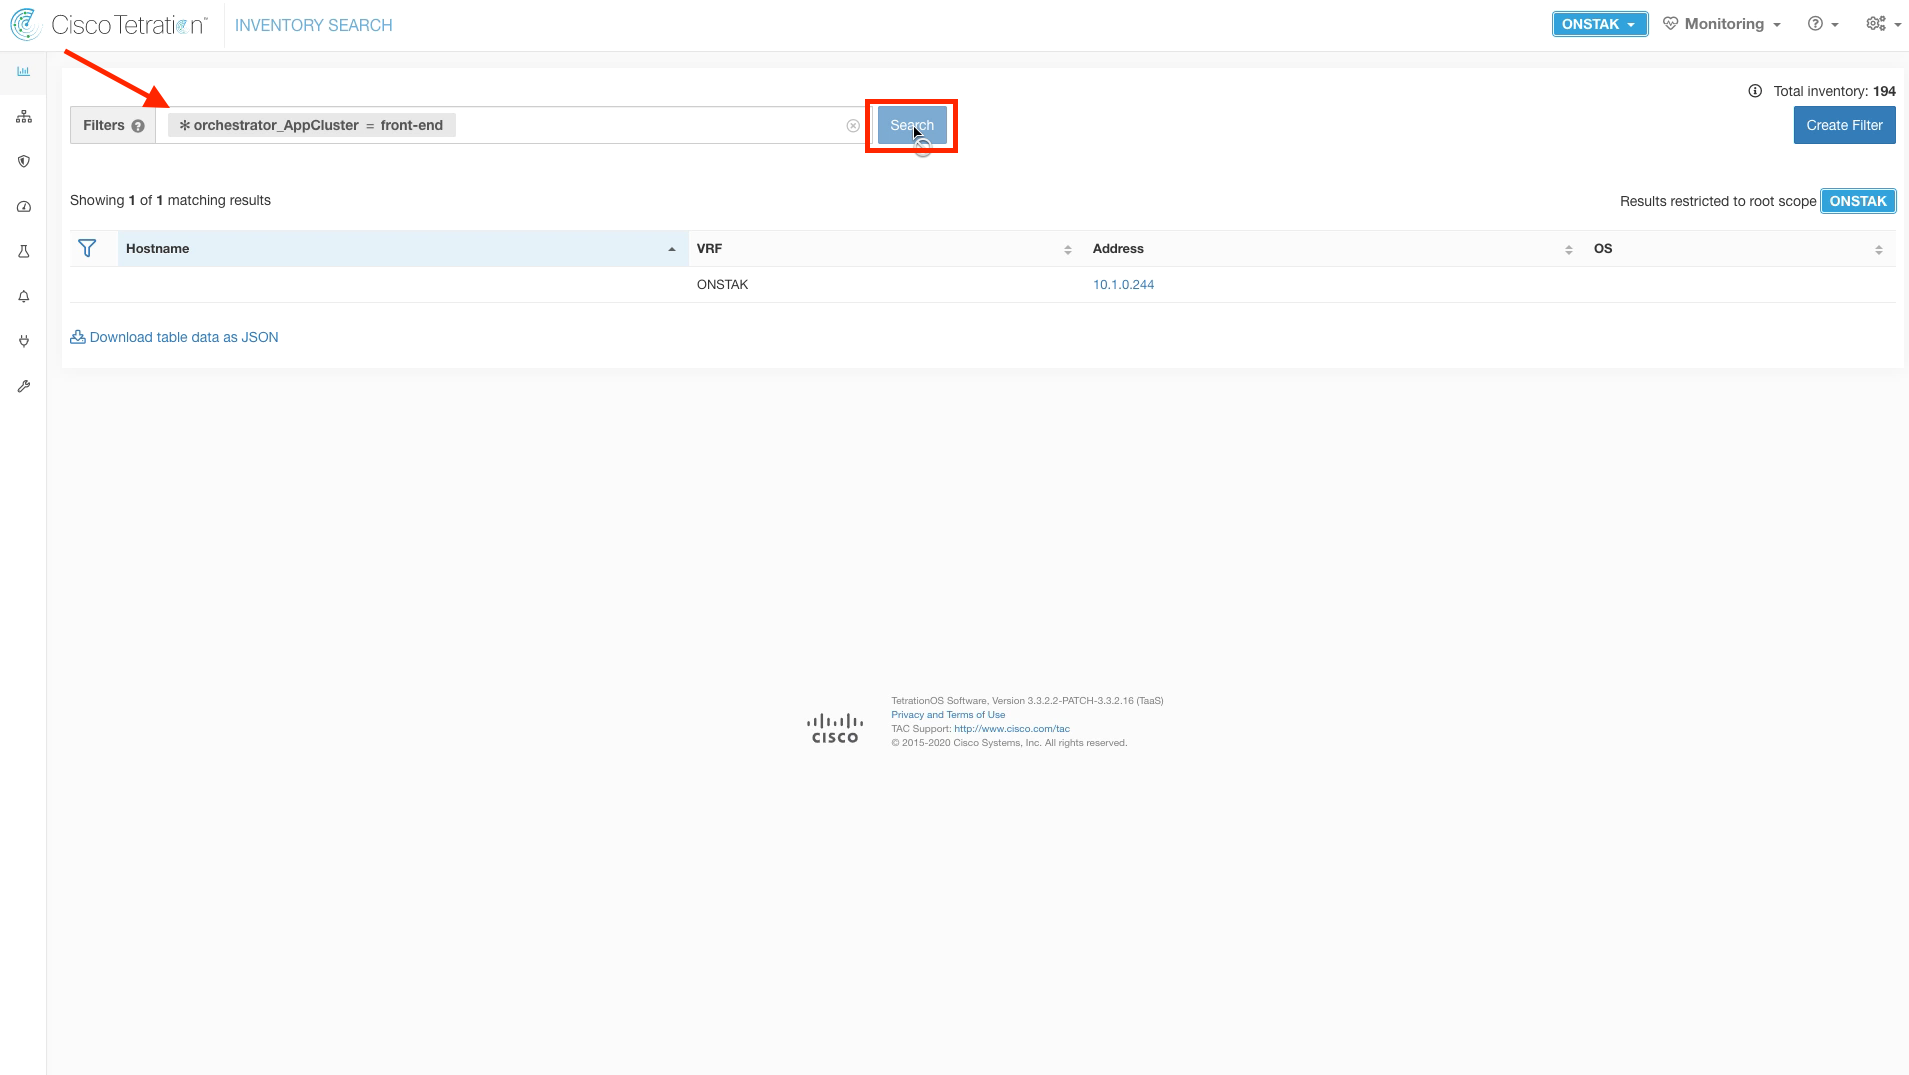
Step 025 - Search for Sock Shop front-end container
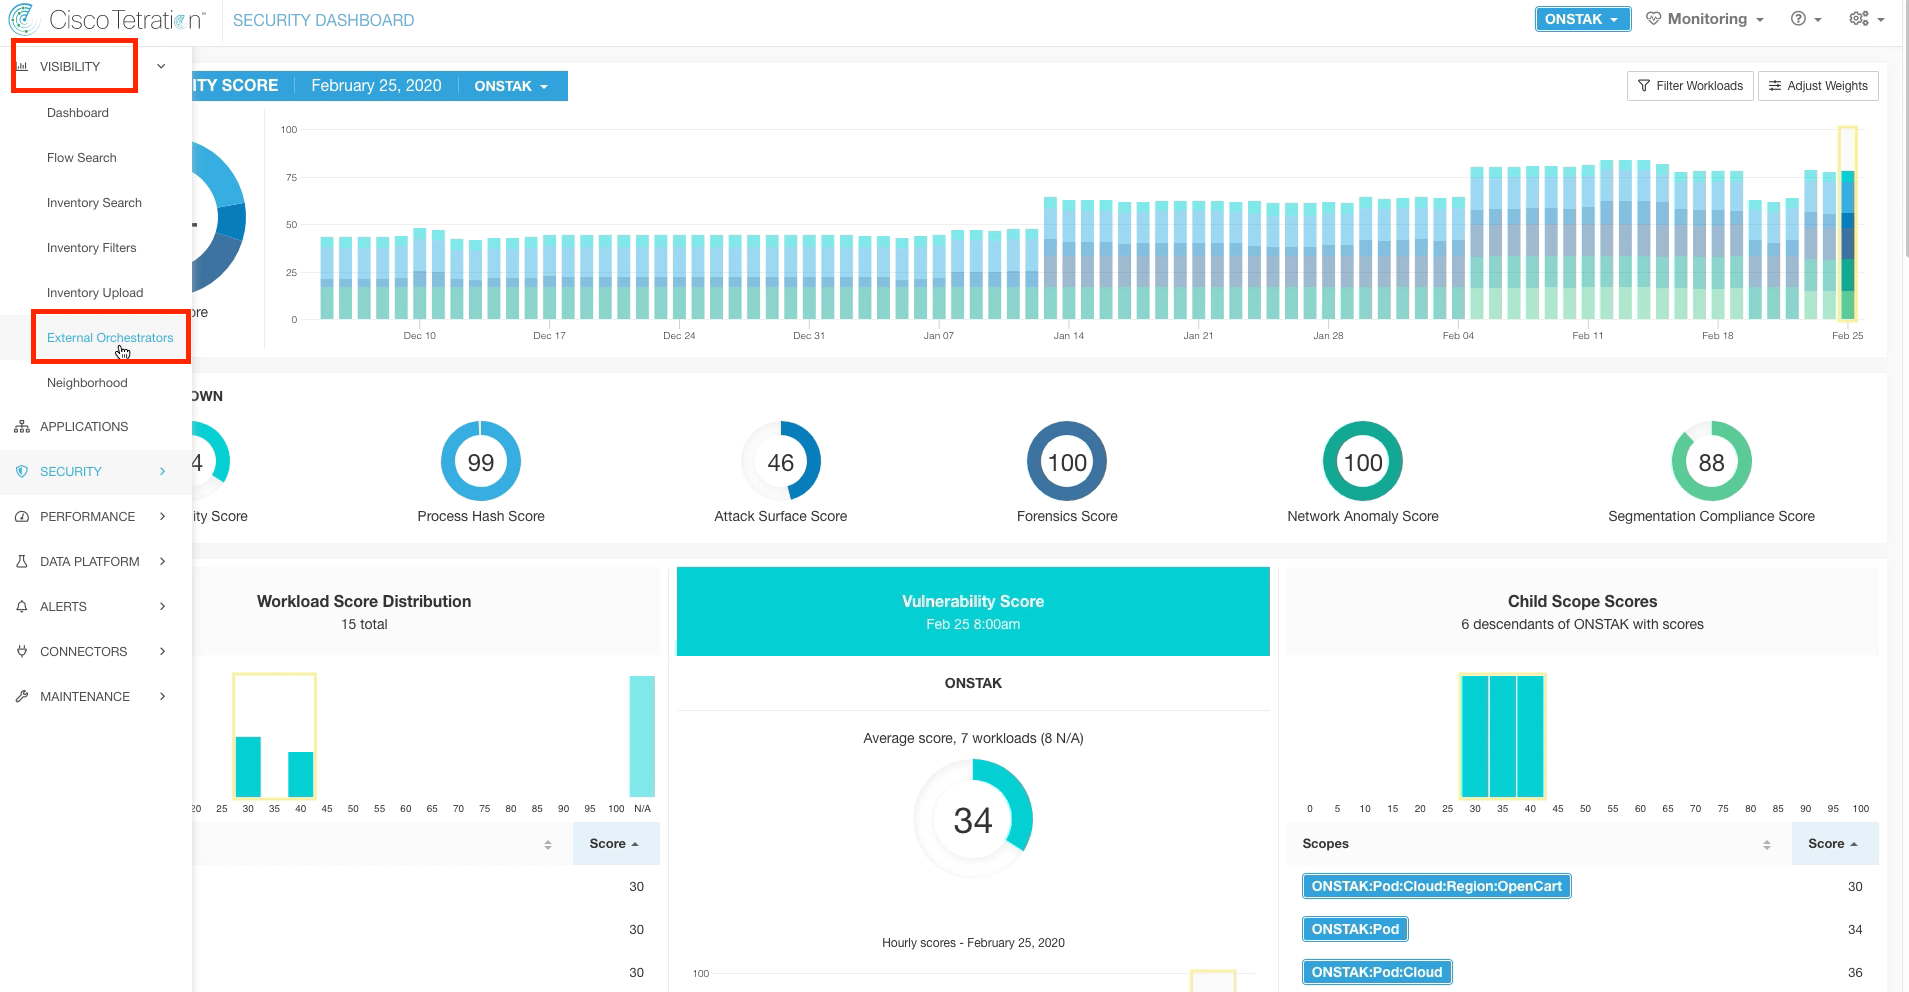
Navigate to External Orchestrators.
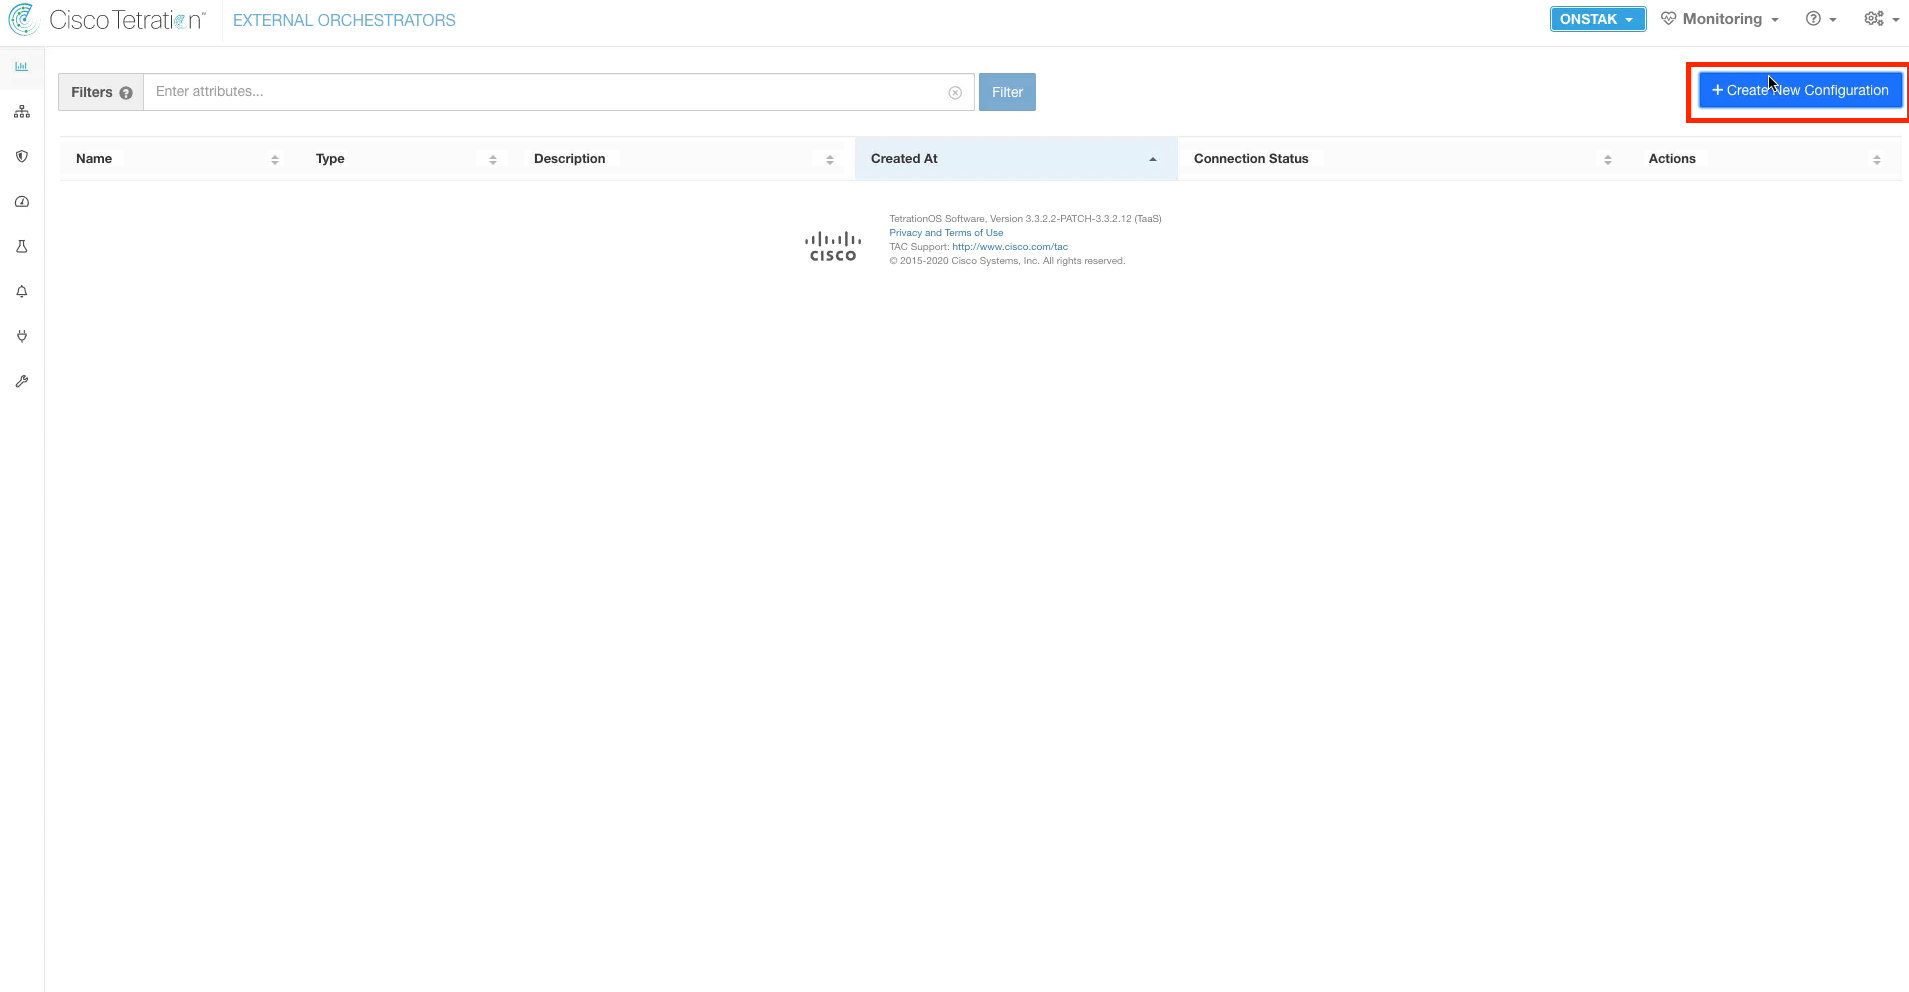
Click on Create New Configuration.
Enter the type as AWS and fill in the Name field with AWS. Enter the AWS Access Key ID and Secret from the provided student workbook.
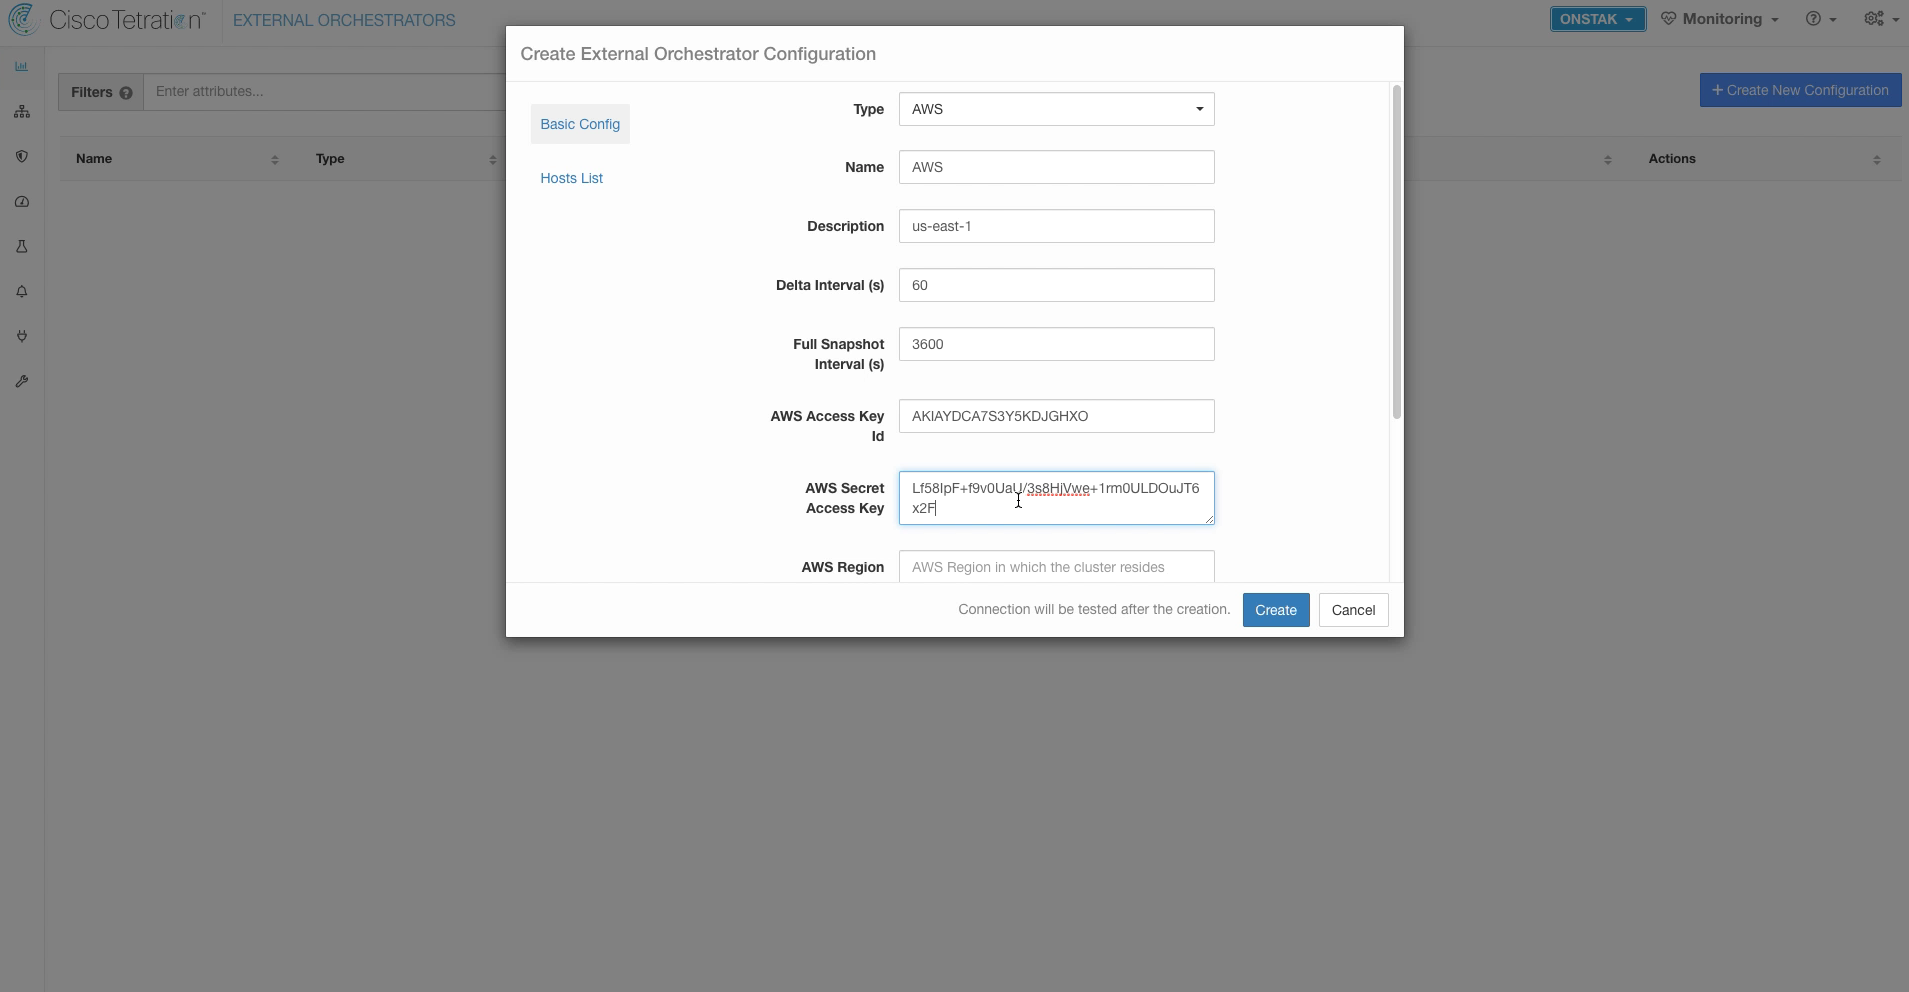
Enter the AWS Region as us-east-1. Uncheck the Secure Connector tunnel and ensure that Insecure is checked. Then click Create.

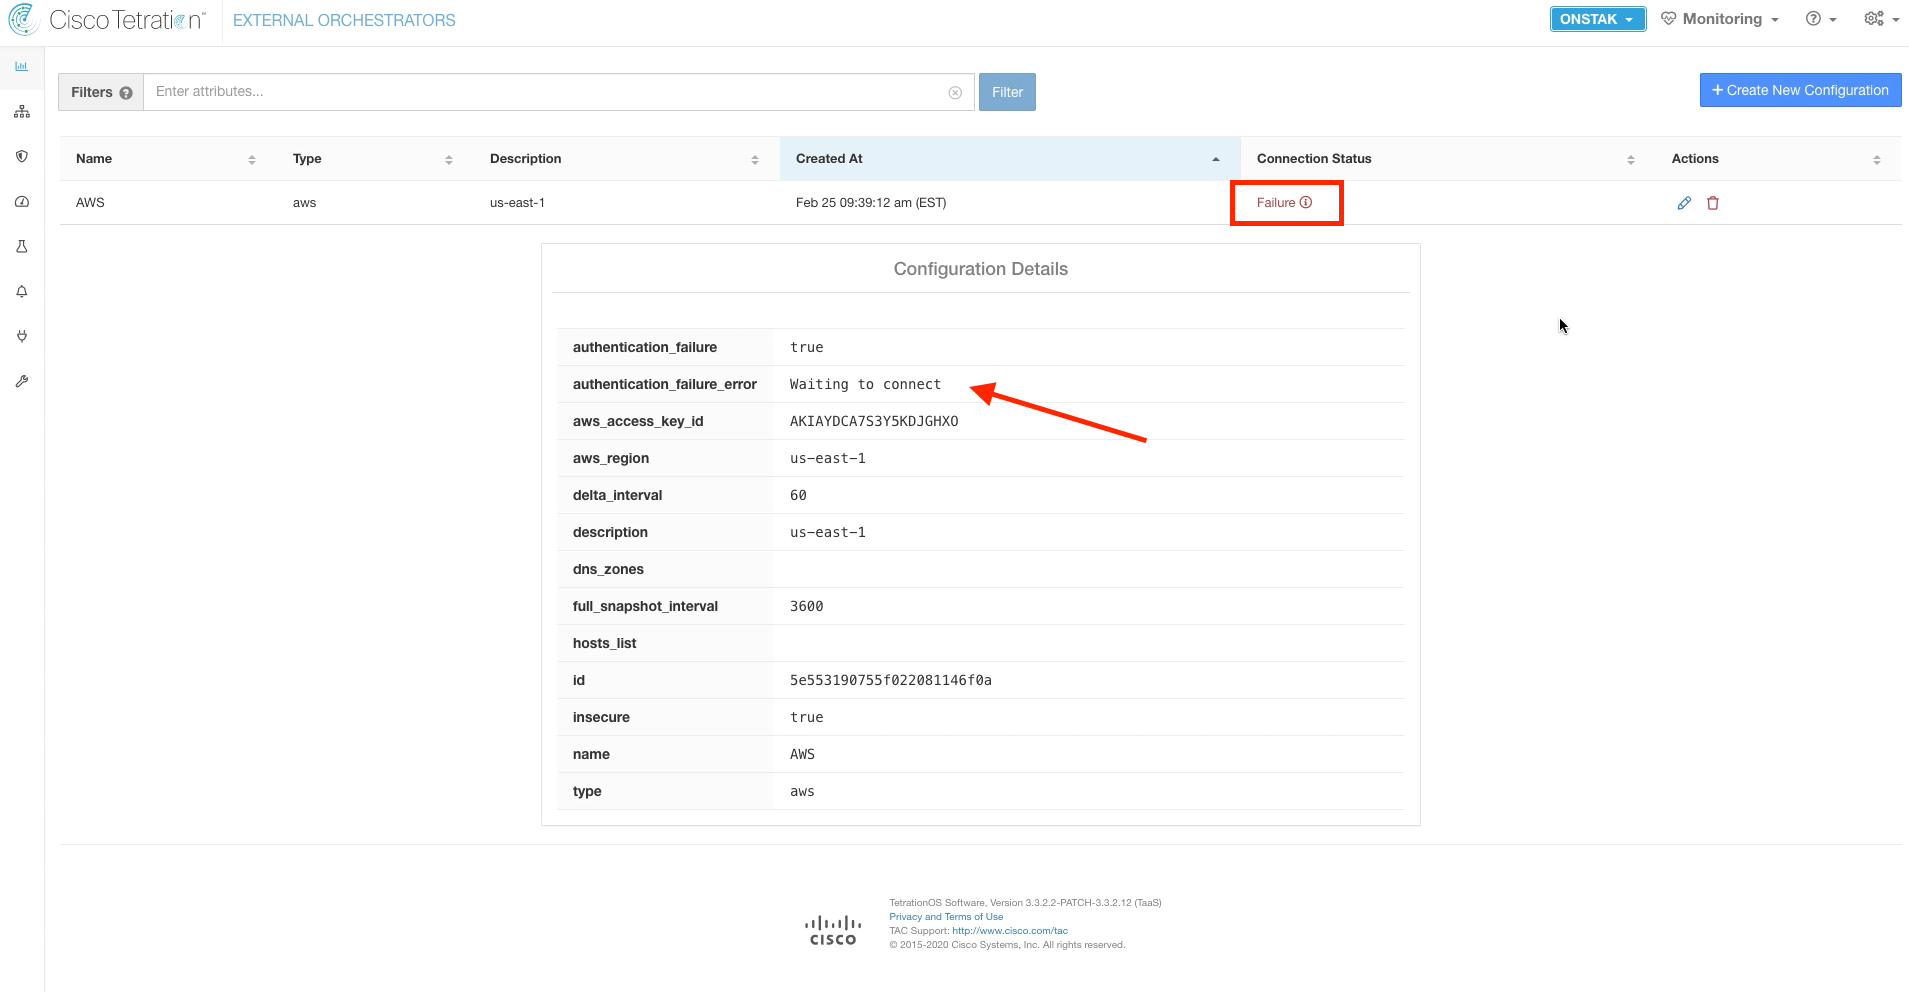
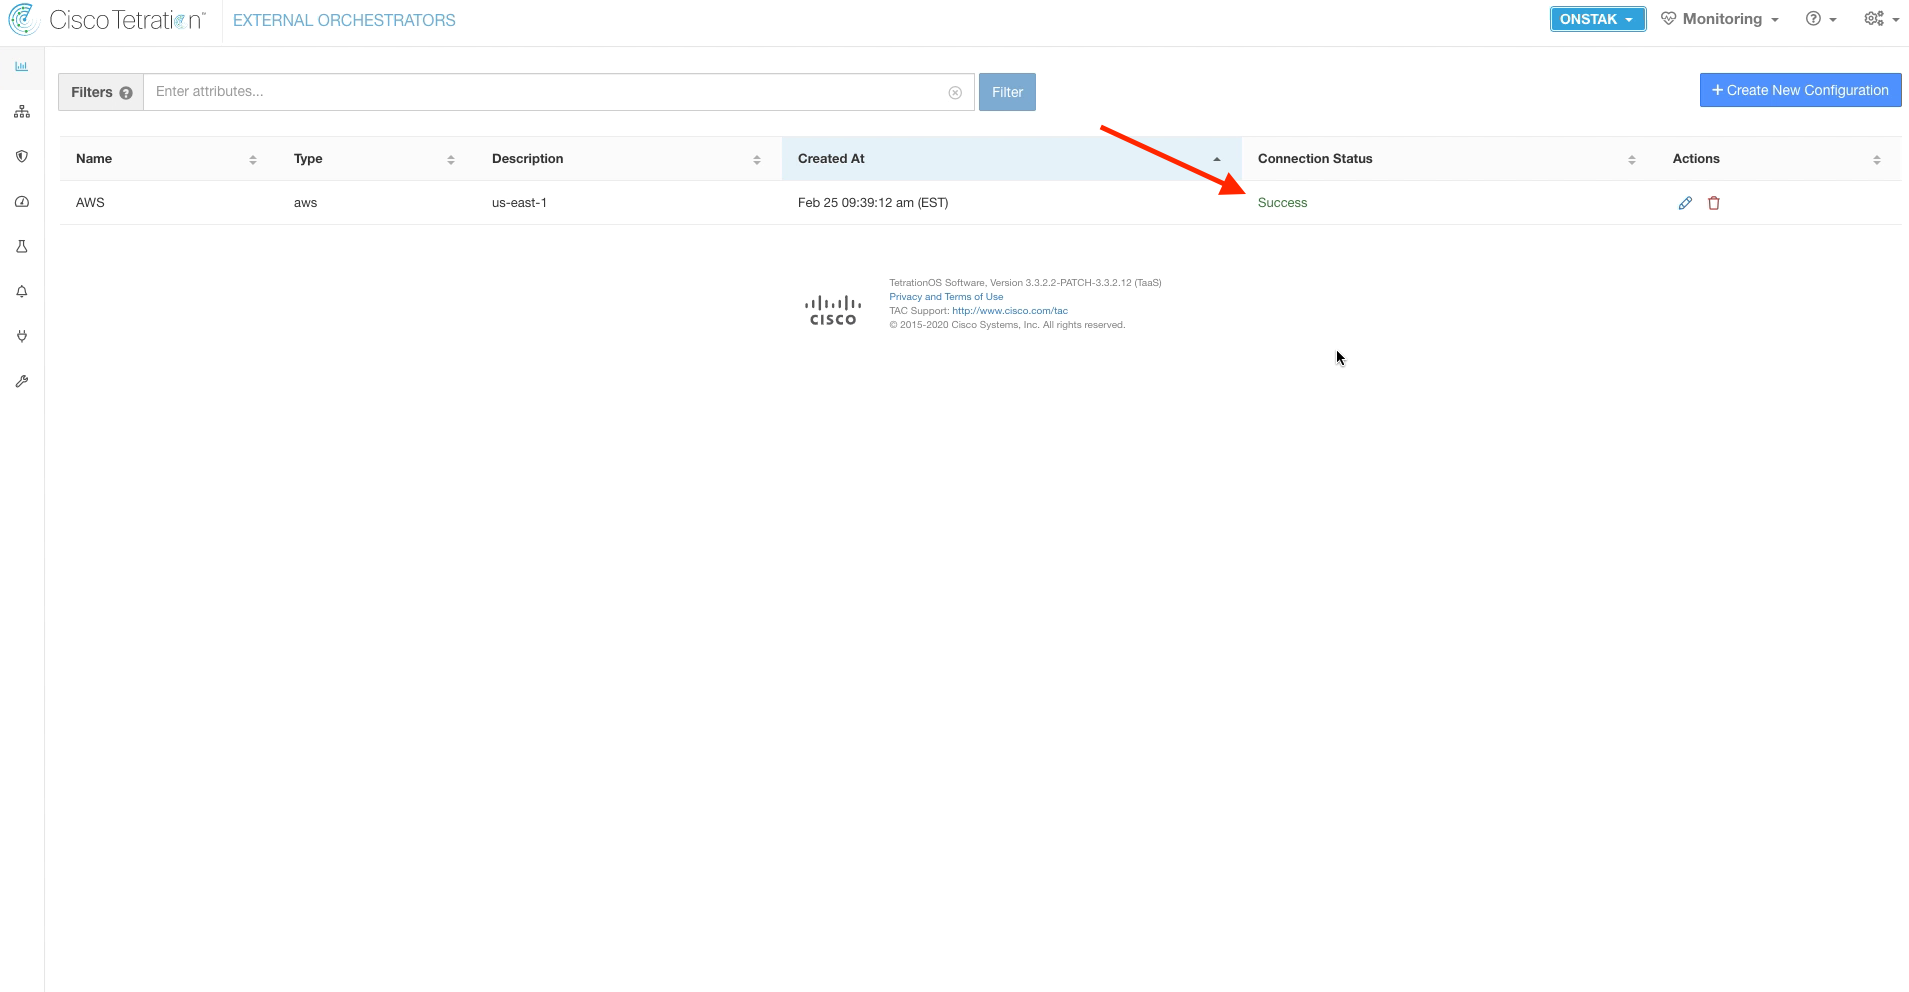
Initially the configuration will show Failure status, this is normal and expected. Click on the Failure status to display the details, and the status should say “Waiting to connect”
The connection will take a few minutes to come up. Keep refreshing the page until you see Success for Connection Status. If Failed continues to be displayed, examine the Configuration Details to ensure that no other errors are being seen.
No action required here, the Connection Status should be a green Success after a few minutes.
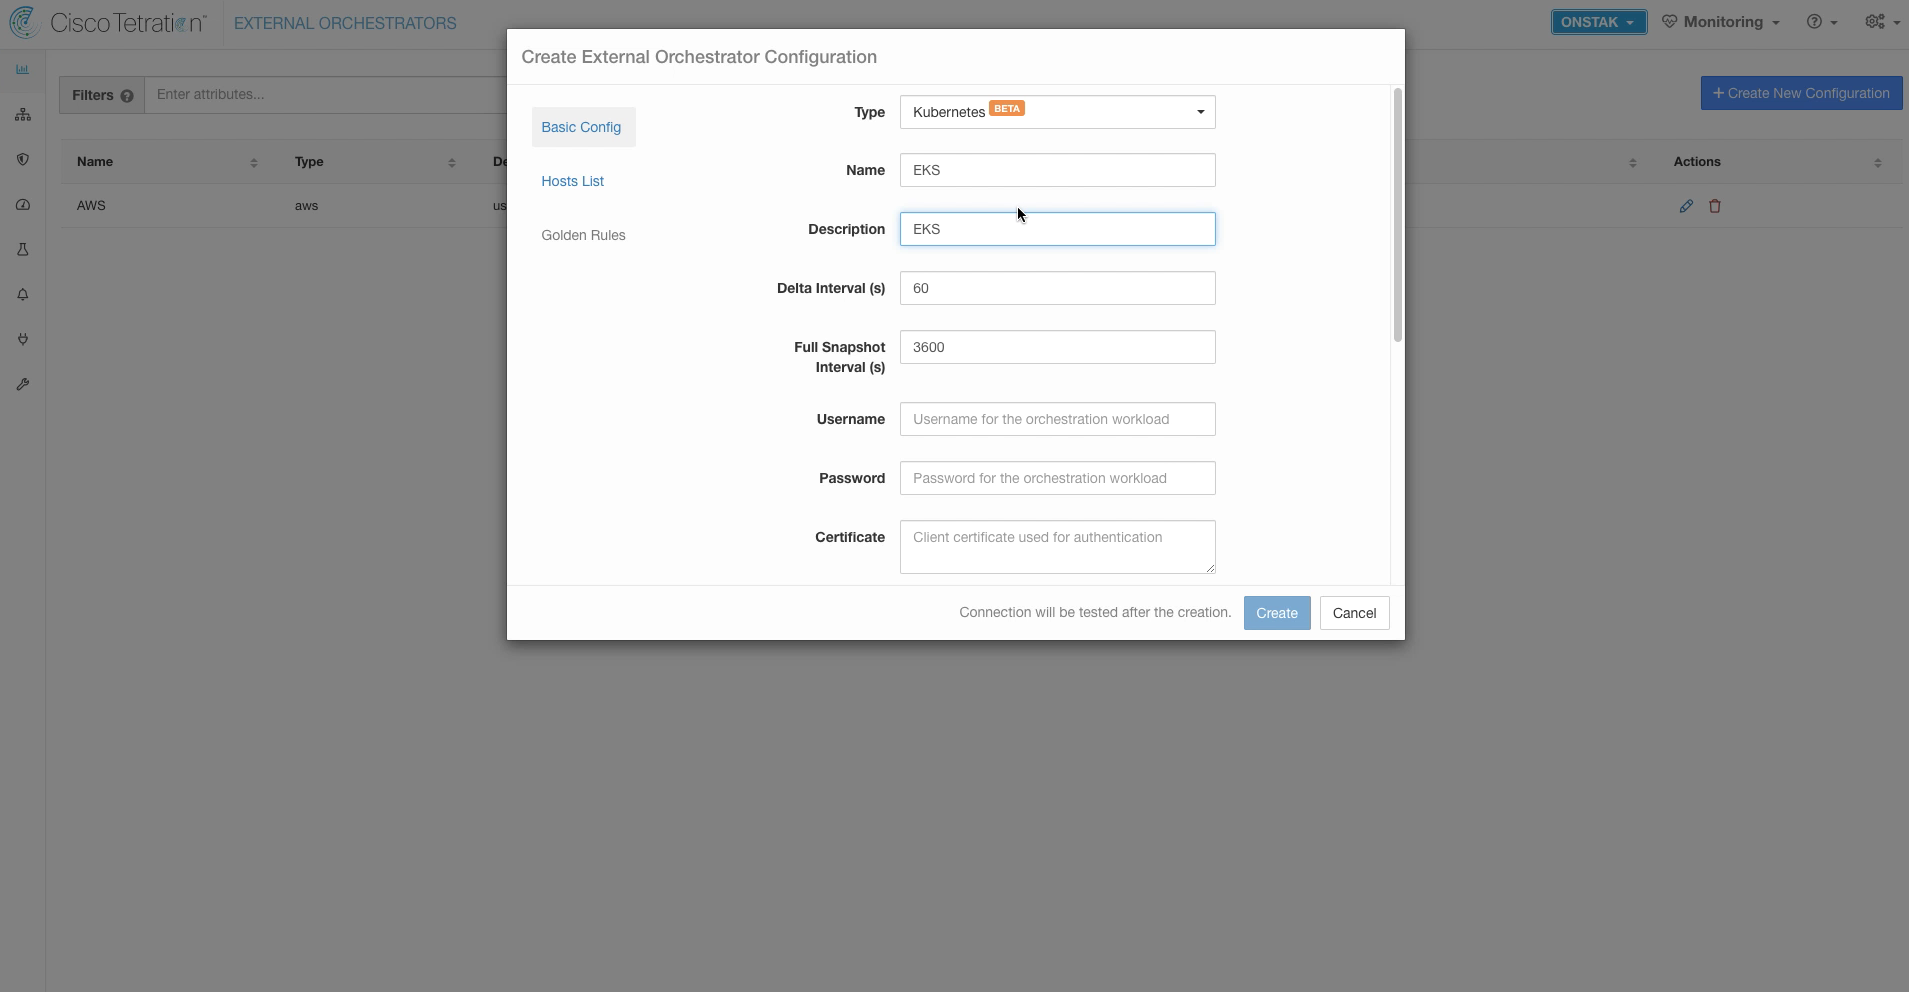
Click on Create New Configuration and select Kubernetes as the type. Enter a name and description. It is not required to enter a username, password, or certificate. We will be using token-based authentication.
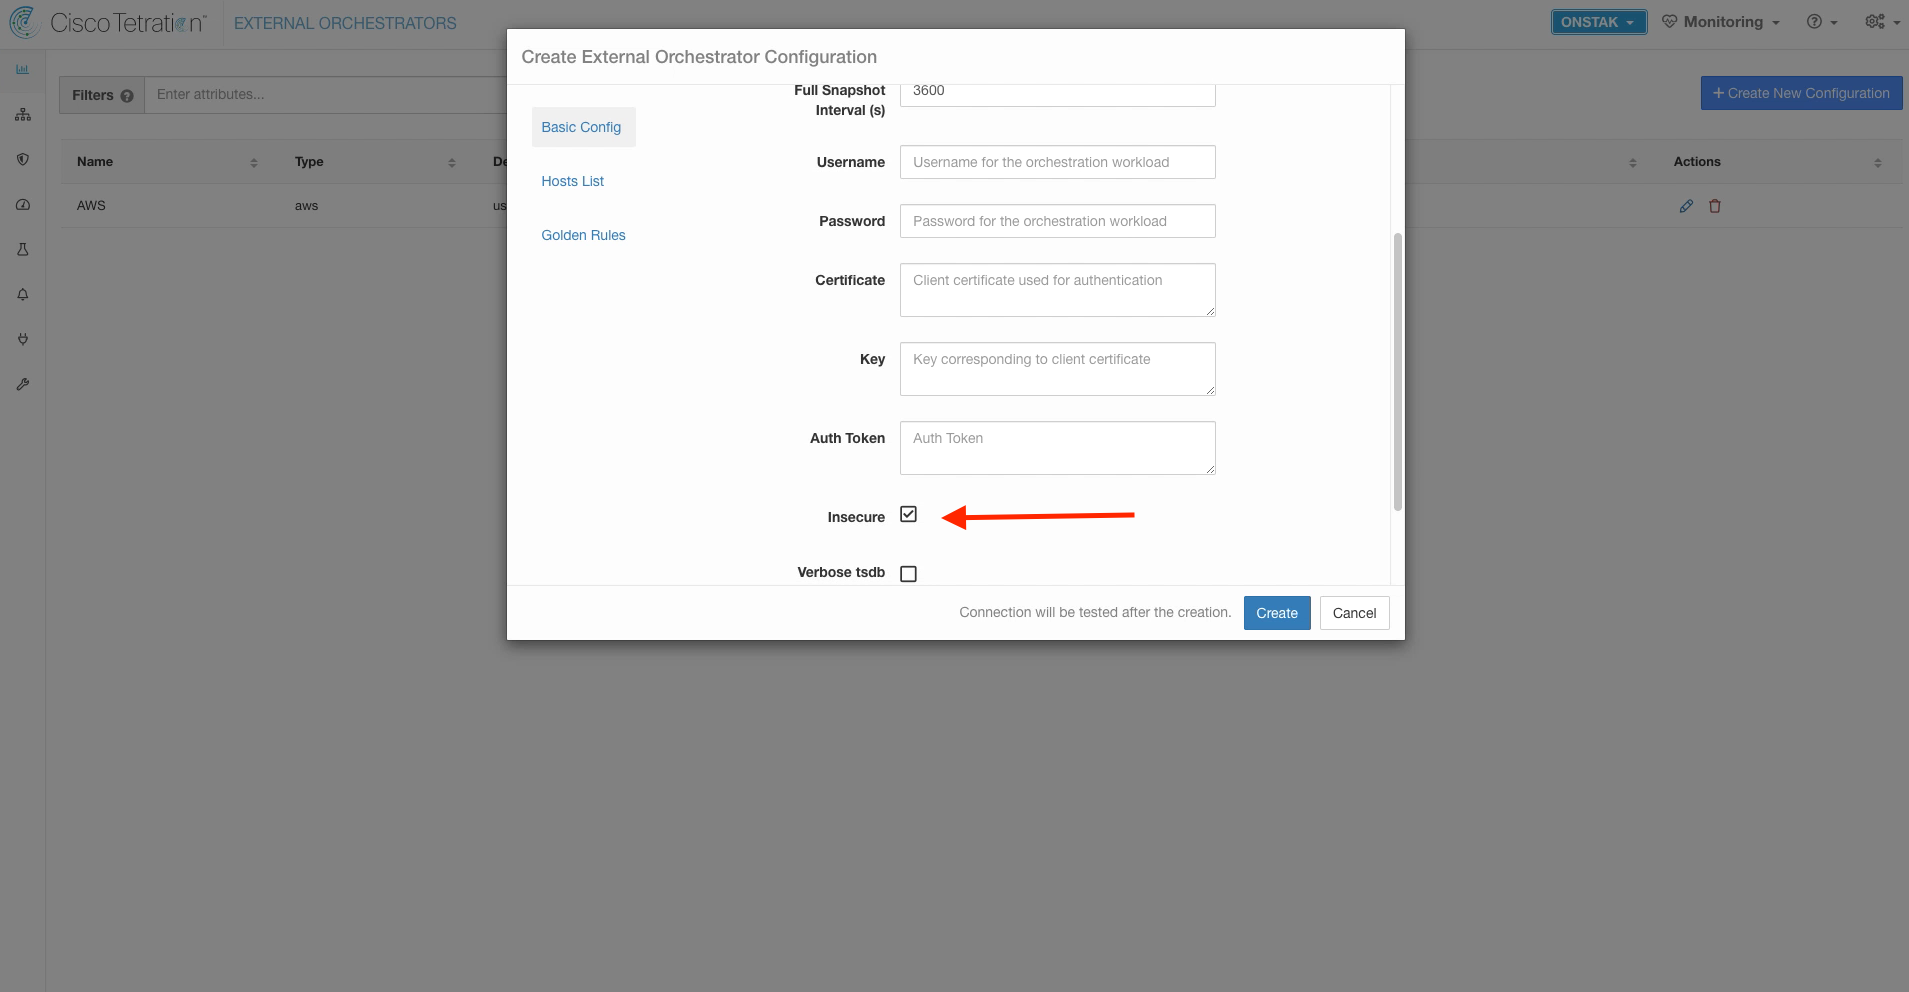
Scroll down and check the Insecure check box.
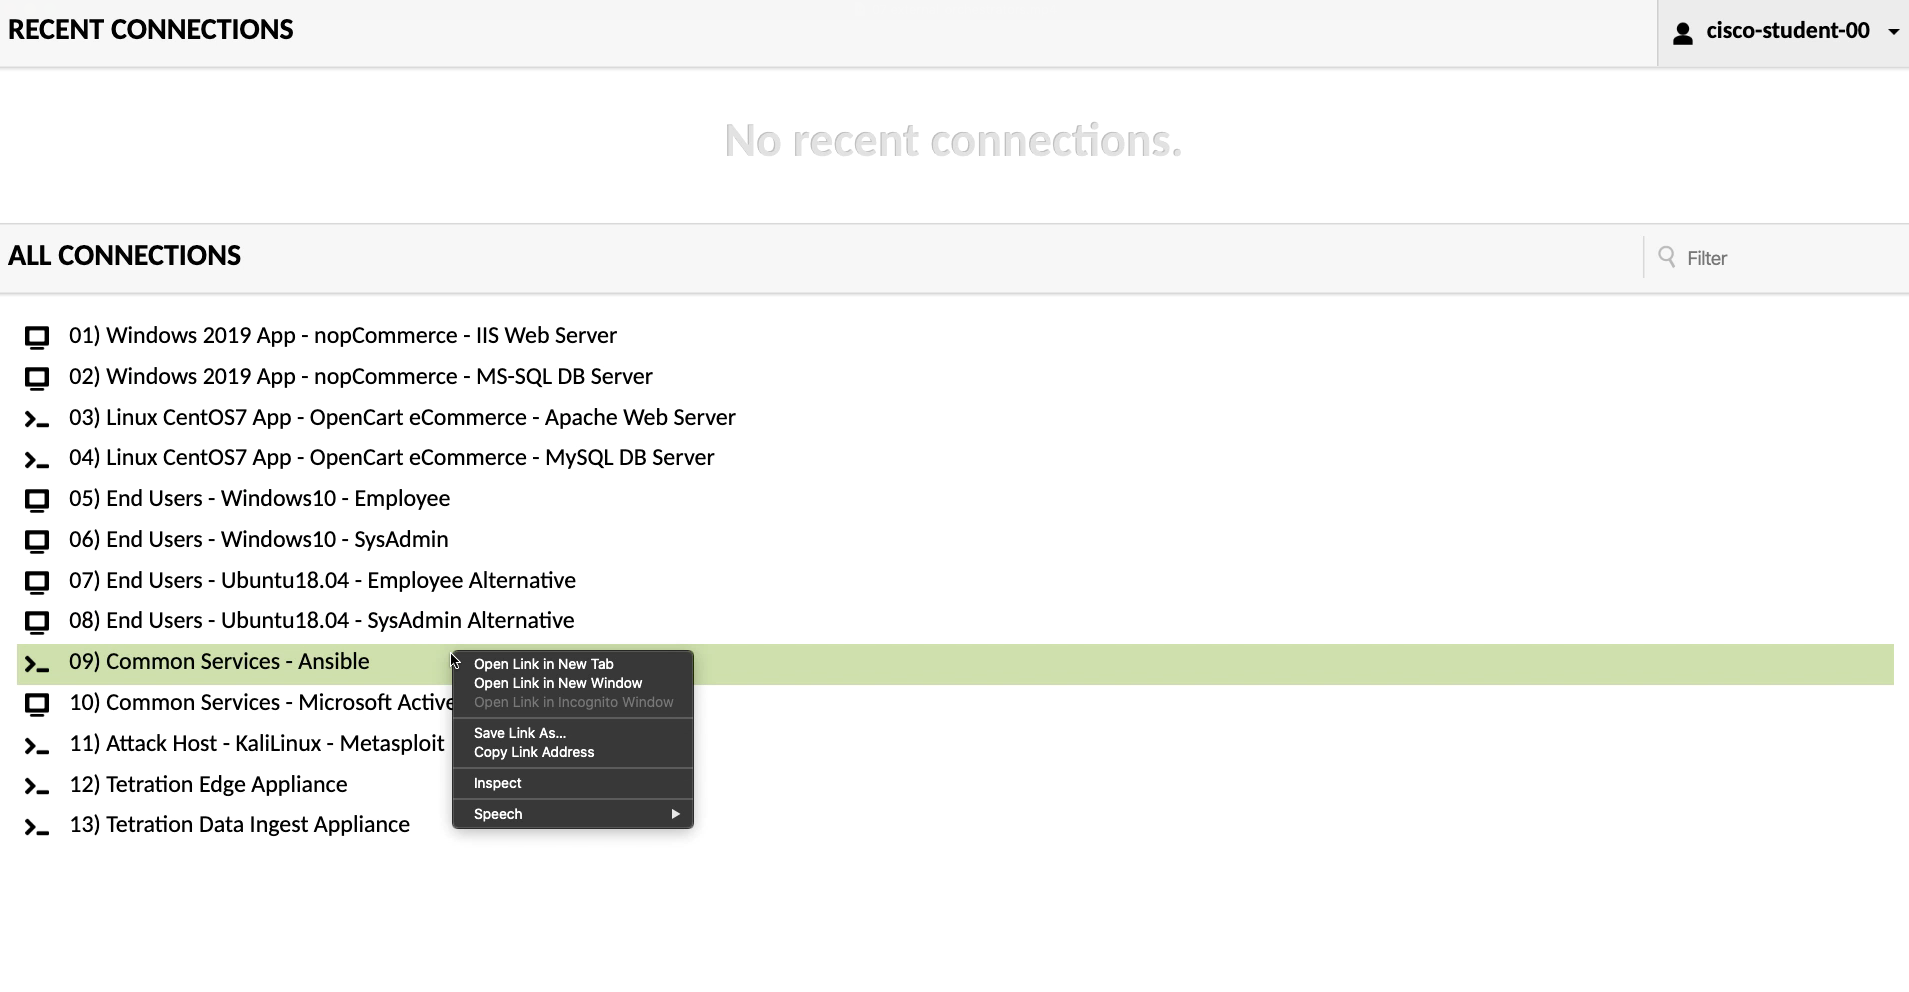
Open a session to the Ansible machine through Apache Guacamole.
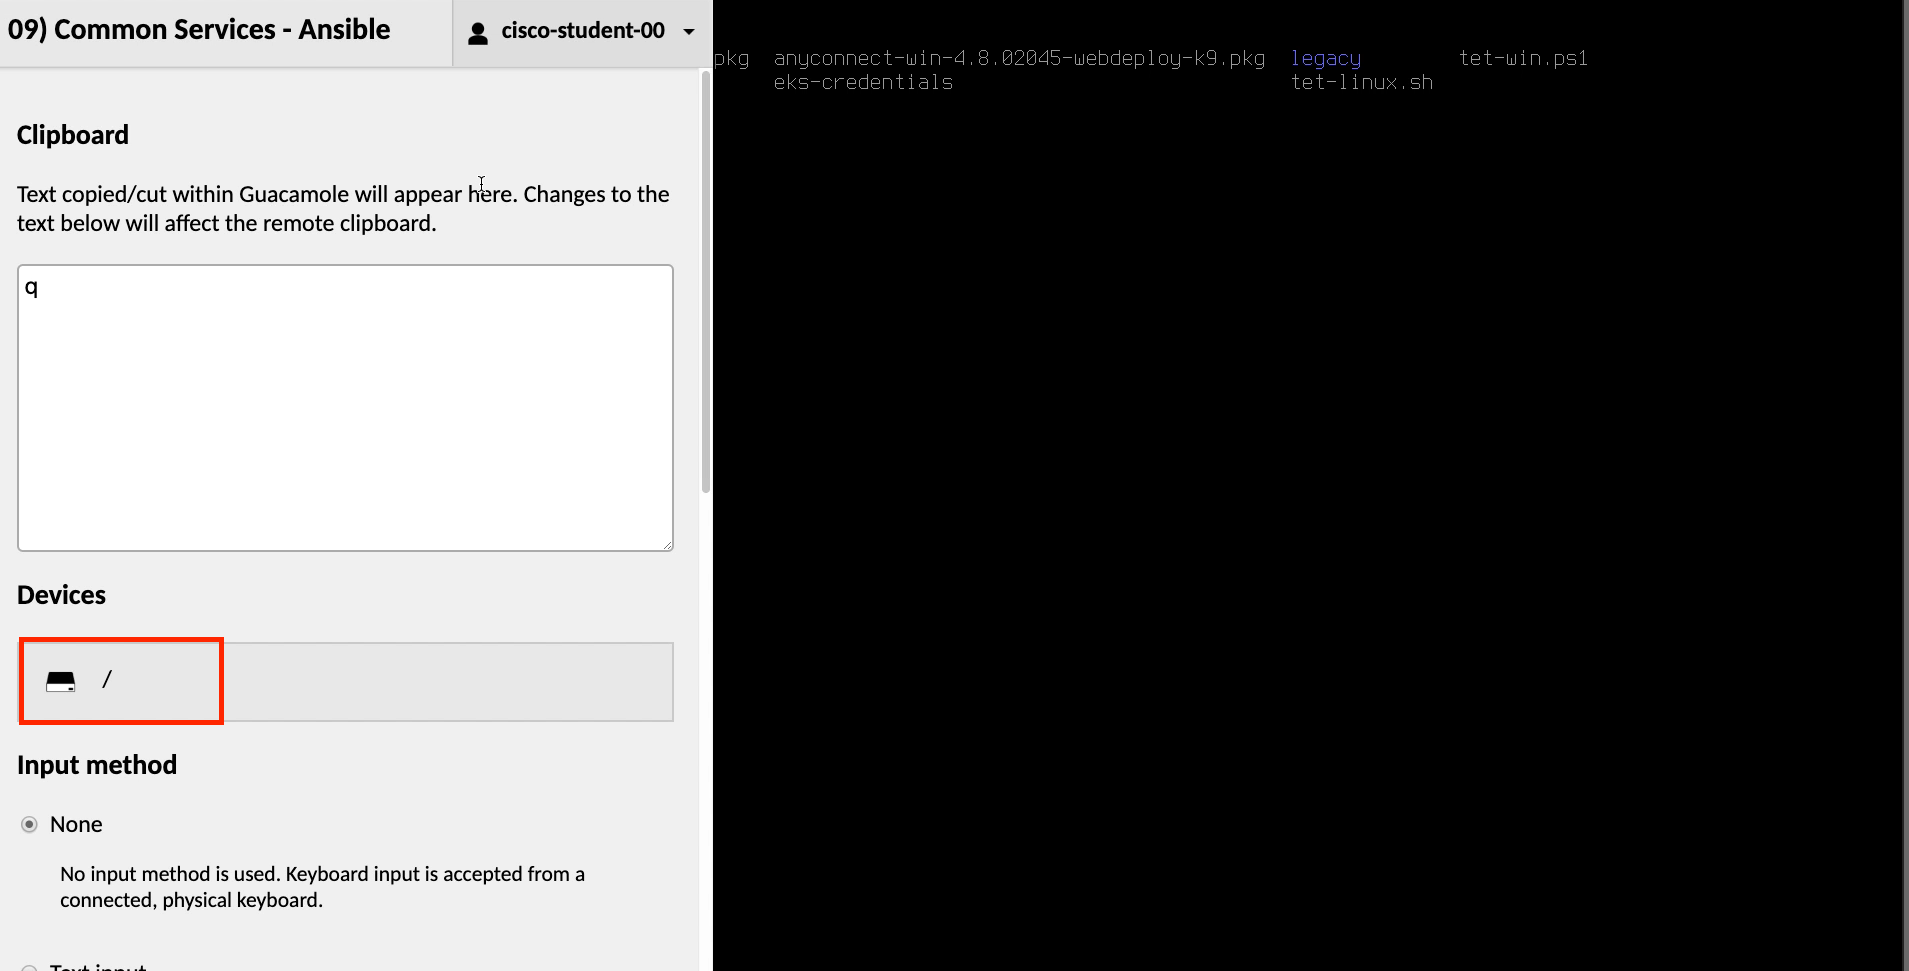
There should be a file called eks_credentials in the home directory, enter the command ls to list the directory and locate the file.

With the focus still on the Ansible console, enter the sequence CTRL-COMMAND-SHIFT on a Mac or CTRL-ALT-SHIFT on a Windows machine to pop up an input menu on the left-hand side of the browser. Double-click on Devices.
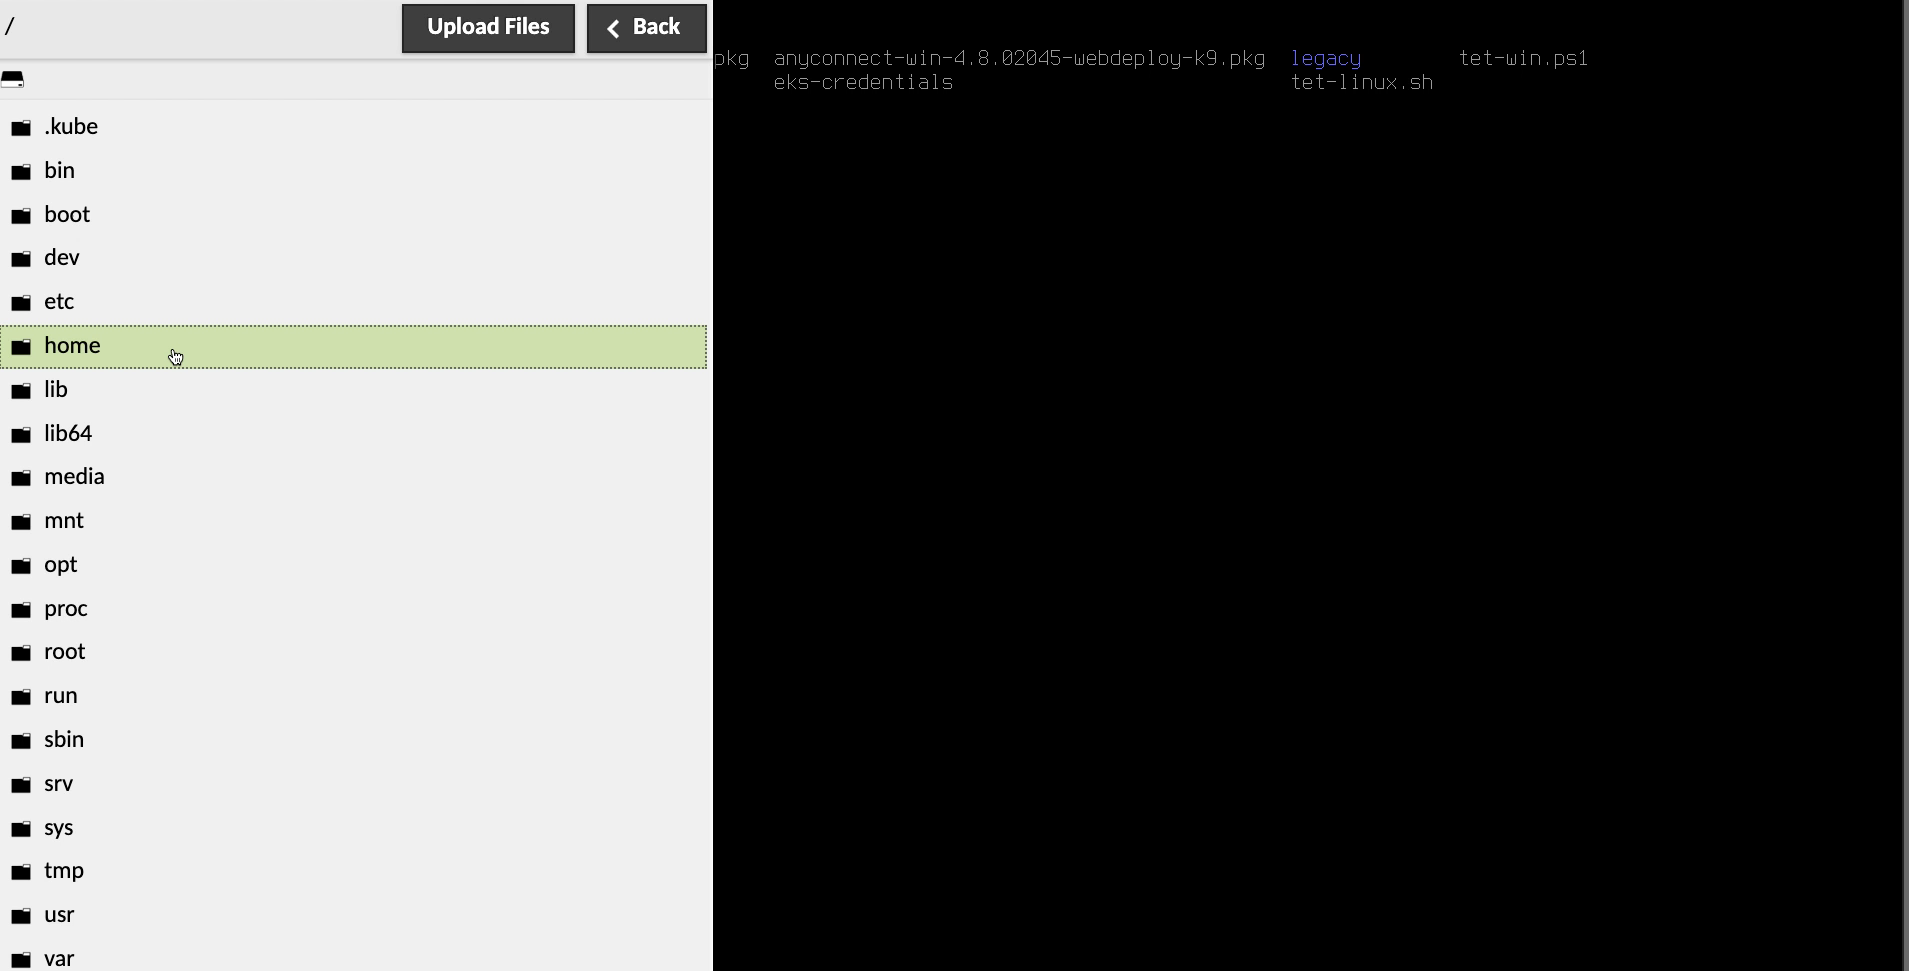
Double-click on the home folder.
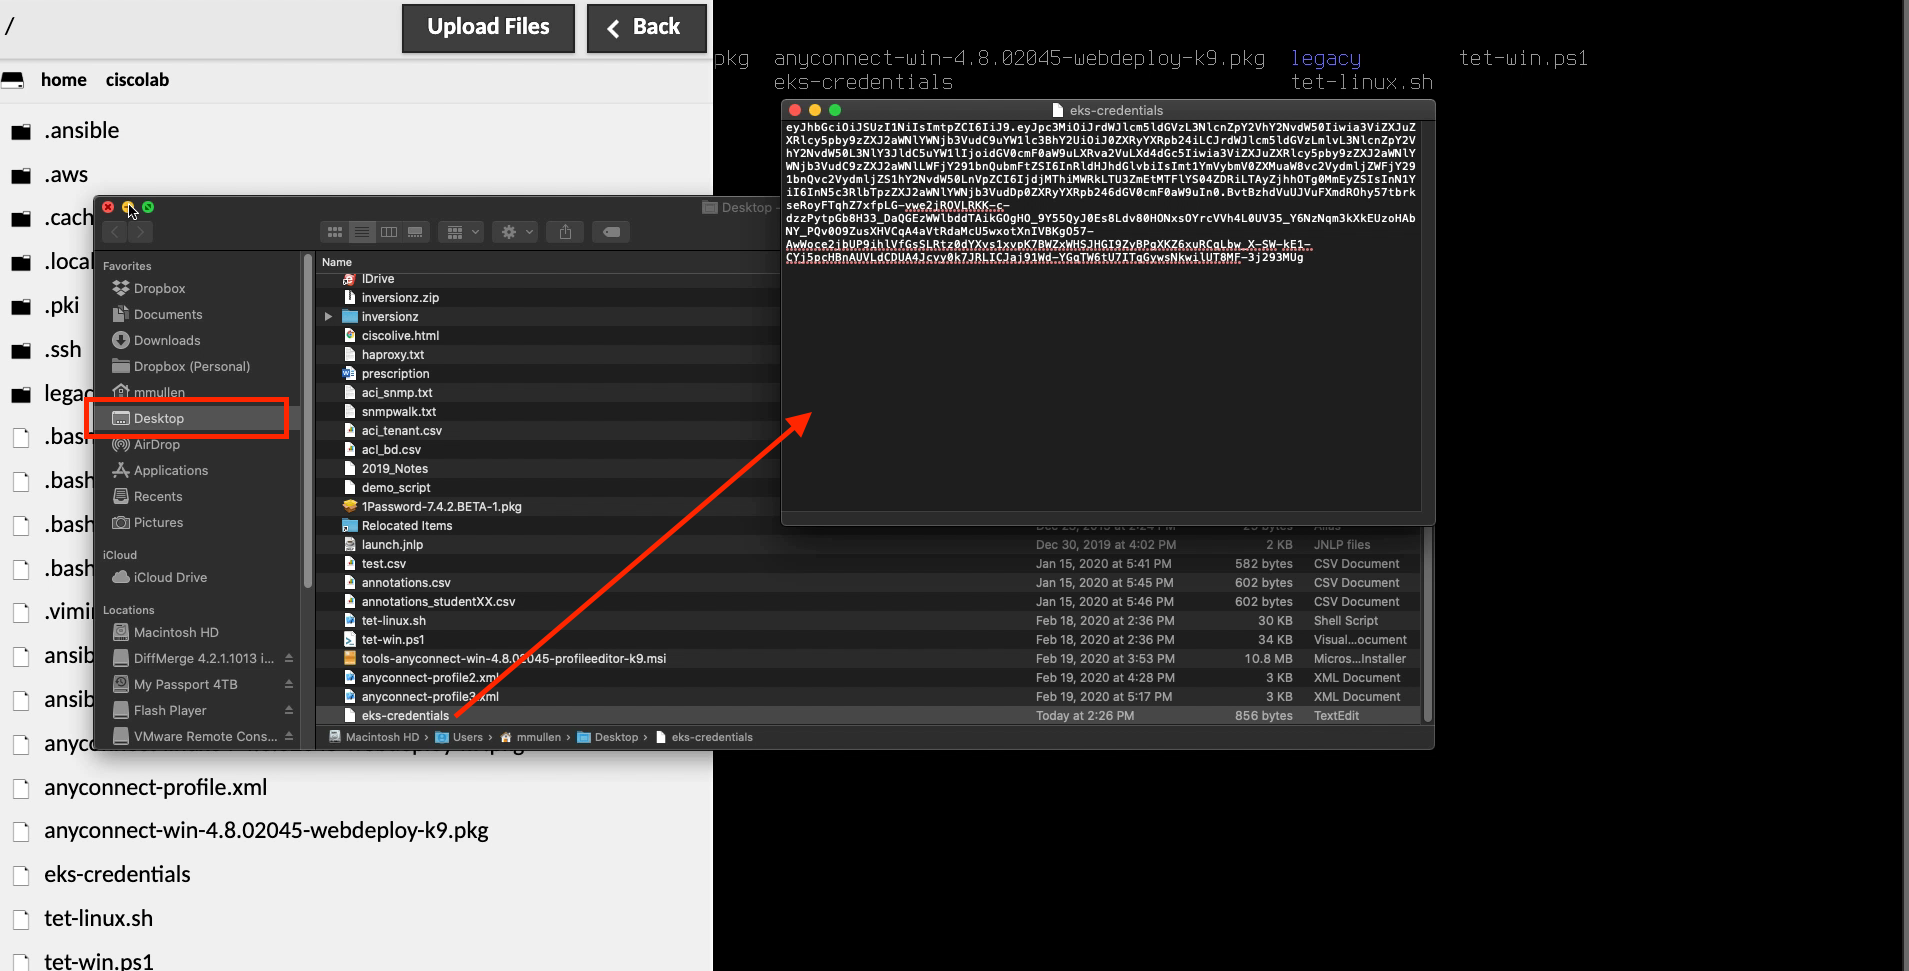
Double-click on the eks-credentials file and save the file to your desktop.

Open the eks_credentials file in a text editor, and copy the token to the clipboard.
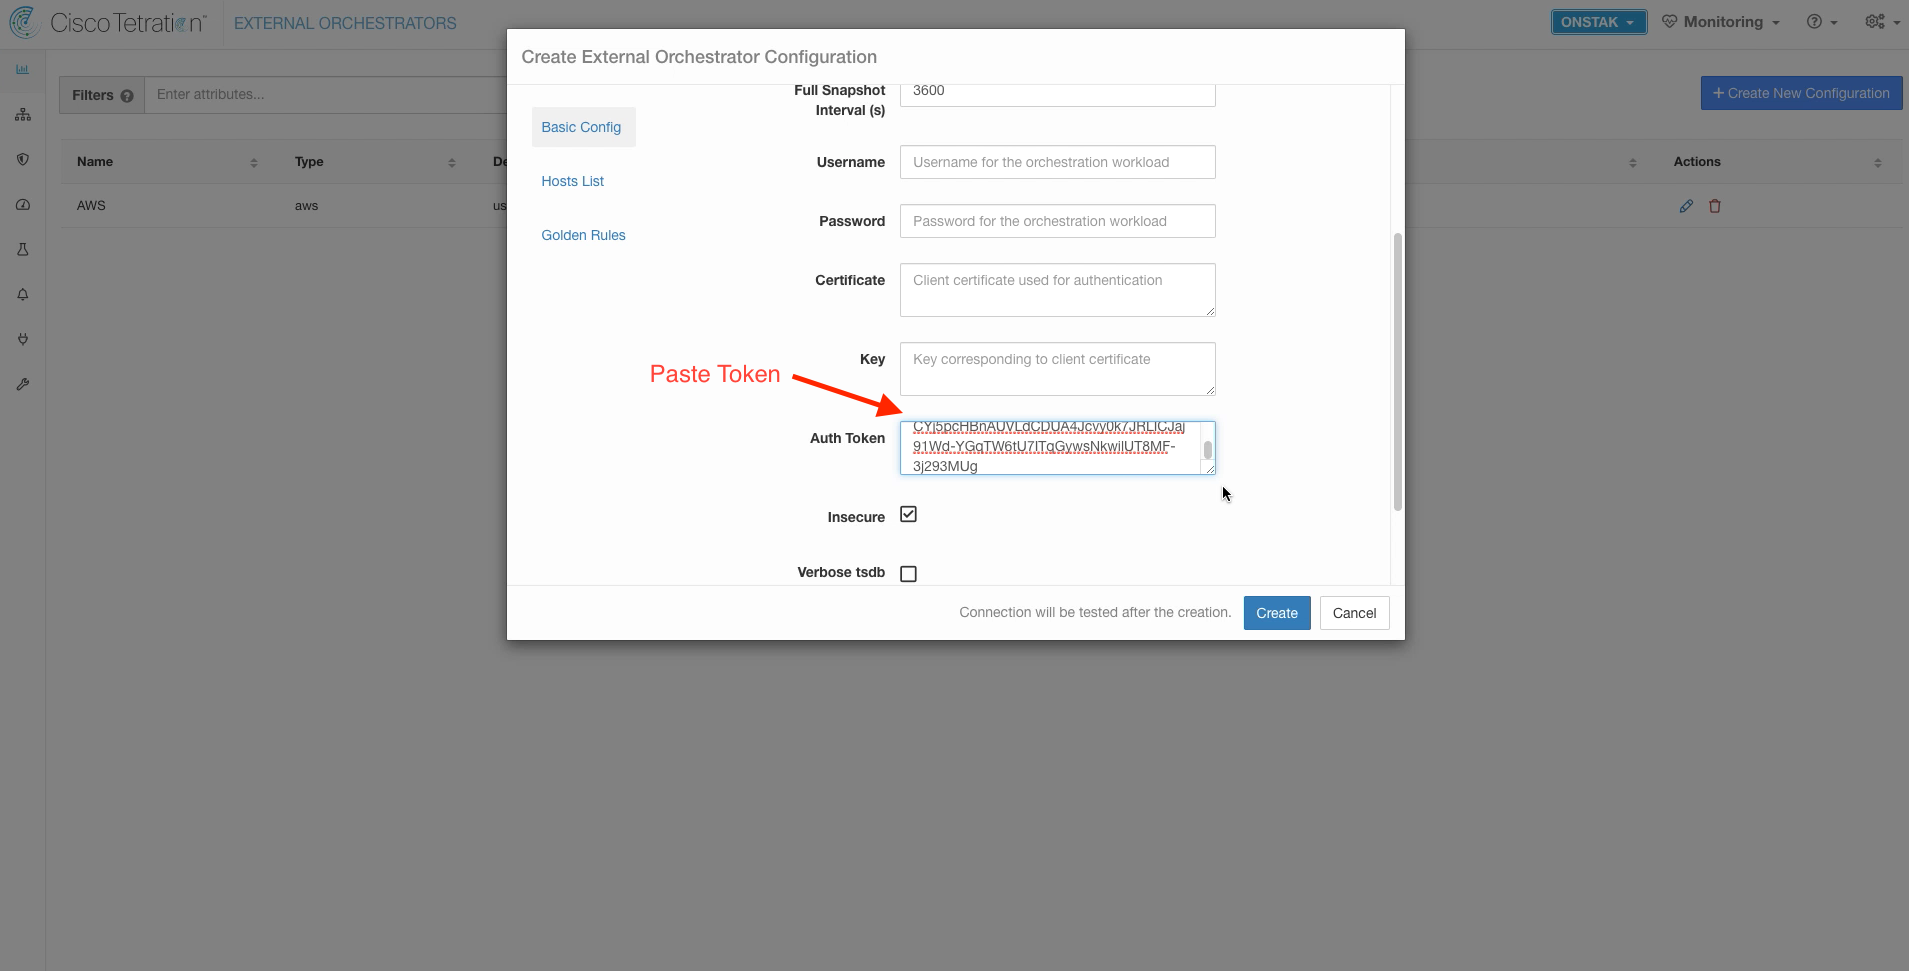
Paste the copied token in the Auth Token field in the External Orchestrator Configuration. Ensure that there are no blank spaces at the end of the string.
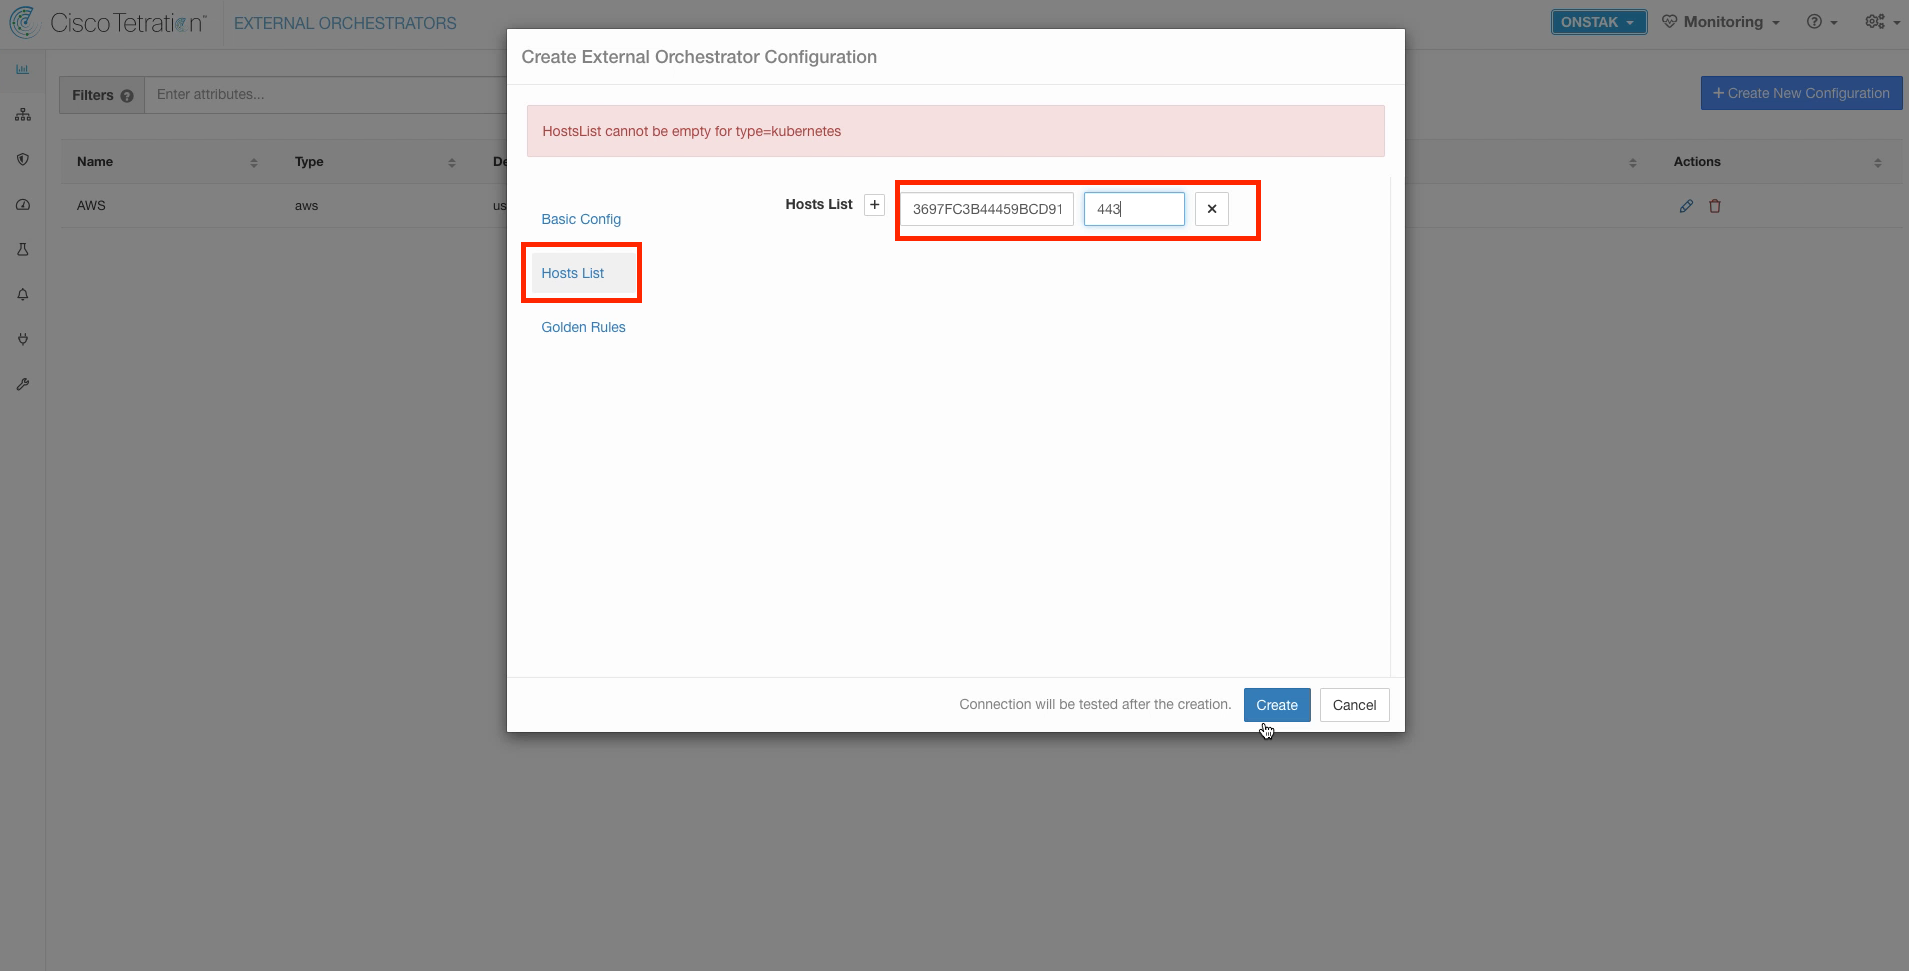
Here we provide the path to the Kubernetes API running on the master node. Click on Hosts List, and click the + icon to add a new host. Enter the EKS endpoint, which is provided in the student worksheet. Enter 443 as the TCP port, then click Create.
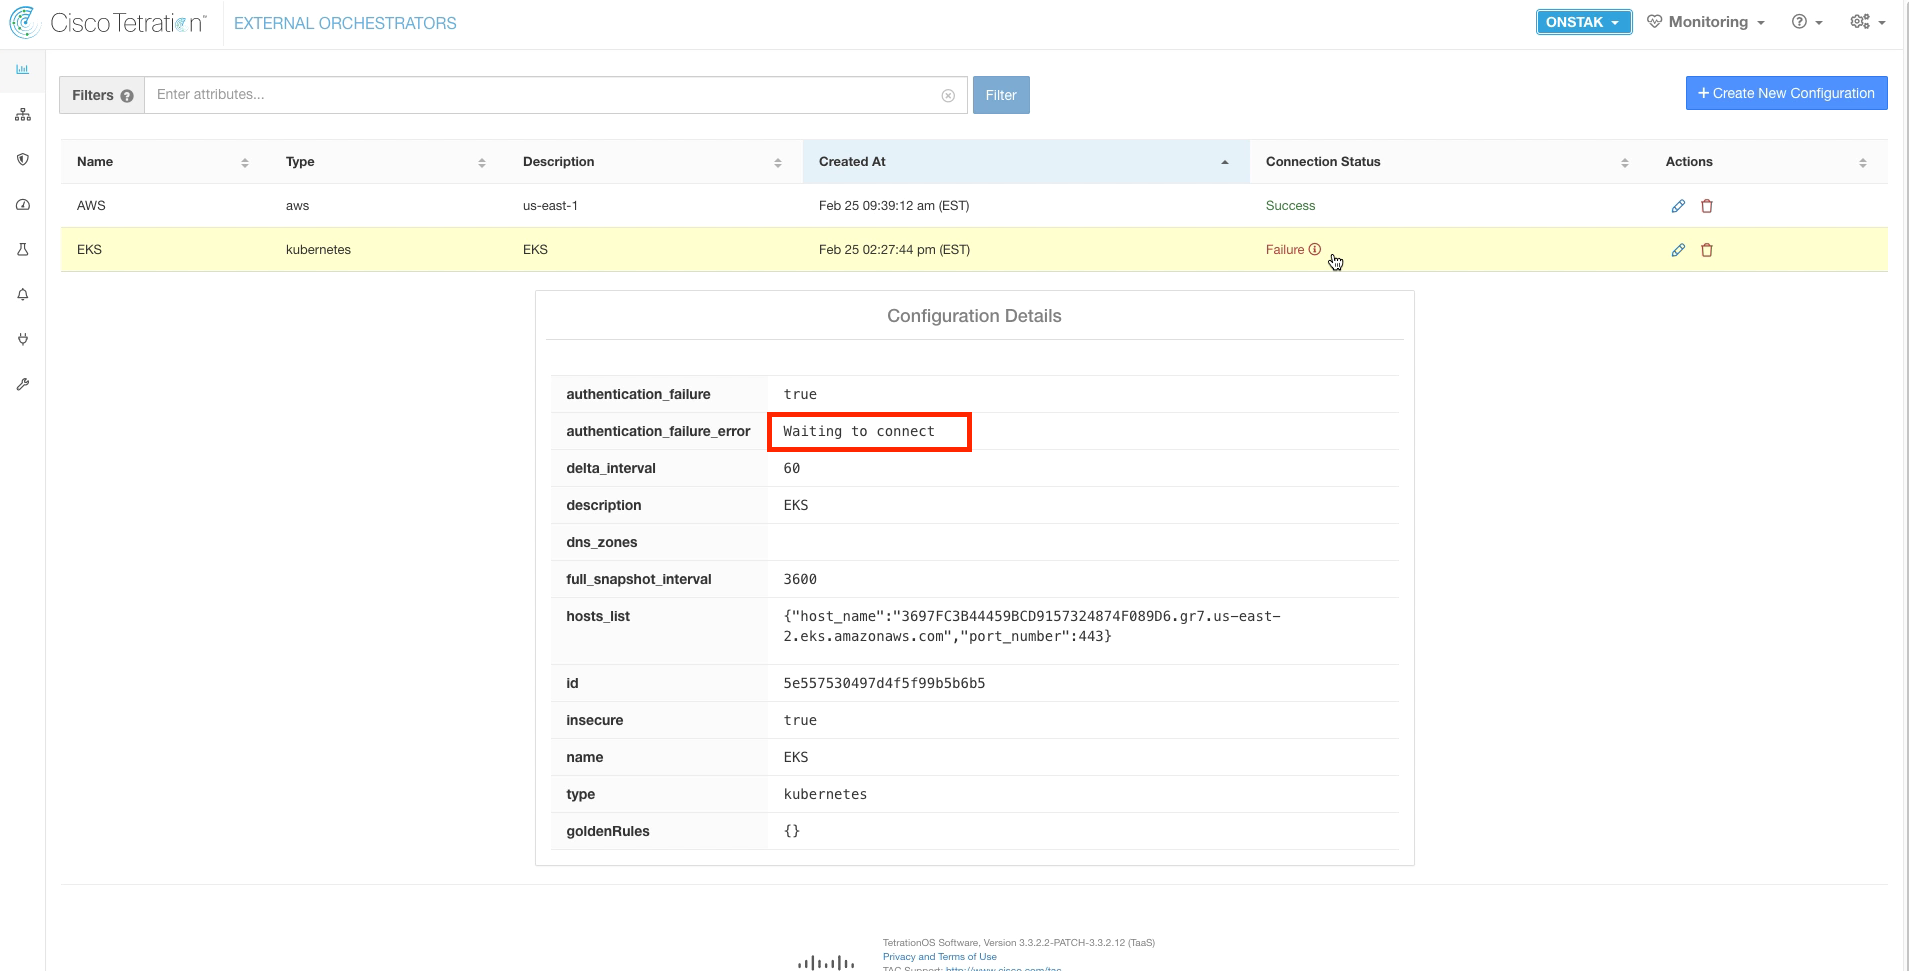
The Connection Status will initial report Failure. Click on the red Failure status and it should display status of “Waiting to connect”.
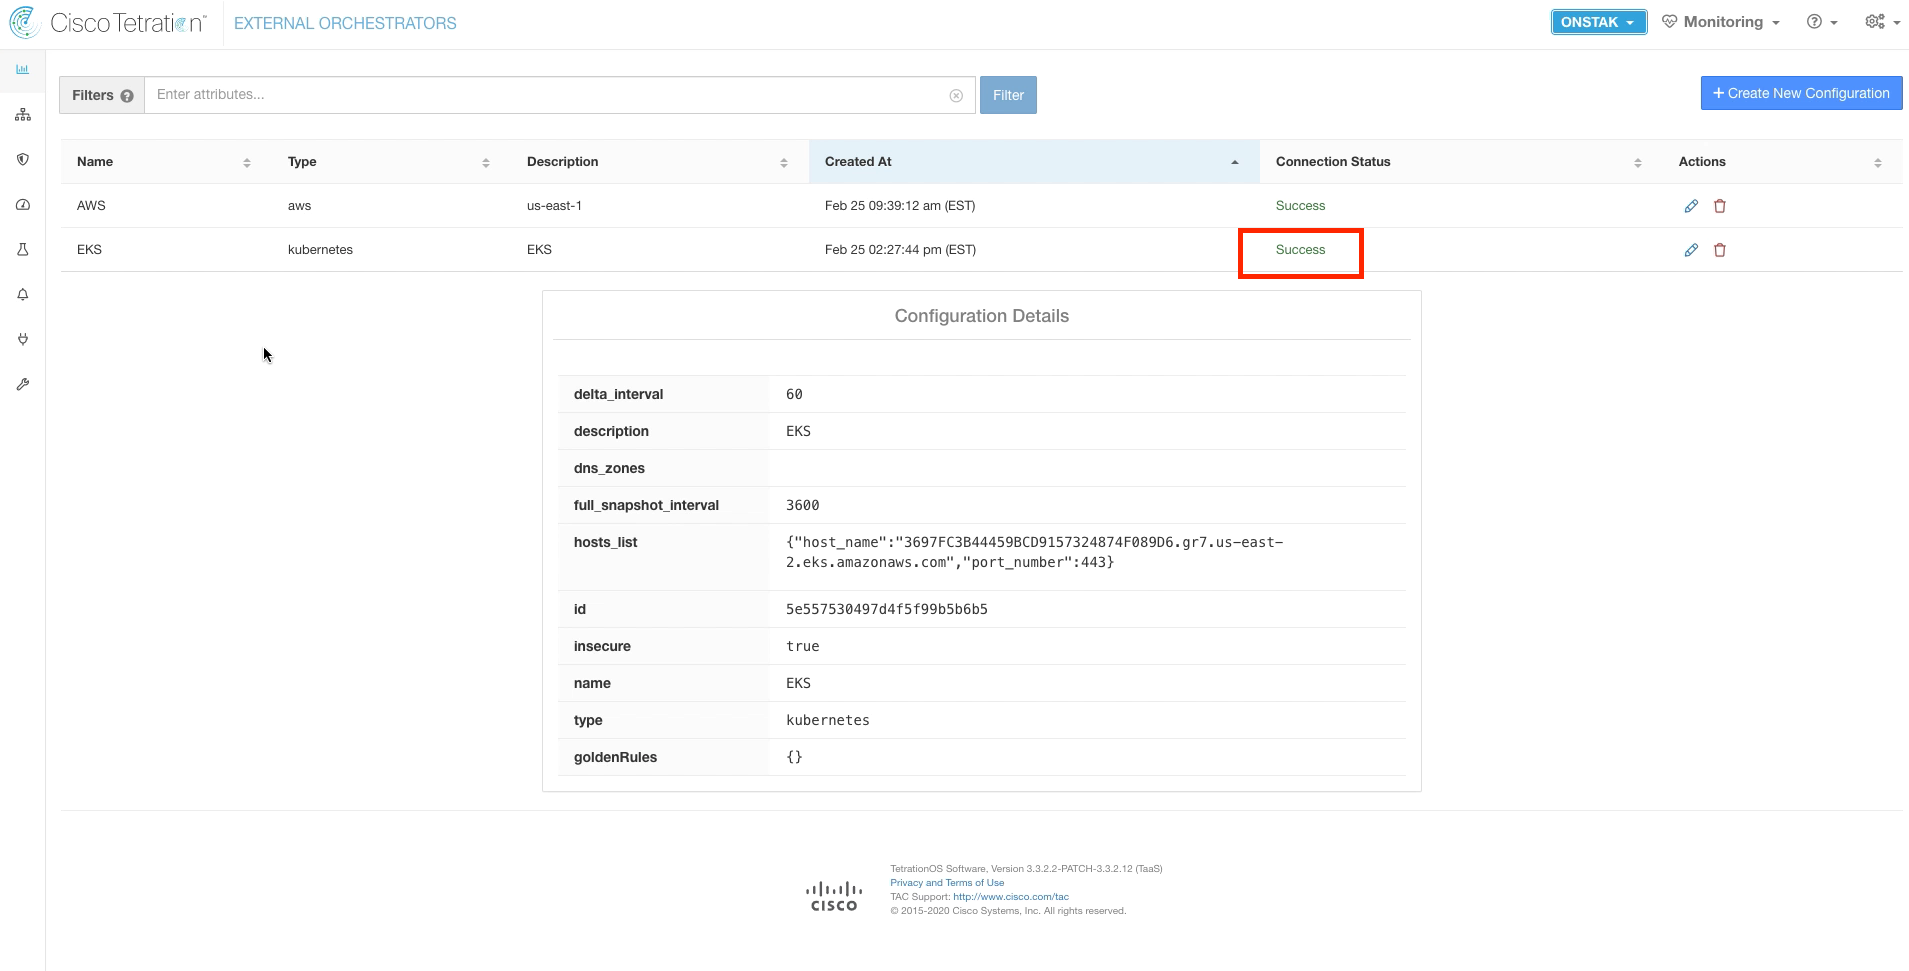
It will take a few minutes for the connection to become active. Refresh the screen until the status indicates Success.
If the Connection Status does not change to Success, check the messages in the Configuration Details.
Now that the External Orchestrators are configured, we can use the annotations that they provide as search criteria throughout the Tetration platform. They can be used to search for workloads with Inventory Search or flows with Flow Search, and can be used in matching criteria when defining Inventory Filters and Scopes. We will see many examples of this throughout the upcoming modules, but for now we will use Inventory search to search for workloads that are annotated with the tags from the External Orchestrators.
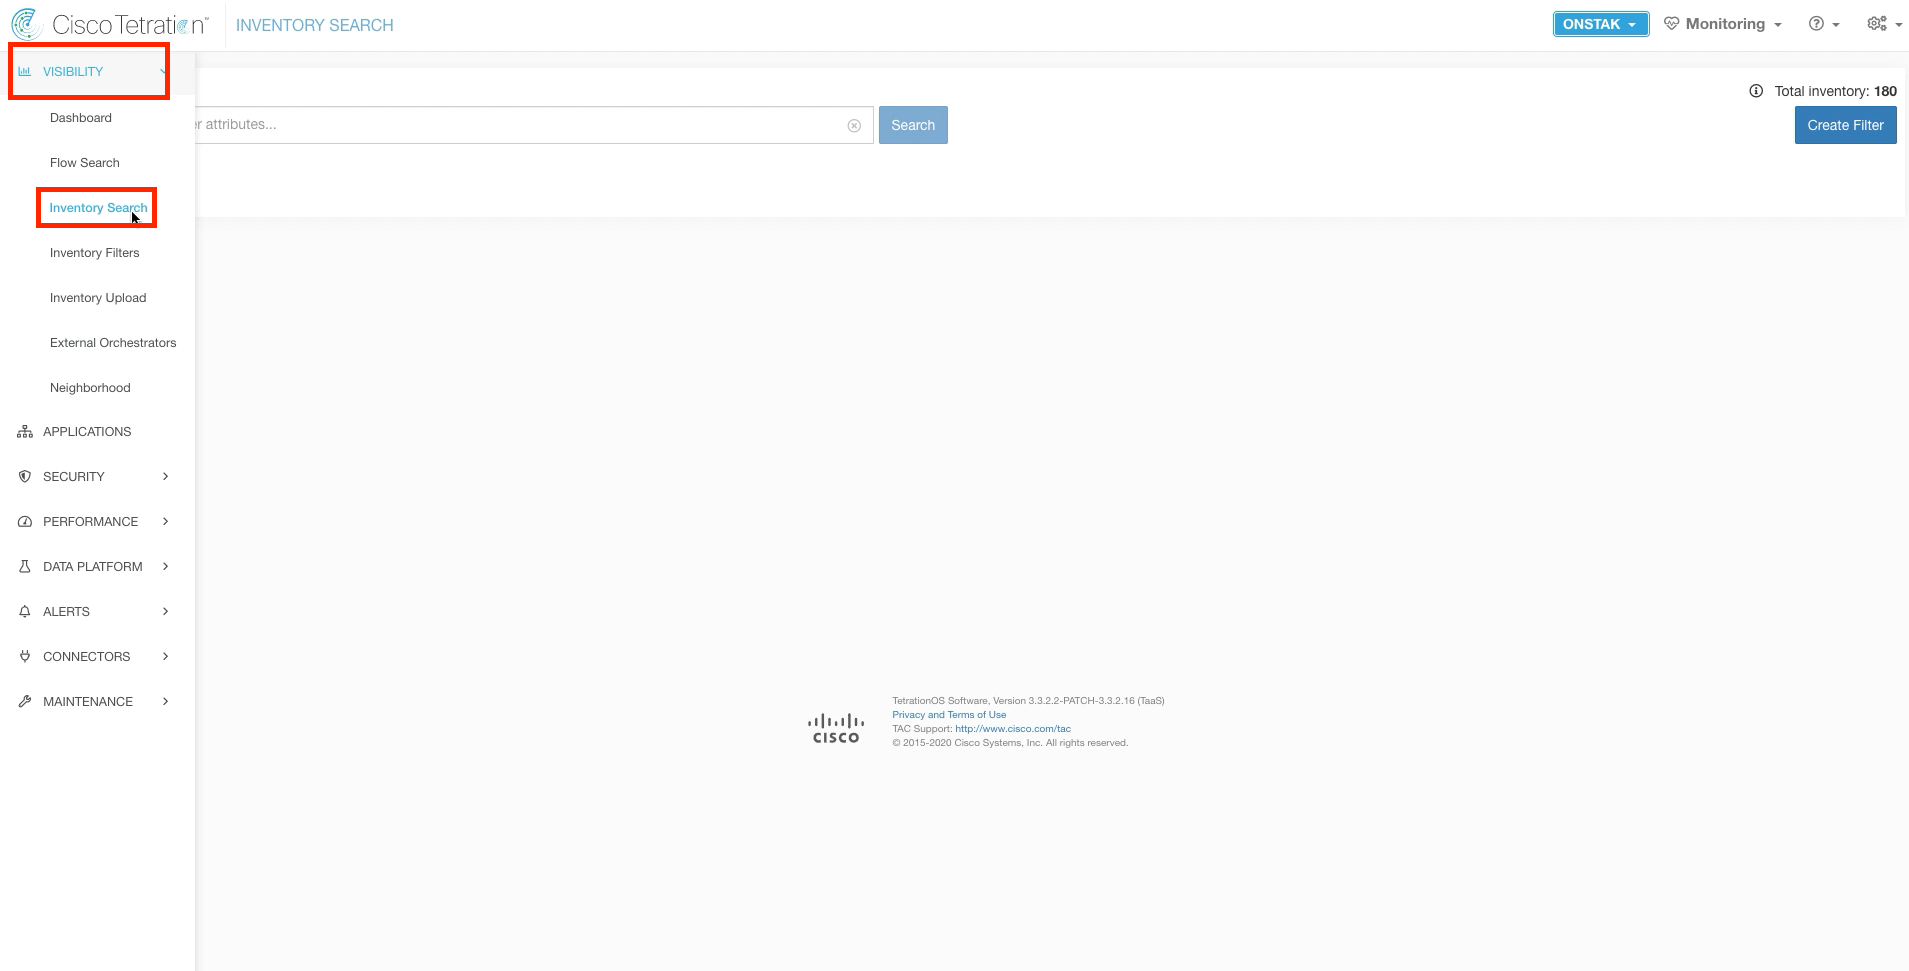
Click on Visibility and Inventory Search.
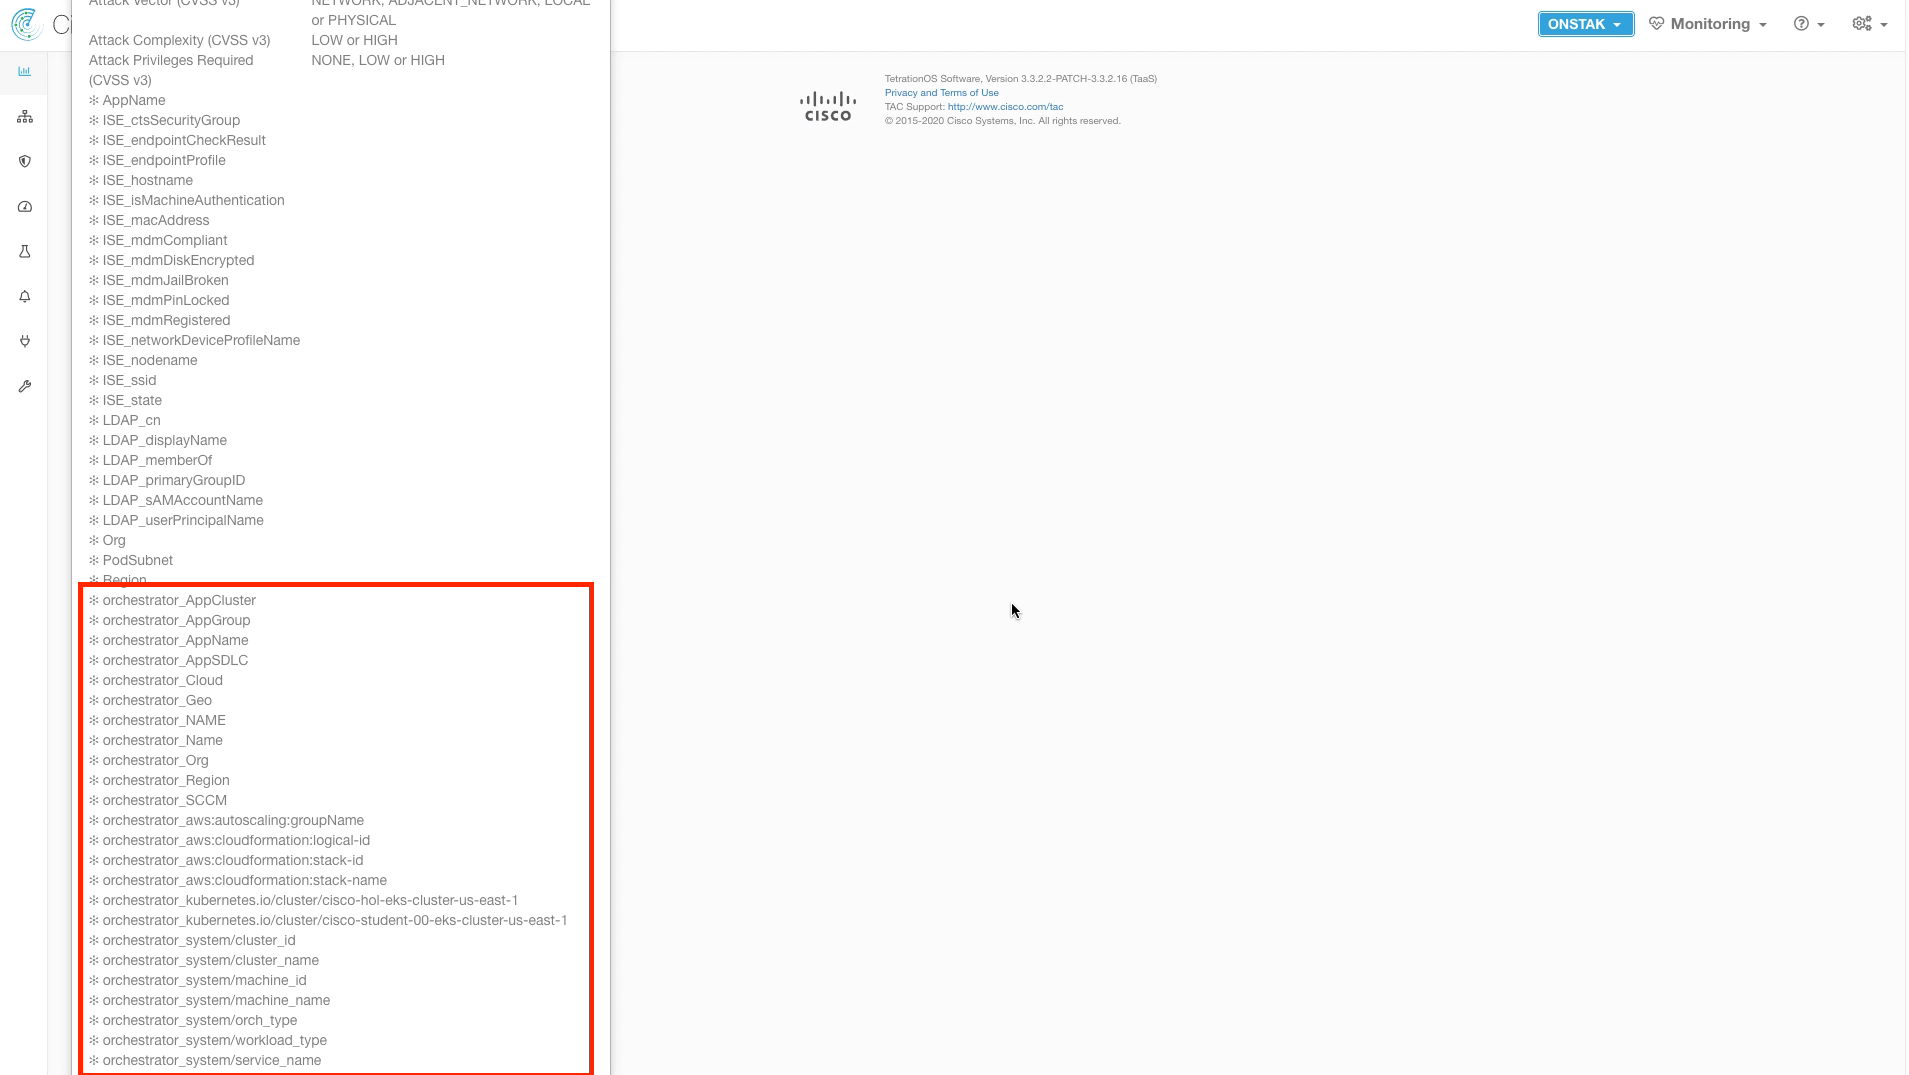
Click on Filters to drop down the help for the available annotations that can be used as filter criteria.
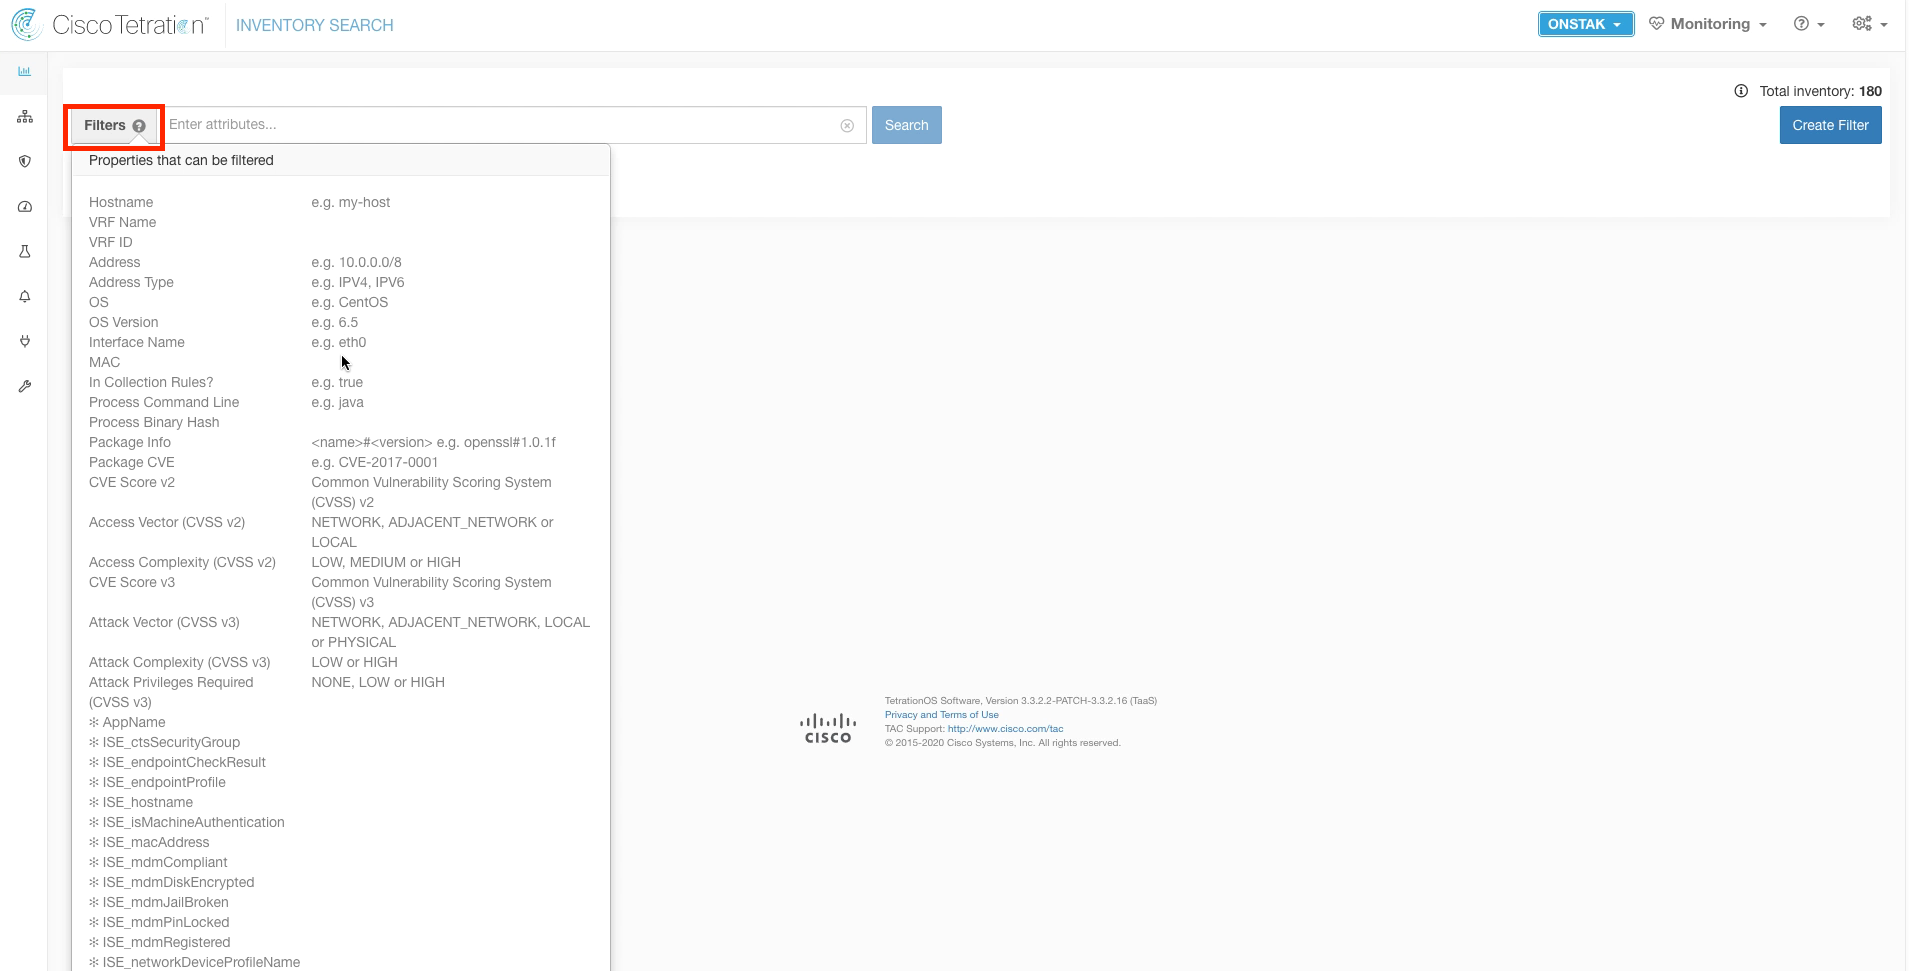
Note the annotations coming from external orchestrators or static annotations will be prefixed with a *.
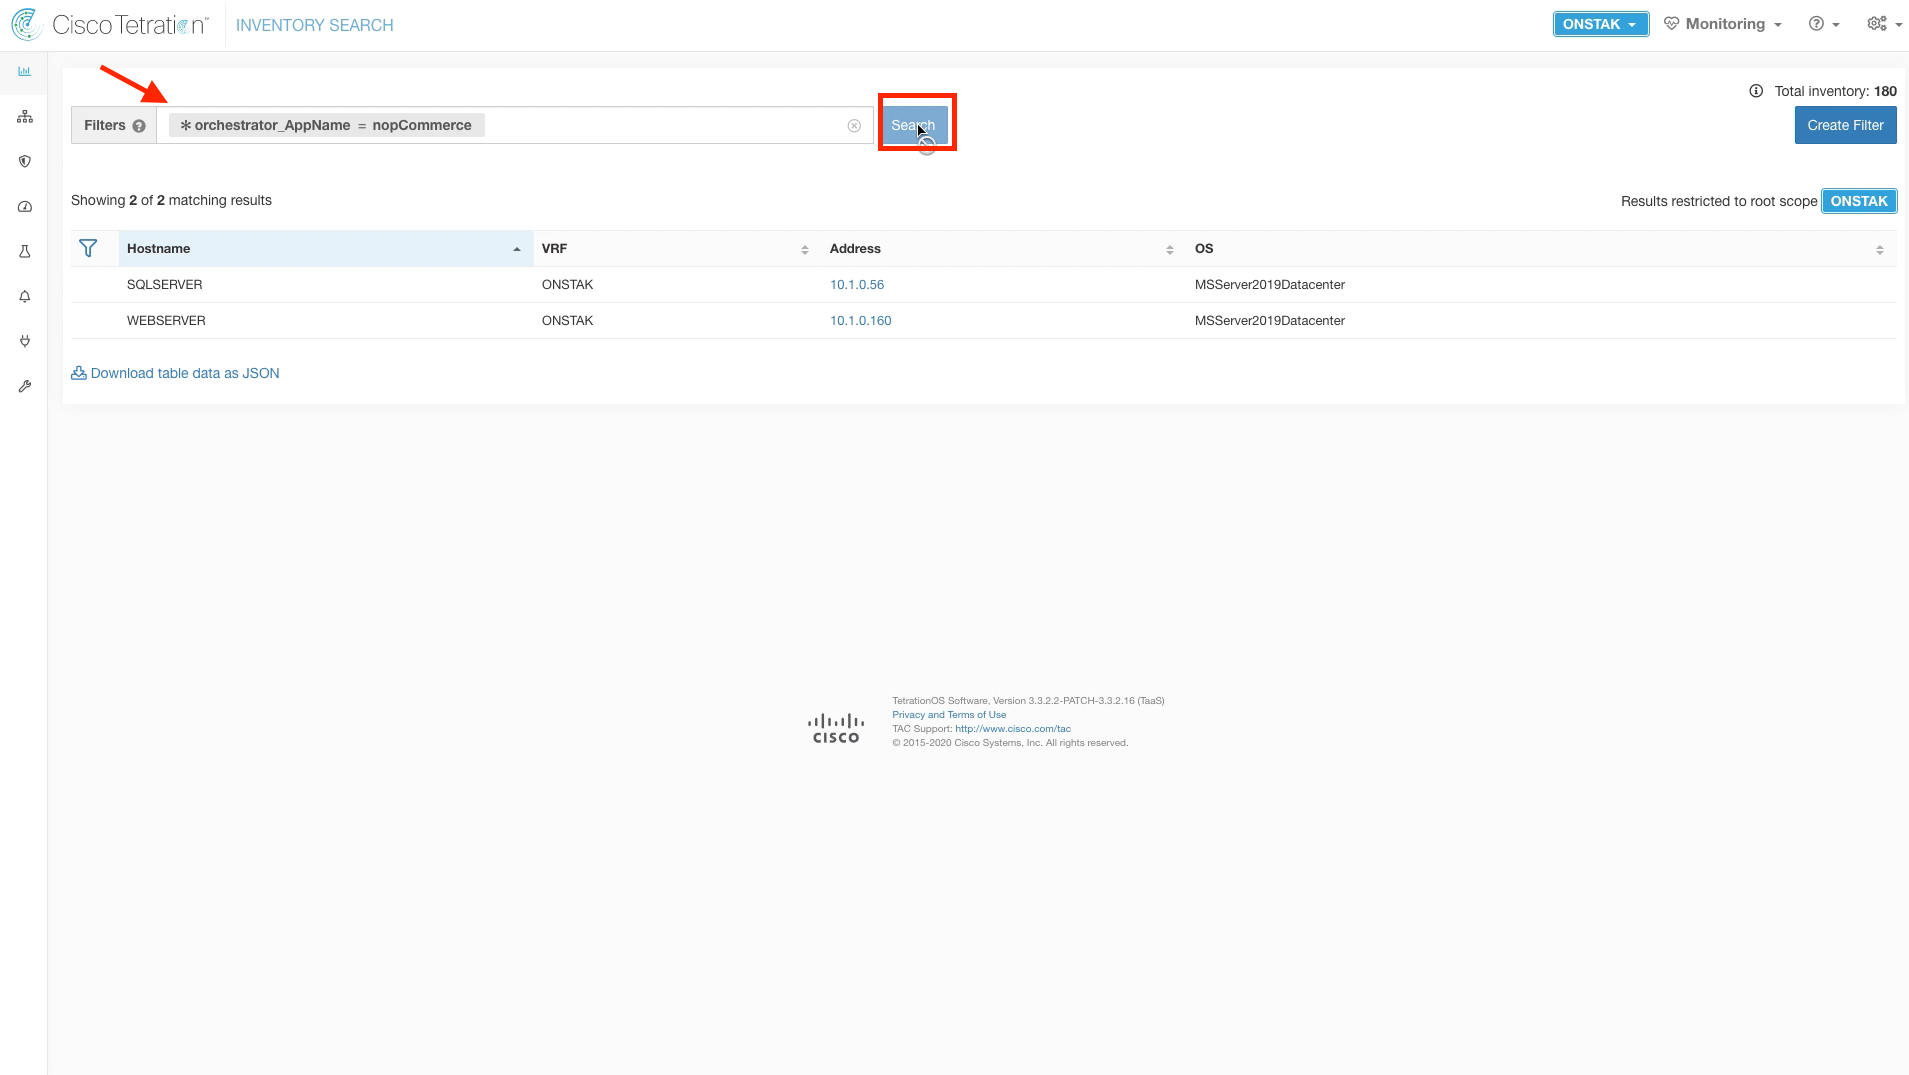
Enter the search criteria * orchestrator_AppName = nopCommerce and select Search. This is matching on the AWS tag AppName, which has been assigned the value of nopCommerce on the Microsoft IIS and Microsoft SQL servers in the AWS environment.
Enter the search criteria * orchestrator_AppCluster = App and select Search. This query matches on the AWS tag AppCluster, which has been assiged the value App on the IIS Web Server and the Apache web server.

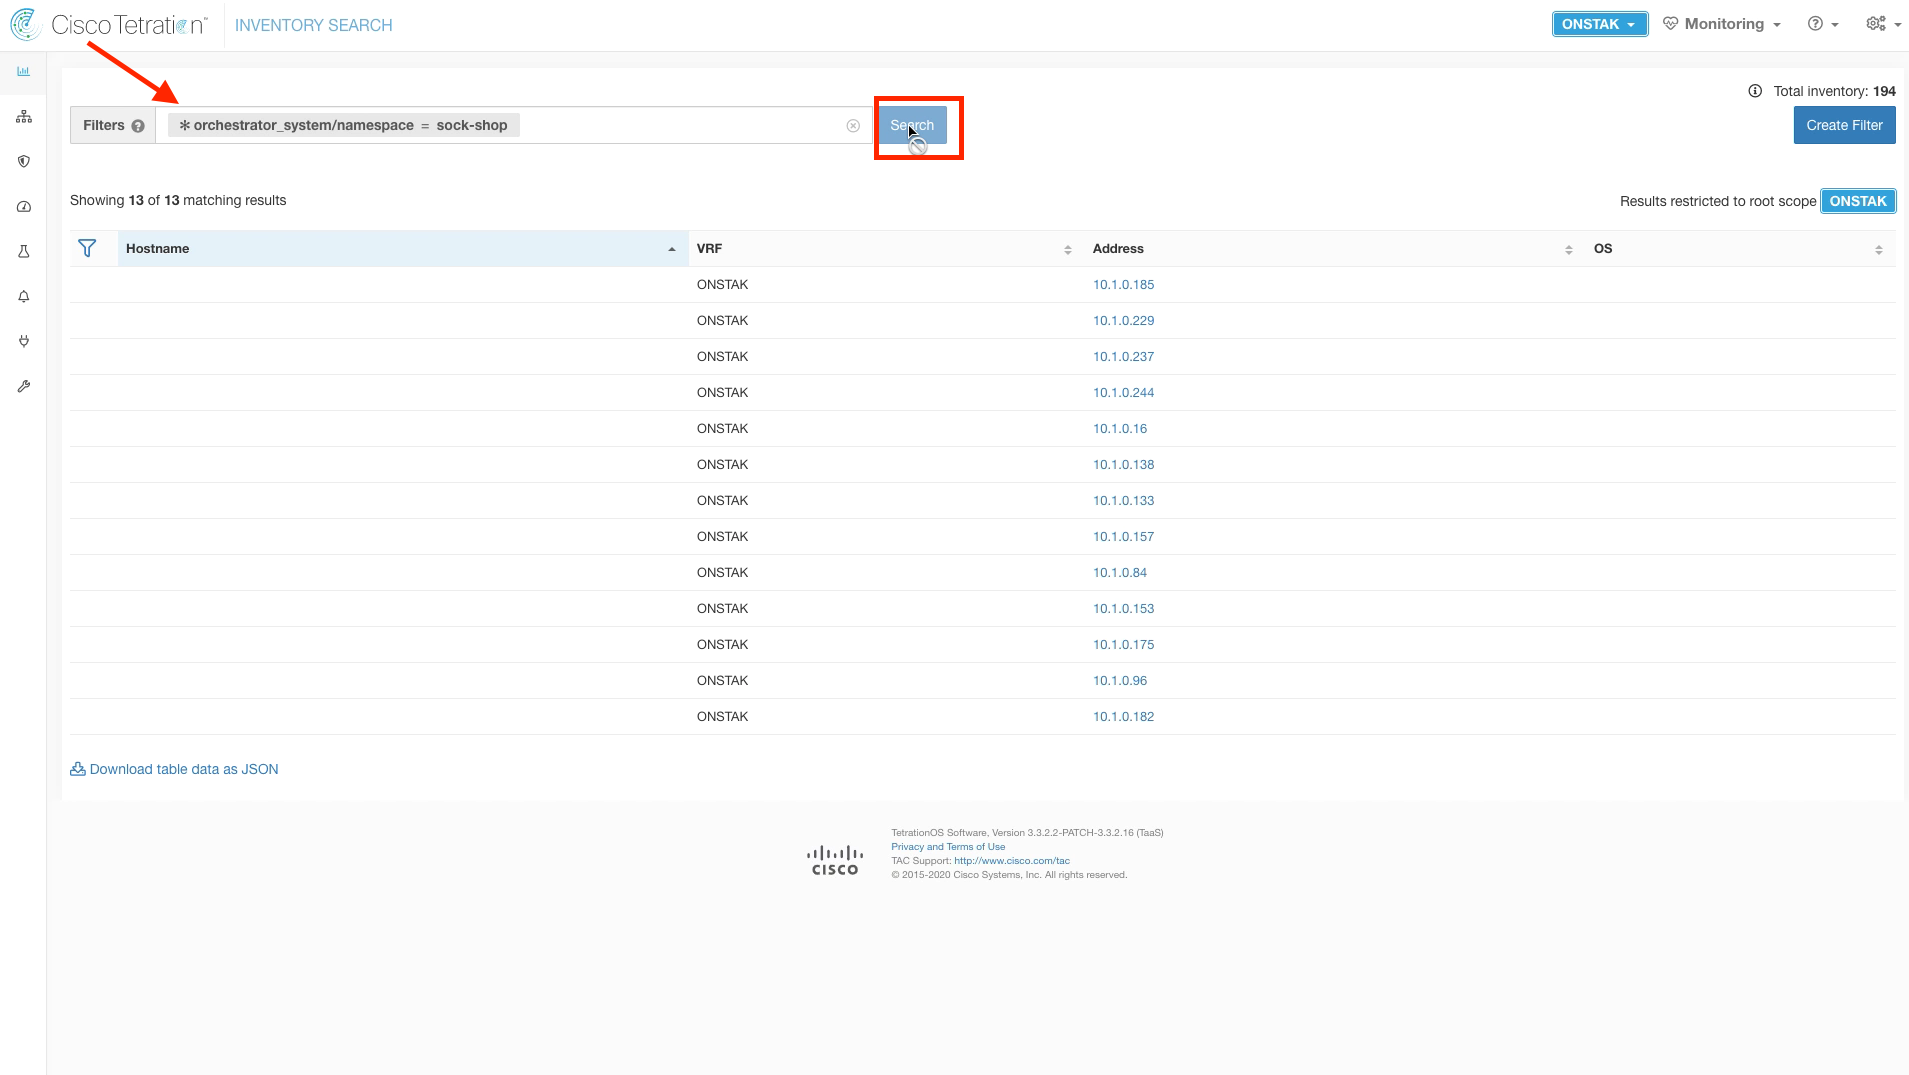
Enter the search criteria * orchestrator_system/namespace = sock-shop and press Search. This query matches the Kubernetes namespace that has been created for the microservices application running on the EKS cluster. The addresses returned are pods associated with the application tiers.
Enter the search criteria * orchestrator_AppCluster = front-end and select Search. This query matches the Kubernetes label placed on the pod providing front-end web services for the application. Notice that in addition to being a Kubernetes label, the name AppCluster is also an AWS tag. The name overlap between the Kubernetes labels and AWS tags does not cause any issues.
YOU HAVE COMPLETED THIS MODULE
| Return to Table of Contents | Go to Top of the Page | Continue to the Next Module |